It was 11:47 PM on a random Tuesday in October, and I had an overwhelming need for something that tasted like fall but felt like a secret. I didn’t have the fancy pudding cups from the bakery down the street, but I had a bag of Oreos, a box of instant vanilla pudding, and this weird idea that wouldn’t leave me alone. The power had flickered twice during a storm earlier that evening, and honestly, I was too wired to sleep anyway.
I started pulling things from the pantry—crushed cookies, cream cheese, a can of pumpkin that had been sitting there since September. My kitchen looked like a small disaster zone by midnight. I forgot I was out of regular milk and had to use the last of the oat milk my roommate bought. I mean, it worked. It totally worked. The pumpkin puree swirled into the pudding mixture like it had always belonged there, and the crushed Oreos on top? That was the moment I knew I was onto something good.
Maybe you’ve been there—standing in your kitchen at an unreasonable hour, convinced that if you just try one more thing, you’ll stumble onto something magical. That’s exactly what happened here. These Pumpkin Patch Dirt Pudding Cups started as a late-night experiment born from a craving and a half-empty fridge. Now they’re the dessert I bring to every fall gathering, the one that disappears before the pumpkin pie even gets sliced. There’s something about the way the creamy pumpkin layer meets that crunchy chocolate cookie “dirt” that just works. It’s weird and wonderful and tastes like Halloween night in a cup.
Why You’ll Love This Recipe
Let me tell you why these Pumpkin Patch Dirt Pudding Cups have become my go-to for every fall gathering. I’ve tested this recipe at least eight times—once for a potluck where I accidentally doubled the cream cheese (best mistake ever), once for my niece’s Halloween party, and once just for myself on a Sunday afternoon. Each time, the feedback was the same: “Can I have the recipe?”
- Quick & Easy : These come together in about 20 minutes of active prep time. No baking, no complicated techniques, just simple layering that looks impressive without the stress.
- Simple Ingredients : You probably have most of this stuff in your kitchen right now. Oreos, cream cheese, pumpkin puree, pudding mix—nothing fancy needed.
- Perfect for Fall Gatherings : Whether it’s a Halloween party, Thanksgiving dinner, or just a cozy Friendsgiving, these cups fit right in. They’re portable, individual-sized, and everyone loves grabbing their own.
- Crowd-Pleaser : Kids go crazy for the “dirt” and gummy worms. Adults appreciate the sophisticated pumpkin flavor. It’s the rare dessert that makes both groups happy.
- Unbelievably Delicious : The texture is what gets me every time. That creamy, slightly tangy pumpkin layer against the crunchy Oreo crumble? It’s next-level comfort food in a cup.
What makes this recipe different from all the other pumpkin desserts out there is the balance. It’s not too sweet, not too heavy, and the chocolate-pumpkin combo is honestly perfect. I’ve tried versions with graham crackers instead of Oreos, and versions with homemade pudding, but nothing beats the simplicity and flavor of this original. It’s the kind of dessert that makes people close their eyes after the first bite—and that’s not something you get from a box mix every day.
What Ingredients You Will Need
This recipe uses simple, mostly pantry-stable ingredients to create something that tastes way more complicated than it actually is. Here’s what you’ll need to grab:
For the Pumpkin Pudding Layer
- 1 box (3.4 oz) instant vanilla pudding mix — I prefer Jell-O brand for consistent results, but store brands work fine too
- 1 cup cold milk (whole milk gives the creamiest texture, but 2% works great)
- 1 cup pumpkin puree — not pumpkin pie filling, just plain pumpkin puree (Libby’s is my go-to)
- 4 oz cream cheese, softened to room temperature (this is important—cold cream cheese will leave lumps)
- 1/2 cup powdered sugar
- 1 teaspoon pumpkin pie spice (or make your own with cinnamon, nutmeg, ginger, and cloves)
- 1/2 teaspoon vanilla extract
For the Dirt Layer
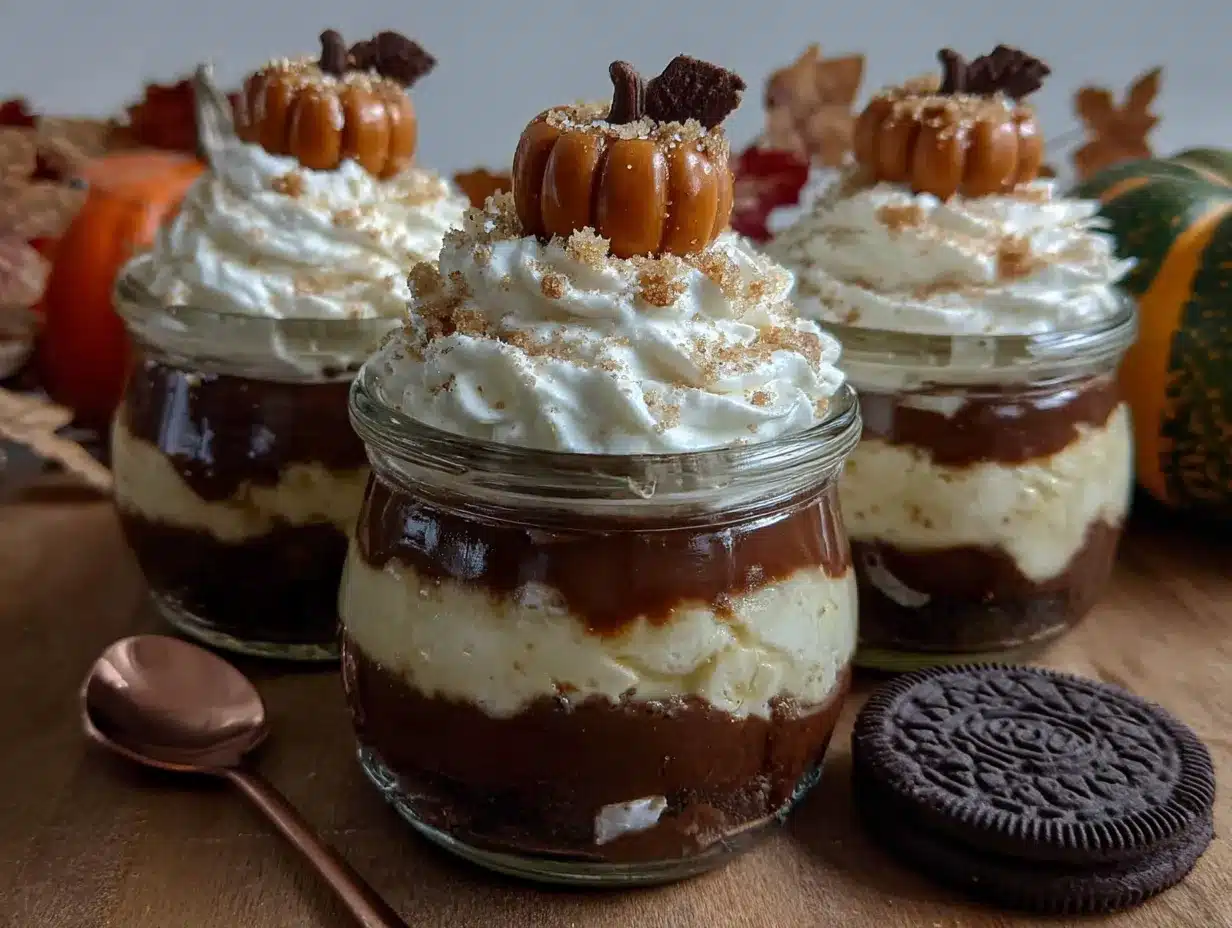
- 1 package (14.3 oz) Oreo cookies — regular ones, not double stuff (you want more cookie than cream for that dirt texture)
- 2 tablespoons melted butter — helps the crumbs stick together slightly
For the Topping & Decoration
- 1 cup Cool Whip or whipped topping, thawed (or make your own stabilized whipped cream)
- Gummy worms — the classic Halloween kind work best
- Optional: candy pumpkins, fall sprinkles, or crushed graham crackers for extra decoration
A few ingredient notes from my personal testing: If you can’t find pumpkin pie spice, just mix 1/2 teaspoon cinnamon, 1/4 teaspoon nutmeg, 1/8 teaspoon ginger, and a pinch of cloves. Also, make sure your cream cheese is truly softened—I’ve ruined a batch by rushing this step, and the lumps just won’t go away. For a dairy-free version, use plant-based cream cheese and coconut milk, though the texture will be slightly less creamy.
Equipment Needed
You don’t need anything fancy for this recipe, which is part of why I love it so much. Here’s what you’ll need:
- Mixing bowls — at least two medium-sized ones
- Electric hand mixer or stand mixer — you can do this by hand with a whisk, but your arm will thank you for using a mixer
- Food processor or zip-top bag and rolling pin — for crushing the Oreos into fine crumbs
- Small cups or jars — 8-ounce plastic cups work great for parties, or use small mason jars for a fancier look
- Spatula — for scraping every last bit of that pumpkin goodness
- Measuring cups and spoons
I’ve made these with both a food processor and the old-school bag-and-rolling-pin method. Honestly, the bag method is more satisfying—there’s something therapeutic about smashing those cookies. Just make sure you get them fine enough. You want mostly crumbs with a few slightly bigger pieces for texture. If you’re using a food processor, pulse rather than running it continuously, or you’ll end up with Oreo dust.
Preparation Method
Alright, let’s get to the fun part. Here’s how to make these Pumpkin Patch Dirt Pudding Cups step by step:
- Crush the Oreos: Place all the Oreos (cream filling included) in a food processor and pulse until you have fine crumbs. Alternatively, put them in a zip-top bag and go to town with a rolling pin. You want about 2 cups of crumbs total. Set aside 1/4 cup for the final topping.
- Mix the cream cheese base: In a medium bowl, beat the softened cream cheese with an electric mixer until smooth and fluffy, about 2 minutes. Add the powdered sugar and vanilla extract, and beat until well combined. Scrape down the sides of the bowl—this is where most lumps hide.
- Prepare the pudding: In a separate bowl, whisk together the instant vanilla pudding mix and cold milk. Whisk for about 2 minutes until it starts to thicken. It should look glossy and slightly set. Let it sit for 3-4 minutes to fully thicken.
- Combine the layers: Add the pumpkin puree and pumpkin pie spice to the cream cheese mixture and beat until smooth. Then fold in the prepared pudding until everything is well combined. The color should be a beautiful peachy-orange, and the texture should be thick and creamy.
- Fold in the whipped topping: Gently fold in the thawed Cool Whip until no white streaks remain. This lightens the mixture and makes it extra fluffy. Don’t overmix or you’ll deflate all that air.
- Layer the cups: Spoon about 2 tablespoons of Oreo crumbs into the bottom of each cup. Press down lightly with the back of a spoon. Then add a generous layer of the pumpkin pudding mixture—about 1/4 cup per cup. Smooth the top with a spoon or small spatula.
- Top with dirt: Sprinkle the remaining Oreo crumbs over the top of each cup. You want a nice thick layer that completely covers the pumpkin pudding—this is your “dirt.” Use about 1-2 tablespoons per cup.
- Decorate: Stick a gummy worm or two into the top of each cup, pushing it down so it looks like it’s crawling out of the dirt. Add a candy pumpkin or some fall sprinkles if you’re feeling festive.
- Chill: Refrigerate the cups for at least 2 hours before serving. This is crucial—the flavors need time to meld together, and the texture firms up beautifully. Overnight is even better.
A few things I’ve learned the hard way: Don’t skip the chilling step. I served these once after only 30 minutes in the fridge, and they were soupy and sad. Also, if your cream cheese isn’t fully softened, you’ll get little white lumps throughout the pumpkin layer. Not the end of the world, but not as pretty. And here’s a pro tip—wet your spoon slightly when smoothing the pudding layer. It prevents sticking and gives you that clean, professional look.
Cooking Tips & Techniques
After making these Pumpkin Patch Dirt Pudding Cups more times than I care to count, I’ve picked up a few tricks that make a real difference. Let me share what I’ve learned:
Temperature matters more than you think. Your cream cheese needs to be truly at room temperature—not just out of the fridge for 10 minutes. Leave it on the counter for at least an hour before starting. Cold cream cheese creates lumps that no amount of mixing will fix. I learned this the hard way when I made these for a Halloween party and ended up with lumpy pudding.
Don’t overcrush the Oreos. You want a mix of fine crumbs and slightly larger pieces. If you turn them into dust, they’ll absorb moisture from the pudding and turn into a paste. That’s not dirt—that’s mud. Pulse your food processor in short bursts and check the texture frequently.
Make the pudding a little thicker than the box instructions say. Use 1 cup of milk instead of the 2 cups the box usually calls for. This gives you a denser, creamier pudding layer that holds its shape better in the cups. Trust me on this one—it’s the difference between a sturdy dessert and a soupy mess.
Layer strategically for the best visual effect. When you’re building these cups for a party, think about how they’ll look on the table. Press the bottom Oreo layer firmly so it doesn’t mix with the pumpkin layer. Smooth the pumpkin layer evenly. And when you add the top “dirt” layer, make sure no pumpkin peeks through—it ruins the illusion.
Prep ahead for stress-free hosting. These cups are perfect for parties because you can make them a day in advance. The flavors actually get better overnight. Just wait to add the gummy worms until right before serving, or they’ll get soft and weird. I usually make the cups, cover them with plastic wrap, and add the decorations right before guests arrive.
Variations & Adaptations
One of the best things about this recipe is how easy it is to switch things up. Here are some variations I’ve tried and loved:
Gluten-Free Version: Swap the Oreos for gluten-free chocolate sandwich cookies. There are several brands available now that taste almost identical to the original. Everything else in the recipe is naturally gluten-free, so this is an easy swap.
Dairy-Free Adaptation: Use dairy-free cream cheese (I like Kite Hill brand), coconut milk or oat milk for the pudding, and a dairy-free whipped topping like CocoWhip. The texture will be slightly less rich, but it’s still delicious. I made this version for a friend with dairy allergies, and she ate three cups.
Pumpkin Cheesecake Version: Add an extra 2 ounces of cream cheese and reduce the pudding mix to half a box. This gives you a denser, cheesecake-like texture that’s incredibly indulgent. Top with a drizzle of caramel sauce for extra decadence.
No-Bake Pumpkin Pie Cups: Replace the Oreos with crushed graham crackers mixed with melted butter. Add a tablespoon of brown sugar to the pumpkin layer for a more traditional pumpkin pie flavor. This version tastes like deconstructed pumpkin pie in a cup.
Adult Version: Add a tablespoon of bourbon or dark rum to the pumpkin pudding mixture. The warmth of the alcohol complements the pumpkin spice beautifully. Just make sure your guests know if you’re serving these at a party with kids around.
Serving & Storage Suggestions
These Pumpkin Patch Dirt Pudding Cups are best served cold, straight from the fridge. The contrast between the cool, creamy pumpkin layer and the crunchy Oreo dirt is what makes them so satisfying. I like to take them out about 10 minutes before serving—just enough time for the chill to soften slightly but not enough to lose that firm texture.
For presentation, arrange the cups on a large platter or tray. If you’re feeling extra festive, scatter some candy corn or fall leaves around the base of the cups. I once served these on a wooden board with mini pumpkins scattered around, and everyone thought I’d gone to way more effort than I actually did.
These pair beautifully with hot apple cider, pumpkin spice lattes, or even a warm cup of coffee. The sweetness of the dessert balances perfectly with something warm and slightly bitter. If you’re serving them at a party, set up a hot drink station nearby—guests love the combo.
Storage: Keep the cups covered in the refrigerator for up to 3 days. The Oreo layer will soften over time, so they’re best within the first 24 hours. If you’re making them ahead, I recommend waiting to add the gummy worms until just before serving. They get sticky and weird after sitting in the fridge overnight.
These cups do not freeze well—the texture gets icy and the Oreos turn mushy. Stick to refrigeration only.
Nutritional Information & Benefits
Let’s be real—these are a treat, not a health food. But here’s the approximate nutritional breakdown for one serving (based on 8 servings per recipe):
- Calories: 310
- Fat: 16g
- Carbohydrates: 40g
- Protein: 4g
- Fiber: 2g
- Sugar: 28g
On the bright side, pumpkin is packed with vitamin A and fiber, and the cream cheese adds a little protein. The Oreos? Well, they’re for the soul. I’ve always believed that desserts like this are about balance—enjoying something indulgent without guilt, especially when it brings people together.
For those watching their sugar intake, you can use sugar-free pudding mix and reduce the powdered sugar to 1/4 cup. The flavor won’t be quite as rich, but it’s a decent compromise. And if you’re serving these to kids, the portion size is naturally controlled since they’re in individual cups—no one’s going back for thirds of a whole pie.
Conclusion
These Pumpkin Patch Dirt Pudding Cups are everything I love about fall desserts—they’re fun, they’re delicious, and they make people smile. That late-night experiment in my kitchen turned into a recipe I genuinely look forward to making every year. There’s something special about watching guests’ faces light up when they see those gummy worms peeking out of the “dirt.”
I hope you’ll try these for your next fall gathering. Don’t be afraid to make them your own—swap the cookies, adjust the spices, add your favorite decorations. That’s the beauty of a recipe like this. It’s forgiving, it’s flexible, and it always delivers.
If you make these, I’d love to hear about it! Drop a comment below and tell me how they turned out. Did you add your own twist? Did the kids go crazy for them? Share your photos and tag me—I can’t wait to see your pumpkin patch creations. Happy fall, friends!
Frequently Asked Questions
Can I make these Pumpkin Patch Dirt Pudding Cups ahead of time?
Absolutely! These are perfect for making a day in advance. Just wait to add the gummy worms until right before serving so they don’t get soft. The flavors actually meld together beautifully overnight.
Can I use homemade whipped cream instead of Cool Whip?
Yes, you can! Make your own stabilized whipped cream by whipping 1 cup of heavy cream with 2 tablespoons of powdered sugar until stiff peaks form. It will be slightly less stable than Cool Whip, but it tastes amazing.
Why is my pumpkin pudding layer runny?
This usually happens for one of two reasons: either you used too much milk in the pudding mix, or you didn’t chill the cups long enough. Make sure you’re using only 1 cup of milk, and give the cups at least 2 hours in the fridge to set properly.
Can I use homemade pumpkin puree instead of canned?
Yes, but you’ll need to strain it first. Homemade pumpkin puree tends to be more watery than canned. Place it in a cheesecloth-lined strainer over a bowl for about 30 minutes to remove excess liquid before using.
How many cups does this recipe make?
This recipe makes about 8 servings if you’re using standard 8-ounce cups. You can easily double the recipe for larger parties. Just make sure you have enough fridge space for all those cups!
PrintCrowd-Pleasing Pumpkin Patch Dirt Pudding Cups

These no-bake Pumpkin Patch Dirt Pudding Cups feature a creamy pumpkin pudding layer, crunchy Oreo ‘dirt,’ and gummy worms for a fun fall dessert that’s perfect for Halloween parties, Thanksgiving, or any autumn gathering.
- Prep Time: 20 minutes
- Cook Time: 0 minutes
- Total Time: 2 hours 20 minutes (includes chilling time)
- Yield: 8 servings 1x
- Category: Dessert
- Cuisine: American
Ingredients
- 1 box (3.4 oz) instant vanilla pudding mix
- 1 cup cold milk (whole milk preferred, 2% works)
- 1 cup pumpkin puree (not pumpkin pie filling)
- 4 oz cream cheese, softened to room temperature
- 1/2 cup powdered sugar
- 1 teaspoon pumpkin pie spice
- 1/2 teaspoon vanilla extract
- 1 package (14.3 oz) Oreo cookies (regular, not double stuff)
- 2 tablespoons melted butter
- 1 cup Cool Whip or whipped topping, thawed
- Gummy worms for decoration
- Optional: candy pumpkins, fall sprinkles, or crushed graham crackers for extra decoration
Instructions
- Crush the Oreos: Place all Oreos (cream filling included) in a food processor and pulse until you have fine crumbs. Alternatively, put them in a zip-top bag and crush with a rolling pin. You want about 2 cups of crumbs total. Set aside 1/4 cup for the final topping.
- Mix the cream cheese base: In a medium bowl, beat the softened cream cheese with an electric mixer until smooth and fluffy, about 2 minutes. Add the powdered sugar and vanilla extract, and beat until well combined. Scrape down the sides of the bowl.
- Prepare the pudding: In a separate bowl, whisk together the instant vanilla pudding mix and cold milk. Whisk for about 2 minutes until it starts to thicken. Let it sit for 3-4 minutes to fully thicken.
- Combine the layers: Add the pumpkin puree and pumpkin pie spice to the cream cheese mixture and beat until smooth. Then fold in the prepared pudding until everything is well combined.
- Fold in the whipped topping: Gently fold in the thawed Cool Whip until no white streaks remain. Do not overmix.
- Layer the cups: Spoon about 2 tablespoons of Oreo crumbs into the bottom of each cup. Press down lightly. Add a generous layer of the pumpkin pudding mixture (about 1/4 cup per cup). Smooth the top.
- Top with dirt: Sprinkle the remaining Oreo crumbs over the top of each cup, using about 1-2 tablespoons per cup, covering the pumpkin layer completely.
- Decorate: Stick a gummy worm or two into the top of each cup. Add candy pumpkins or fall sprinkles if desired.
- Chill: Refrigerate the cups for at least 2 hours before serving. Overnight is even better.
Notes
Don’t skip the chilling step—it’s crucial for the texture to set properly. Make sure cream cheese is fully softened to avoid lumps. For a dairy-free version, use plant-based cream cheese and coconut milk. For gluten-free, use gluten-free chocolate sandwich cookies. These cups can be made a day in advance; add gummy worms just before serving. Store covered in the refrigerator for up to 3 days. Do not freeze.
Nutrition
- Serving Size: 1 cup (8 oz)
- Calories: 310
- Sugar: 28
- Sodium: 320
- Fat: 16
- Saturated Fat: 8
- Carbohydrates: 40
- Fiber: 2
- Protein: 4
Keywords: pumpkin dessert, dirt pudding cups, Halloween dessert, no-bake dessert, fall dessert, pumpkin pudding, Oreo dessert, gummy worms, kid-friendly dessert


