My sister-in-law, Jen, wasn’t trying to impress anyone. I’d stopped by to drop off a casserole dish she’d loaned me, and the smell of Jell-O hit me before I even got through the back door. Not just any Jell-O, mind you — it was this layered, creamy-looking concoction sitting in little cups on her counter. She was on the phone, casually gesturing at me to help myself, like she’d just whipped up a batch of regular lemonade. I took one, and honestly, my brain short-circuited for a second. It tasted like a boozy, creamy version of a candy corn, and it was the most perfect, ridiculous thing I’d ever seen. She hung up, shrugged, and said, “Oh, those? Just a little something for a Halloween thing.” Just a little something. Let me tell you, that “little something” has been a staple at every fall gathering I’ve hosted since. Maybe you’ve been there, looking for a party trick that’s actually easy? This is it.
These Easy Candy Corn Jello Shots for Adults are the kind of recipe that looks like you spent hours on it, when in reality, you’re just layering a few simple ingredients. They have that nostalgic, Halloween candy vibe but with a grown-up kick that makes them perfect for a Halloween party or a casual get-together. The best part? They’re almost impossible to mess up. I mean, if you can boil water and pour liquid into a cup, you’re basically a mixologist in my book.
I’ve made these for a few Halloween bashes now, and they disappear every single time. People are always so charmed by the look — those three distinct layers of orange, yellow, and white — and then they take a sip and get that surprising little kick from the vodka. It’s a conversation starter, a crowd-pleaser, and honestly, the most fun I’ve ever had with a box of Jell-O. This recipe has stayed with me because it’s the perfect blend of playful and practical, and that’s a hard combo to beat.
Why You’ll Love This Recipe
Let’s be real — most Jell-O shot recipes are fine, but these are a whole different level. I’ve tested this particular method more times than I’d like to admit (happy accidents, mostly), and it’s become my go-to for any Halloween party. Here’s why you’ll absolutely love it:
- Quick & Easy: Comes together in about 30 minutes of active time. The hardest part is waiting for the layers to set in the fridge. It’s perfect for a busy weeknight when you need a last-minute party contribution.
- Simple Ingredients: No fancy grocery trips. You just need a few boxes of Jell-O, some sweetened condensed milk, unflavored gelatin, and your favorite vodka. You probably already have most of this in your pantry.
- Perfect for Halloween Parties: These are the star of any spooky spread. They look like candy corn, which is instantly recognizable and so nostalgic. They’re great for adult-only gatherings where you want something fun and festive.
- Crowd-Pleaser: I’ve seen people who “don’t do Jell-O shots” go back for seconds. The creamy texture from the condensed milk makes them feel more like a dessert than a standard shot. Kids and adults (the adult kind) always love them.
- Unbelievably Delicious: The flavor combo is pure comfort. The orange layer is bright and sweet, the yellow is a tangy lemon-lime, and the creamy white layer balances it all out. It’s like a boozy, layered candy bar in a cup.
What makes this different from every other Jell-O shot recipe out there is the technique for getting those perfect, clean layers. I’ve learned the hard way that rushing the process leads to a muddy mess. This version uses a little trick with the unflavored gelatin to make the creamy layer set firmly, so you don’t end up with a sad, blended puddle. It’s not just another version—it’s the best version. This recipe isn’t just good; it’s the kind that makes you close your eyes after the first sip. It’s comfort food reimagined—faster, funnier, and with the same soul-soothing satisfaction. Perfect for impressing guests without any stress.
What Ingredients You Will Need
This recipe uses simple, mostly pantry-stable ingredients to create that iconic candy corn look and flavor. The magic is in the layering, and each component plays a crucial role in getting that perfect, creamy texture and clear color separation.
- For the Orange Layer (Bottom):
- 1 (3 oz) box of Orange Jell-O (I prefer the classic Jell-O brand for the most vibrant color)
- 1 cup boiling water
- 1/2 cup cold water
- 1/2 cup vodka (a plain, mid-range vodka works best; don’t use anything too fancy or flavored)
- For the Yellow Layer (Middle):
- 1 (3 oz) box of Lemon Jell-O (or any yellow citrus flavor)
- 1 cup boiling water
- 1/2 cup cold water
- 1/2 cup vodka
- For the Creamy White Layer (Top):
- 1 (3 oz) box of Unflavored Gelatin (like Knox brand — this is key for the firmness)
- 1/2 cup cold water (for blooming the gelatin)
- 1 (14 oz) can Sweetened Condensed Milk
- 1/2 cup boiling water
- 1/4 cup vodka (less vodka here keeps the creamy layer stable)
- Optional for Garnish:
- Whipped cream
- Orange or yellow sanding sugar
- Mini candy corns (for a double dose of the theme)
Ingredient Tips & Substitutions: For the Jell-O, I really recommend sticking with the brand-name stuff for the most consistent results, especially for the orange layer. Generic brands sometimes have a weaker set. For the vodka, you can use a citrus-flavored vodka for an extra punch, but plain is safer. If you want to make these non-alcoholic, simply replace the vodka with cold water in every layer. The texture will be a bit softer, but they’ll still taste great. For a gluten-free option, just check your Jell-O boxes — most are naturally gluten-free, but it’s always good to verify. You can also swap the sweetened condensed milk for a can of full-fat coconut milk for a dairy-free version, but the texture will be slightly less firm and more like a panna cotta.
Equipment Needed
You don’t need a professional bar set-up for these. A few basic kitchen tools and a bit of patience is all it takes. Here’s what you’ll need:
- 2-cup Liquid Measuring Cup: A large Pyrex measuring cup is perfect for mixing the Jell-O layers. It has a spout for easy pouring.
- Small Bowls: You’ll need a few small bowls for the different gelatin mixtures. I use my standard mixing bowls.
- Whisk: A small whisk is great for ensuring the gelatin is fully dissolved without lumps. A fork works in a pinch.
- Disposable 2 oz Shot Cups with Lids: These are a must. You can find them at any party supply store or online. The lids are crucial for stacking and storing them in the fridge without spilling.
- A Baking Sheet or Tray: To hold the shot cups while you fill them and move them to the fridge. A rimmed baking sheet is ideal so you don’t accidentally tip them over.
- Refrigerator: The most important piece of equipment! You need a flat space in your fridge where the shots can sit undisturbed for at least an hour between each layer.
- Patience: Okay, this isn’t a tool, but it’s the most important ingredient. Rushing the layers is the #1 reason these fail.
Honestly, you don’t need anything fancy. I’ve made these with a cheap whisk and a plastic measuring cup, and they turned out perfectly. The only thing I’d recommend splurging on is the lids for the cups. They make life so much easier. If you don’t have a tray, a large cutting board works just fine to hold the cups in the fridge.
Preparation Method
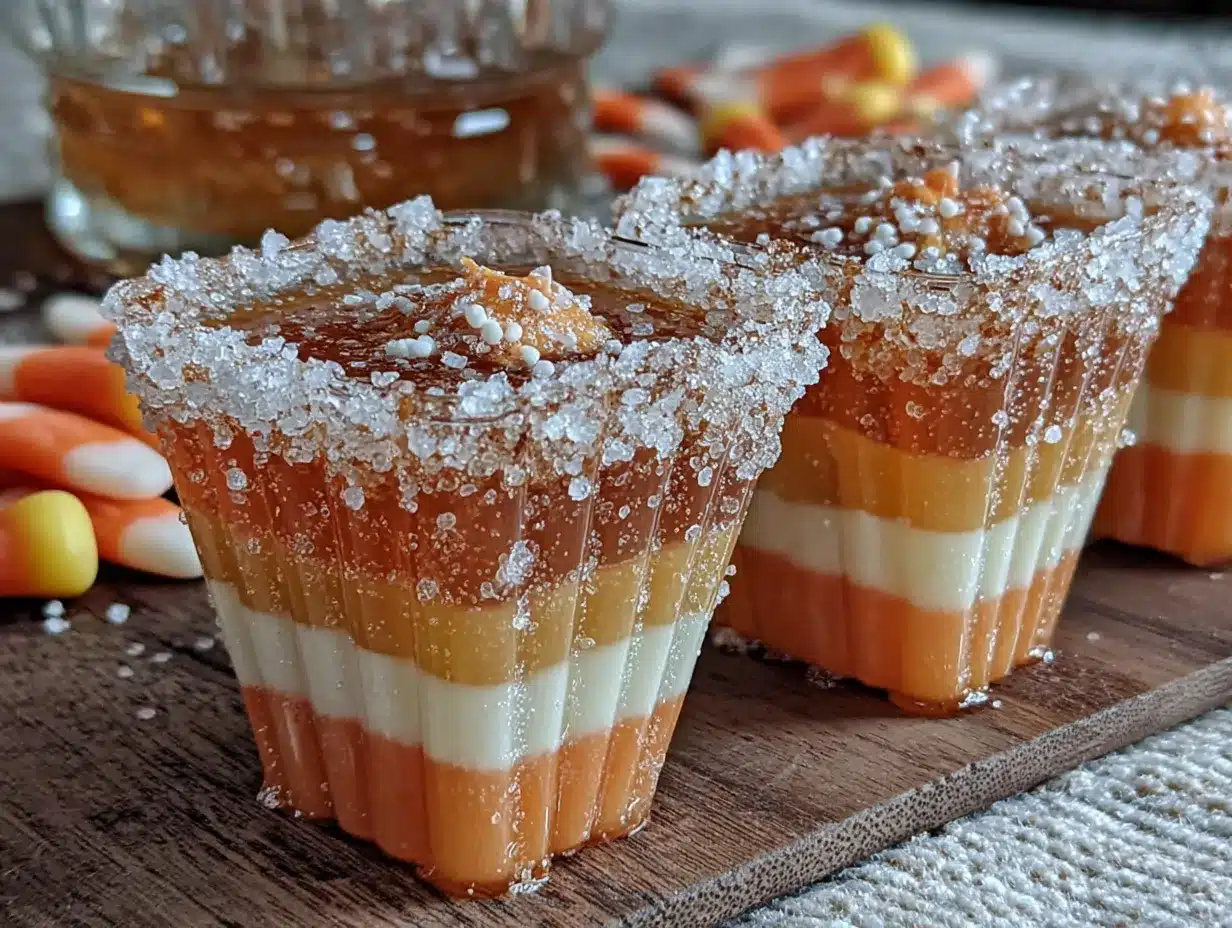
Okay, let’s get to the fun part. The key to these is patience. Each layer needs to set completely before you add the next one. Trust me, I tried to speed this up once, and I ended up with a very pretty, but very mixed-up, orange-pink mess. Here’s the step-by-step method that works every time.
- Prepare Your Workspace: Arrange your 24 shot cups on a baking sheet. Make sure they are stable and not touching each other. This is your assembly line. You don’t want to be moving them around once they have liquid in them.
- Make the Orange Layer (Bottom): In your 2-cup measuring cup, empty the box of Orange Jell-O. Add 1 cup of boiling water and whisk for about 2 minutes, until the powder is completely dissolved. Then, stir in 1/2 cup of cold water and 1/2 cup of vodka. Give it a final stir.
- Pour the First Layer: Carefully pour the orange mixture into each shot cup, filling them about 1/3 of the way full. I find a small ladle or a measuring cup with a spout works best for this. Place the baking sheet in the refrigerator and let them set for at least 1 hour, or until the layer is firm to the touch.
- Make the Yellow Layer (Middle): While the first layer is setting, you can clean your measuring cup. When the orange layer is firm, repeat the process with the Lemon Jell-O. Dissolve it in 1 cup of boiling water, then add 1/2 cup cold water and 1/2 cup vodka.
- Pour the Second Layer: Gently pour the yellow mixture over the set orange layer. Try to pour it against the side of the cup to avoid disturbing the bottom layer. Fill each cup to about 2/3 full. Return the tray to the fridge for another hour, until the yellow layer is firm.
- Make the Creamy White Layer (Top): This is the trickiest part, but it’s not hard. In a small bowl, sprinkle the unflavored gelatin over 1/2 cup of cold water. Let it sit for 5 minutes to “bloom.” It will look like a thick, spongy paste. In a separate bowl, whisk together the can of sweetened condensed milk and 1/2 cup of boiling water until smooth. Then, add the bloomed gelatin to the hot milk mixture and whisk vigorously until it is completely dissolved. Finally, stir in the 1/4 cup of vodka.
- Pour the Final Layer: Let the creamy mixture cool for about 5 minutes (you don’t want it to be hot, or it might melt the yellow layer). Gently pour it over the set yellow layer, filling the cups to the top. If you have lids, put them on now. Refrigerate for at least 4 hours, or overnight, for the best results. The longer they set, the firmer and cleaner they will be.
A Note on Timing: I usually make these the day before my party. I do one layer in the morning, one in the afternoon, and the final layer before I go to bed. It breaks up the work and ensures each layer is perfectly set. You’ll know the layers are ready when you can gently poke the surface and it doesn’t stick to your finger. The creamy layer should be firm but still have a slight jiggle.
Cooking Tips & Techniques
I’ve made my fair share of Jell-O shot mistakes, so you don’t have to. Here are the biggest lessons I’ve learned to get that perfect, candy-corn look every time.
The Biggest Mistake: Pouring Too Fast. I cannot stress this enough. When you pour the second and third layers, do not just dump it in the center of the cup. The force of the liquid will break through the set layer below and create a messy swirl. Always pour the new layer slowly against the inside wall of the cup. It’s a little tedious, but the result is worth it. I usually use a small measuring cup with a tiny spout for this.
The Temperature Trap. The creamy layer uses unflavored gelatin, which needs to be dissolved in hot liquid. But if you pour that hot mixture directly onto the cold, set Jell-O layer, it can melt it. Always let your creamy mixture cool down for 5-7 minutes before you pour it. It should feel warm to the touch, not hot. This little pause is the secret to clean lines.
Multitasking Strategy. While one layer is setting in the fridge, that’s your time to clean up or prep the next layer. I like to measure out the water and vodka for the next step so I can just grab and go. It makes the process feel much less disjointed. Also, use a timer! It’s so easy to forget when you put the tray in the fridge, especially if you’re busy with other party prep.
The “Bloom” is Your Friend. Don’t skip the blooming step for the unflavored gelatin. If you just dump the powder into the hot liquid, it will form clumps and your creamy layer will be lumpy and weird. Letting it sit in cold water for 5 minutes creates a smooth, even texture when it’s dissolved. It’s a tiny extra step that makes a huge difference in the final mouthfeel.
Variations & Adaptations
Once you master the basic candy corn technique, the possibilities are endless. This recipe is a fantastic base for getting creative with different flavors and themes. Here are a few variations I’ve tried and loved.
- Spooky Berry Twist: Swap the orange and yellow layers for berry flavors. Use Berry Blue Jell-O for the bottom, a layer of Raspberry for the middle, and the same creamy white top. It looks like a spooky, layered galaxy shot and tastes like a boozy berry smoothie. I made these for a friend’s Halloween party, and they were a huge hit with people who aren’t big on citrus.
- Mango-Peach Paradise: For a summer-themed party (or just to use up some Jell-O boxes), try a Mango (bottom) and Peach (middle) combo. The creamy top works with any fruit flavor. This version is less “candy corn” and more “tropical sunset,” but it’s just as easy and delicious.
- Low-Sugar / Sugar-Free Option: You can absolutely make these with sugar-free Jell-O. The texture will be slightly different—a bit less firm—but the flavor is still great. Just follow the exact same instructions. For the creamy layer, you can use a sugar-free sweetened condensed milk, or use a combination of heavy cream and a sugar substitute, but the texture will be more like a soft panna cotta.
- Spiked with Rum or Tequila: Don’t feel locked into vodka! A good quality white rum adds a lovely sweetness that pairs beautifully with the citrus flavors. For a more adult, slightly earthy twist, try a silver tequila in the orange layer. It gives it a little bit of a margarita vibe that is surprisingly good.
My personal favorite variation is the Spooky Berry one. I made it for a “Stranger Things” themed party, and the dark blue and red layers looked so eerie under the black lights. It’s a great way to customize the recipe for a specific theme or just to play with your favorite flavors.
Serving & Storage Suggestions
These little shots are best served cold, straight from the fridge. The firm, cold texture is what makes them so satisfying. Here’s how to serve and store them for the best experience.
Serving Temperature & Presentation: Take them out of the fridge just before you’re ready to serve. If you leave them out for more than 30 minutes, they will start to soften and lose their clean layers. For presentation, I like to leave them on the baking sheet or arrange them on a large platter. You can sprinkle a little orange and yellow sanding sugar on top of the creamy layer right before serving for an extra festive touch. A dollop of whipped cream and a single mini candy corn on top is also a killer look.
What to Serve With Them: These are perfect on their own, but they pair wonderfully with other Halloween snacks. Think salty popcorn, spicy buffalo wings, or even a bowl of chili. The sweet, creamy shot is a great counterpoint to savory, spicy foods. For drinks, they’re the main event, but you could also have a batch of non-alcoholic punch for designated drivers.
Storage Instructions: This is the best part—they store beautifully! Keep the lids on the cups and store them in the refrigerator for up to 5 days. The flavors will actually meld together a bit and get even better after the first day. Do not freeze them. Freezing will ruin the texture and make them watery and separated when thawed. The creamy layer is especially sensitive to freezing.
Reheating? No, you don’t reheat Jell-O shots. They are a cold-set dessert. If they’ve been sitting out for a while and have softened, just pop them back in the fridge for 30 minutes to firm them up again. The flavors develop beautifully over a day or two, so they are actually a perfect make-ahead party food.
Nutritional Information & Benefits
Let’s be honest—these are a treat, not a health food. But it’s still good to know what you’re working with. Here’s a general idea of the nutritional breakdown per shot (assuming 24 shots from the recipe).
Estimated Nutritional Values (per shot):
- Calories: ~110-130
- Fat: 2-3g (mostly from the sweetened condensed milk)
- Carbohydrates: 18-22g (mostly sugar)
- Protein: 2-3g
- Alcohol Content: Roughly 0.5 oz of vodka per shot
Health Benefits (sort of): Gelatin is a source of collagen, which is good for your joints, skin, and hair. So, you know, you’re basically doing your skin a favor by eating these. The sweetened condensed milk provides a bit of calcium. But really, the biggest benefit is the joy and fun they bring to a party. They are a low-calorie option compared to a lot of creamy cocktails or sugary Halloween candies. If you use sugar-free Jell-O, you can cut the carbs and sugar significantly.
Dietary Considerations: These are not vegan (due to the gelatin and milk). They are gluten-free (check your Jell-O brand). They are not low-fat. The main allergen is milk. If you need a dairy-free version, use full-fat coconut milk instead of the sweetened condensed milk, but the texture will be softer. They are obviously not for kids or anyone avoiding alcohol.
My personal take? I don’t make these for the nutritional value. I make them because they’re a fun, nostalgic, and delicious way to celebrate Halloween with my friends. A little bit of sugar and vodka now and then is part of a balanced life, right?
Conclusion
So there you have it—my tried-and-true method for making the most fun, crowd-pleasing Easy Candy Corn Jello Shots for Adults. They look complicated, but they’re really just a matter of a little patience and a few simple ingredients. The look on people’s faces when they see those perfect, layered cups is always worth the wait.
I really hope you give these a try for your next Halloween party or fall gathering. Don’t be afraid to experiment with the flavors and make them your own. Whether you stick with the classic candy corn colors or go for a spooky berry twist, I promise they’ll be a hit. They’ve become a non-negotiable part of my Halloween tradition, and I have a feeling they’ll become one of yours, too.
I’d love to hear how they turn out for you! Drop a comment below and let me know what flavor combinations you tried, or tag me in your photos on social media. Did you add a special garnish? Did you use a different type of alcohol? Sharing your wins (and your happy accidents) is what makes this community so great. Now go forth and make some boozy, beautiful candy corn!
Frequently Asked Questions
Can I make these non-alcoholic?
Absolutely! Simply replace the vodka in each layer with an equal amount of cold water. The texture will be slightly softer, but they’ll still set and taste great. They become a fun, kid-friendly Halloween dessert this way.
My layers are bleeding into each other. What went wrong?
This is almost always because you poured the next layer too quickly or while the bottom layer was still too warm. Make sure each layer is completely set (firm to the touch) before adding the next. Also, pour the new liquid slowly against the side of the cup, not directly into the center.
Can I use different flavors of Jell-O?
Yes! The candy corn look is about the colors (orange, yellow, white), but you can use any flavors that match those colors. Try peach, lemon, or even pineapple for the yellow. For the orange, mango or tangerine work great.
How far in advance can I make these?
You can make them up to 5 days in advance. In fact, they taste even better after a day or two as the flavors meld. Just keep them sealed with lids in the refrigerator. Do not freeze them.
Can I use a different type of alcohol?
Definitely. White rum or silver tequila are great substitutes for the vodka. For a different flavor profile, try a citrus-flavored vodka. Avoid dark spirits like whiskey or dark rum, as they will muddy the bright colors of the Jell-O layers.
Pin This Recipe!
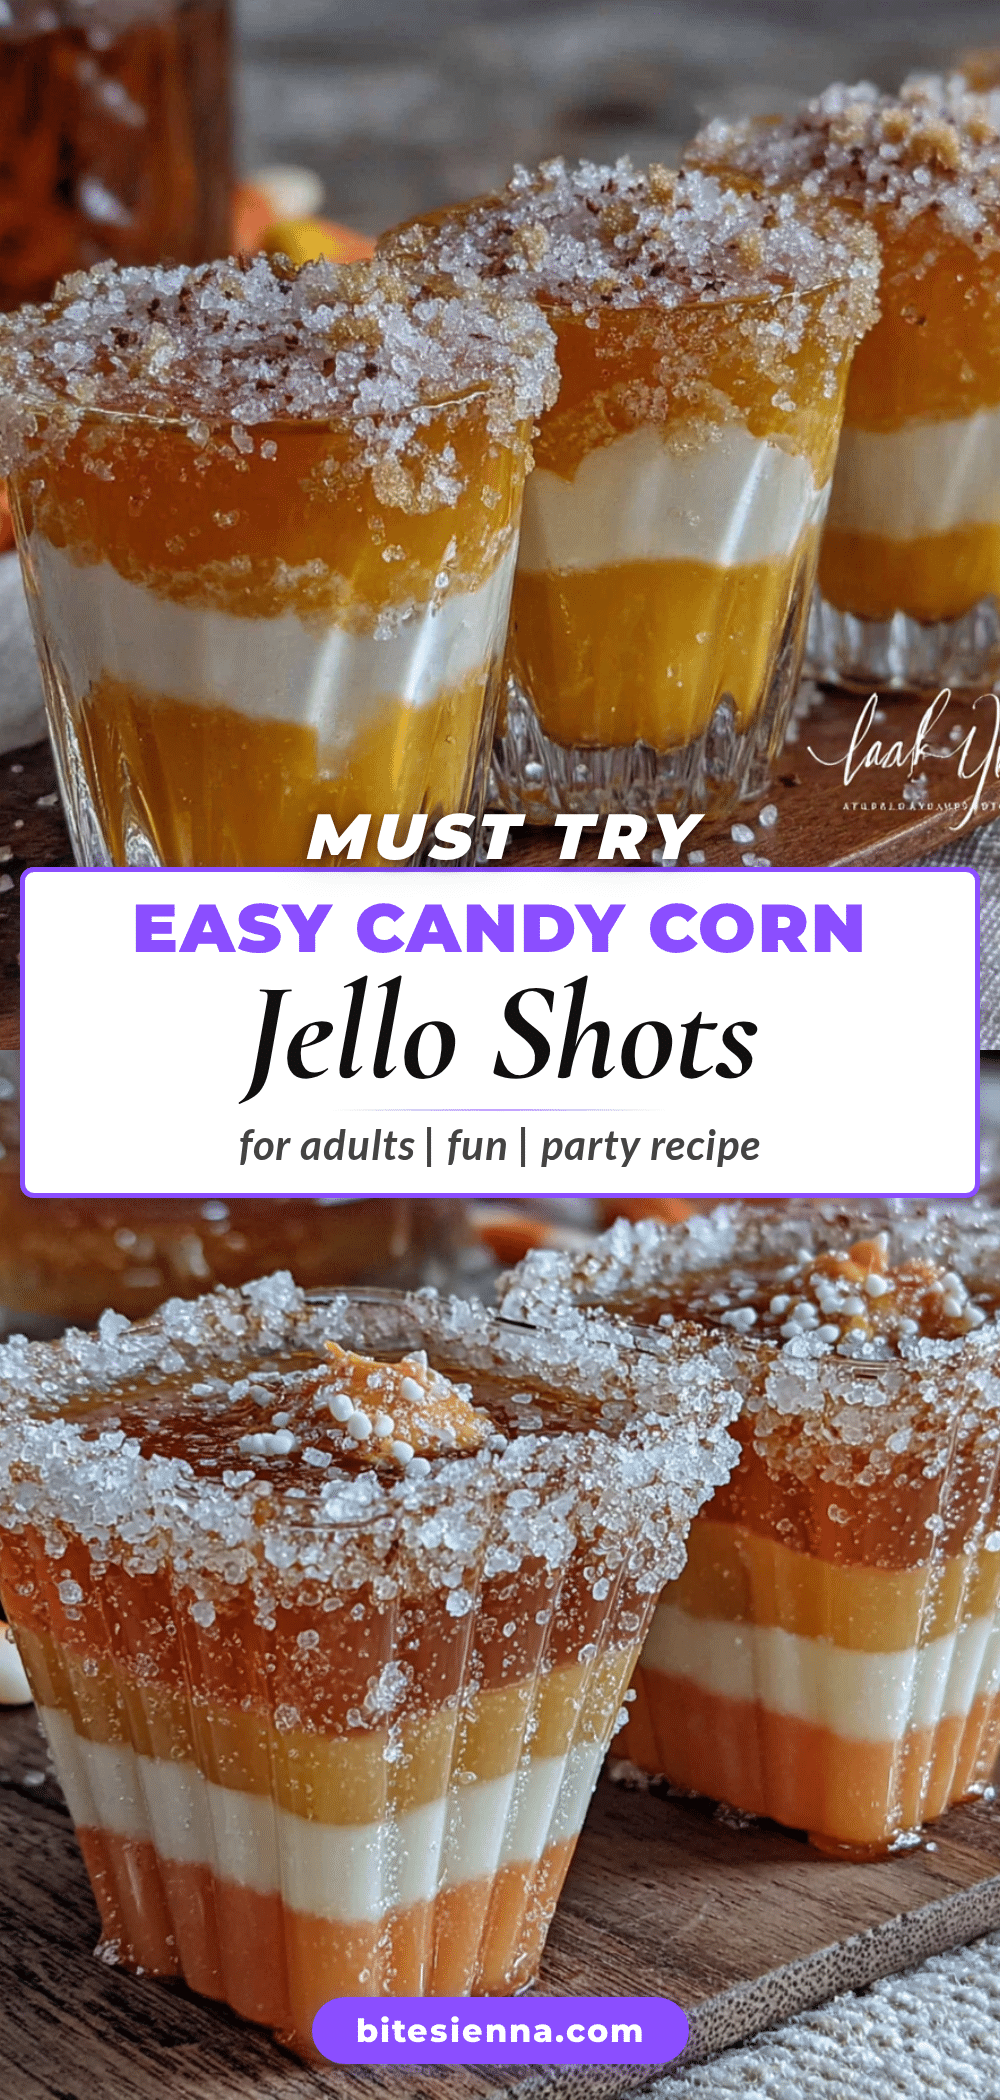
Easy Halloween Candy Corn Jello Shots Perfect for Adults
These layered Jello shots look like candy corn and taste like a boozy, creamy version of the classic Halloween treat. They’re surprisingly easy to make and perfect for adult Halloween parties.
- Prep Time: 30 minutes
- Cook Time: 0 minutes
- Total Time: 6 hours 30 minutes (includes chilling time)
- Yield: 24 servings 1x
- Category: Dessert
- Cuisine: American
Ingredients
- 1 (3 oz) box Orange Jell-O
- 1 cup boiling water
- 1/2 cup cold water
- 1/2 cup vodka
- 1 (3 oz) box Lemon Jell-O
- 1 cup boiling water
- 1/2 cup cold water
- 1/2 cup vodka
- 1 (3 oz) box Unflavored Gelatin (like Knox)
- 1/2 cup cold water (for blooming gelatin)
- 1 (14 oz) can Sweetened Condensed Milk
- 1/2 cup boiling water
- 1/4 cup vodka
- Whipped cream (optional, for garnish)
- Orange or yellow sanding sugar (optional, for garnish)
- Mini candy corns (optional, for garnish)
Instructions
- Arrange 24 shot cups on a baking sheet. Make sure they are stable and not touching.
- Make the orange layer: In a 2-cup measuring cup, dissolve Orange Jell-O in 1 cup boiling water. Stir in 1/2 cup cold water and 1/2 cup vodka. Pour mixture into each shot cup, filling about 1/3 full. Refrigerate for at least 1 hour until firm.
- Make the yellow layer: Repeat step 2 with Lemon Jell-O, 1 cup boiling water, 1/2 cup cold water, and 1/2 cup vodka. Gently pour over set orange layer, filling cups to about 2/3 full. Refrigerate for at least 1 hour until firm.
- Make the creamy white layer: In a small bowl, sprinkle unflavored gelatin over 1/2 cup cold water. Let sit for 5 minutes to bloom. In a separate bowl, whisk together sweetened condensed milk and 1/2 cup boiling water until smooth. Add bloomed gelatin and whisk until dissolved. Stir in 1/4 cup vodka. Let cool for 5 minutes.
- Gently pour creamy mixture over set yellow layer, filling cups to the top. Cover with lids if using. Refrigerate for at least 4 hours or overnight until firm.
- Garnish with whipped cream, sanding sugar, or mini candy corns just before serving, if desired.
Notes
Patience is key: each layer must set completely before adding the next. Pour new layers slowly against the side of the cup to avoid disturbing the set layer. Let the creamy mixture cool for 5 minutes before pouring to prevent melting the yellow layer. These can be made up to 5 days in advance and stored in the refrigerator. Do not freeze.
Nutrition
- Serving Size: 1 shot
- Calories: 120
- Sugar: 18
- Sodium: 80
- Fat: 2.5
- Saturated Fat: 1.5
- Carbohydrates: 20
- Protein: 2.5
Keywords: Halloween, Jello shots, candy corn, adult party, vodka, gelatin, layered dessert


