There used to be a tiny, dimly lit wine bar tucked behind a vintage bookstore in my old neighborhood called “The Cellar Door” that made the most incredible cheese ball I have ever tasted. It wasn’t just any cheese ball—it was wrapped in what looked like flaky, golden bandages, sitting on a wooden board like a delicious little ghost. When they closed their doors two summers ago, I honestly felt a little pang of grief. I mean, where was I supposed to get my fix? After seven tries—and one particularly sad, crumbly disaster that ended up in the trash—I finally cracked the code. This spooky mummy wrapped cheese ball is my love letter to that lost recipe, and let me tell you, it’s even better than I remembered.
You know that feeling when you take a bite of something and your brain just goes quiet for a second? That’s this cheese ball. It’s creamy, savory, and wrapped in a flaky, buttery blanket that looks like a mummy. It’s the perfect centerpiece for any Halloween party, and honestly, it’s so easy to put together that you’ll wonder why you ever bought store-bought cheese logs. Let’s get into it, because this spooky snack is about to become your new October tradition.
Why You’ll Love This Spooky Mummy Wrapped Cheese Ball
This isn’t just another cheese ball recipe. This is the one that gets the “oh wow” reaction every single time. Here’s why this spooky mummy wrapped cheese ball is going to steal the show at your Halloween gathering:
- Quick & Easy: Comes together in under 30 minutes of active prep time. You can make it ahead and just bake it when guests arrive. Perfect for busy Halloween weeknights.
- Simple Ingredients: No fancy grocery trips needed. Cream cheese, cheddar, and crescent rolls are all you really need. You probably have everything in your kitchen right now.
- Perfect for Halloween: It looks like a prop from a haunted house, but it tastes like a five-star appetizer. Great for parties, potlucks, or just a spooky movie night at home.
- Crowd-Pleaser: Kids love the mummy look, and adults love the creamy, cheesy goodness. It disappears faster than candy on Halloween night.
- Unbelievably Delicious: The contrast between the warm, flaky crescent roll “bandages” and the cold, creamy cheese center is next-level comfort food. Seriously, it’s addictive.
What makes this recipe different from the rest? It’s the texture. Most cheese balls are just a log of cold cheese. This one gets wrapped in buttery crescent dough and baked until golden, so you get that warm, flaky exterior with a cool, creamy center. It’s the best of both worlds. I’ve tested this with different cheeses and doughs, and this version is the one that gets the most “can I have the recipe?” requests. It’s comfort food reimagined—spooky, but with the same soul-soothing satisfaction.
What Ingredients You Will Need
This spooky mummy wrapped cheese ball uses simple, wholesome ingredients to deliver big flavor and a fun presentation. Most of these are pantry staples, which makes it a lifesaver for last-minute Halloween prep.
- For the Cheese Ball Base:
- 16 oz cream cheese, softened (I use Philadelphia—it gives the creamiest texture)
- 1 ½ cups sharp cheddar cheese, shredded (freshly shredded melts better than pre-shredded, trust me)
- ¼ cup grated Parmesan cheese (adds a salty, nutty kick)
- 1 teaspoon garlic powder
- 1 teaspoon onion powder
- ½ teaspoon smoked paprika (for a subtle smoky depth)
- ¼ teaspoon black pepper
- 2 tablespoons fresh chives, finely chopped (optional, but adds a nice pop of color)
- For the Mummy Wrap:
- 2 cans (8 oz each) refrigerated crescent roll dough (Pillsbury works great)
- 1 large egg, beaten (for the egg wash)
- For the Mummy Eyes:
- 2 small candy eyes (or use sliced black olives and a dab of cream cheese)
- For Serving:
- Assorted crackers (I love buttery Ritz or sturdy water crackers)
- Fresh vegetable sticks (carrots, celery, bell peppers)
Ingredient Tips: Make sure your cream cheese is truly softened—leave it on the counter for at least 30 minutes. Cold cream cheese will leave you with lumpy cheese ball. If you want a spicier kick, add a pinch of cayenne pepper or some chopped jalapeños to the cheese mixture. For a gluten-free version, use gluten-free crescent dough or simply skip the wrap and serve the cheese ball cold with veggies.
Equipment Needed
You don’t need any fancy gadgets for this spooky mummy wrapped cheese ball. Here’s what you’ll need:
- Large mixing bowl
- Hand mixer or sturdy spatula (I prefer a hand mixer for a super smooth texture)
- Plastic wrap
- Baking sheet lined with parchment paper
- Pastry brush (for the egg wash)
- Sharp knife or pizza cutter (for cutting the dough strips)
- Small bowl (for the egg wash)
Budget-Friendly Alternatives: No hand mixer? No problem. You can mix the cheese ball by hand with a strong spatula—it’ll just take a little more elbow grease. No pastry brush? Use a clean silicone brush or even a paper towel to dab on the egg wash. I’ve used a butter knife to cut crescent dough strips for years, and it works just fine.
Preparation Method
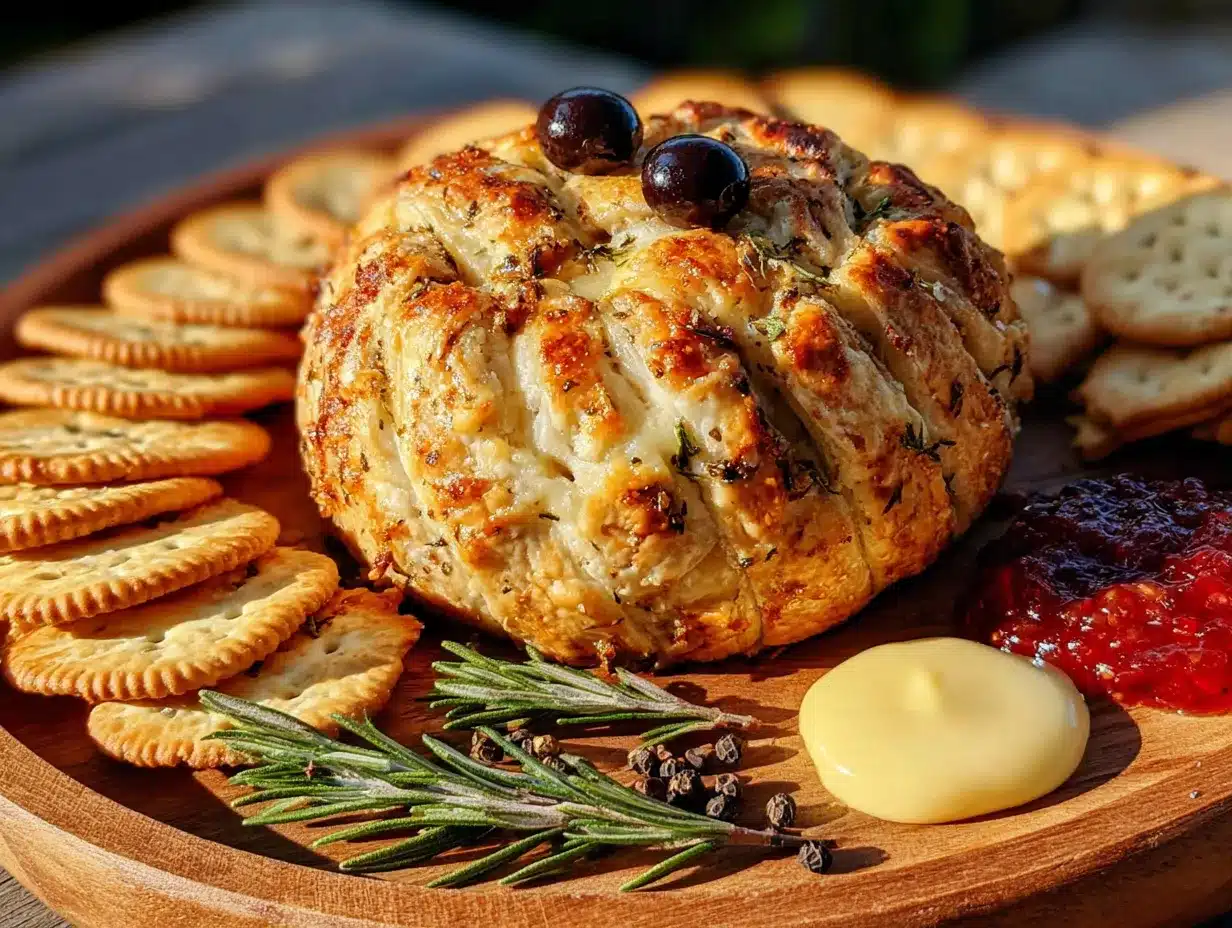
- Make the Cheese Ball Base: In a large mixing bowl, combine the softened cream cheese, shredded cheddar, Parmesan, garlic powder, onion powder, smoked paprika, black pepper, and chives. Mix with a hand mixer on medium speed until everything is fully combined and smooth. Scrape down the sides of the bowl to make sure there are no lumps. The mixture should be thick and creamy.
- Shape the Cheese Ball: Scoop the cheese mixture onto a large piece of plastic wrap. Use the wrap to shape it into a round ball, about the size of a softball. Wrap it tightly and refrigerate for at least 1 hour, or up to 24 hours. This step is crucial—a cold cheese ball holds its shape better when you wrap it in dough.
- Preheat the Oven: When you’re ready to bake, preheat your oven to 375°F (190°C). Line a baking sheet with parchment paper.
- Prepare the Dough Strips: Unroll the crescent dough cans. Separate the dough along the perforated lines, so you have 8 triangles per can. Using a sharp knife or pizza cutter, cut each triangle lengthwise into 3 thin strips. You’ll have about 48 thin strips total. Don’t worry if they’re not perfect—mummies are supposed to look a little messy!
- Wrap the Mummy: Take the chilled cheese ball out of the fridge and unwrap it. Place it in the center of the prepared baking sheet. Now, start wrapping the dough strips around the cheese ball. Lay them across the ball, slightly overlapping, until the entire ball is covered. Leave a small gap in the front for the eyes. Press the ends of the strips gently into the bottom of the cheese ball to secure them.
- Add the Egg Wash: In a small bowl, beat the egg with a tablespoon of water. Using a pastry brush, gently brush the egg wash over all the dough strips. This will give your mummy a beautiful golden-brown color.
- Bake the Mummy: Bake for 18-22 minutes, or until the dough is golden brown and puffed. The cheese ball should be slightly soft in the center but still hold its shape. Let it cool on the baking sheet for 5 minutes.
- Add the Eyes: While the mummy is still warm, gently press the candy eyes into the gap you left in the dough. If you’re using olives, press a small slice of black olive into a dab of cream cheese and place it on the mummy.
- Serve Immediately: Transfer the spooky mummy wrapped cheese ball to a serving board. Surround it with crackers and vegetable sticks. Serve while the dough is warm and the cheese center is still soft and dippable.
Sensory Cues: When you’re mixing the cheese, it should smell savory and slightly tangy. When you’re wrapping the dough, the strips should feel cool and pliable. When it’s baking, your kitchen will smell like buttery, toasted cheese—absolutely irresistible. The finished mummy should look golden, with the dough slightly puffed and the cheese center just starting to peek through the cracks.
Cooking Tips & Techniques
I’ve made this spooky mummy wrapped cheese ball more times than I care to admit, and I’ve learned a few things the hard way. Here are my best tips:
- Don’t Skip the Chill: I once tried to wrap a warm cheese ball, and it was a disaster. The dough just slid off, and I ended up with a lumpy mess. Chilling the cheese ball for at least an hour makes it firm enough to handle.
- Overlap the Strips: Make sure your dough strips overlap slightly. If there are gaps, the cheese will ooze out during baking. Mummies are supposed to be wrapped tightly!
- Watch the Oven: Ovens vary, so keep an eye on your mummy after 15 minutes. You want the dough golden brown, not dark brown. If the top is browning too fast, tent it loosely with foil.
- Serve Warm, Not Hot: Let it cool for 5 minutes before serving. If you cut into it immediately, the cheese will be too runny. If it gets cold, the cheese will firm up again. Warm is the sweet spot.
- Double the Recipe: I promise you, one cheese ball is never enough at a party. Make two—they’ll both disappear.
Variations & Adaptations
This spooky mummy wrapped cheese ball is super versatile. Here are some ways to make it your own:
- Spicy Southwest Mummy: Add ½ cup of diced pickled jalapeños, 1 teaspoon of cumin, and use pepper jack cheese instead of cheddar. The heat pairs beautifully with the buttery dough.
- Herb & Garlic Mummy: Swap the chives for fresh rosemary and thyme. Add an extra clove of minced garlic to the cheese mixture. It’s earthy, aromatic, and perfect for a more sophisticated Halloween party.
- Sweet & Savory Mummy: Add ¼ cup of dried cranberries and ¼ cup of chopped pecans to the cheese mixture. The sweetness of the cranberries contrasts beautifully with the savory cheese and flaky dough.
- Vegan Mummy: Use vegan cream cheese and shredded vegan cheddar. Most vegan crescent doughs work well too. The texture will be slightly different, but it’s still delicious.
- Gluten-Free Mummy: Use gluten-free crescent dough or simply skip the wrap. Serve the cheese ball cold with gluten-free crackers. It’s still a hit, just without the mummy look.
I personally love the spicy version—I made it for a Halloween potluck last year, and someone asked me if I was secretly a professional chef. I wasn’t, but I didn’t correct them!
Serving & Storage Suggestions
This spooky mummy wrapped cheese ball is best served warm, right out of the oven. The contrast between the warm, flaky dough and the cool, creamy center is what makes it special. Arrange it on a large wooden board or a slate platter. Surround it with an assortment of crackers—buttery Ritz, salty pretzel crisps, and sturdy water crackers all work well. Add some fresh vegetable sticks for color and crunch: carrot sticks, celery, bell pepper strips, and cucumber rounds are great choices.
Storage: If you have leftovers (which is rare, honestly), let the mummy cool completely. Wrap it tightly in plastic wrap and store it in the refrigerator for up to 3 days. The dough will soften as it sits, so it won’t be as flaky the next day, but it’s still delicious cold.
Reheating: To reheat, place the mummy on a baking sheet and warm it in a 350°F (175°C) oven for 10-12 minutes, or until the dough is crispy again. Avoid the microwave—it will turn the dough into a sad, soggy mess.
Make Ahead Tip: You can prepare the cheese ball up to 24 hours in advance and keep it in the fridge. Wrap it in dough and bake it just before serving. The flavors actually get better overnight!
Nutritional Information & Benefits
Let’s be real—this is a treat, not a health food. But it’s made with real ingredients, which is always a win. Here’s the estimated nutritional breakdown per serving (based on 8 servings):
- Calories: 380
- Fat: 28g
- Carbohydrates: 22g
- Protein: 12g
- Fiber: 1g
- Sugar: 5g
Health Benefits: Cream cheese and cheddar provide a good dose of calcium and protein. The chives add a small amount of vitamins A and C. If you’re looking for a lighter option, use reduced-fat cream cheese and low-fat cheddar. It won’t be as creamy, but it’ll still taste great.
Dietary Considerations: This recipe contains dairy and gluten. For a dairy-free version, use vegan cream cheese and vegan cheddar. For a gluten-free version, use gluten-free crescent dough or serve the cheese ball cold with gluten-free crackers. It’s also easy to make nut-free by skipping any nut-based variations.
I personally love that this recipe feels indulgent without being overly complicated. It’s a treat for the taste buds and a feast for the eyes.
Conclusion
This spooky mummy wrapped cheese ball is the Halloween appetizer you didn’t know you needed. It’s fun, it’s delicious, and it’s surprisingly easy to make. Whether you’re hosting a big Halloween bash or just having a quiet night in with a scary movie, this mummy will steal the show. I love how it brings people together—everyone gathers around the board, oohing and aahing before digging in. That’s the kind of moment I live for.
I’d love to hear how yours turns out! Did you add a spicy twist? Did your kids help wrap the mummy? Drop a comment below and let me know. And if you loved this recipe, share it with your friends—they’ll thank you when their Halloween party is a hit. Happy Halloween, and happy snacking!
Frequently Asked Questions
Can I make this spooky mummy wrapped cheese ball ahead of time?
Yes, absolutely! You can prepare the cheese ball up to 24 hours in advance and keep it in the fridge. Wrap it in the crescent dough and bake it just before serving for the best texture.
What if I don’t have candy eyes for the mummy?
No problem! Use sliced black olives for the eyes. Just place a small dab of cream cheese on the back of each olive slice to help it stick to the dough. It looks just as spooky.
Can I use a different type of cheese?
Definitely! You can swap the cheddar for Gouda, mozzarella, or even pepper jack for a spicy kick. Just make sure to use a cheese that melts well and has good flavor.
How do I prevent the dough from getting soggy?
Make sure your cheese ball is well-chilled before wrapping it. Also, don’t overbake it—remove it from the oven as soon as the dough is golden brown. Serving it warm (not piping hot) helps keep the dough crispy.
Can I freeze this spooky mummy wrapped cheese ball?
I don’t recommend freezing it after baking, as the texture will change. However, you can freeze the unbaked cheese ball (without the dough) for up to a month. Thaw it in the fridge overnight, then wrap and bake as directed.
Pin This Recipe!
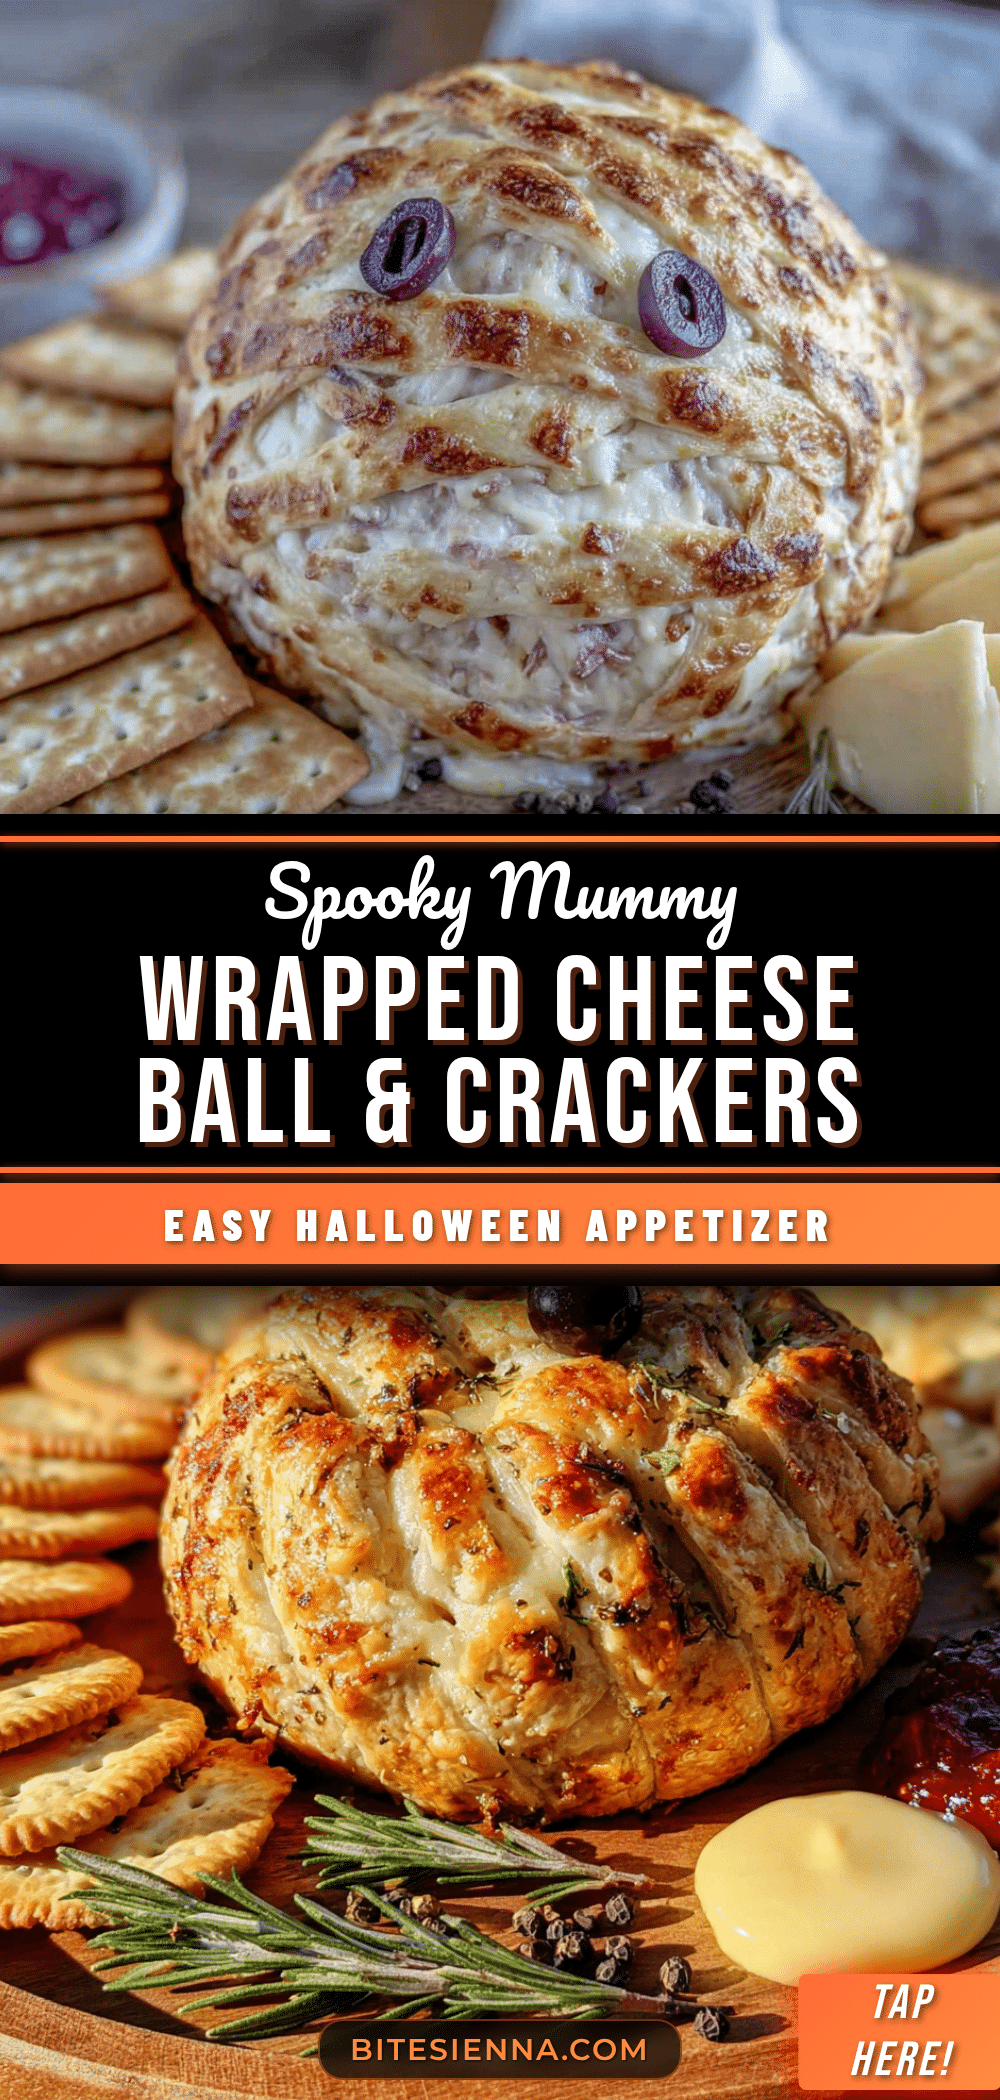
Spooky Mummy Wrapped Cheese Ball: Easy Halloween Appetizer

A creamy, savory cheese ball wrapped in a flaky, buttery crescent dough blanket that looks like a mummy. Perfect for Halloween parties, this easy appetizer combines a cool, creamy center with a warm, golden exterior.
- Prep Time: 30 minutes
- Cook Time: 20 minutes
- Total Time: 50 minutes
- Yield: 8 servings 1x
- Category: Appetizer
- Cuisine: American
Ingredients
- 16 oz cream cheese, softened
- 1 ½ cups sharp cheddar cheese, shredded
- ¼ cup grated Parmesan cheese
- 1 teaspoon garlic powder
- 1 teaspoon onion powder
- ½ teaspoon smoked paprika
- ¼ teaspoon black pepper
- 2 tablespoons fresh chives, finely chopped (optional)
- 2 cans (8 oz each) refrigerated crescent roll dough
- 1 large egg, beaten
- 2 small candy eyes (or sliced black olives and cream cheese)
- Assorted crackers for serving
- Fresh vegetable sticks for serving
Instructions
- Make the Cheese Ball Base: In a large mixing bowl, combine the softened cream cheese, shredded cheddar, Parmesan, garlic powder, onion powder, smoked paprika, black pepper, and chives. Mix with a hand mixer on medium speed until fully combined and smooth.
- Shape the Cheese Ball: Scoop the cheese mixture onto a large piece of plastic wrap. Use the wrap to shape it into a round ball, about the size of a softball. Wrap tightly and refrigerate for at least 1 hour, or up to 24 hours.
- Preheat the Oven: When ready to bake, preheat oven to 375°F (190°C). Line a baking sheet with parchment paper.
- Prepare the Dough Strips: Unroll the crescent dough cans. Separate the dough along the perforated lines to get 8 triangles per can. Cut each triangle lengthwise into 3 thin strips (about 48 strips total).
- Wrap the Mummy: Place the chilled cheese ball in the center of the prepared baking sheet. Wrap the dough strips around the cheese ball, slightly overlapping, until the entire ball is covered. Leave a small gap in the front for the eyes. Press the ends gently into the bottom.
- Add the Egg Wash: In a small bowl, beat the egg with a tablespoon of water. Brush the egg wash over all the dough strips.
- Bake the Mummy: Bake for 18-22 minutes, or until the dough is golden brown and puffed. Let cool on the baking sheet for 5 minutes.
- Add the Eyes: While still warm, gently press the candy eyes into the gap left in the dough. If using olives, press a small slice of black olive into a dab of cream cheese and place on the mummy.
- Serve Immediately: Transfer to a serving board. Surround with crackers and vegetable sticks. Serve while the dough is warm and the cheese center is soft.
Notes
Make sure cream cheese is truly softened for a smooth texture. Chill the cheese ball for at least 1 hour before wrapping to prevent the dough from sliding off. Overlap dough strips to prevent cheese from oozing out. Serve warm for the best texture. For a gluten-free version, use gluten-free crescent dough or serve the cheese ball cold with gluten-free crackers.
Nutrition
- Serving Size: 1 serving (based on
- Calories: 380
- Sugar: 5
- Fat: 28
- Carbohydrates: 22
- Fiber: 1
- Protein: 12
Keywords: Halloween appetizer, mummy cheese ball, cheese ball, crescent roll cheese ball, spooky snack, easy Halloween recipe


