It was 10:47 PM on a random Tuesday in October, and I was supposed to be meal-prepping for the rest of the week. But there I was, staring into the pantry like it held the secrets to the universe, when a very specific craving hit—something salty, something sweet, and something that screamed Halloween without requiring me to actually bake a cake from scratch. I didn’t have the brain power for a layer cake, and honestly, I didn’t have the patience either. But I had a bag of popcorn, a half-empty bag of candy melts from a project last spring, and a bag of candy eyeballs that I bought on a whim because they were just too funny to leave at the store.
The idea arrived like a little sugar-fueled ghost: dump everything in a bowl, melt the candy coating, and see what happens. Let me tell you, the result was so much better than I expected. It was crunchy, it was creepy (in a cute way), and it took maybe fifteen minutes from start to finish. I stood there in my pajamas, eating handfuls of this stuff straight from the mixing bowl, and I knew I had stumbled onto something special. Maybe you’ve been there—standing in your kitchen late at night, too tired to do anything complicated but craving something that feels like a celebration.
This Easy Candy Eyeball Popcorn Halloween Snack Mix is that recipe. It’s the one you make when you want to bring something fun to a party but you don’t want to spend hours in the kitchen. It’s the snack that makes kids (and adults) giggle, and honestly, it’s dangerously addictive. I’ve made it three times since that Tuesday night, and each time, I tweak it just a little bit. But the core—the popcorn, the candy coating, those ridiculous eyeballs staring up at you—that stays the same. This is the kind of recipe that makes you feel like a kitchen genius with almost zero effort.
Why You’ll Love This Recipe
This isn’t just another Halloween snack. This is the one that disappears first at every party, the one people stand around the bowl picking at while they chat. I’ve tested this recipe on my neighbors, my coworkers, and a group of skeptical teenagers, and every single time, the bowl comes back empty. Here’s why this Easy Candy Eyeball Popcorn Halloween Snack Mix is about to become your new favorite thing to make in October.
- Quick & Easy: From start to finish, this comes together in under 20 minutes. No baking, no complicated steps, no waiting for things to cool. Just melt, toss, and eat.
- Simple Ingredients: You probably already have most of what you need. Popcorn, candy melts, and those candy eyeballs are the stars. No fancy grocery store trips required.
- Perfect for Halloween: Whether it’s for a classroom party, a movie night, or just because it’s October and you want to have fun, this snack fits every spooky occasion.
- Crowd-Pleaser: I have never met a single person who didn’t like this. Kids love the eyeballs, adults love the salty-sweet combo, and everyone loves how easy it is to grab a handful.
- Unbelievably Delicious: The combination of crunchy popcorn, smooth white chocolate, and that little pop of color from the candy eyes is next-level comfort food. It’s the kind of snack that makes you close your eyes after the first bite.
What makes this recipe different from the rest is the texture. Most popcorn snack mixes get soggy after a day, but this one stays perfectly crunchy because we use a specific technique—melting the candy coating just right and tossing it while the popcorn is still warm. It’s a small thing, but it makes a huge difference. Plus, you can customize it a hundred different ways without ruining it. This isn’t just another version of Halloween popcorn—it’s your best version.
What Ingredients You Will Need
This Easy Candy Eyeball Popcorn Halloween Snack Mix uses simple, everyday ingredients to deliver big flavor and that perfect crunchy texture. The beauty of this recipe is that you don’t need anything fancy—just a few key items that you can find at any grocery store or online. Let me walk you through what you’ll need and why each ingredient matters.
For the Popcorn Base
- 12 cups popped popcorn (about 1/2 cup unpopped kernels or one large bag of plain microwave popcorn) — You want plain, unsalted, and unbuttered popcorn here. The neutral flavor lets the candy coating shine. I prefer using air-popped popcorn because it stays crunchier, but microwave popcorn works in a pinch. Just skip the butter-flavored kind.
- 1/4 teaspoon salt (optional, but recommended) — A tiny pinch of salt balances the sweetness of the candy coating. Don’t skip this—it’s what makes the snack addictive instead of just sugary.
For the Candy Coating
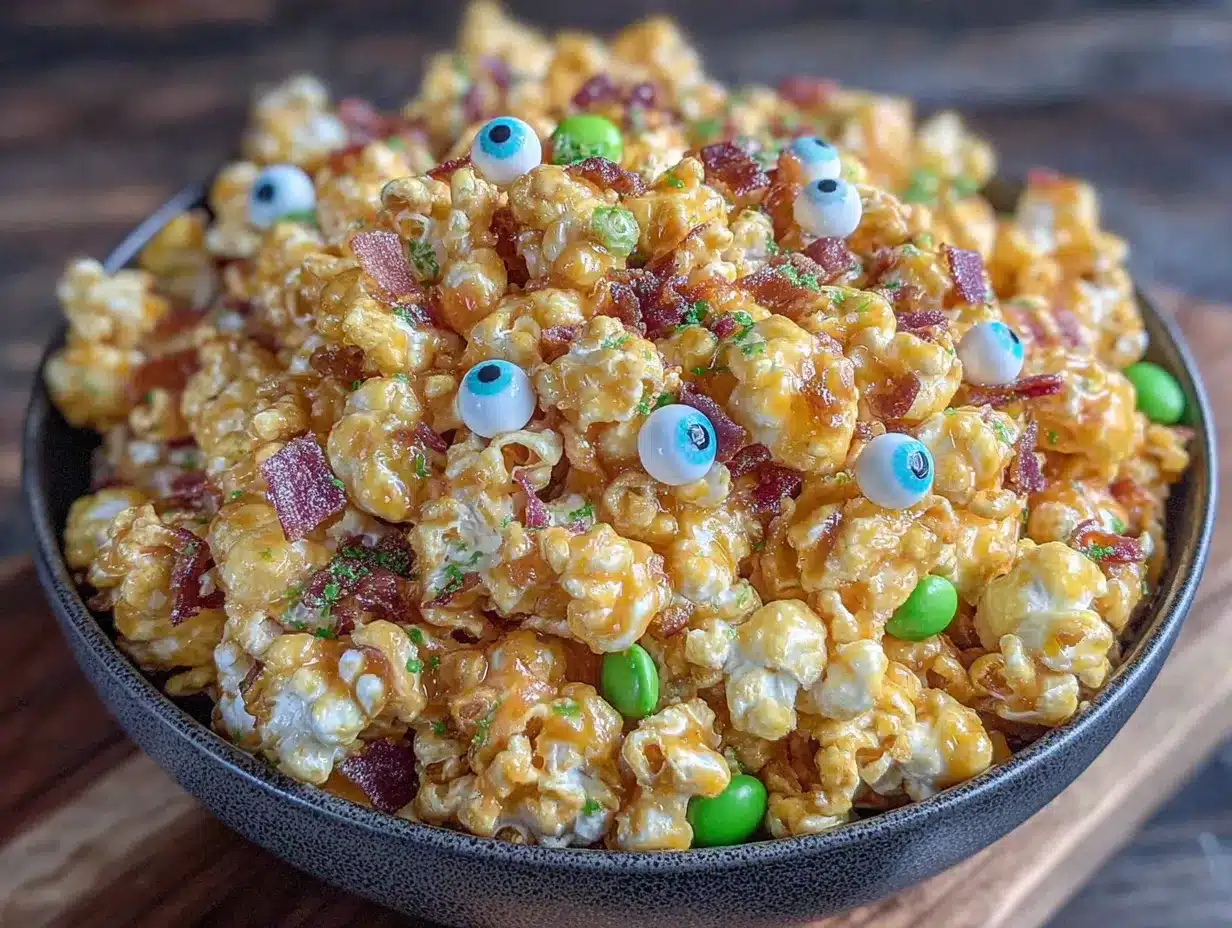
- 12 ounces white candy melts or white chocolate chips (I recommend Wilton candy melts for the smoothest coating, but Ghirardelli white chocolate chips work beautifully too) — This is what binds everything together and gives that gorgeous white base that makes the candy eyeballs pop. If you use white chocolate chips, add 1 teaspoon of coconut oil to help them melt smoothly.
- 1 tablespoon coconut oil or vegetable shortening (only if using white chocolate chips) — This helps thin out the chocolate so it coats the popcorn evenly without clumping.
For the Halloween Decorations
- 1/2 cup candy eyeballs (the edible kind, found in the baking aisle or online) — These are non-negotiable for the full effect. You want the ones that look like actual eyeballs, not just white dots with black pupils. Wilton makes great ones, and they come in different sizes.
- 1/4 cup orange and black sprinkles (optional, but adds extra Halloween flair) — I like using Halloween-themed jimmies or nonpareils. They add color and texture, plus they make the mix look even more festive.
- 1/4 cup mini candy corn (optional) — If you’re a candy corn fan, this is a great addition. If you’re not, feel free to skip it or substitute with chopped candy bars.
Substitution Guidance
If you want to make this dairy-free, use dairy-free white chocolate chips and coconut oil. For a gluten-free version, just double-check that your candy eyeballs and sprinkles are certified gluten-free—most are, but it’s worth checking. If you can’t find candy eyeballs, you can use white chocolate chips with a dot of black icing on each one, but honestly, the pre-made eyeballs are so much easier and look way better. I’ve also made this with dark chocolate melts instead of white, and it was delicious—just less spooky-looking.
Equipment Needed
You don’t need a fancy kitchen to make this Easy Candy Eyeball Popcorn Halloween Snack Mix. In fact, you probably already have everything you need. Here’s the short list.
- Large mixing bowl — You need something big enough to toss the popcorn without spilling it everywhere. I use a metal bowl because it conducts heat well, but any large bowl works.
- Baking sheet — For spreading the popcorn out to set. A half-sheet pan is perfect. Line it with parchment paper or a silicone baking mat for easy cleanup.
- Microwave-safe bowl or double boiler — For melting the candy coating. I use a glass measuring cup in the microwave because it’s quick and easy, but a double boiler gives you more control if you’re nervous about burning the chocolate.
- Spatula or wooden spoon — For stirring and tossing. A silicone spatula is my go-to because it doesn’t scratch the bowl and it scrapes every last bit of candy coating.
- Measuring cups and spoons — For accuracy. Eyeballing works for some things, but for this recipe, you want to get the ratios right so the coating isn’t too thick or too thin.
If you don’t have a microwave, you can melt the candy coating on the stovetop using a double boiler. Just be patient and stir constantly—candy melts can seize up if they get too hot. I learned that the hard way my first time, and let me tell you, there’s nothing more frustrating than ruined candy coating at 11 PM on a Tuesday.
Preparation Method
Let me walk you through this step by step. I promise, it’s so simple you’ll memorize it after the first time. The key is to work quickly once the candy coating is melted, because it sets fast.
- Pop the popcorn. If you’re using kernels, pop them using your preferred method—air popper, stovetop, or microwave. You want about 12 cups of popped popcorn. Spread it out on a baking sheet and pick out any unpopped kernels (trust me, nobody wants to bite into one of those). Let it cool for 2-3 minutes while you prep the other ingredients.
- Melt the candy coating. Place the white candy melts in a microwave-safe bowl. Microwave in 30-second intervals, stirring well after each interval, until completely smooth. This usually takes about 1.5 to 2 minutes total. Don’t overheat it, or the candy will seize up and turn grainy. If you’re using white chocolate chips, add the coconut oil before melting to help it stay smooth.
- Combine the popcorn and coating. Pour the melted candy coating over the popcorn in your large mixing bowl. Use a spatula to gently fold and toss until every piece of popcorn is coated. Work quickly here—the coating starts to set as it cools. You want to make sure everything is evenly covered before it hardens.
- Add the decorations. While the coating is still wet, sprinkle in the candy eyeballs, sprinkles, and candy corn (if using). Toss gently to distribute them evenly. The candy coating acts like glue, so the decorations will stick to the popcorn. Don’t dump them all in one spot—scatter them as you go for even distribution.
- Spread and set. Turn the coated popcorn out onto your prepared baking sheet. Spread it into an even layer. Don’t pack it down—you want the pieces to stay separate so they set individually. Let it sit at room temperature for about 15-20 minutes, or until the coating is completely hard. If you’re in a hurry, you can pop it in the fridge for 10 minutes.
- Break it up. Once the coating is set, break the popcorn into clusters. Some pieces will stick together, and that’s totally fine—those are the best parts. If you want smaller pieces, just break them apart gently with your hands.
A quick note: if the candy coating starts to thicken while you’re working, pop it back in the microwave for 10 seconds to loosen it up. This happens especially if your kitchen is cold. Just don’t overdo it, or you’ll end up with a sticky mess.
Cooking Tips & Techniques
After making this Easy Candy Eyeball Popcorn Halloween Snack Mix about a dozen times (no exaggeration), I’ve picked up a few tricks that make the process smoother and the result better. Here are my best tips for success.
Use room temperature popcorn. If your popcorn is too warm, it can make the candy coating too thin and runny. If it’s too cold, the coating will seize up before you can spread it. Let the popcorn sit for a few minutes after popping to cool to room temperature. This is one of those small details that makes a big difference.
Don’t skip the salt. I know it seems counterintuitive to add salt to a sweet snack, but trust me on this one. A tiny pinch of salt balances the sweetness and makes the flavors pop. Without it, the snack can taste flat and one-dimensional. I learned this the hard way when I made a batch without salt and it just wasn’t as good.
Work in batches if needed. If you’re doubling the recipe, don’t try to coat all the popcorn at once. Split it into two batches. The candy coating will cool too quickly if you’re working with too much popcorn, and you’ll end up with uneven coverage. I made this mistake when I was making a big batch for a party, and the second half of the popcorn barely had any coating on it.
Store it properly. This snack stays fresh for up to a week if stored in an airtight container at room temperature. Don’t put it in the fridge—the moisture will make the popcorn soggy. And whatever you do, don’t leave it uncovered overnight. I left a batch out once and woke up to stale, chewy popcorn. It was heartbreaking.
Get creative with the decorations. The candy eyeballs are the star, but you can add other Halloween-themed candies too. I’ve used chopped Reese’s cups, mini M&Ms in Halloween colors, and even crushed Oreos for a “dirt” effect. The possibilities are endless, so don’t be afraid to experiment.
Variations & Adaptations
One of the best things about this Easy Candy Eyeball Popcorn Halloween Snack Mix is how easy it is to customize. Here are some of my favorite variations that I’ve tried over the years.
Spooky Spiderweb Popcorn
Instead of using all white candy coating, melt some dark chocolate and drizzle it over the white-coated popcorn in a zigzag pattern. It looks like a spiderweb and tastes amazing. I did this for a Halloween party last year, and people couldn’t stop talking about it.
Monster Munch Popcorn
Swap the white candy coating for green or purple candy melts. Add candy eyeballs and some gummy worms for a creepy-crawly effect. This is perfect for a kids’ party where you want something that looks truly monstrous. My nephew declared it “the best snack ever,” which is high praise from a picky seven-year-old.
Gluten-Free Version
This recipe is naturally gluten-free as long as you check your ingredients. Most popcorn, candy melts, and candy eyeballs are gluten-free, but always read the labels to be safe. I have a friend with celiac disease, and I always make a separate batch for her using certified gluten-free ingredients. She says it’s one of the few Halloween treats she can actually enjoy.
Nut-Free Option
If you’re serving this at a school or event where nut allergies are a concern, skip any nut-based candies and stick with the basic recipe. The candy eyeballs and sprinkles are usually nut-free, but again, check the labels. I always make a nut-free version for my daughter’s classroom, and it’s always a hit.
Extra Crunchy Version
Add 1/2 cup of pretzel sticks or broken pretzel pieces to the mix before adding the candy coating. The saltiness of the pretzels pairs perfectly with the sweet coating, and the extra crunch is addictive. This is my personal favorite variation, and I almost always add pretzels to my batches now.
Serving & Storage Suggestions
This Easy Candy Eyeball Popcorn Halloween Snack Mix is best served at room temperature, straight from the bowl. The coating should be firm and snappy, and the popcorn should be crunchy. If you’re serving it at a party, put it in a large decorative bowl and watch it disappear. I like to use a clear glass bowl so the candy eyeballs are visible—it adds to the fun factor.
For storage, transfer the popcorn to an airtight container or a resealable plastic bag. It will stay fresh for up to a week at room temperature. I don’t recommend refrigerating it, as the moisture can make the popcorn lose its crunch. If you’re making it ahead of time for a party, I suggest making it no more than two days in advance for the best texture.
The flavors actually develop a little over time—the saltiness mellows out, and the sweetness becomes more pronounced. I actually prefer it the day after I make it, when everything has settled and the coating has fully set. That said, it’s pretty hard to resist eating it immediately, so I usually make a double batch: one to eat right away and one to save for later.
This snack pairs beautifully with hot apple cider, pumpkin spice lattes, or even a cold glass of milk. If you’re serving it at a Halloween party, set it next to a bowl of caramel apples or pumpkin-shaped cookies for a full spread. It’s also great for movie nights—just put it in individual bags for a grab-and-go treat.
Nutritional Information & Benefits
Let’s be real—this is a treat, not a health food. But that doesn’t mean it can’t have some redeeming qualities. Popcorn is a whole grain, which means it provides fiber and complex carbohydrates. When you air-pop it without butter or oil, it’s actually a pretty healthy base. The candy coating and decorations add sugar and fat, but in moderation, this is a fun indulgence that won’t derail your healthy eating habits.
Here’s an approximate nutritional breakdown per serving (about 1 cup):
- Calories: 180-200
- Total Fat: 8-10g
- Carbohydrates: 25-28g
- Fiber: 1-2g
- Sugar: 18-20g
- Protein: 2-3g
If you’re looking to lighten it up, you can use less candy coating or skip the sprinkles. You can also use dark chocolate melts instead of white, which adds antioxidants. But honestly, this is one of those recipes where you should just enjoy it for what it is—a fun, festive treat that brings a smile to everyone’s face. Life is too short to count calories on Halloween.
For those with dietary restrictions, this recipe can be made dairy-free, gluten-free, and nut-free with simple substitutions. Always check ingredient labels to ensure they meet your dietary needs, especially with specialty items like candy eyeballs and sprinkles.
Conclusion
This Easy Candy Eyeball Popcorn Halloween Snack Mix is the kind of recipe that makes you feel like a kitchen hero with almost zero effort. It’s quick, it’s fun, and it’s absolutely delicious. Whether you’re making it for a Halloween party, a classroom celebration, or just because you want to add a little spooky fun to your Tuesday night, this snack delivers every single time.
I love this recipe because it reminds me that cooking doesn’t have to be complicated to be special. Sometimes the best things come from late-night pantry experiments and a willingness to try something silly. Those candy eyeballs staring up at me from the mixing bowl still make me laugh, and that’s exactly the kind of energy I want in my kitchen.
Now I want to hear from you! Have you tried this recipe? Did you add your own twist? Drop a comment below and let me know how it turned out. And if you’re looking for more Halloween treats, be sure to check out our spooky Halloween cupcakes and easy pumpkin dip for even more festive fun. Happy snacking, and may your Halloween be full of crunchy, eyeball-filled goodness!
Frequently Asked Questions
Can I use microwave popcorn for this recipe?
Absolutely! Just make sure you use plain or lightly salted microwave popcorn, not the butter-flavored kind. The butter can interfere with the candy coating and make it greasy. If all you have is buttered popcorn, you can still use it—just know that the coating might not stick as well.
How long does this popcorn stay fresh?
Stored in an airtight container at room temperature, this popcorn will stay fresh and crunchy for up to a week. I don’t recommend refrigerating it, as the moisture can make it soggy. If you’re making it for a party, I suggest making it no more than two days in advance for the best texture.
Can I freeze this popcorn?
I don’t recommend freezing it. The popcorn can become stale and the candy coating can develop a weird texture after thawing. This recipe is best enjoyed fresh or within a few days of making it. If you need to make it ahead, stick to the two-day rule.
Where can I buy candy eyeballs?
You can find candy eyeballs in the baking aisle of most grocery stores, especially around Halloween. They’re also widely available online—Amazon and Wilton both carry them year-round. If you can’t find them, you can make your own by piping small dots of black icing onto white chocolate chips, but honestly, the pre-made ones are easier and look better.
Can I use dark chocolate instead of white?
Yes! Dark chocolate melts work beautifully in this recipe. The flavor is richer and less sweet, which some people prefer. Just keep in mind that the dark color makes the candy eyeballs less visible, so the “spooky” effect isn’t as strong. If you go this route, consider adding extra sprinkles for color contrast.
Pin This Recipe!
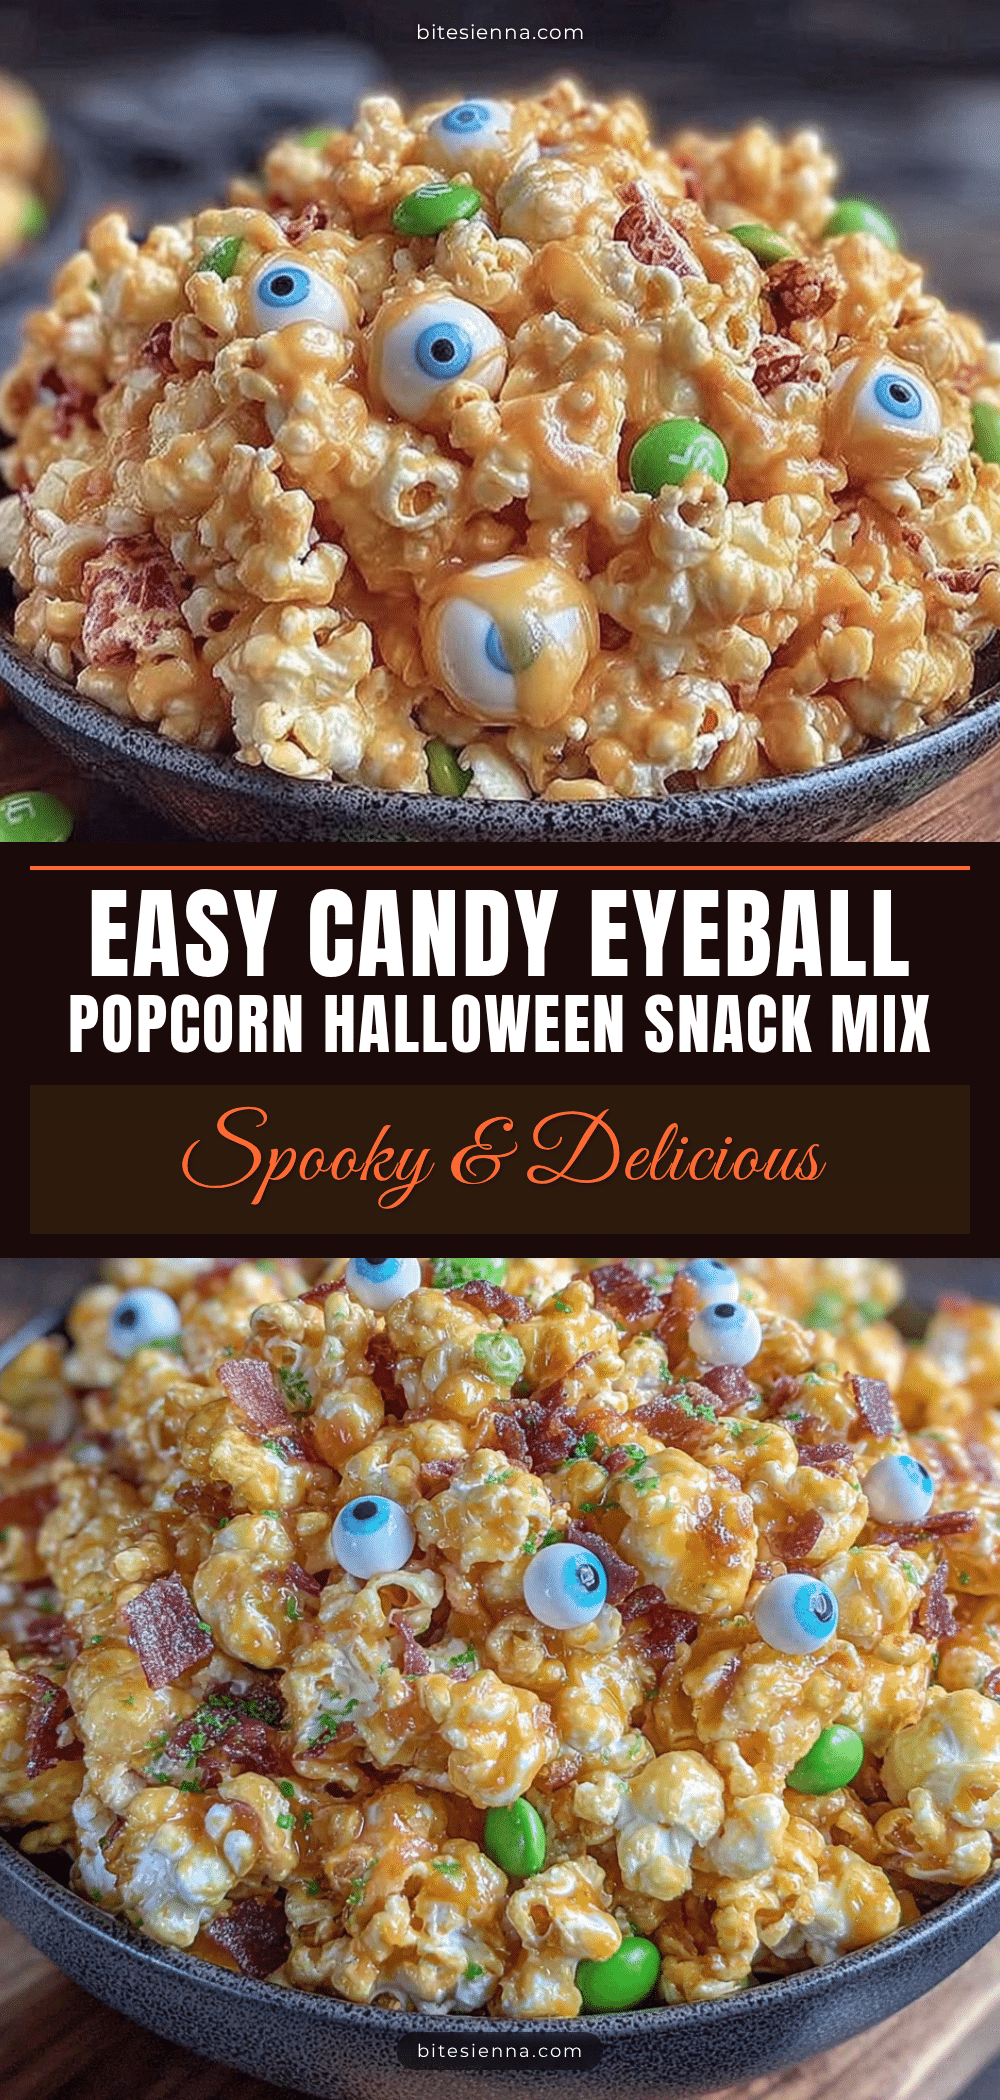
Easy Candy Eyeball Popcorn: Best Halloween Snack Mix
This Easy Candy Eyeball Popcorn Halloween Snack Mix is a quick, no-bake treat that combines crunchy popcorn with a sweet white candy coating and fun candy eyeballs. Perfect for parties, movie nights, or a spooky snack, it comes together in under 20 minutes and is guaranteed to be a crowd-pleaser.
- Prep Time: 10 minutes
- Cook Time: 5 minutes
- Total Time: 20 minutes
- Yield: 12 servings 1x
- Category: Snack
- Cuisine: American
Ingredients
- 12 cups popped popcorn (about 1/2 cup unpopped kernels or one large bag of plain microwave popcorn)
- 1/4 teaspoon salt (optional, but recommended)
- 12 ounces white candy melts or white chocolate chips (Wilton candy melts or Ghirardelli white chocolate chips recommended)
- 1 tablespoon coconut oil or vegetable shortening (only if using white chocolate chips)
- 1/2 cup candy eyeballs (edible kind)
- 1/4 cup orange and black sprinkles (optional)
- 1/4 cup mini candy corn (optional)
Instructions
- Pop the popcorn: If using kernels, pop using your preferred method (air popper, stovetop, or microwave) to get about 12 cups. Spread on a baking sheet, remove any unpopped kernels, and let cool for 2-3 minutes.
- Melt the candy coating: Place white candy melts in a microwave-safe bowl. Microwave in 30-second intervals, stirring well after each, until completely smooth (about 1.5 to 2 minutes total). If using white chocolate chips, add coconut oil before melting.
- Combine popcorn and coating: Pour melted candy coating over popcorn in a large mixing bowl. Gently fold and toss with a spatula until every piece is evenly coated. Work quickly as the coating sets fast.
- Add decorations: While coating is still wet, sprinkle in candy eyeballs, sprinkles, and candy corn (if using). Toss gently to distribute evenly.
- Spread and set: Turn coated popcorn onto a parchment-lined baking sheet. Spread into an even layer without packing down. Let sit at room temperature for 15-20 minutes until coating is hard, or refrigerate for 10 minutes if in a hurry.
- Break it up: Once set, break popcorn into clusters with your hands. Some sticking together is fine—those are the best parts.
Notes
Use room temperature popcorn for best coating consistency. Don’t skip the salt—it balances the sweetness. Work in batches if doubling the recipe. Store in an airtight container at room temperature for up to a week; do not refrigerate. If candy coating thickens while working, microwave for 10 seconds to loosen.
Nutrition
- Serving Size: 1 cup
- Calories: 190
- Sugar: 19
- Sodium: 85
- Fat: 9
- Saturated Fat: 5
- Carbohydrates: 26
- Fiber: 1
- Protein: 2
Keywords: Halloween popcorn, candy eyeball popcorn, easy Halloween snack, popcorn snack mix, spooky popcorn, white chocolate popcorn, no-bake Halloween treat


