A few Octobers ago, my nephew asked why I couldn’t just use olives for the spider bodies instead of fussing with some fancy piped filling. I started to explain that the whole point was the creamy yolk mixture—then stopped. He was eight, holding a can of black olives with the confidence of a kid who’d just solved world hunger. I let him try it. And honestly? He was completely right.
That afternoon, with Halloween music playing and flour dusted across the counter, we made the most delightfully creepy batch of deviled eggs I’d ever seen. The black olives made perfect little spider bodies—shiny, plump, and just the right size. My nephew arranged them himself, carefully placing the olive halves on top of the creamy filling. I had to admit, they looked way more like actual spiders than my original plan. Sometimes the student really does teach the teacher.
These Spooky Halloween Deviled Egg Spiders have become our annual tradition. Every October, he asks if we’re making “the spider eggs” again, and honestly, I look forward to it just as much as he does. There’s something about seeing a classic appetizer transformed into something playful that makes the whole holiday feel special. Maybe you’ve been there—trying to come up with a Halloween dish that’s actually tasty, not just cute. These deliver on both fronts.
Why You’ll Love This Recipe
Let me tell you why these little creepy-crawlies have earned a permanent spot in my Halloween rotation. After testing this recipe with multiple batches of eggs (and yes, a few olive casualties), I can confidently say this is the version that works every single time.
- Quick & Easy: Comes together in under 30 minutes, perfect for last-minute Halloween party prep or classroom treats.
- Simple Ingredients: No fancy grocery trips needed—eggs, mayonnaise, mustard, and a can of black olives are all you need.
- Perfect for Halloween: Great for spooky parties, potlucks, trick-or-treat gatherings, or just a fun family snack before heading out.
- Crowd-Pleaser: Always gets rave reviews from kids and adults alike—even people who claim they don’t like deviled eggs end up grabbing two.
- Unbelievably Delicious: The creamy, tangy filling paired with the briny olive “bodies” is a flavor combo that works surprisingly well.
What makes this recipe different from the rest? It’s not just about making deviled eggs look like spiders. It’s about the perfect ratio of filling to olive, the right consistency so the eggs hold their shape, and a few tricks I’ve learned along the way to keep the yolks from getting that weird gray ring around them. This isn’t just another Halloween appetizer—it’s the one people will ask you to bring year after year.
I mean, honestly, how often does a recipe manage to be both genuinely delicious and genuinely spooky? These eggs have that perfect balance. They’re comfort food with a creepy twist, easy enough for kids to help assemble, but impressive enough to steal the show at any Halloween gathering.
What Ingredients You Will Need
This recipe uses simple, everyday ingredients to create something that looks way more complicated than it actually is. Most of these are probably already sitting in your fridge and pantry right now.
- 12 large eggs, hard-boiled and peeled (look for eggs that are at least a week old—they peel much easier than super fresh ones)
- 1/3 cup mayonnaise (I prefer Hellmann’s or Duke’s for that perfect tangy creaminess)
- 1 tablespoon yellow mustard (or Dijon if you want a sharper flavor)
- 1 teaspoon white vinegar (adds brightness and helps balance the richness)
- 1/4 teaspoon salt (adjust to taste)
- 1/8 teaspoon black pepper
- 1 can (6 ounces) large black olives, drained (look for the biggest olives you can find—the jumbo ones work best for spider bodies)
- Paprika, for garnish (optional, but adds a nice color contrast)
A few ingredient notes from my kitchen: For the best texture, use full-fat mayonnaise—the low-fat versions tend to make the filling watery. If you’re not a fan of mustard, you can reduce it to 2 teaspoons, but don’t skip it entirely; it adds necessary acidity. The white vinegar is optional but highly recommended—it gives that classic deviled egg tang that makes them so addictive.
Substitution guidance: Need a dairy-free option? Use vegan mayonnaise and skip the paprika. For a spicier version, add a dash of hot sauce or a pinch of cayenne pepper to the yolk mixture. You can also swap the yellow mustard for whole grain mustard if you want little bursts of flavor in every bite.
For the olives, I’ve tried both canned and jarred varieties. Canned works perfectly fine, but if you can find the big Greek or California olives in a jar, they tend to be firmer and hold their shape better when you cut them. Just make sure they’re pitted—nobody wants to bite into a pit mid-spider!
Equipment Needed
You don’t need anything fancy for these spooky spiders. Here’s what you’ll need:
- Large pot for boiling eggs (one with a lid works best)
- Mixing bowl for the yolk mixture
- Fork or potato masher for mashing the yolks
- Small spoon or piping bag for filling the egg whites (a zip-top bag with the corner snipped off works great in a pinch)
- Cutting board and sharp knife for slicing olives
- Serving platter (a dark-colored one makes the spiders pop!)
If you don’t have a piping bag, don’t stress. I’ve used a small spoon for years and the filling looks just as good. A piping bag just gives you that slightly fancier, more uniform look. Honestly, the rustic spoon method has its own charm—especially for a Halloween party where things are supposed to look a little messy anyway.
Budget-friendly tip: Skip the fancy egg slicer and olive pitter. A sharp knife and steady hand work perfectly. I’ve been using the same paring knife for years and it’s never let me down.
Preparation Method
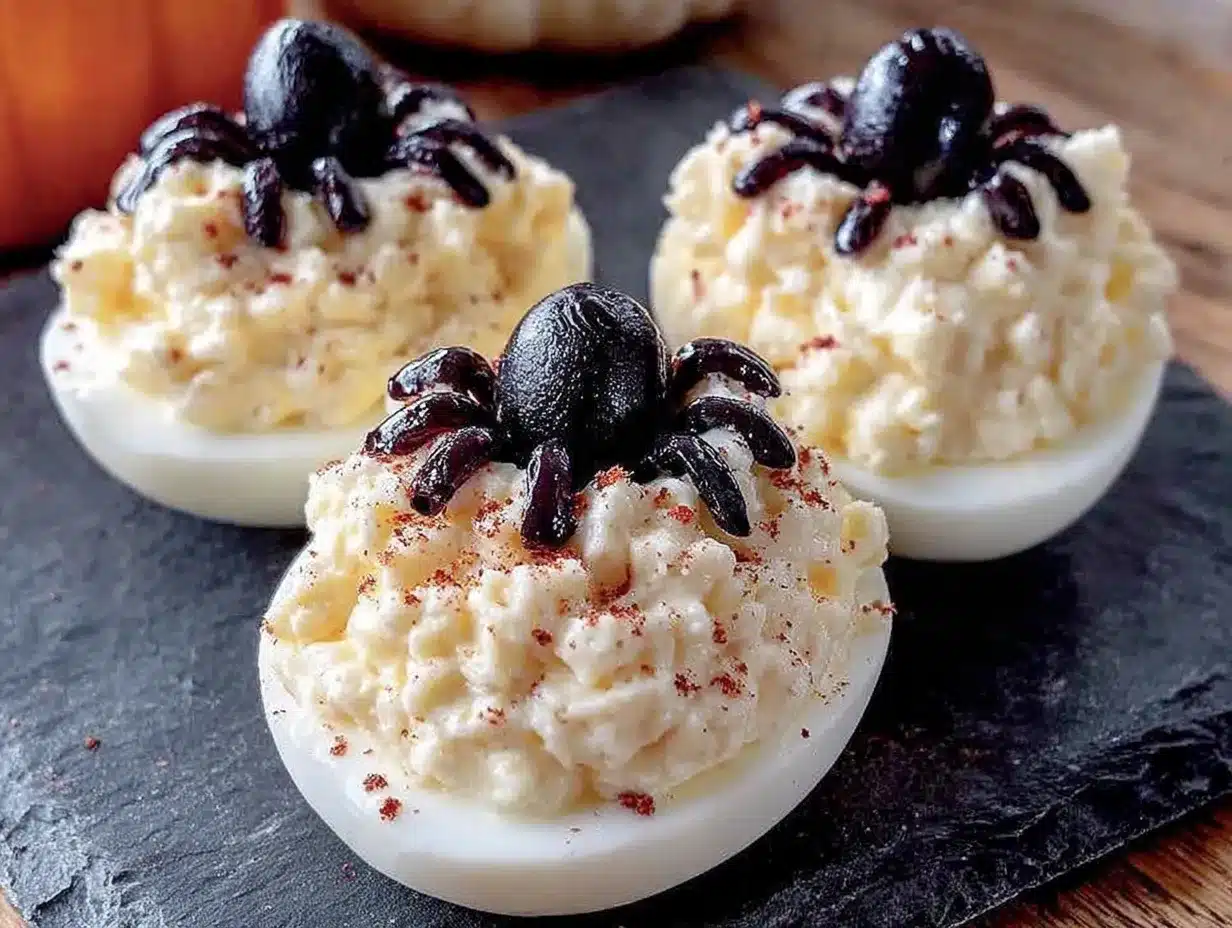
Let’s get cooking! Here’s exactly how to make these creepy deviled egg spiders.
Step 1: Hard-Boil the Eggs
Place your 12 eggs in a single layer in a large pot. Cover them with cold water by about an inch. Bring the water to a rolling boil over high heat, then immediately remove the pot from the heat, cover it, and let it sit for exactly 12 minutes. This method gives you perfectly cooked yolks without that unappealing greenish-gray ring.
While the eggs are sitting, prepare an ice bath—a large bowl filled with cold water and plenty of ice cubes. After 12 minutes, transfer the eggs to the ice bath using a slotted spoon. Let them chill for at least 10 minutes. This stops the cooking process and makes peeling way easier.
Step 2: Peel the Eggs
Gently tap each egg on the counter to crack the shell, then roll it between your palms to loosen the shell. Start peeling from the wider end—there’s usually an air pocket there that makes it easier to get under the shell. Rinse the peeled eggs under cool water to remove any tiny shell fragments.
If you’re struggling with peeling, try peeling the eggs under running water. The water helps separate the shell from the egg white. And remember, older eggs peel much easier than fresh ones, so plan ahead if you can.
Step 3: Prepare the Egg Whites
Using a sharp knife, slice each peeled egg in half lengthwise. Gently pop out the yolks into a medium mixing bowl. Arrange the egg white halves on your serving platter, cut side up. You should have 24 white halves ready for filling.
Pat the egg whites dry with a paper towel if they seem wet—this helps the filling stick better and prevents the platter from getting watery.
Step 4: Make the Filling
Add the mayonnaise, mustard, vinegar, salt, and pepper to the bowl with the egg yolks. Mash everything together with a fork until the mixture is smooth and creamy. Taste it and adjust the seasoning—maybe a pinch more salt, an extra dash of mustard. This is your moment to make it perfect.
For an ultra-smooth filling, you can press the mixture through a fine-mesh sieve, but honestly, I never bother. A few tiny lumps just make it feel more homemade.
Step 5: Fill the Egg Whites
Spoon the yolk mixture into a piping bag fitted with a star tip, or simply use a small spoon. Pipe or spoon the filling into each egg white half, mounding it slightly in the center. You want enough filling to create a nice base for your olive spiders.
If using a piping bag, twist the top to push the filling down toward the tip. Start from the center of each egg white and work outward in a circular motion. Don’t overfill—you want room for the olive on top.
Step 6: Create the Spiders
Now for the fun part! Drain the black olives and pat them dry with a paper towel. For each spider, you’ll need one whole olive for the body and another olive sliced lengthwise into thin strips for the legs.
To make the legs, slice 6 to 8 olives into thin strips lengthwise—each strip should be about 1/4 inch wide. You’ll need 8 legs per spider, so plan accordingly. Gently press 4 leg strips into the filling on each side of the egg white, arranging them to look like spider legs.
Place one whole olive in the center of the filling on top of where the legs meet. That’s your spider body! Repeat with the remaining eggs and olives.
Step 7: Garnish and Serve
Lightly sprinkle paprika over the spiders for a touch of color—it makes them look even more dramatic against the black olives. Serve immediately or refrigerate until ready to serve. These are best enjoyed within a few hours of assembly.
Cooking Tips & Techniques
After making these spiders for three Halloweens straight, I’ve picked up a few tricks that make the process smoother and the results better.
The perfect hard-boiled egg: The 12-minute resting method I mentioned is foolproof. I learned this after years of either undercooking or overcooking eggs. The key is starting with cold water and letting the residual heat do the work. Don’t skip the ice bath—it’s not just for cooling; it actually helps the egg whites contract slightly, making peeling easier.
Peeling without the frustration: Here’s something I wish I’d known sooner—add a teaspoon of baking soda to the boiling water. It raises the pH level of the water, which makes the egg whites separate more easily from the shell. Game changer, honestly. Also, crack the eggs gently all over before peeling, then start from the wider end where the air pocket is.
Keeping the filling stable: If your filling seems too soft, add a little more mayonnaise or mustard to thicken it up. The filling should be creamy but firm enough to hold its shape when piped. If it’s too runny, refrigerate it for 10 minutes before piping.
Olive prep: Pat the olives dry before slicing them. Wet olives make the legs slide around on the filling. And slice the legs as uniformly as possible—it makes the spiders look more intentional and less like a pile of olive scraps.
Timing strategy: You can hard-boil the eggs and make the filling up to two days ahead. Just store the peeled egg whites and filling separately in the refrigerator. Assemble the spiders on the day you plan to serve them—they look best fresh.
Variations & Adaptations
One of the best things about this recipe is how easy it is to customize. Here are some variations I’ve tried and loved:
Spicy Spider Eggs
Add 1/2 teaspoon of cayenne pepper or a few dashes of your favorite hot sauce to the yolk mixture. The heat contrasts beautifully with the cool, creamy filling and briny olives. I made these for a Halloween party last year and they disappeared faster than the regular ones.
Avocado Deviled Spider Eggs
Replace half the mayonnaise with mashed ripe avocado. This gives the filling a gorgeous green color and a creamy, slightly different flavor. Just be aware that the filling will brown faster, so assemble these closer to serving time. A squeeze of lime juice in the filling helps slow down the browning.
Bacon Spider Eggs
Because everything’s better with bacon, right? Crumble 3-4 slices of crispy bacon and mix half into the filling. Sprinkle the remaining bacon bits over the finished spiders before serving. The smoky, salty crunch takes these to another level.
Gluten-Free and Keto-Friendly
This recipe is naturally gluten-free and low-carb, making it perfect for guests with dietary restrictions. The eggs provide protein and healthy fats, while the olives add more good fats. Just double-check your mayonnaise label if you’re strictly gluten-free—most brands are, but it’s worth confirming.
Serving & Storage Suggestions
These Spooky Halloween Deviled Egg Spiders are best served chilled or at room temperature. Arrange them on a dark-colored platter or a black serving board to make the spiders really pop against the background. You can also place them on a bed of fresh lettuce or kale for a creepy, forest-floor vibe.
For parties: I like to arrange them in a circular pattern on a large platter, with the spiders facing outward. It makes the platter look like a spider colony, which is exactly the right amount of creepy for Halloween. Add a few plastic spider rings around the platter for extra effect.
Storage: If you have leftovers (which rarely happens in my house), store them in an airtight container in the refrigerator for up to two days. The olives might soften slightly over time, but they’ll still taste great. Don’t freeze deviled eggs—the texture gets weird and watery when thawed.
Reheating: These are meant to be served cold, so no reheating needed. If you’ve refrigerated them, just let them sit at room temperature for 10-15 minutes before serving so the filling softens slightly.
Flavor development: The filling actually gets better after a few hours in the fridge—the flavors meld together and mellow out. That said, the olive legs can start to slide around after a day, so for the best presentation, assemble them within a few hours of serving.
Nutritional Information & Benefits
Here’s the approximate nutritional breakdown for one deviled egg spider (one filled egg white with olive body and legs):
- Calories: 85
- Protein: 6g
- Fat: 6g
- Carbohydrates: 1g
- Fiber: 0g
- Sugar: 0g
These little spiders are surprisingly nutritious for a party appetizer. Eggs are packed with high-quality protein, vitamin D, and choline—which is great for brain health. Black olives provide healthy monounsaturated fats and antioxidants like vitamin E. The mayonnaise adds a bit of fat to help keep you full, but you can use a lighter version if you prefer.
Dietary considerations: This recipe is naturally gluten-free, low-carb, and keto-friendly. It contains eggs and mayonnaise (which typically contains eggs), so it’s not suitable for those with egg allergies. For a vegan version, you could try using tofu or chickpea flour to create a similar filling, though I haven’t tested that myself.
From a wellness perspective, I love that these are a healthier option for Halloween parties. They’re filling enough to keep kids (and adults) from loading up on candy, but fun enough that nobody feels deprived. It’s a win-win in my book.
Conclusion
These Spooky Halloween Deviled Egg Spiders are honestly one of my favorite recipes to make all year. They’re fun, they’re delicious, and they bring a smile to everyone’s face—including my nephew’s, who still takes credit for the olive idea every single time we make them.
What I love most is how they transform a simple, classic appetizer into something that feels special and seasonal. You don’t need fancy ingredients or complicated techniques. Just a dozen eggs, a can of olives, and a little creativity. The result is a dish that looks like you spent hours on it, when really it comes together in minutes.
I hope you give these a try for your next Halloween gathering. And don’t be afraid to let the kids help—they might just have a better idea than you do. If you make them, I’d love to hear how they turned out. Drop a comment below and let me know your favorite Halloween party trick, or tag me in your photos if you share them online. Happy Halloween, and happy cooking!
Frequently Asked Questions
Can I make these deviled egg spiders ahead of time?
Yes! You can hard-boil the eggs and prepare the filling up to two days in advance. Store the peeled egg whites and filling separately in the refrigerator. Assemble the spiders on the day you plan to serve them for the best presentation. The olive legs can slide around if stored too long after assembly.
How do I keep the olive legs from falling off?
Make sure your filling is thick enough to hold the legs in place. If the filling seems too soft, refrigerate it for 10 minutes before piping. Gently press the olive strips into the filling so they’re anchored, and avoid overloading the eggs with too many legs. Eight thin legs per spider is plenty.
Can I use different types of olives?
Absolutely! While large black olives are traditional for the spider look, you can use green olives or even stuffed olives for a different flavor. Just keep in mind that smaller olives will make smaller spiders. Kalamata olives work but have a stronger, saltier flavor that might overpower the deviled egg filling.
How do I get perfectly peeled hard-boiled eggs every time?
Use older eggs (at least a week old), add a teaspoon of baking soda to the boiling water, and don’t skip the ice bath. Starting from the wider end of the egg where the air pocket is makes peeling easier. If you’re still struggling, try peeling under running water—it helps separate the shell from the egg white.
Can I make these spiders dairy-free or vegan?
For a dairy-free version, use vegan mayonnaise. This recipe is naturally dairy-free otherwise. For a fully vegan version, you’d need to replace the eggs entirely—try using halved hard-boiled potatoes or tofu as the base, with a vegan filling made from mashed chickpeas, vegan mayo, and mustard. The texture won’t be exactly the same, but the spider concept still works!
Pin This Recipe!
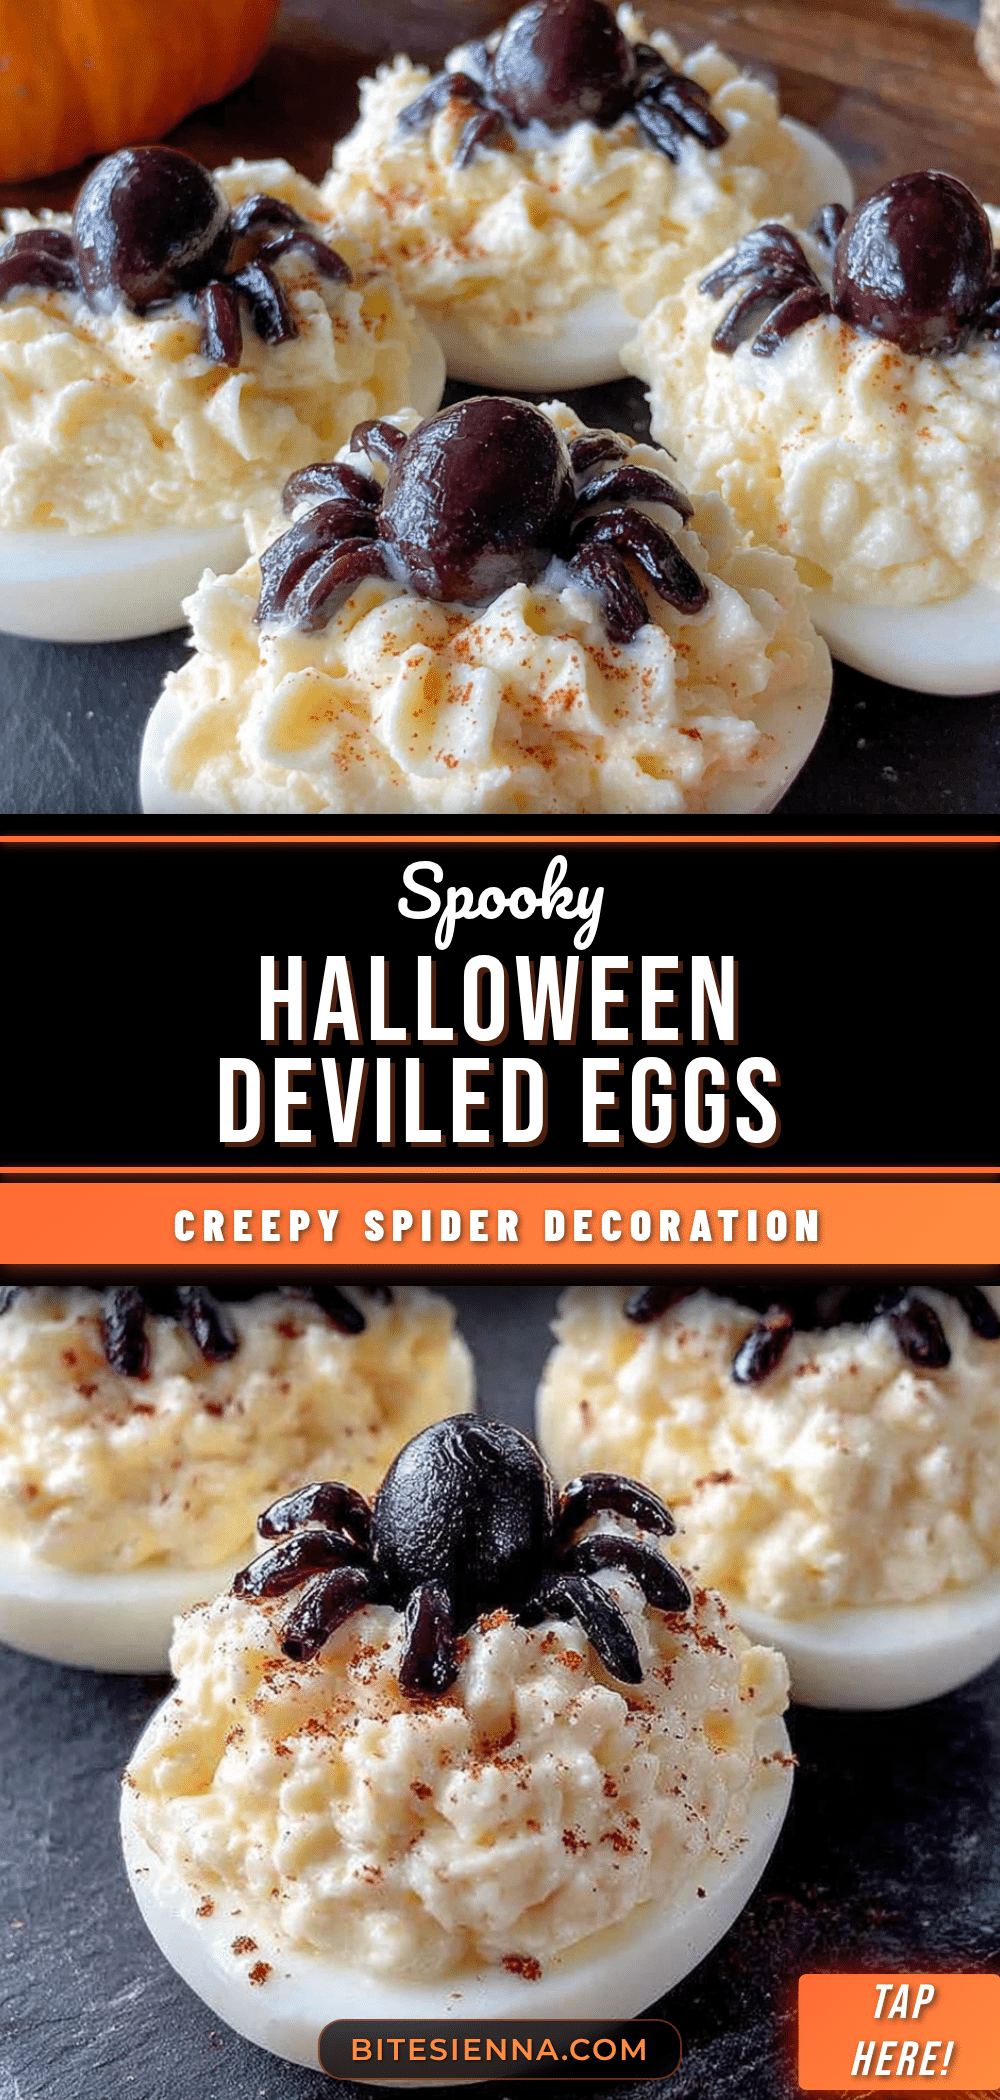
Spooky Halloween Deviled Egg Spiders: Easy Best Horror Appetizer
These Spooky Halloween Deviled Egg Spiders are a fun and delicious appetizer that transforms classic deviled eggs into creepy-crawly treats. With a creamy yolk filling and black olive spider bodies, they’re perfect for Halloween parties and guaranteed to be a crowd-pleaser.
- Prep Time: 15 minutes
- Cook Time: 12 minutes
- Total Time: 27 minutes
- Yield: 24 servings 1x
- Category: Appetizer
- Cuisine: American
Ingredients
- 12 large eggs, hard-boiled and peeled
- 1/3 cup mayonnaise
- 1 tablespoon yellow mustard
- 1 teaspoon white vinegar
- 1/4 teaspoon salt
- 1/8 teaspoon black pepper
- 1 can (6 ounces) large black olives, drained
- Paprika, for garnish (optional)
Instructions
- Place eggs in a single layer in a large pot. Cover with cold water by about an inch. Bring to a rolling boil over high heat, then remove from heat, cover, and let sit for exactly 12 minutes.
- Prepare an ice bath. Transfer eggs to the ice bath using a slotted spoon and let chill for at least 10 minutes.
- Peel the eggs: gently tap each egg on the counter to crack the shell, roll between palms, and peel starting from the wider end. Rinse under cool water.
- Slice each peeled egg in half lengthwise. Pop out yolks into a medium mixing bowl. Arrange egg white halves on a serving platter, cut side up. Pat dry if needed.
- Add mayonnaise, mustard, vinegar, salt, and pepper to the bowl with yolks. Mash together with a fork until smooth and creamy. Adjust seasoning to taste.
- Spoon the yolk mixture into a piping bag fitted with a star tip or use a small spoon. Pipe or spoon filling into each egg white half, mounding slightly in the center.
- Drain black olives and pat dry. For each spider, use one whole olive for the body and slice another olive lengthwise into thin strips (about 1/4 inch wide) for legs. You need 8 legs per spider.
- Gently press 4 leg strips into the filling on each side of the egg white. Place one whole olive in the center of the filling on top of where the legs meet.
- Lightly sprinkle paprika over the spiders for color. Serve immediately or refrigerate until ready to serve.
Notes
For best results, use eggs that are at least a week old for easier peeling. Add a teaspoon of baking soda to the boiling water to help with peeling. The filling can be made up to two days ahead; store peeled egg whites and filling separately in the refrigerator. Assemble spiders on the day of serving for best presentation. Pat olives dry before slicing to prevent legs from sliding.
Nutrition
- Serving Size: 1 deviled egg spider
- Calories: 85
- Sodium: 180
- Fat: 6
- Saturated Fat: 1.5
- Carbohydrates: 1
- Protein: 6
Keywords: Halloween deviled eggs, spider deviled eggs, spooky appetizer, Halloween party food, deviled egg spiders


