I was standing in the middle of the snack aisle at my local grocery store last Tuesday when it hit me. Not the smell of something baking, but the sound. That unmistakable crinkle of a bag being opened, coming from a kid sitting in a cart a few feet away. And just like that, I was ten years old again, sitting cross-legged on my Aunt Jo’s linoleum floor, a giant plastic bowl of her famous party mix between my knees. She’d always let me pick out the pretzels first, claiming she “didn’t really like them anyway.”
Aunt Jo passed about five years ago, and honestly, I haven’t had her Chex Mix since. But that sound in the grocery store—it was like a key turning in a lock I didn’t even know was there. I grabbed a box of cereal and a bag of pretzels without thinking, my brain already racing ahead. I wanted that salty, spicy, slightly sweet crunch so bad I could almost taste it.
But here’s the thing—I don’t eat like I did when I was ten. My body doesn’t love all that butter and processed stuff the way it used to. So I spent the next two days in my kitchen, trying to figure out how to get that same addictive crunch without the heavy feeling afterward. This Lighter Sweet & Spicy Buffalo Ranch Chex Mix is what came out of that experiment. It’s not Aunt Jo’s recipe—it’s mine. And maybe you’ve been there too, trying to recreate a memory while making it work for who you are now.
Why You’ll Love This Recipe
Let me tell you why this particular batch of Chex Mix is different from every other recipe floating around the internet. I tested this thing six times before I got it right. Six times. My neighbors started knocking on my door asking if everything was okay, and my recycling bin was basically a graveyard of butter wrappers and hot sauce bottles.
- Seriously Lighter, Not Just Pretending: Most “lightened up” snack recipes taste like punishment. Not this one. I swapped out half the butter for egg whites and used a fraction of the oil, and you know what? It’s crunchier, not less crunchy. Go figure.
- That Buffalo Ranch Combo: The sweet and spicy thing is real here—the brown sugar balances the hot sauce in a way that doesn’t make you reach for a glass of milk after every handful. And the ranch seasoning? It ties everything together like the friend who introduces two people at a party and they end up getting married.
- Simple Pantry Ingredients: You probably have most of this stuff already. I mean, I had to buy the hot sauce because I’m a wimp who doesn’t keep it around, but the rest was just sitting in my cabinets waiting for its moment.
- Perfect for Game Day or Snack Attack: This is the kind of recipe that works for a Super Bowl party or a Tuesday night when you just want something to crunch on while you watch TV. No judgment here.
- Crowd-Pleaser Status: I brought a batch to my book club and three people asked for the recipe before we even discussed the first chapter. That’s the kind of power we’re talking about.
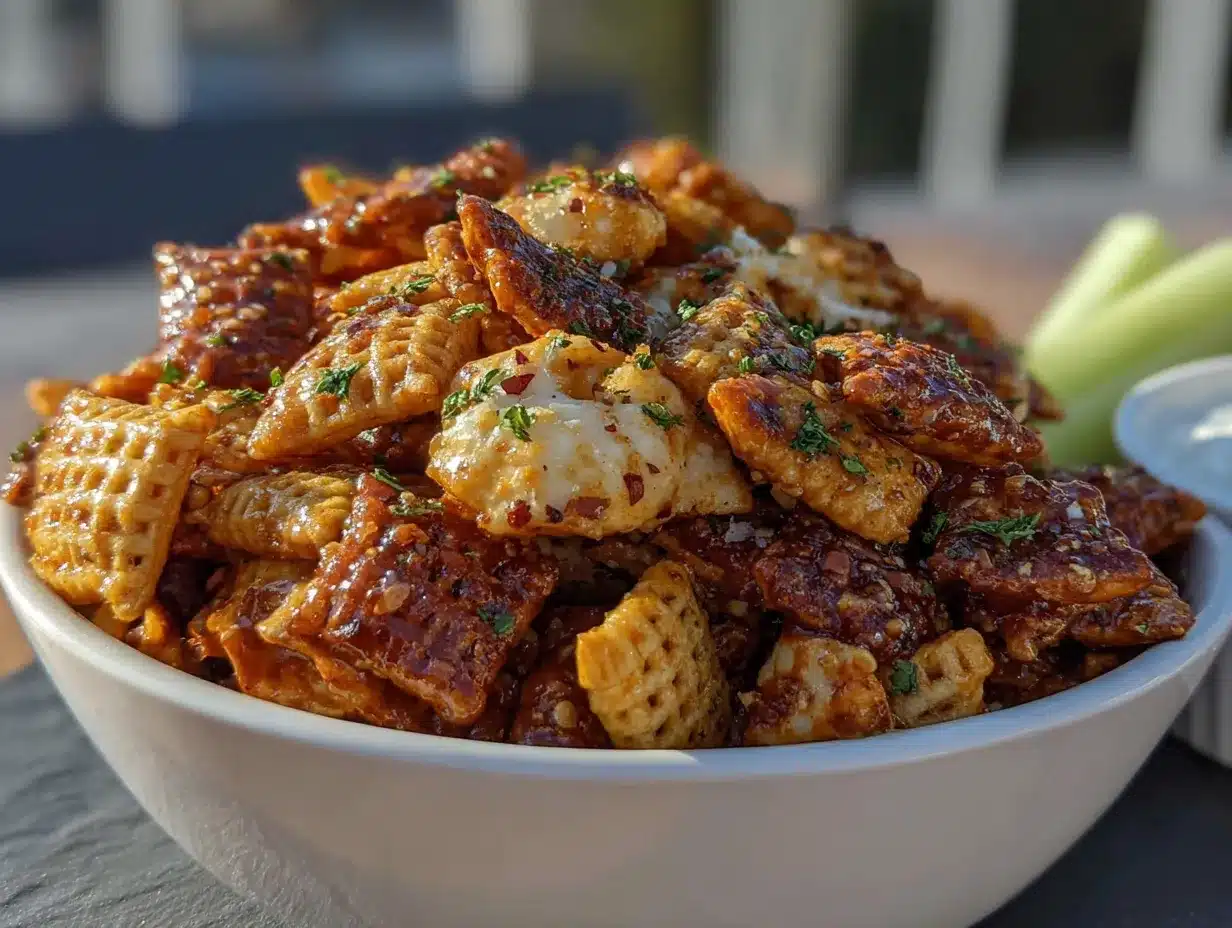
What makes this different from the bagged stuff at the store? It’s fresher, you control exactly what goes in it, and honestly, it tastes like someone actually cared when they made it. That first bite—the one where the sweet and the heat hit you at the same time, followed by that cool ranch finish—it’s the kind of thing that makes you close your eyes for a second. Comfort food reimagined, healthier, faster, but with the same soul-soothing satisfaction.
What Ingredients You Will Need
This recipe uses simple, wholesome ingredients to deliver that bold buffalo ranch flavor without the heavy greasy feeling. Most of these are pantry staples, which makes this perfect for those “I need a snack right now” moments.
For the Mix Base
- 4 cups Rice Chex cereal (the gluten-free option if that’s your thing)
- 4 cups Corn Chex cereal (gives that nice corn flavor)
- 2 cups mini pretzels (the twisty kind or the little squares—both work great)
- 1 cup mixed nuts (I use a mix of almonds and cashews, but peanuts work too)
- 1 cup cheese crackers (like Goldfish or the store brand—adds that cheesy pop)
For the Lighter Coating
- 3 tablespoons unsalted butter, melted (I use salted in a pinch and just skip the added salt)
- 2 large egg whites (this is the secret to the crunch without all the fat)
- 2 tablespoons hot sauce (Frank’s RedHot is my go-to, use your favorite)
- 2 tablespoons brown sugar, packed (light or dark—dark gives more molasses flavor)
- 1 packet ranch seasoning mix (about 1 ounce, or 2 tablespoons homemade)
- 1/2 teaspoon garlic powder (not garlic salt—we’re controlling the salt separately)
- 1/2 teaspoon onion powder (adds that savory depth)
- 1/4 teaspoon cayenne pepper (optional, but recommended if you like heat)
Ingredient Tips I Learned the Hard Way
Don’t skip the egg whites. I tried making this with just butter and oil the first time, and it came out soggy. The egg whites create this light, crispy coating that actually gets crunchier as it cools. Trust me on this one.
For the hot sauce, I recommend Frank’s RedHot because it has that vinegary kick that cuts through the sweetness. But if you only have Sriracha or Tabasco, go for it—just know the flavor profile will shift a little. The ranch seasoning packet is non-negotiable unless you’re making your own blend. Hidden Valley is the classic, but the store brand works just fine.
And here’s something I figured out after batch number three: use the pretzel twists, not the sticks. The sticks break apart too easily when you’re stirring everything together, and you end up with pretzel dust at the bottom of the bowl. Not the worst problem to have, but still.
Equipment Needed
You don’t need a fancy kitchen for this. Here’s what you’ll need:
- Large mixing bowl (big enough to toss everything without spilling—I use my biggest metal bowl)
- Two rimmed baking sheets (half-sheet pans work perfectly, you need two so everything fits in a single layer)
- Parchment paper or silicone baking mats (parchment is cheaper and works just as well)
- Whisk (for mixing the coating ingredients together)
- Rubber spatula (for scraping every last bit of that buffalo ranch goodness)
- Measuring cups and spoons (the usual suspects)
- Small bowl (for whisking the egg whites and butter mixture)
- Cooling rack (optional but helpful—lets the mix cool faster and stay crunchy)
If you don’t have two baking sheets, you can bake in batches. Just let the first batch cool completely before storing it while the second batch bakes. I’ve done it that way when my second sheet pan was covered in burnt cheese from last week’s nachos. No judgment.
One tip: line those pans with parchment paper. Not just for easy cleanup, but because the coating can stick to bare metal and make a mess. I learned this the messy way, scrubbing a pan for twenty minutes while questioning my life choices.
Preparation Method
- Preheat your oven to 250°F (120°C). I know, this seems low, but trust me. Low and slow is the secret to crunchy Chex Mix that doesn’t burn. Line two rimmed baking sheets with parchment paper.
- In your giant mixing bowl, combine the dry base ingredients. Add the Rice Chex, Corn Chex, mini pretzels, mixed nuts, and cheese crackers. Give them a gentle toss with your hands to distribute everything evenly. Don’t be too rough—the cereal can break, and nobody wants a bowl of crumbs.
- In a small bowl, whisk together the wet coating ingredients. Start with the melted butter and egg whites. Whisk them together until they’re well combined—it might look a little weird at first, but keep going. Add the hot sauce, brown sugar, ranch seasoning mix, garlic powder, onion powder, and cayenne if you’re using it. Whisk until the brown sugar is mostly dissolved and everything looks smooth. Taste it if you’re brave—it’s pretty intense on its own, but that’s the point.
- Pour the coating over the dry mix. This is where you need to work fast. Pour about half the coating over the cereal mixture, then use a rubber spatula to gently fold everything together. Add the remaining coating and keep folding until every piece looks lightly coated. Don’t rush this step—I promise it’s worth taking an extra minute to make sure the pretzels on the bottom get some love too.
- Spread the mixture onto the prepared baking sheets. Divide it evenly between the two pans, spreading it out in a single layer. You want the pieces to have some breathing room—if they’re piled on top of each other, they’ll steam instead of getting crispy. Leave a little space around the edges.
- Bake for 45 minutes, stirring every 15 minutes. Set a timer for 15 minutes, pull the pans out, and give everything a good stir with a spatula. Rotate the pans between racks if you’re using both oven shelves. This stirring is crucial—it ensures even coating and prevents the edges from burning while the middle stays soft. I forgot to stir once and ended up with a pan of half-burnt, half-soggy Chex Mix. Not my finest moment.
- Let it cool completely on the baking sheets. This is the hardest part, honestly. The mix will continue to crisp up as it cools, so don’t rush it. Leave it on the pans for at least 30 minutes. If you’re impatient like me, you can transfer it to a cooling rack after 20 minutes to speed things up. Just don’t put it in the fridge—that adds moisture and ruins the crunch.
- Break up any large clumps. Once it’s completely cool, gently break apart any pieces that stuck together. You should have a beautiful, crunchy, perfectly coated Chex Mix that smells like heaven.
Cooking Tips & Techniques
Here’s the stuff I wish someone had told me before I started this journey. First off, don’t overmix the coating with the cereal. I know it’s tempting to keep stirring until everything looks perfectly uniform, but you’ll end up crushing the cereal pieces. Gentle folds are your friend here.
The egg whites are the real MVP of this recipe. They create this thin, crispy shell around each piece that locks in the flavor without adding heaviness. But here’s the thing—if your egg whites aren’t fully whisked into the butter mixture, you’ll get weird little white spots on your finished mix. Not a huge deal flavor-wise, but visually, it looks a little off. Whisk until it’s fully combined, even if it takes an extra thirty seconds.
Temperature control matters more than you’d think. I tried baking this at 300°F once because I was in a hurry, and the brown sugar burned before the mix had a chance to dry out. Burnt sugar plus hot sauce equals a weird bitter-spicy combo that I don’t recommend. Stick with 250°F and give it the full time.
Another mistake I made? Not stirring enough. The pieces on the edges of the pan cook faster than the ones in the middle, so if you skip a stir, you’ll end up with uneven results. Set those timers. Your future self will thank you.
And here’s a pro tip: if you want extra crunch, let the mix sit out uncovered overnight after it’s cooled. The air circulation dries it out even more, making it dangerously crunchy. Just cover it loosely with a paper towel to keep dust off.
Variations & Adaptations
One of the best things about this recipe is how flexible it is. Here are some ways I’ve adapted it depending on what I have on hand or who I’m serving.
Make It Gluten-Free
This one’s easy—just use gluten-free pretzels and check that your cheese crackers are certified gluten-free. Rice Chex is already gluten-free, so you’re halfway there. I’ve made this for my friend Sarah who has celiac disease, and she couldn’t tell the difference.
Turn Up the Heat
If you’re a spice lover like my brother-in-law, double the hot sauce and add an extra 1/2 teaspoon of cayenne. You can also toss in some dried chili flakes before baking. Just be warned—this version is not for the faint of heart. I made it once and my husband couldn’t stop eating it even though his eyes were watering.
Sweet Version
Skip the hot sauce and cayenne, double the brown sugar, and add a teaspoon of cinnamon. You’ll end up with a sweet-and-salty snack that feels like dessert. I call this my “movie night mix” because it pairs perfectly with popcorn.
Dairy-Free Option
Use vegan butter or coconut oil instead of regular butter, and check that your ranch seasoning packet is dairy-free (some brands use buttermilk powder). The rest of the ingredients are naturally dairy-free, so you’re good to go.
Add Some Crunchy Extras
Feel free to throw in some sesame sticks, bagel chips, or even broken-up rice cakes for extra texture. I once added a handful of wasabi peas and it was weirdly amazing—the heat from the wasabi played nicely with the buffalo flavor.
Serving & Storage Suggestions
This Chex Mix is best served at room temperature, straight from the bowl. It’s perfect for snacking while you’re watching a movie, hosting a party, or just standing in front of the pantry at 10 PM wondering where your self-control went.
For parties, I like to serve it in a big wooden bowl or a ceramic dish with a little serving spoon. It’s also great in individual paper cones for a more casual vibe. Pair it with cold beer, sparkling water with lime, or a creamy dip like ranch dressing or blue cheese. The cool, creamy dip balances the heat beautifully.
Storage is pretty straightforward. Keep your Chex Mix in an airtight container at room temperature for up to two weeks. I use a large glass jar with a tight-fitting lid, but a zip-top bag works too—just squeeze out as much air as possible before sealing. Don’t store it in the fridge, because the moisture will make it soft.
If you want to keep it longer, you can freeze it for up to three months. Just put it in a freezer-safe bag or container, and let it come to room temperature before opening to prevent condensation. The texture stays surprisingly good after freezing—I’ve done it multiple times.
One thing I’ve noticed: the flavors actually get better after a day or two. The spices settle into the cereal pieces, and everything melds together. So if you can resist eating it all on day one, you’re in for a treat on day three. I say “if” because I’ve never managed it myself.
Nutritional Information & Benefits
Here’s the approximate nutritional breakdown for a 1-cup serving of this Lighter Sweet & Spicy Buffalo Ranch Chex Mix:
| Nutrient | Amount per Serving |
|---|---|
| Calories | 180 |
| Total Fat | 7g |
| Saturated Fat | 2.5g |
| Cholesterol | 10mg |
| Sodium | 380mg |
| Total Carbohydrates | 26g |
| Dietary Fiber | 2g |
| Sugars | 5g |
| Protein | 4g |
The egg whites in this recipe add protein without the saturated fat of extra butter, making this a smarter choice for snacking. The nuts provide healthy fats and a little fiber, while the whole-grain Chex cereal offers some B vitamins and iron. It’s not health food by any means, but it’s a lighter take on a classic indulgence that won’t leave you feeling weighed down.
If you’re watching your sodium, you can use low-sodium pretzels and unsalted nuts to bring the numbers down. And if you’re avoiding processed foods, making your own ranch seasoning from dried herbs is easy and lets you control the salt.
Conclusion
This Lighter Sweet & Spicy Buffalo Ranch Chex Mix is more than just a snack—it’s proof that you can have your comfort food and eat it too. It’s got that addictive crunch, that perfect balance of sweet and heat, and that creamy ranch finish that makes you reach for just one more handful. And the best part? It won’t leave you feeling like you need to run a marathon to burn it off.
I love this recipe because it’s mine. It’s not Aunt Jo’s, it’s not something I found on Pinterest—it’s the result of a lot of trial and error, a few burnt batches, and one very memorable grocery store moment. And now it’s yours too, to adapt and make your own. Add more heat, dial back the sugar, throw in whatever crackers you have in the pantry. That’s the beauty of a recipe like this—it’s a starting point, not a rulebook.
So go ahead, make a batch. Share it with your people. And if you come up with a variation that blows your mind, I want to hear about it. Drop a comment below or tag me in your photos. Let’s keep this snack party going.
Frequently Asked Questions
Can I use microwave instead of oven?
Technically yes, but I don’t recommend it. The microwave doesn’t dry out the mix the same way the oven does, so you’ll end up with a softer texture. If you’re in a real pinch, microwave on high for 2-minute intervals, stirring in between, until the coating is set. But honestly, the oven is worth the wait.
Why did my Chex Mix turn out soggy?
Two main reasons: either your oven temperature was too low, or you didn’t bake it long enough. Make sure your oven is actually at 250°F (use an oven thermometer if you have one), and don’t skip the last 15 minutes of baking. The mix should feel dry to the touch when it comes out of the oven—it will crisp up more as it cools.
Can I make this without egg whites?
You can, but it won’t be as light and crunchy. Substitute the egg whites with an additional 2 tablespoons of melted butter or oil. The texture will be a little heavier and greasier, but it will still taste good. Just know that the “lighter” part of the name won’t apply as much.
How long does this stay fresh?
Stored in an airtight container at room temperature, it stays fresh for up to two weeks. After that, the crunch starts to fade. If it gets a little soft, you can re-crisp it in a 250°F oven for 5-10 minutes. Just let it cool completely before storing again.
Can I double this recipe?
Absolutely. Just make sure you have enough baking sheets to spread everything in a single layer. You might need to bake in batches or use three pans. The baking time stays the same, but keep an eye on it—larger batches can sometimes take a few extra minutes to dry out evenly.
Pin This Recipe!

Lighter Sweet & Spicy Buffalo Ranch Chex Mix

A lighter, healthier twist on classic Chex Mix with a perfect balance of sweet, spicy, and ranch flavors. This addictive snack is crunchy, flavorful, and won’t leave you feeling weighed down.
- Prep Time: 15 minutes
- Cook Time: 45 minutes
- Total Time: 1 hour 30 minutes (including cooling)
- Yield: 12 servings 1x
- Category: Snack
- Cuisine: American
Ingredients
- 4 cups Rice Chex cereal
- 4 cups Corn Chex cereal
- 2 cups mini pretzels (twist or square)
- 1 cup mixed nuts (almonds and cashews, or peanuts)
- 1 cup cheese crackers (like Goldfish)
- 3 tablespoons unsalted butter, melted
- 2 large egg whites
- 2 tablespoons hot sauce (Frank’s RedHot recommended)
- 2 tablespoons brown sugar, packed
- 1 packet ranch seasoning mix (about 1 ounce or 2 tablespoons)
- 1/2 teaspoon garlic powder
- 1/2 teaspoon onion powder
- 1/4 teaspoon cayenne pepper (optional)
Instructions
- Preheat your oven to 250°F (120°C). Line two rimmed baking sheets with parchment paper.
- In a large mixing bowl, combine the Rice Chex, Corn Chex, mini pretzels, mixed nuts, and cheese crackers. Gently toss with your hands to distribute evenly.
- In a small bowl, whisk together the melted butter and egg whites until well combined. Add the hot sauce, brown sugar, ranch seasoning mix, garlic powder, onion powder, and cayenne (if using). Whisk until the brown sugar is mostly dissolved and the mixture is smooth.
- Pour half the coating over the dry mix and gently fold with a rubber spatula. Add the remaining coating and fold until every piece is lightly coated.
- Spread the mixture evenly onto the prepared baking sheets in a single layer, leaving space around the edges.
- Bake for 45 minutes, stirring every 15 minutes. Rotate the pans between racks if using both oven shelves.
- Let the mix cool completely on the baking sheets for at least 30 minutes. It will continue to crisp up as it cools.
- Once completely cool, gently break apart any large clumps.
Notes
Don’t skip the egg whites—they create a light, crispy coating. Use Frank’s RedHot for the best flavor. Stir every 15 minutes to ensure even baking. Let cool completely before storing to maintain crunch. Store in an airtight container at room temperature for up to two weeks. For extra crunch, let the mix sit out uncovered overnight after cooling.
Nutrition
- Serving Size: 1 cup
- Calories: 180
- Sugar: 5
- Sodium: 380
- Fat: 7
- Saturated Fat: 2.5
- Carbohydrates: 26
- Fiber: 2
- Protein: 4
Keywords: Chex Mix, buffalo ranch, sweet and spicy, lighter snack, game day snack, party mix, homemade snack