Scrambling through the kitchen with half a box of white cake mix open and the firework sounds faintly echoing outside, I realized I had forgotten the dessert—again. The usual last-minute panic was setting in, but then this idea hit me: a red white and blue layered jello poke cake. Honestly, it was born out of sheer necessity, with kids tugging at my sleeves and neighbors dropping by early for the 4th of July barbecue. The fridge was bare except for a few staples, some Jello packets, and a box of cake mix. I grabbed what I had and started poking holes in that cake, literally. The colors started seeping in, the layers came alive, and somehow this quick, colorful concoction turned into the star of the summer party.
This isn’t just any dessert slapped together last minute—it’s a festive, fun, and surprisingly easy treat that carries the spirit of the holiday in every bite. The way the red, white, and blue layers blend with the moist cake, topped with fluffy whipped cream, is something I swear makes folks pause their conversations mid-chew. And hey, it’s not just for the big day. This layered jello poke cake sticks in my recipe box because it’s simple, cheerful, and always brings a smile, even when the kitchen feels like chaos.
So if you’ve ever found yourself needing an easy, show-stopping dessert with a patriotic twist, this recipe might just become your go-to. It’s a sweet little reminder that sometimes, the best dishes come from those moments when you’re juggling too much but still want to make something special.
Why You’ll Love This Patriotic Perfect Red White and Blue Layered Jello Poke Cake Recipe
This red white and blue layered jello poke cake has been tested in my kitchen more times than I can count, especially on those busy holiday afternoons when simplicity is key but flavor can’t be sacrificed. Here’s why this recipe stands out:
- Quick & Easy: Ready in about an hour, including chilling time, it’s perfect for last-minute celebrations or unexpected guests.
- Simple Ingredients: Uses pantry staples like boxed cake mix and Jello packets—no complicated shopping runs needed.
- Perfect for 4th of July: Its vibrant red, white, and blue layers make it an instant hit for patriotic occasions or summer parties.
- Crowd-Pleaser: Kids love the fun colors, and adults appreciate the nostalgic, refreshing flavors.
- Unbelievably Delicious: The poke technique lets the jello soak into the cake, creating a moist, flavorful texture that’s anything but ordinary.
What really sets this cake apart is the layering method paired with the poke cake style. Instead of mixing colors or flavors, you get distinct, visually stunning layers that stay vibrant and fresh-looking. The white layer, made with cream cheese or whipped topping, balances the tangy red and blue jello flavors perfectly. It’s a dessert that not only tastes good but looks downright festive, making it ideal for impressing guests without stress.
Honestly, the first time I made it, I closed my eyes after the first bite—there’s something about that sweet, slightly tangy jello mixed into the soft cake that just feels like summer happiness on a plate. It’s a dish that brings people together, sparks smiles, and makes holiday memories a little sweeter.
What Ingredients You Will Need
This recipe uses simple, wholesome ingredients to deliver bold color and flavor without fuss. Most are pantry staples, and substitutions are easy if you have dietary preferences or ingredient swaps in mind.
- For the Cake:
- 1 box white cake mix (I prefer Betty Crocker for best texture)
- Ingredients called for on the cake mix box (usually eggs, oil, water)
- For the Jello Layers:
- 1 (3 oz) package red Jello (strawberry or cherry)
- 1 (3 oz) package blue Jello (blueberry or berry blue)
- 1 cup boiling water per Jello package
- 1 cup cold water per Jello package
- For the White Layer:
- 8 oz cream cheese, softened (adds richness and tang)
- 1 cup powdered sugar
- 1 tsp vanilla extract
- 1 cup heavy whipping cream, whipped to soft peaks
Ingredient Selection Tips: Look for smaller-curd cream cheese for a smoother white layer. If you want a dairy-free version, swap cream cheese with a vegan alternative and use coconut cream to whip.
Substitutions: Use almond flour-based cake mixes for gluten-free versions. Swap the heavy cream with coconut whipped topping if avoiding dairy. For a lighter white layer, Greek yogurt can be folded in place of cream cheese, though texture will be different.
Equipment Needed
- 9×13 inch baking pan (glass or metal works fine)
- Mixing bowls (large and medium sizes)
- Electric mixer or hand whisk (for whipping cream and mixing cream cheese layer)
- Measuring cups and spoons for accuracy
- Toothpick or skewer (for poking holes in the cake)
- Spatula for folding and spreading layers
If you don’t have an electric mixer, a vigorous hand whisk can do the trick but expect a bit more arm work. I’ve used both glass and metal pans, and glass tends to give a more even bake and easier cleanup. For budget-friendly options, any standard 9×13 pan will do just fine.
Preparation Method
- Preheat your oven to 350°F (175°C). Grease your 9×13 pan lightly or line it with parchment for easier removal.
- Prepare the cake batter. Follow the instructions on your white cake mix box exactly—typically mixing cake mix with eggs, oil, and water. Pour evenly into your prepared pan.
- Bake for 25-30 minutes. Insert a toothpick near the center; if it comes out clean, the cake is done. Let it cool completely (about 30-45 minutes). This step is crucial because warm cake will melt the jello and ruin the layers.
- Poke the cake. Using a toothpick or skewer, poke holes all over the cake about 1 inch apart. The holes should be deep but not going through the bottom.
- Prepare the jello layers. For each jello packet, dissolve the 3 oz package in 1 cup boiling water, stirring until fully dissolved. Add 1 cup cold water and mix. Let cool to room temperature but don’t let it set.
- Pour the red jello over one-third of the cake. Pour evenly over one side, letting it seep into the holes. Chill for 15 minutes in the fridge to let it start setting.
- Pour the blue jello over another third of the cake. Carefully pour on the opposite side, again letting it soak into the holes. Chill for another 15 minutes. Leave the middle section plain for the white layer.
- Make the white layer. Beat the softened cream cheese with powdered sugar and vanilla until smooth. Fold in whipped cream gently to keep it light and fluffy.
- Spread the white layer in the middle section of the cake. Use a spatula to smooth it over the un-jelled part of the cake, filling the poked holes but keeping the layers distinct.
- Chill the whole cake for at least 2 hours. This allows the jello to fully set and the flavors to meld.
- Serve chilled. Slice carefully to showcase the red, white, and blue layers. Top with extra whipped cream or fresh berries if desired.
Pro Tip: Make sure your jello isn’t too hot when pouring — room temperature is perfect. Too hot and it will melt the cake; too cold and it won’t seep properly. Also, chilling between each jello pour helps keep the layers from bleeding into each other. Trust me, I learned that the hard way!
Cooking Tips & Techniques
Getting this patriotic jello poke cake just right means paying attention to a few key details. First, the poke technique is what makes this dessert stand out. You want to create enough holes for the jello to seep in without breaking the cake apart—think neat, purposeful pokes, not random stabbing.
One mistake I often made was pouring all the jello at once, which leads to colors bleeding and a messy look. Pouring and chilling in stages helps keep the layers crisp and visually striking.
Whipping the cream just right is another game changer. Over-whipped cream turns grainy, while under-whipped cream won’t hold the white layer’s structure. Stop when you see soft peaks—that’s your sweet spot.
Timing is also important. The cake must be fully cooled before poking and pouring jello. Otherwise, the jello melts and ruins the texture. Patience here pays off.
If you have a busy kitchen like mine, multitasking by preparing the jello while the cake cools saves valuable minutes. Also, using a glass pan helps you see the jello layers as they set, which is a nifty visual guide.
Variations & Adaptations
This red white and blue layered jello poke cake is flexible, so feel free to tweak it based on your tastes or dietary needs.
- Dietary Variation: Swap the white cake mix for a gluten-free one and use dairy-free cream cheese and coconut cream to make it allergy-friendly.
- Flavor Twist: Use raspberry or watermelon jello for the red layer and blueberry-lemon for the blue for a fresh fruit flavor boost.
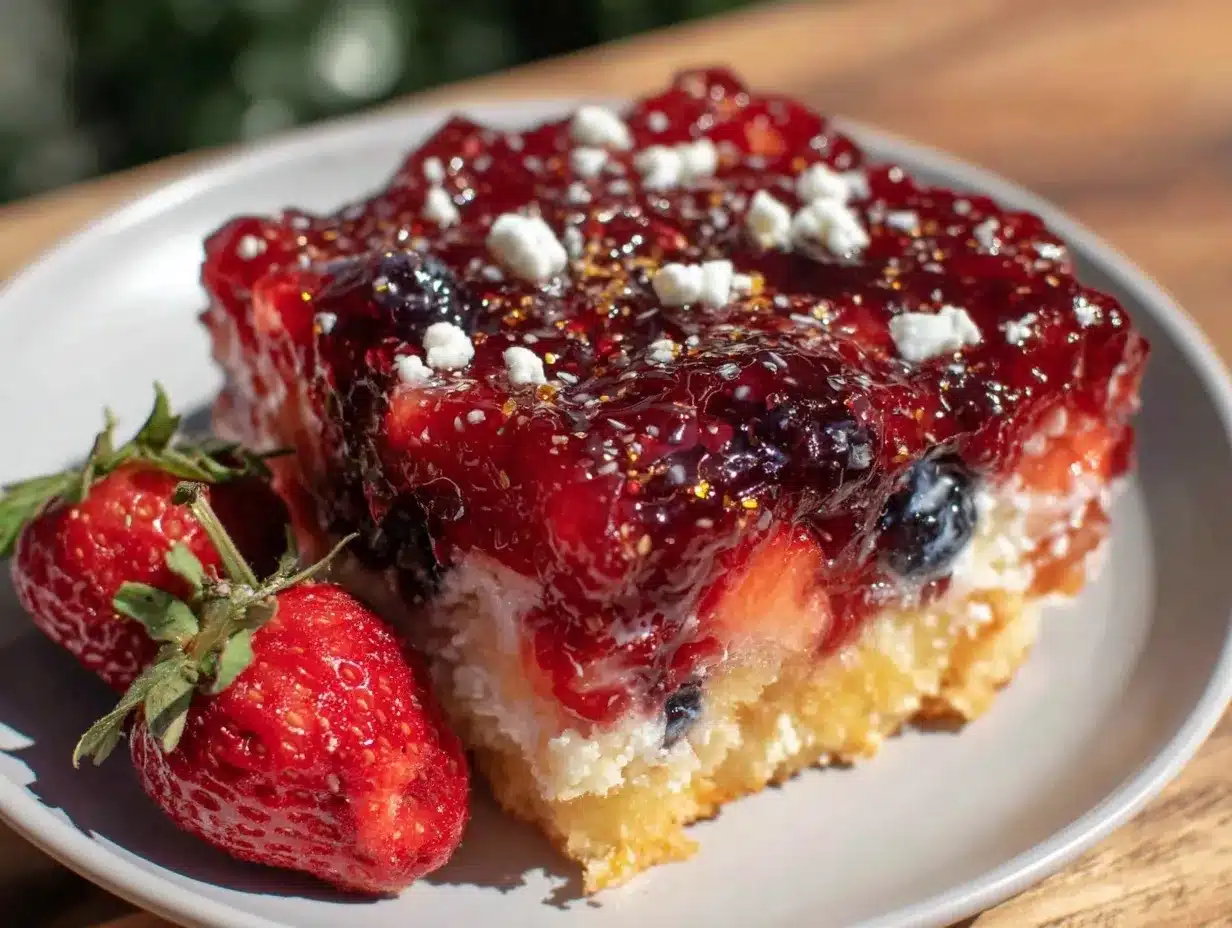
- Seasonal Adaptation: In summer, top the cake with fresh strawberries, blueberries, and dollops of whipped cream for extra texture and flavor.
- Cooking Method: If you want a no-bake option, try layering prepared angel food cake pieces with jello and white cream layers in a trifle dish.
- Personal Favorite: I once added a thin layer of crushed graham crackers between the blue jello and white cream layers for a subtle crunch that everyone loved.
Serving & Storage Suggestions
Serve this cake chilled, straight from the fridge, to best enjoy the refreshing jello flavors and creamy white layer. It pairs wonderfully with a cold glass of iced tea or a sparkling cucumber mint drink to keep things light and festive.
For gatherings, slice into neat squares to show off those patriotic layers. Adding a few fresh berries on top or a sprig of mint adds a nice touch without much effort.
Store leftovers covered in the refrigerator for up to 3 days. Jello can soften the cake over time, so it’s best enjoyed fresh but still delightful the next day. Avoid freezing, as jello’s texture changes when frozen.
Reheat? Nah, this one’s best cold, but if you want a twist, try serving with a dollop of vanilla ice cream or alongside a batch of garlic butter salmon for a full festive meal.
Nutritional Information & Benefits
Each serving of this jello poke cake has approximately 300-350 calories, depending on slice size. The use of white cake mix means moderate carbs, while the cream cheese and whipped cream add some fat and protein for balance.
The jello layers bring a nostalgic sweetness but are low in calories and fat, making it a lighter dessert option compared to heavy frostings. Using fresh berries on top adds antioxidants and vitamin C, enhancing the health factor.
If you’re watching gluten or dairy, easy substitutions keep this dessert accessible. It’s a fun way to enjoy a sweet treat without feeling weighed down, especially during summer celebrations where lightness feels best.
Conclusion
This Patriotic Perfect Red White and Blue Layered Jello Poke Cake isn’t just a dessert; it’s a little celebration on a plate that’s easy to throw together, even when the day’s been wild. Its colorful layers, refreshing flavors, and simple ingredients make it a standout at any summer gathering or 4th of July party.
What I love most about this cake is how it invites creativity—whether you’re swapping flavors, adding fresh fruit, or adjusting for dietary needs, it always turns out festive and delicious. So go ahead, make it your own and let those red, white, and blue layers bring a splash of joy to your table.
And hey, if you try this recipe or put your own spin on it, I’d love to hear about it in the comments. Sharing these little kitchen wins always makes the holiday sweeter!
Frequently Asked Questions
Can I make this cake ahead of time?
Yes! You can prepare it a day in advance and keep it refrigerated. Just cover tightly to prevent the cake from drying out.
What if I don’t have red or blue Jello?
Substitute with any flavored gelatin you like, or mix fruit-flavored gelatin to create your own color combo.
Can I use homemade cake instead of box mix?
Absolutely! A simple white or yellow cake recipe works well, just ensure it’s fully cooled before poking and adding jello.
How do I prevent the jello from bleeding into other layers?
Chill the cake between pouring each color layer so it sets slightly before adding the next. This helps keep the colors distinct.
Is there a dairy-free version of the white layer?
Yes, use dairy-free cream cheese alternatives and coconut cream whipped topping for a similar creamy effect.
Pin This Recipe!

Patriotic Perfect Red White and Blue Layered Jello Poke Cake
A festive, fun, and easy red, white, and blue layered jello poke cake perfect for 4th of July celebrations or any summer party. Moist cake layers infused with jello and topped with a creamy white layer create a colorful and delicious dessert.
- Prep Time: 15 minutes
- Cook Time: 30 minutes
- Total Time: 2 hours 45 minutes
- Yield: 12 servings 1x
- Category: Dessert
- Cuisine: American
Ingredients
- 1 box white cake mix (e.g., Betty Crocker)
- Ingredients called for on the cake mix box (usually eggs, oil, water)
- 1 (3 oz) package red Jello (strawberry or cherry)
- 1 (3 oz) package blue Jello (blueberry or berry blue)
- 1 cup boiling water per Jello package
- 1 cup cold water per Jello package
- 8 oz cream cheese, softened
- 1 cup powdered sugar
- 1 tsp vanilla extract
- 1 cup heavy whipping cream, whipped to soft peaks
Instructions
- Preheat your oven to 350°F (175°C). Grease a 9×13 inch baking pan lightly or line it with parchment paper.
- Prepare the cake batter according to the instructions on the white cake mix box, typically mixing cake mix with eggs, oil, and water. Pour evenly into the prepared pan.
- Bake for 25-30 minutes. Insert a toothpick near the center; if it comes out clean, the cake is done. Let the cake cool completely for about 30-45 minutes.
- Using a toothpick or skewer, poke holes all over the cake about 1 inch apart, making sure holes are deep but do not go through the bottom.
- For each Jello packet, dissolve the 3 oz package in 1 cup boiling water, stirring until fully dissolved. Add 1 cup cold water and mix. Let cool to room temperature but do not let it set.
- Pour the red Jello evenly over one-third of the cake, letting it seep into the holes. Chill in the fridge for 15 minutes to start setting.
- Pour the blue Jello evenly over another third of the cake on the opposite side, letting it soak into the holes. Chill for another 15 minutes. Leave the middle section plain for the white layer.
- Beat the softened cream cheese with powdered sugar and vanilla extract until smooth. Gently fold in the whipped cream to keep the mixture light and fluffy.
- Spread the white cream cheese layer over the middle section of the cake, filling the poked holes but keeping the layers distinct.
- Chill the entire cake for at least 2 hours to allow the Jello to fully set and flavors to meld.
- Serve chilled. Slice carefully to showcase the red, white, and blue layers. Optionally top with extra whipped cream or fresh berries.
Notes
Make sure the cake is completely cooled before poking holes and pouring jello to prevent melting. Pour jello at room temperature and chill between layers to avoid color bleeding. Whip cream to soft peaks for best texture. For dairy-free or gluten-free versions, substitute ingredients accordingly.
Nutrition
- Serving Size: 1 slice (1/12 of cak
- Calories: 325
- Sugar: 32
- Sodium: 280
- Fat: 14
- Saturated Fat: 8
- Carbohydrates: 45
- Fiber: 0.5
- Protein: 4
Keywords: 4th of July dessert, patriotic cake, jello poke cake, layered jello cake, easy summer dessert, red white and blue dessert