My neighbor, Sarah, wasn’t making a big deal of it. I’d stopped by to borrow a cup of sugar—a cliché, I know, but it was a Tuesday and I was halfway through a batch of cookies—and the smell of warm, buttery dough hit me before I even got to her kitchen door. She was standing at the counter, rolling out a sheet of puff pastry like it was nothing, layering it with thin slices of ham and a pile of shredded cheese. “Oh, just lunch stuff for the kids,” she said when I asked, barely looking up. But let me tell you, the way those little spirals came out of the oven—golden, puffed, with the cheese bubbling at the edges—made me forget all about my sugar shortage. I stood there, holding an empty measuring cup, watching her pack them into lunch boxes like they were the most ordinary thing in the world. Honestly, they looked anything but ordinary. They looked like the kind of thing you’d pay a fortune for at a fancy bakery, not something whipped up on a random Tuesday morning. Maybe you’ve been there, standing in someone else’s kitchen, realizing you’ve just stumbled onto a secret weapon. That day, I learned that the best recipes aren’t always the complicated ones. They’re the ones someone makes without even thinking, the ones that solve a real problem—like what to pack for lunch that won’t come back uneaten. I’ve been making these easy mini ham and cheese pinwheels ever since, and they’ve never let me down.
Why You’ll Love This Recipe
Let’s face it—packing lunch boxes can feel like a chore. You want something that’s quick, kid-approved, and actually gets eaten, not traded away. These easy mini ham and cheese pinwheels check all those boxes and then some. I’ve tested this recipe a dozen times, tweaking the cheese blend and the rolling technique until it was just right. The result? A lunch box hero that’s as practical as it is delicious.
- Quick & Easy: Comes together in under 30 minutes, from fridge to lunch box. Perfect for busy mornings or last-minute meal prep.
- Simple Ingredients: No fancy grocery trips needed. You likely already have puff pastry, ham, and cheese in your kitchen right now.
- Perfect for Lunch Boxes: Bite-sized, mess-free, and they taste great cold or at room temperature. No reheating required.
- Crowd-Pleaser: Always gets rave reviews from kids and adults alike. I’ve seen grown-ups sneak these from the lunch-packing station.
- Unbelievably Delicious: The flaky, buttery pastry wrapped around savory ham and melty cheese is next-level comfort food in a mini size.
What makes these pinwheels different from the rest is the technique. Instead of using a dry, store-bought dough, I recommend a high-quality all-butter puff pastry. It puffs up beautifully and gives you that bakery-style flakiness without any extra work. Plus, the way I layer the ham—slightly overlapping—ensures every bite has a perfect meat-to-cheese ratio. This isn’t just another version of ham and cheese rolls. It’s the version that makes you close your eyes after the first bite, the one that turns a simple lunch into something your kids will actually look forward to.
What Ingredients You Will Need
This recipe uses simple, wholesome ingredients to deliver bold flavor and satisfying texture without the fuss. Most of these are pantry staples, making these pinwheels a go-to for last-minute lunch prep.
- 1 sheet frozen puff pastry, thawed (I recommend Pepperidge Farm or Dufour for best flakiness)
- 6-8 slices deli ham, thinly sliced (honey ham or black forest ham work great)
- 1 cup shredded cheese (cheddar, mozzarella, or a mix—use a good melting cheese)
- 1 large egg, beaten (for the egg wash, gives that golden shine)
- 1 tablespoon Dijon mustard (optional, but adds a nice tangy kick)
- 1 teaspoon dried oregano or Italian seasoning (optional, for extra flavor)
- Flour, for dusting (prevents sticking when rolling)
For the ham, I prefer using thinly sliced deli ham because it rolls easily and doesn’t create bulky layers. If you’re using thicker slices, just pound them a bit flatter with a rolling pin. For the cheese, a blend of sharp cheddar and mozzarella gives you both flavor and that perfect stretchy melt. You can also use Swiss cheese for a more traditional ham and cheese combo. If you’re dairy-free, try a plant-based shredded cheese that melts well—I’ve had good luck with Daiya brand. And for a gluten-free option, use a gluten-free puff pastry (available at most health food stores) and ensure your ham is gluten-free as well.
Equipment Needed
You don’t need a fancy kitchen to make these pinwheels. Here’s what you’ll need:
- Baking sheet (a standard half-sheet pan works perfectly)
- Parchment paper (for easy cleanup and to prevent sticking)
- Rolling pin (to gently roll out the puff pastry if needed)
- Sharp knife or pizza cutter (for clean, even slices)
- Pastry brush (for the egg wash; a small silicone brush is my favorite)
- Cutting board (a flat surface for assembly)
- Ruler (optional, but helpful for cutting even pinwheels)
If you don’t have a pastry brush, you can use a paper towel dipped in egg wash. And if you’re using a pizza cutter, it makes slicing through the rolled pastry a breeze—no dragging or tearing. I’ve used a regular chef’s knife before, and it works fine, just make sure it’s sharp. Budget-friendly tip: you can find a good silicone pastry brush for under $5 at most grocery stores.
Preparation Method

Let’s get rolling! Here’s how to make these easy mini ham and cheese pinwheels step by step.
- Preheat your oven to 400°F (200°C). Line a baking sheet with parchment paper and set aside.
- Lightly flour your work surface. Unfold the thawed puff pastry sheet and gently roll it out to a 10×12-inch rectangle. Don’t overwork the dough—you just want to smooth out the creases.
- Spread the Dijon mustard (if using) in a thin, even layer over the pastry, leaving a 1-inch border at the top edge. This helps the roll seal later.
- Layer the ham slices evenly over the mustard, slightly overlapping them. You want full coverage but not so thick that it’s hard to roll.
- Sprinkle the shredded cheese evenly over the ham. Don’t go overboard—too much cheese will ooze out during baking. About 1 cup is perfect.
- Starting from the bottom edge, tightly roll the pastry into a log, using the border at the top to seal it. Pinch the seam gently to close.
- Wrap the log in plastic wrap and refrigerate for 15-20 minutes. This firms up the dough and makes slicing much easier. (I learned this the hard way after a few squished rolls!)
- Remove from the fridge and slice the log into 1/2-inch thick rounds. You should get about 12-14 pinwheels. Use a sharp knife and a gentle sawing motion to avoid flattening them.
- Place the pinwheels on the prepared baking sheet, spacing them about 1 inch apart. They’ll puff up a bit, so give them room.
- Brush each pinwheel with the beaten egg using your pastry brush. This gives them that beautiful golden color.
- Sprinkle with dried oregano or Italian seasoning if desired. A little flaky sea salt on top is also lovely.
- Bake for 15-18 minutes, or until the pinwheels are puffed and golden brown. The cheese should be bubbly and the pastry flaky.
- Let them cool on the baking sheet for 5 minutes, then transfer to a wire rack to cool completely before packing. This prevents sogginess.
A quick note: if you’re making these for lunch boxes, let them cool completely before storing. Warm pinwheels can create condensation and make the pastry soft. Patience pays off here!
Cooking Tips & Techniques
After making these pinwheels more times than I can count, I’ve picked up a few tricks that make a real difference. First, always chill the rolled log before slicing. I skipped this step once because I was in a hurry, and the pinwheels came out more like squished blobs than neat spirals. The chill time firms up the butter in the pastry, giving you clean, even cuts.
Another thing I’ve learned: don’t overfill. It’s tempting to pile on the ham and cheese, but too much filling makes the pinwheels bulge and unroll during baking. Stick to the amounts listed, and you’ll get perfect spirals every time. Also, if you’re using a very wet cheese (like fresh mozzarella), pat it dry with paper towels first to prevent a soggy bottom.
For consistent results, use a ruler to measure your slices. I know it sounds fussy, but even pinwheels bake more evenly and look prettier in the lunch box. And here’s a pro tip: if your puff pastry starts to get too soft while you’re working, pop it back in the fridge for 5 minutes. Cold pastry is your friend—it puffs up better in the oven.
One mistake I made early on was using a dull knife to slice the log. It squished the pastry and the layers stuck together. A sharp serrated knife or a pizza cutter works best. Use a gentle sawing motion, and don’t press down too hard.
Variations & Adaptations
These pinwheels are incredibly versatile. Here are some variations I’ve tried and loved:
- Turkey and Swiss: Swap the ham for thinly sliced turkey and use Swiss cheese. Add a smear of cranberry sauce for a holiday twist.
- Veggie Lover’s: Skip the ham and layer with sautéed spinach, roasted red peppers, and a sprinkle of feta cheese. Delicious and colorful.
- Spicy Chorizo: Use crumbled cooked chorizo instead of ham, and mix pepper jack cheese into the cheddar. The smoky heat is amazing.
- Breakfast Style: Replace ham with cooked breakfast sausage crumbles and use cheddar. Serve these for brunch or pack them for a savory morning snack.
- Gluten-Free: Use a gluten-free puff pastry and ensure all other ingredients are certified gluten-free. The texture will be slightly different, but still tasty.
For a dairy-free version, use a plant-based cheese that melts well and skip the egg wash (brush with a little plant-based milk instead). I’ve also made these with a thin layer of pesto instead of mustard—it adds a lovely herby flavor that pairs beautifully with the ham.
Serving & Storage Suggestions
These pinwheels are best served at room temperature, making them perfect for lunch boxes. They’re also delicious warm, straight from the oven, if you’re serving them as an appetizer or snack. For a fun presentation, arrange them on a platter with a small bowl of honey mustard or ranch dressing for dipping.
To store, place cooled pinwheels in an airtight container lined with paper towels. They’ll keep in the refrigerator for up to 4 days. The paper towels help absorb any excess moisture, keeping the pastry flaky. You can also freeze them for up to 2 months—just layer them between sheets of parchment paper in a freezer-safe container.
When reheating, pop them in a 350°F (175°C) oven for 5-7 minutes, or until warmed through. Avoid the microwave, as it will make the pastry soggy. If you’re packing them for lunch, just take them straight from the fridge—they taste great cold. The flavors actually meld together after a day or two, making them even more delicious.
I’ve noticed that these pinwheels develop a deeper, more savory flavor after sitting overnight. So don’t hesitate to make them a day ahead. Your future self (and your lunch box packer) will thank you.
Nutritional Information & Benefits
Here’s an approximate breakdown per pinwheel (based on 12 servings):
- Calories: 180
- Protein: 8g
- Fat: 11g
- Carbohydrates: 12g
- Fiber: 1g
- Sodium: 420mg
The ham provides a good source of protein, which helps keep kids (and adults) full and focused. The puff pastry, while indulgent, offers quick energy, and the cheese adds calcium for strong bones. If you’re watching sodium, opt for low-sodium ham and reduce the added salt. These pinwheels are not gluten-free by default, but with the substitutions mentioned, they can be adapted. They’re also nut-free and egg-free (if you skip the egg wash), making them a safe option for many school lunch policies. I love that I can pack these knowing they’re a balanced, satisfying meal that doesn’t rely on processed snacks.
Conclusion
These easy mini ham and cheese pinwheels have become a staple in my kitchen, and I bet they’ll become one in yours too. They’re quick, forgiving, and endlessly adaptable—everything a busy lunch packer needs. Whether you’re making them for school, work, or just a fun snack, they deliver that perfect combo of flaky pastry, savory ham, and melty cheese every single time. I love that I can whip up a batch on a Sunday afternoon and have lunch sorted for the week. It makes those hectic mornings feel a little less chaotic.
Go ahead and make these your own—swap in your favorite fillings, experiment with different cheeses, or double the batch for a party. I’d love to hear how they turn out! Drop a comment below and let me know your favorite variation, or share a photo of your pinwheels. And if you’re looking for more lunch box inspiration, check out my crispy garlic chicken for another crowd-pleasing option. Happy rolling!
Frequently Asked Questions
Can I use crescent roll dough instead of puff pastry?
Yes, you can! Crescent roll dough will give you a softer, more bread-like texture. Just roll it out, fill, and bake as directed. The bake time may be slightly shorter—check at 12 minutes.
How do I prevent the pinwheels from unrolling during baking?
Make sure you roll the pastry tightly and chill the log before slicing. The egg wash also helps seal the edge. If they still unroll, place the pinwheels seam-side down on the baking sheet.
Can I make these ahead of time for a party?
Absolutely! Assemble the pinwheels up to the slicing step, then freeze the uncooked slices on a baking sheet. Once frozen, transfer to a freezer bag. Bake directly from frozen, adding 3-5 minutes to the bake time.
What’s the best way to reheat leftover pinwheels?
The oven is your best bet. Reheat at 350°F (175°C) for 5-7 minutes. An air fryer also works well at 350°F for 3-4 minutes. Avoid the microwave to keep the pastry crispy.
Can I add vegetables to the filling?
Definitely! Sautéed mushrooms, bell peppers, or spinach work great. Just make sure to cook off any excess moisture before adding them, or the pastry may become soggy.
Pin This Recipe!
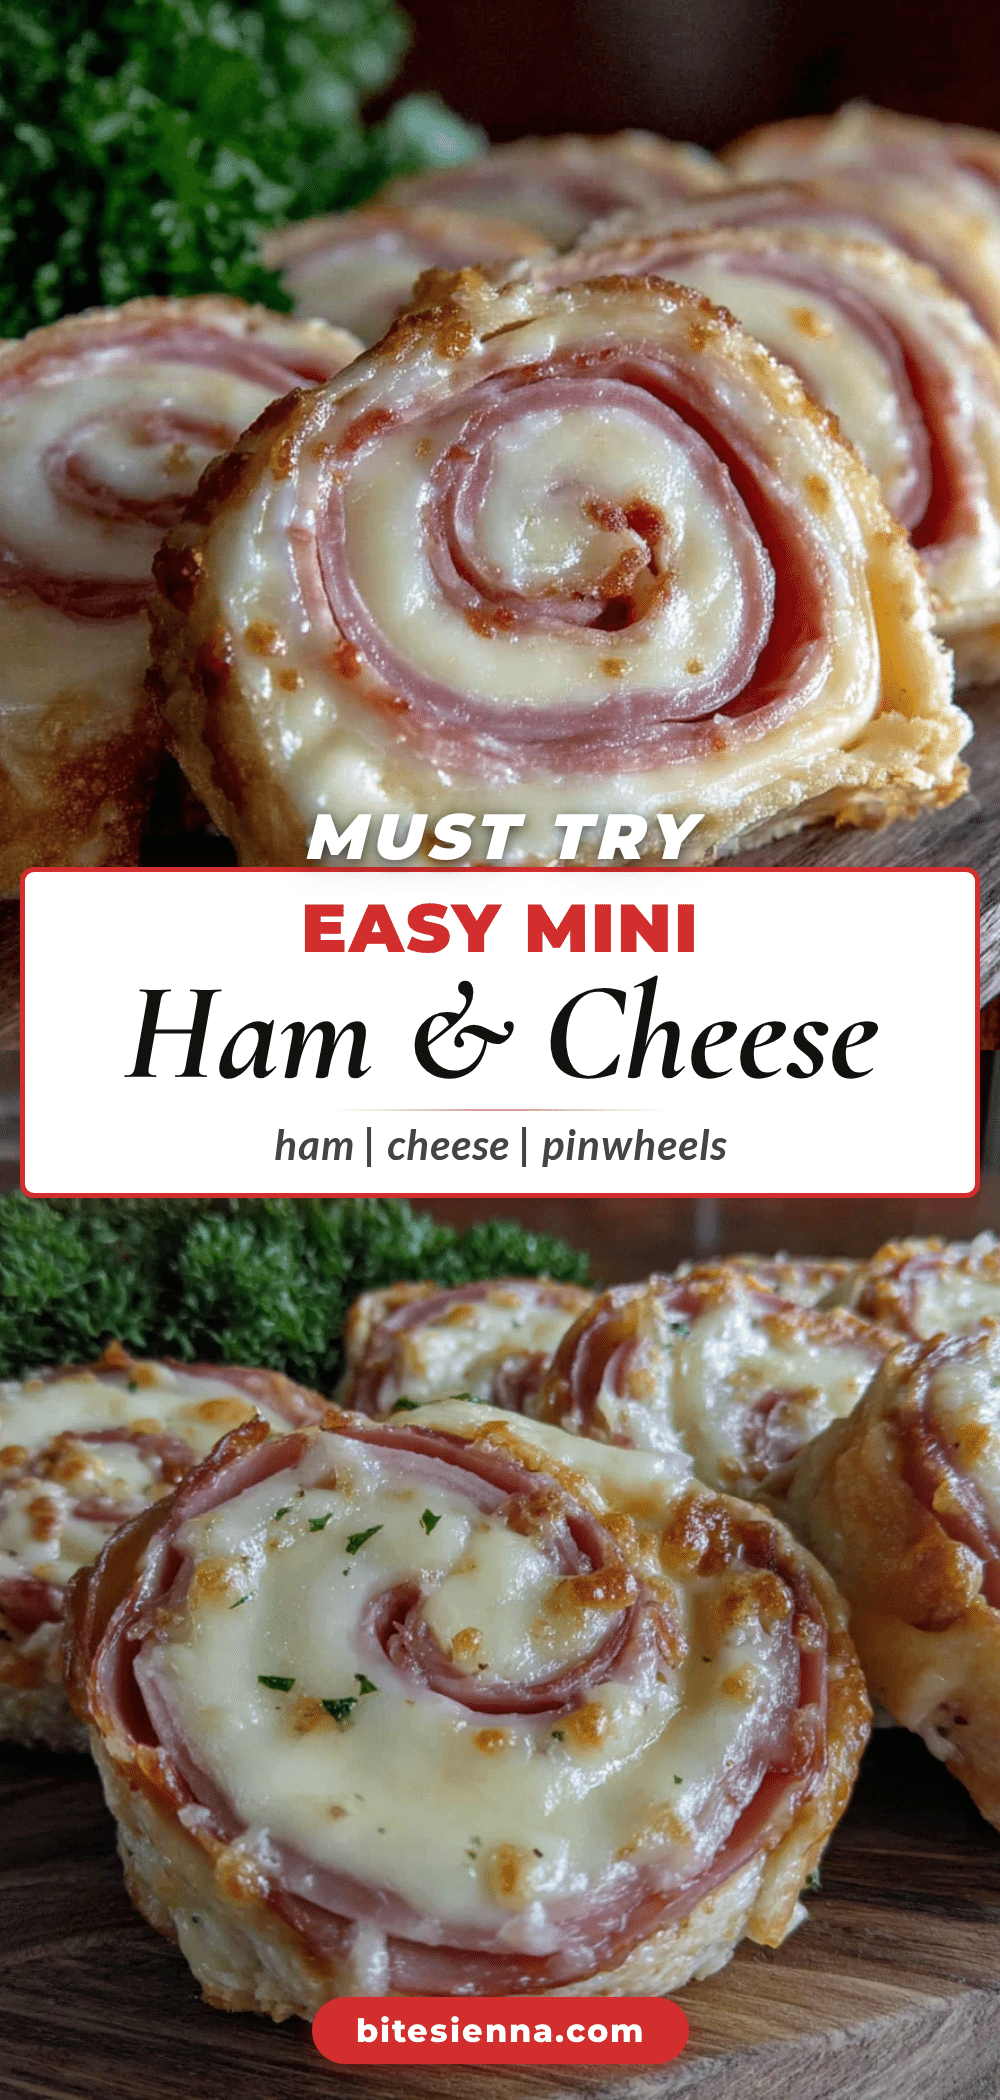
Easy Mini Ham and Cheese Pinwheels: Best Lunch Box Idea

These easy mini ham and cheese pinwheels are a lunch box hero—quick, kid-approved, and made with simple ingredients like puff pastry, ham, and cheese. Perfect for busy mornings or last-minute meal prep.
- Prep Time: 15 minutes
- Cook Time: 18 minutes
- Total Time: 33 minutes
- Yield: 12-14 pinwheels 1x
- Category: Appetizer
- Cuisine: American
Ingredients
- 1 sheet frozen puff pastry, thawed
- 6–8 slices deli ham, thinly sliced
- 1 cup shredded cheese (cheddar, mozzarella, or a mix)
- 1 large egg, beaten
- 1 tablespoon Dijon mustard (optional)
- 1 teaspoon dried oregano or Italian seasoning (optional)
- Flour, for dusting
Instructions
- Preheat your oven to 400°F (200°C). Line a baking sheet with parchment paper and set aside.
- Lightly flour your work surface. Unfold the thawed puff pastry sheet and gently roll it out to a 10×12-inch rectangle. Don’t overwork the dough—you just want to smooth out the creases.
- Spread the Dijon mustard (if using) in a thin, even layer over the pastry, leaving a 1-inch border at the top edge. This helps the roll seal later.
- Layer the ham slices evenly over the mustard, slightly overlapping them. You want full coverage but not so thick that it’s hard to roll.
- Sprinkle the shredded cheese evenly over the ham. Don’t go overboard—too much cheese will ooze out during baking. About 1 cup is perfect.
- Starting from the bottom edge, tightly roll the pastry into a log, using the border at the top to seal it. Pinch the seam gently to close.
- Wrap the log in plastic wrap and refrigerate for 15-20 minutes. This firms up the dough and makes slicing much easier.
- Remove from the fridge and slice the log into 1/2-inch thick rounds. You should get about 12-14 pinwheels. Use a sharp knife and a gentle sawing motion to avoid flattening them.
- Place the pinwheels on the prepared baking sheet, spacing them about 1 inch apart. They’ll puff up a bit, so give them room.
- Brush each pinwheel with the beaten egg using your pastry brush. This gives them that beautiful golden color.
- Sprinkle with dried oregano or Italian seasoning if desired. A little flaky sea salt on top is also lovely.
- Bake for 15-18 minutes, or until the pinwheels are puffed and golden brown. The cheese should be bubbly and the pastry flaky.
- Let them cool on the baking sheet for 5 minutes, then transfer to a wire rack to cool completely before packing. This prevents sogginess.
Notes
Chill the rolled log before slicing for clean cuts. Don’t overfill to prevent unrolling. For best results, use high-quality all-butter puff pastry. Let pinwheels cool completely before storing to avoid sogginess.
Nutrition
- Serving Size: 1 pinwheel
- Calories: 180
- Sugar: 1
- Sodium: 420
- Fat: 11
- Saturated Fat: 4
- Carbohydrates: 12
- Fiber: 1
- Protein: 8
Keywords: ham and cheese pinwheels, mini pinwheels, lunch box ideas, easy appetizer, puff pastry recipes, kid-friendly lunch


