I was standing in the baking aisle of our local grocery store last October, staring at a row of black food coloring bottles, when the smell hit me. It wasn’t cocoa powder or vanilla extract. It was the faint, waxy scent of a Halloween costume I’d worn when I was six—a black cat suit my mom had sewn, complete with a felt tail that kept falling off. And just like that, I was back in her tiny kitchen, watching her pull a tray of cupcakes from the oven. They weren’t just any cupcakes. They were black velvet—dark as midnight, topped with a swirl of cream cheese frosting that she’d pipe into a web pattern using nothing but a sandwich bag and a pair of scissors. She wasn’t a fancy baker. Honestly, she didn’t even own a piping bag. But every year for Halloween, she made these, and every year, I’d stand on a chair beside her, sneaking licks of the batter when she turned around. I haven’t had one of her cupcakes in over fifteen years. She passed when I was in college, and I guess I just never thought I could make them right. But that day in the grocery store, I grabbed the black coloring, some cocoa powder, and a block of cream cheese. I was determined to get it back—that feeling of biting into something that tasted like home and Halloween all at once. Maybe you’ve had a recipe like that. One you’re almost scared to try again because you’re worried it won’t taste the same. Let me tell you, these Perfect Black Velvet Cupcakes with Cream Cheese Spiderweb aren’t just a nostalgic trip. They’re better than I remembered. And now, I make them every single year.
Why You’ll Love This Recipe
These aren’t your average Halloween cupcakes. They’re moist, rich, and have that slight tang from buttermilk that makes red velvet so famous—except we’re going dark. I’ve tested this recipe six times over the past two years to get the crumb just right. Not too dense, not too fluffy. The kind of cupcake that holds up to a generous swirl of frosting without crumbling into a mess.
- Quick & Easy: From start to finish, you’re looking at about 45 minutes. The batter comes together in one bowl, no electric mixer required if you’ve got a strong arm.
- Simple Ingredients: No weird extracts or hard-to-find items. Cocoa powder, flour, sugar, buttermilk, and black gel food coloring. That’s it.
- Perfect for Halloween: Whether you’re hosting a party, sending treats to school, or just want something spooky for your family, these fit the bill.
- Crowd-Pleaser: Kids love the color. Adults love the flavor. I’ve yet to meet someone who didn’t reach for a second one.
- Unbelievably Delicious: The cream cheese frosting is tangy and smooth, and that spiderweb design looks way harder than it actually is. Trust me, if I can do it with a zip-top bag, you can too.
What makes this recipe different? It’s the balance. A lot of black velvet recipes taste artificial or dry out overnight. Mine uses a touch of vinegar and baking soda for lift, plus a secret splash of hot coffee that deepens the chocolate flavor without making it taste like coffee. It’s not just another Halloween cupcake. It’s the one you’ll bookmark and make year after year.
What Ingredients You Will Need
This recipe uses mostly pantry staples, so you probably already have most of these on hand. The star of the show is the black gel food coloring, which gives the cupcakes that dramatic, dark velvet look without turning the batter gray or muddy.
- All-purpose flour – 1 ½ cups (190g). The base of the cupcake. Spoon and level it into your measuring cup for best results.
- Granulated sugar – 1 cup (200g). Adds sweetness and helps keep the crumb tender.
- Unsweetened cocoa powder – ¼ cup (20g). I prefer a natural cocoa powder like Hershey’s for this, but Dutch-process works too.
- Baking soda – 1 teaspoon. Helps the cupcakes rise and gives them that soft texture.
- Salt – ½ teaspoon. Balances the sweetness.
- Vegetable oil – ½ cup (120ml). Keeps the cupcakes moist for days. I’ve used canola and melted coconut oil too—both work fine.
- Buttermilk – ¾ cup (180ml), room temperature. You can make your own by adding 1 tablespoon of lemon juice or vinegar to regular milk and letting it sit for 5 minutes.
- Large eggs – 2, room temperature. Let them sit out for 30 minutes before starting.
- Vanilla extract – 1 teaspoon. Pure vanilla tastes best, but imitation works in a pinch.
- White vinegar – 1 teaspoon. Reacts with the baking soda for extra lift.
- Hot coffee or hot water – ½ cup (120ml). Enhances the cocoa flavor. I use leftover morning coffee, but hot water is totally fine.
- Black gel food coloring – 1 to 2 tablespoons. I recommend the Wilton brand. Liquid coloring won’t give you that deep, true black.
For the Cream Cheese Spiderweb Frosting:
- Cream cheese – 8 ounces (226g), softened. Full-fat is best for stability.
- Unsalted butter – ½ cup (113g), softened. Let it sit out with the cream cheese.
- Powdered sugar – 3 to 4 cups (340g to 450g). Sift it if you want a super smooth frosting.
- Vanilla extract – 1 teaspoon.
- Pinch of salt – Just a tiny one to cut the sweetness.
Equipment Needed
You don’t need a fancy bakery setup for these cupcakes. Here’s what you’ll need:
- Muffin tin – A standard 12-cup tin works perfectly. I’ve used both non-stick and dark metal pans; dark metal tends to brown the edges a bit faster, so keep an eye on them.
- Paper cupcake liners – I like using black or orange liners for Halloween, but white works too. Just avoid the super thin ones—they tend to peel off.
- Mixing bowls – One large bowl for the dry ingredients and another for the wet. I just use one big bowl and add the dry ingredients right on top of the wet.
- Whisk – For mixing the batter. A hand whisk is fine. No need to break out the stand mixer for this.
- Rubber spatula – For scraping down the sides and folding in the coffee.
- Electric hand mixer or stand mixer – For the cream cheese frosting. You can whisk it by hand if you’re patient, but a mixer makes it light and fluffy in minutes.
- Piping bag or zip-top bag – For the spiderweb design. A zip-top bag with a tiny corner snipped off works like a charm. I’ve also used a Wilton #2 round tip.
- Cooling rack – Let those cupcakes cool completely before frosting. I learned that lesson the hard way when my first batch turned into a melty mess.
If you don’t have a cooling rack, you can use a wire oven rack or even a clean towel laid flat. Just make sure air circulates around the cupcakes so they don’t get soggy bottoms.
Preparation Method
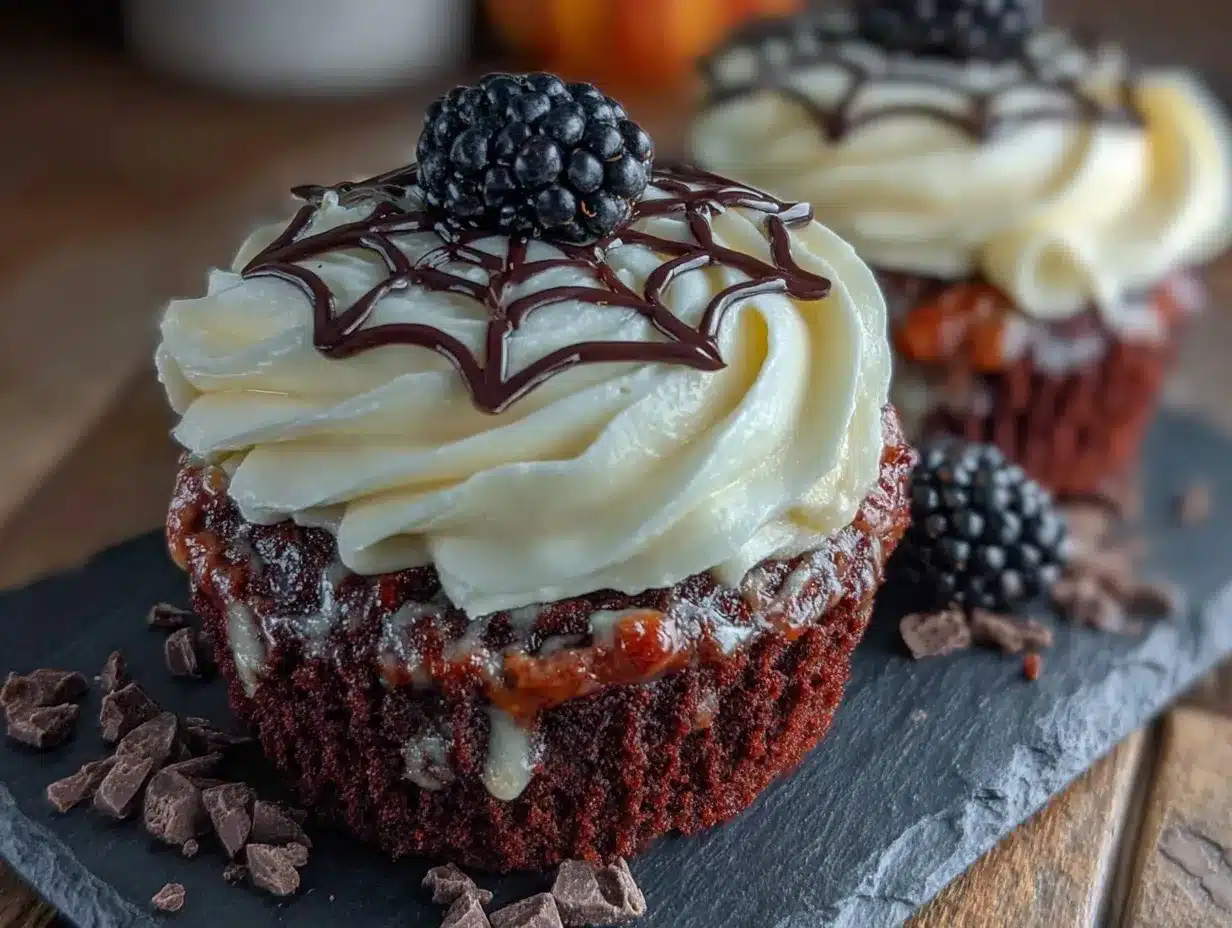
- Preheat your oven to 350°F (175°C). Line your muffin tin with 12 paper liners. This is a good time to take your cream cheese and butter out of the fridge so they soften while you bake.
- Mix the dry ingredients. In a large bowl, whisk together the flour, sugar, cocoa powder, baking soda, and salt. Make sure there are no lumps. I use a fork to break up any cocoa clumps.
- Add the wet ingredients. Make a well in the center and pour in the vegetable oil, buttermilk, eggs, vanilla extract, and white vinegar. Whisk everything together until just combined. Don’t overmix—a few lumps are okay. Overmixing makes tough cupcakes.
- Add the hot coffee and food coloring. Pour in the hot coffee (or hot water) and the black gel food coloring. Stir gently with a rubber spatula until the batter is smooth and uniformly black. The batter will be thin—that’s normal. It should look like a dark, glossy chocolate pudding.
- Fill the liners. Use a cookie scoop or a measuring cup to fill each liner about ⅔ full. I use a ¼ cup measure for consistency. Don’t overfill, or they’ll mushroom over the top.
- Bake for 18 to 22 minutes. Rotate the pan halfway through. You’ll know they’re done when a toothpick inserted in the center comes out clean or with a few moist crumbs. The tops should spring back when lightly touched.
- Cool completely. Let the cupcakes sit in the pan for 5 minutes, then transfer them to a cooling rack. Don’t even think about frosting them until they’re completely cool. Warm cupcakes will turn your cream cheese frosting into a puddle.
- Make the frosting. In a large bowl, beat the softened cream cheese and butter together on medium speed until smooth and creamy, about 2 minutes. Add the vanilla and a pinch of salt. Gradually add the powdered sugar, one cup at a time, mixing on low speed until incorporated. Once all the sugar is in, beat on high for 2 to 3 minutes until light and fluffy. If the frosting is too thick, add a splash of milk. Too thin? Add more powdered sugar.
- Frost the cupcakes. Spread a generous layer of frosting on each cupcake using an offset spatula or a piping bag. I like to leave the tops slightly domed for the spiderweb effect.
- Create the spiderweb. Fit a piping bag or zip-top bag with a small round tip (or snip a tiny corner). Fill it with about ½ cup of the cream cheese frosting. Starting from the center of each cupcake, pipe a spiral outward to the edge. Then, using a toothpick or a skewer, gently drag lines from the center outward, like spokes on a wheel. Repeat every few spirals to create the web effect. Wipe the toothpick clean between cupcakes for sharp lines.
Cooking Tips & Techniques
I’ve messed up this recipe more times than I’d like to admit. The first time I tried black velvet, I used liquid food coloring and ended up with gray-green cupcakes that tasted like chemicals. Not my finest moment. Here’s what I’ve learned:
- Use gel food coloring, not liquid. Liquid coloring will make your batter too runny and won’t give you that deep black color. Gel is concentrated and won’t affect the texture. I buy the Wilton 1-ounce jar and it lasts me at least two batches.
- Let your ingredients come to room temperature. Cold eggs and cold buttermilk don’t emulsify well with the oil. You’ll end up with a greasy batter. Set everything out 30 minutes before you start.
- Don’t skip the hot coffee. Even if you hate coffee, use it. The hot liquid helps bloom the cocoa powder, which brings out a richer chocolate flavor. You won’t taste the coffee at all.
- Measure your flour correctly. Spoon it into your measuring cup and level it off with a knife. Scooping directly from the bag can pack in too much flour, making your cupcakes dry and dense.
- For the spiderweb, less is more. You don’t need to drag the toothpick through every single spiral. Just four or five even lines create a beautiful web. If you overdo it, the frosting just looks muddled.
- Chill the frosted cupcakes for 10 minutes. This sets the spiderweb design and makes it easier to transport. I pop them in the fridge while I clean up the kitchen.
Variations & Adaptations
One of the best things about this recipe is how flexible it is. I’ve played around with it quite a bit, and here are some of my favorite variations:
- Gluten-Free Version: Swap the all-purpose flour for a 1:1 gluten-free baking flour. I’ve used Bob’s Red Mill with great results. Just don’t overmix the batter, and check for doneness a minute or two early.
- Dairy-Free Adaptation: Use a plant-based buttermilk (like almond milk mixed with vinegar) and substitute the butter and cream cheese with dairy-free versions. Miyoko’s cream cheese works beautifully.
- Spiderweb Color Swap: Instead of white cream cheese frosting, tint the frosting with orange or purple gel coloring. You can also pipe the web with melted white chocolate for a glossy look.
- Mini Cupcakes: Use a mini muffin tin and bake for 10 to 12 minutes. You’ll get about 36 mini cupcakes. Perfect for classroom parties.
- Chocolate Ganache Drip: For an extra decadent touch, drizzle a little dark chocolate ganache over the frosted cupcakes before piping the spiderweb. It adds a glossy, professional finish.
- Spider Decoration: Place a small plastic spider on top of each cupcake. I found a bag of 12 at the dollar store last year. Kids absolutely lose their minds over them.
Serving & Storage Suggestions
These cupcakes are best served at room temperature, which lets the cream cheese frosting soften to that perfect, creamy texture. If you’ve chilled them, let them sit out for 15 to 20 minutes before serving.
They pair beautifully with a glass of cold milk, a warm cup of spiced apple cider, or even a pumpkin spice latte. For a Halloween party spread, serve them alongside other spooky treats like pumpkin bars with cream cheese frosting or caramel apple bites.
Storage: Store any leftovers in an airtight container in the refrigerator for up to 5 days. The cream cheese frosting needs to stay chilled. I line the container with paper towels to absorb any excess moisture.
Freezing: You can freeze the unfrosted cupcakes for up to 3 months. Wrap each one tightly in plastic wrap, then place them in a freezer bag. Thaw at room temperature, then frost and decorate. I’ve also frozen the frosting in a piping bag—just let it thaw in the fridge overnight and give it a quick whip before using.
Reheating: If you like your cupcakes slightly warm, pop one in the microwave for 8 to 10 seconds. Just don’t overdo it, or the frosting will melt.
One thing I’ve noticed: the flavor actually gets better on day two. The cocoa and black coloring meld together, and the cupcakes become even more moist. So if you can resist eating them all on day one, you’re in for a treat.
Nutritional Information & Benefits
Let’s be real—these are a treat, not a health food. But knowing what’s in them can help you plan your day around a little indulgence. Here’s the estimated nutrition per cupcake (based on 12 servings):
| Nutrient | Amount |
|---|---|
| Calories | 385 |
| Total Fat | 18g |
| Saturated Fat | 9g |
| Cholesterol | 65mg |
| Sodium | 280mg |
| Total Carbohydrates | 53g |
| Sugars | 38g |
| Protein | 5g |
On the bright side, cocoa powder is rich in antioxidants and can help improve mood (I mean, chocolate literally makes you happy). The cream cheese adds a bit of protein and calcium. And if you use the hot coffee trick, you’re getting a tiny boost of caffeine too. Everything in moderation, right? I usually serve these as a special Halloween treat, not an everyday snack. But honestly, if you want to eat one for breakfast on November 1st, I’m not going to judge.
Conclusion
These Perfect Black Velvet Cupcakes with Cream Cheese Spiderweb are more than just a Halloween dessert. They’re a little piece of nostalgia wrapped in a paper liner, with a creamy, tangy web on top that looks like it took hours to create. But here’s the secret: it takes maybe 10 minutes to decorate a whole batch. That’s the kind of baking I can get behind—big payoff, minimal fuss.
I hope you give these a try. Make them for your Halloween party, your kid’s classroom, or just for yourself on a cozy October afternoon. And if you do, I’d love to hear about it. Drop a comment below and tell me how they turned out, or share a photo of your spiderweb design. Did you add plastic spiders? Did you try the orange frosting? Let me know! And if you’re looking for more spooky treats, check out my mummy hot dogs or witch hat cookies.
Happy Halloween, and happy baking!
Frequently Asked Questions
Can I make these cupcakes ahead of time?
Absolutely. Bake the cupcakes up to two days in advance and store them in an airtight container at room temperature. Make the frosting and decorate the day you plan to serve them for the best presentation.
Why did my cupcakes turn out gray instead of black?
You likely used liquid food coloring instead of gel. Liquid coloring won’t concentrate enough to overcome the brown of the cocoa powder. Next time, use a good quality black gel food coloring and don’t be shy with it.
Can I use this recipe for a cake instead of cupcakes?
Yes! Pour the batter into two greased 8-inch round cake pans and bake at 350°F for 25 to 30 minutes. You’ll need to double the frosting recipe to cover both layers. The spiderweb design works beautifully on a cake too.
How do I get clean spiderweb lines?
Wipe your toothpick or skewer clean between each set of lines. If you drag frosting from one line to the next without wiping, the web will look messy. Also, don’t press too hard—just barely touch the surface of the frosting.
Can I freeze the frosted cupcakes?
I don’t recommend freezing them once frosted, as the cream cheese frosting can become grainy after thawing. Freeze the unfrosted cupcakes instead, then thaw, frost, and decorate fresh.
Pin This Recipe!
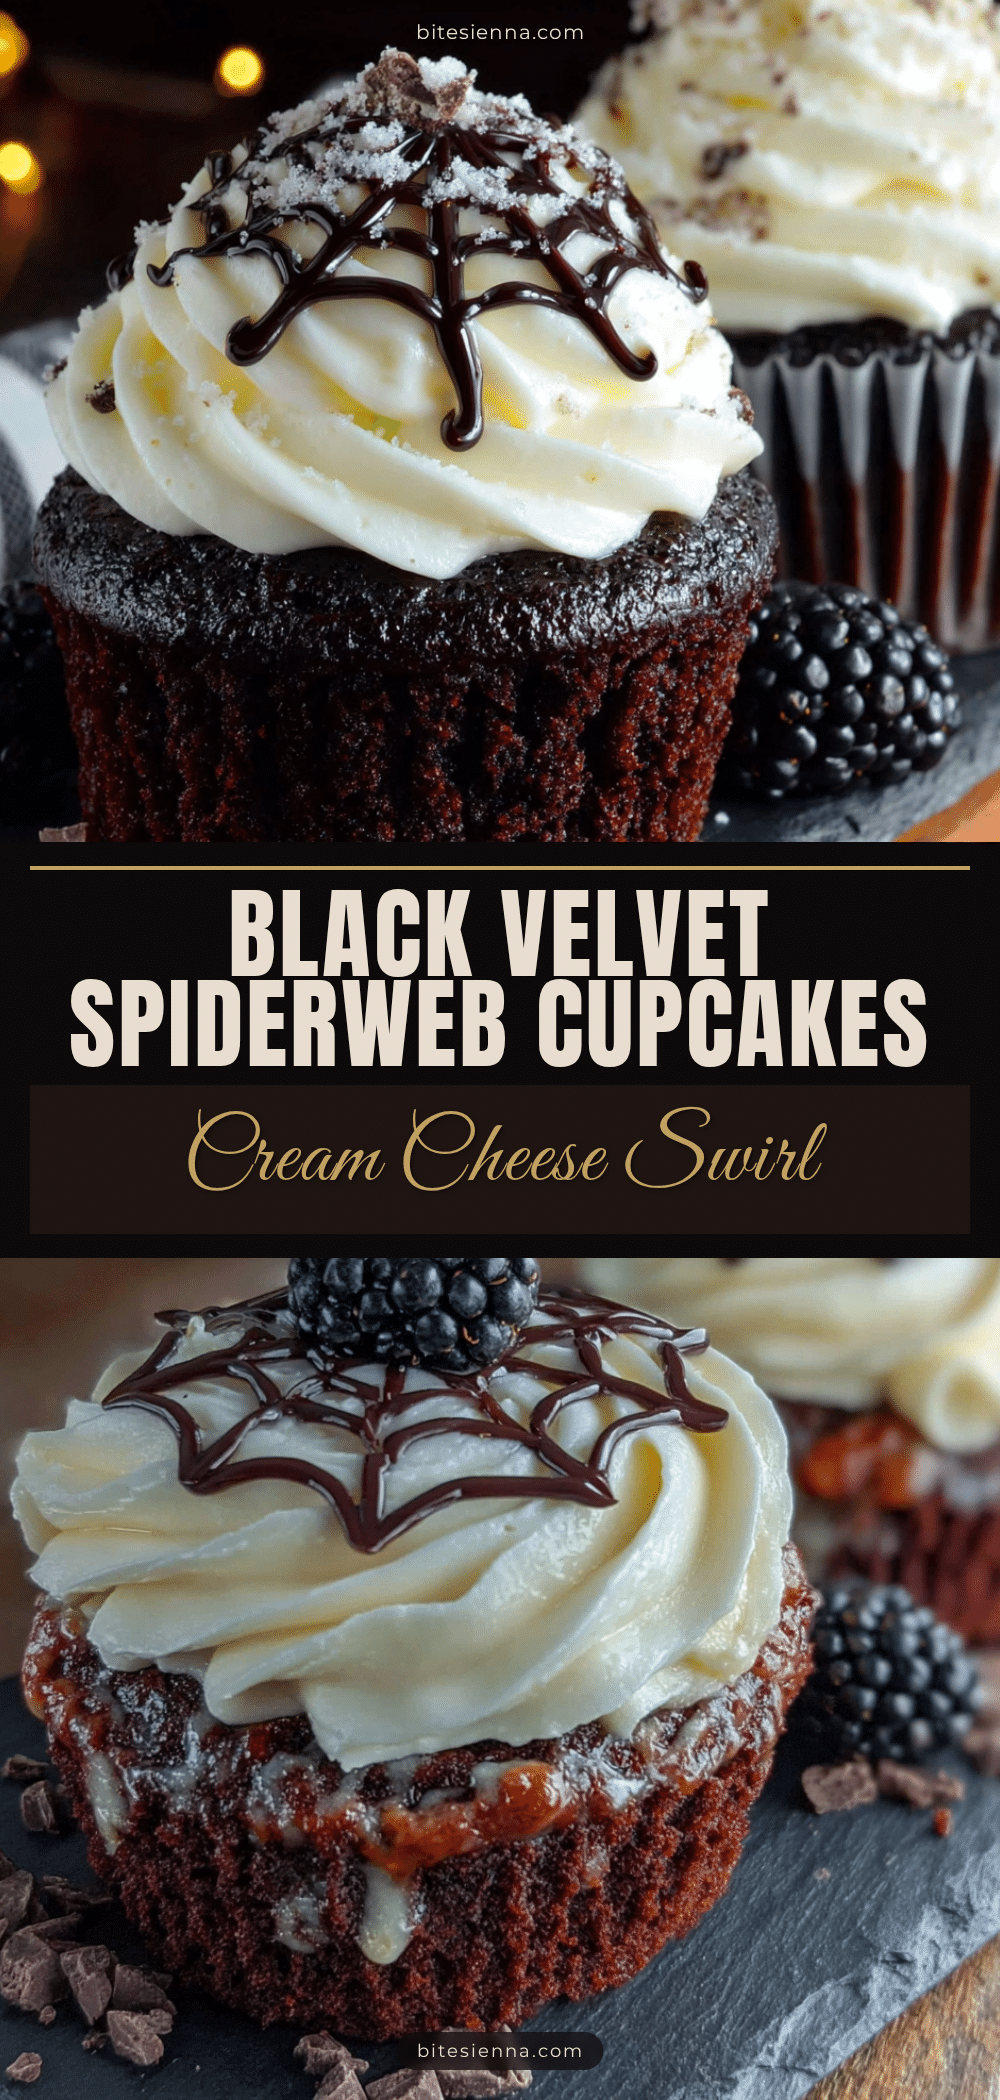
Perfect Black Velvet Cupcakes with Easy Spiderweb Top
Moist, rich black velvet cupcakes topped with a tangy cream cheese frosting and an easy spiderweb design. Perfect for Halloween, these nostalgic treats come together in about 45 minutes with simple ingredients.
- Prep Time: 15 minutes
- Cook Time: 20 minutes
- Total Time: 45 minutes
- Yield: 12 cupcakes 1x
- Category: Dessert
- Cuisine: American
Ingredients
- 1 ½ cups (190g) all-purpose flour
- 1 cup (200g) granulated sugar
- ¼ cup (20g) unsweetened cocoa powder
- 1 teaspoon baking soda
- ½ teaspoon salt
- ½ cup (120ml) vegetable oil
- ¾ cup (180ml) buttermilk, room temperature
- 2 large eggs, room temperature
- 1 teaspoon vanilla extract
- 1 teaspoon white vinegar
- ½ cup (120ml) hot coffee or hot water
- 1 to 2 tablespoons black gel food coloring
- 8 ounces (226g) cream cheese, softened
- ½ cup (113g) unsalted butter, softened
- 3 to 4 cups (340g to 450g) powdered sugar
- 1 teaspoon vanilla extract
- Pinch of salt
Instructions
- Preheat oven to 350°F (175°C). Line a 12-cup muffin tin with paper liners. Set cream cheese and butter out to soften.
- In a large bowl, whisk together flour, sugar, cocoa powder, baking soda, and salt.
- Make a well in the center and add vegetable oil, buttermilk, eggs, vanilla extract, and white vinegar. Whisk until just combined; do not overmix.
- Pour in hot coffee (or hot water) and black gel food coloring. Stir gently with a rubber spatula until batter is smooth and uniformly black. Batter will be thin.
- Fill each liner about ⅔ full using a cookie scoop or ¼ cup measure.
- Bake for 18 to 22 minutes, rotating the pan halfway through. Cupcakes are done when a toothpick inserted in the center comes out clean or with a few moist crumbs.
- Let cupcakes cool in the pan for 5 minutes, then transfer to a cooling rack to cool completely.
- For the frosting: In a large bowl, beat softened cream cheese and butter on medium speed until smooth and creamy, about 2 minutes. Add vanilla and a pinch of salt. Gradually add powdered sugar, one cup at a time, mixing on low. Once all sugar is added, beat on high for 2 to 3 minutes until light and fluffy.
- Frost each cupcake generously with cream cheese frosting using an offset spatula or piping bag.
- To create the spiderweb: Fill a piping bag or zip-top bag with a small round tip (or snip a tiny corner) with about ½ cup frosting. Pipe a spiral from the center outward on each cupcake. Using a toothpick or skewer, gently drag lines from the center outward like spokes on a wheel. Wipe toothpick clean between cupcakes.
Notes
Use gel food coloring, not liquid, for a true black color. Let ingredients come to room temperature for best results. Hot coffee enhances the chocolate flavor without tasting like coffee. For clean spiderweb lines, wipe the toothpick clean between each set of lines. Chill frosted cupcakes for 10 minutes to set the design.
Nutrition
- Serving Size: 1 cupcake
- Calories: 385
- Sugar: 38
- Sodium: 280
- Fat: 18
- Saturated Fat: 9
- Carbohydrates: 53
- Fiber: 1
- Protein: 5
Keywords: black velvet cupcakes, Halloween cupcakes, spiderweb cupcakes, cream cheese frosting, black velvet, Halloween dessert, easy cupcakes


