I was standing in the frozen foods aisle at Target last December, just trying to grab a bag of peas, when a woman walked past me carrying a box of peppermint bark. That red-and-white wrapper hit me like a freight train — and suddenly I was twelve years old, sitting on the cold linoleum floor of my aunt Carol’s kitchen, watching her smash candy canes with a rolling pin while Christmas music crackled from a tiny radio. She always made her peppermint bark from scratch, spreading it thin on wax paper, and she’d let me eat the broken pieces that didn’t look perfect enough for the tins she gave as gifts. I haven’t thought about that kitchen in years. Honestly, I almost started crying right there next to the frozen waffles.
So of course I bought three boxes of peppermint bark and spent the next week trying to figure out how to get that same magic into a chocolate chip cookie. It took some trial and error — my first batch turned into a flat, sugary mess that I’m pretty sure the dog refused to eat — but eventually I landed on something that made me close my eyes after the first bite. These Ultimate Peppermint Bark Chocolate Chip Cookies are exactly what I was chasing: soft centers, crispy edges, melty chocolate chunks, and that cool, minty crunch that makes the whole thing taste like Christmas morning.
Maybe you’ve been there too — standing in a grocery store, hit by a random smell or sight that yanks you backwards through time. This cookie is my attempt to hold onto that feeling, and I think you’re going to love it.
Why You’ll Love These Cookies
I’ve tested this recipe more times than I care to admit. Like, embarrassing number of times. But that’s exactly why I can tell you with confidence that these cookies are different from every other peppermint chocolate chip cookie you’ve seen online. Here’s what makes them special:
- Quick & Easy : From start to warm cookie in under 30 minutes. No chilling required — I know, I was skeptical too, but it works.
- Simple Ingredients : Nothing weird here. Butter, sugar, eggs, flour — plus some store-bought peppermint bark that does all the heavy lifting for you.
- Perfect for the Holidays : Cookie exchanges, ugly sweater parties, or just a quiet night by the tree with a mug of something warm.
- Crowd-Pleaser : I brought these to my neighbor’s holiday party and three people asked for the recipe before I even took my coat off.
- Unbelievably Delicious : The texture is what gets you. Soft and chewy in the middle, slightly crisp at the edges, with pockets of melted chocolate and crunchy peppermint in every bite.
What really sets this recipe apart is the technique. Instead of just folding crushed candy canes into a standard cookie dough, I use chopped peppermint bark as both a mix-in AND a topping. That double hit of minty chocolate is what makes these cookies taste like you spent hours on them — when really, you didn’t.
And let me tell you something: these cookies make people happy. I mean genuinely happy. There’s something about that combination of rich chocolate and cool peppermint that just hits different. It’s comfort food with a holiday twist, and it works every single time.
What Ingredients You Will Need
This recipe uses straightforward ingredients to create something that tastes way more complicated than it actually is. Most of these are pantry staples, and the peppermint bark is the star of the show.
- Unsalted butter, softened (1 cup / 2 sticks) — I use Land O’Lakes because it has a consistent fat content. Make sure it’s truly softened, not melted. You want it to give slightly when you press it.
- Granulated sugar (3/4 cup / 150g) — Adds sweetness and helps with spreading. Don’t reduce this or your cookies won’t spread properly.
- Light brown sugar, packed (3/4 cup / 150g) — This is where the chewiness comes from. Dark brown sugar works too if that’s what you have, but the flavor will be slightly more molasses-forward.
- Large eggs (2, room temperature) — Room temperature eggs incorporate more air into the dough. If you forget to take them out early, put them in a bowl of warm water for 5 minutes.
- Vanilla extract (2 teaspoons) — Pure vanilla extract makes a difference here. I know it’s more expensive, but the artificial stuff has a weird aftertaste that doesn’t play well with peppermint.
- Peppermint extract (1/2 teaspoon) — Go easy here. Peppermint extract is potent, and you can always add more but you can’t take it out. I use Nielsen-Massey because it’s clean and not overly medicinal.
- All-purpose flour (2 1/4 cups / 280g) — Spoon and level your flour. Scooping directly from the bag packs it down and you’ll end up with dry cookies.
- Baking soda (1 teaspoon) — Make sure it’s fresh. If it doesn’t fizz when you mix it with a little vinegar, toss it and buy new.
- Salt (1/2 teaspoon) — I use fine sea salt. It balances the sweetness and makes the chocolate taste more chocolatey.
- Semi-sweet chocolate chips (1 cup / 175g) — I like Ghirardelli for the flavor, but any good-quality chip works. You could also chop up a chocolate bar if you prefer bigger puddles of chocolate.
- Peppermint bark, chopped (1 1/2 cups, divided) — This is the key ingredient. I use Ghirardelli peppermint bark from the grocery store. You want the kind with the dark chocolate base and white chocolate top with crushed candy cane pieces. Chop it into small chunks — some will melt into the dough and some will stay as distinct pieces.
- Optional: Crushed candy canes for topping (1/4 cup) — Adds extra crunch and makes the cookies look festive. Totally optional but highly recommended.
Ingredient Substitution Notes: If you’re dairy-free, use plant-based butter and dairy-free chocolate chips. For a gluten-free version, swap the all-purpose flour with a 1:1 gluten-free baking blend. I’ve tried both and they work well, though the texture is slightly different — still delicious, just not quite as chewy.
Equipment Needed
Nothing fancy here. You probably already own everything you need.
- Large mixing bowl — I use a ceramic one because it doesn’t slide around on the counter. Glass or stainless steel works fine too.
- Hand mixer or stand mixer — A hand mixer is totally fine. I actually prefer it for cookie dough because I feel like I have more control. If you’re mixing by hand, you’ll need some arm strength and a good wooden spoon.
- Rubber spatula — For scraping down the sides of the bowl and folding in the chocolate and peppermint bark. Get one with a heat-resistant head.
- Baking sheets — I use two half-sheet pans so I can bake all the cookies at once. If you only have one, let it cool completely between batches or the dough will spread too much.
- Parchment paper or silicone baking mats — Parchment paper is cheaper and gives slightly crispier bottoms. Silicone mats produce softer cookies. Both work great.
- Cookie scoop (about 2 tablespoons) — This is my favorite tool. It makes perfectly round, evenly-sized cookies every time. A regular spoon works, but the cookies won’t be as uniform.
- Cooling rack — Lets air circulate around the cookies so they cool evenly and don’t get soggy on the bottom.
- Sharp knife and cutting board — For chopping the peppermint bark. A serrated knife works best because the candy cane pieces can be stubborn.
Budget-Friendly Tip: If you don’t have a cookie scoop, use two spoons — one to scoop and one to push the dough off. It takes a little longer but works just as well.
Preparation Method
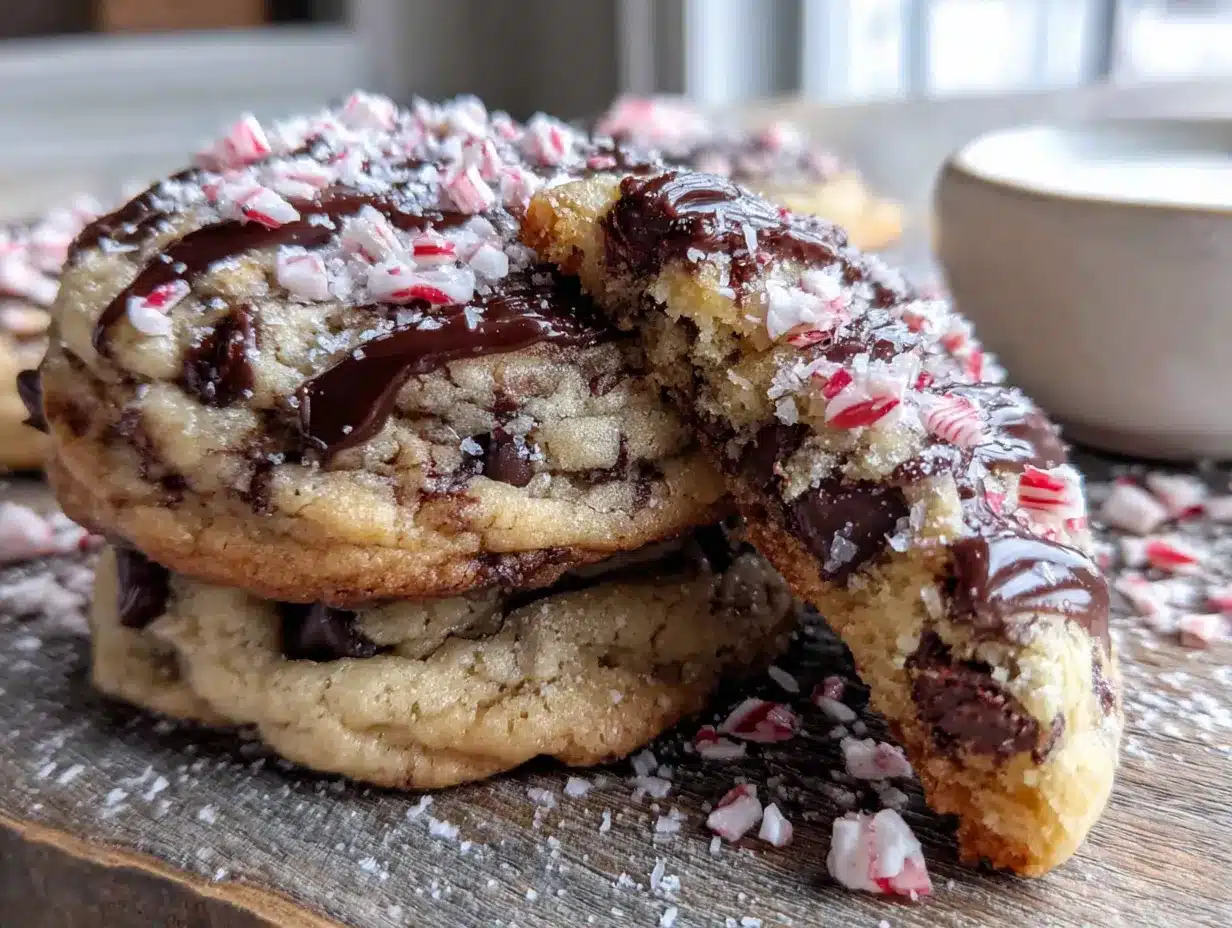
Ready to make the best cookies of your holiday season? Let’s go. This recipe makes about 28 cookies, and you’re going to want to share them — or not, I won’t judge.
- Preheat your oven to 350°F (175°C). Line two baking sheets with parchment paper or silicone mats. This is non-negotiable — these cookies have a lot of butter and sugar, and they will stick to an unlined pan.
- Cream the butter and sugars together. In a large mixing bowl, beat the softened butter, granulated sugar, and brown sugar together on medium speed until light and fluffy. This takes about 3-4 minutes with a hand mixer. You’re looking for a color change — it should go from pale yellow to almost off-white. Scrape down the sides of the bowl with your spatula halfway through. Don’t rush this step; properly creamed butter and sugar is what gives cookies their structure.
- Add the eggs and extracts. Crack the eggs into a small bowl first (just in case you get any shell), then add them to the butter mixture one at a time, beating well after each addition. Add the vanilla extract and the peppermint extract and beat until just combined. The dough will look a little curdled at this point — that’s normal, don’t panic.
- Whisk the dry ingredients together. In a separate bowl, whisk together the flour, baking soda, and salt. This ensures the baking soda and salt are evenly distributed so you don’t get a pocket of salt in one cookie.
- Combine the wet and dry ingredients. Gradually add the flour mixture to the wet ingredients, mixing on low speed. I add it in three batches, mixing just until the flour disappears after each addition. Overmixing at this stage develops gluten and makes tough cookies. Stop as soon as you don’t see any more white streaks.
- Fold in the mix-ins. Switch to your rubber spatula. Gently fold in the chocolate chips and 1 cup of the chopped peppermint bark. Reserve the remaining 1/2 cup for topping. Fold just until everything is evenly distributed — about 10-12 folds. The dough will be thick and slightly sticky. If it feels too soft to scoop, pop it in the fridge for 10 minutes.
- Scoop the dough. Using your cookie scoop, portion out rounded tablespoons of dough (about 2 tablespoons each) and place them 2 inches apart on the prepared baking sheets. I fit 12 cookies per sheet. Don’t flatten them — they’ll spread as they bake.
- Top with remaining peppermint bark. Press a few pieces of the reserved chopped peppermint bark onto the top of each dough ball. This is what makes them look like bakery cookies. If you’re using crushed candy canes, sprinkle a little on top too.
- Bake for 10-12 minutes. Bake one sheet at a time in the center of the oven. The cookies are done when the edges are golden brown and the centers still look slightly underdone and puffy. They’ll continue to set on the baking sheet as they cool. I usually pull mine at 11 minutes — they come out perfectly soft.
- Cool on the baking sheet for 5 minutes. This is important. If you try to move them immediately, they’ll fall apart. After 5 minutes, transfer them to a cooling rack to cool completely. Or eat one warm. Or two. I won’t tell anyone.
Pro tip: If you want perfectly round cookies, use a round cookie cutter or the rim of a glass to gently scoot the edges into a circle while they’re still warm. It’s a little trick bakery bakeries use to make cookies look professional.
Cooking Tips & Techniques
I’ve made this recipe more times than I can count, and I’ve learned a few things along the way. Here are the tips that actually matter.
Don’t overmix the dough. I know I said this already, but it’s worth repeating. Once you add the flour, mix just until combined. Overmixing develops gluten, which makes cookies tough and cakey instead of soft and chewy. I learned this the hard way after making a batch that could have doubled as hockey pucks.
Use a cookie scoop for even baking. Cookies that are different sizes bake at different rates. A cookie scoop ensures every cookie is the same size, so they all come out perfectly at the same time. Plus it makes the dough balls look neat and uniform.
Chill the dough if your kitchen is warm. If it’s a hot day or your kitchen runs warm, the butter in the dough can soften too much and cause the cookies to spread into flat, greasy puddles. If your dough feels soft and sticky after mixing, pop it in the fridge for 15-20 minutes before scooping. It makes a huge difference.
Rotate your baking sheet halfway through. Ovens have hot spots. Halfway through baking, rotate the sheet 180 degrees. This ensures even browning and prevents the cookies on one side from burning while the other side is still pale.
Let the cookies cool on the baking sheet. This is the hardest part — waiting. But the cookies need those 5 minutes on the hot sheet to finish setting up. If you move them too soon, they’ll fall apart. If you leave them too long, they’ll continue cooking and get overdone. Set a timer. Trust me.
Variations & Adaptations
One of the best things about this recipe is how easy it is to adapt. Here are some variations I’ve tried and loved.
Dark Chocolate Lovers Version: Swap the semi-sweet chocolate chips for dark chocolate chunks (60-70% cacao). The bitterness of the dark chocolate balances the sweetness of the peppermint bark beautifully. I made this version for my dad, who claims he doesn’t like “sweet cookies,” and he ate six.
White Chocolate Peppermint Cookies: Replace the semi-sweet chips with white chocolate chips or chopped white chocolate. This gives you a double hit of white chocolate from the chips and the peppermint bark. It’s sweeter, but in a way that feels like a fancy bakery cookie.
Gluten-Free Adaptation: Use a 1:1 gluten-free baking flour blend. I’ve tested this with King Arthur Measure for Measure and it works perfectly. The cookies are slightly more delicate, so handle them gently when transferring to the cooling rack.
Extra Minty Version: Increase the peppermint extract to 1 teaspoon. This is for true peppermint lovers. Just be careful — too much extract can make the cookies taste like toothpaste. Start with 3/4 teaspoon and taste the dough (yes, it’s safe to eat a little raw dough, just don’t go crazy).
Chocolate Base Version: Replace 1/4 cup of the flour with unsweetened cocoa powder to make chocolate peppermint cookies. This creates a double chocolate experience that’s absolutely decadent. Reduce the chocolate chips to 3/4 cup since the dough itself is already chocolatey.
Serving & Storage Suggestions
These cookies are best served slightly warm, when the chocolate is still a little melty and the peppermint bark has softened just enough to be chewy. But they’re also fantastic at room temperature — honestly, I’ve never met a state of these cookies I didn’t like.
Serving Ideas: Arrange them on a festive plate with a dusting of powdered sugar for a snow effect. They pair beautifully with a cup of hot cocoa, a peppermint mocha, or a cold glass of milk. For a holiday dessert board, arrange them alongside other Christmas cookies, fresh fruit, and a bowl of whipped cream for dipping.
Storage: Store in an airtight container at room temperature for up to 5 days. Place a slice of bread in the container to keep them soft — the cookies will absorb the moisture from the bread. Replace the bread slice every other day. I learned this trick from my grandmother and it works like magic.
Freezing: These cookies freeze beautifully. Place cooled cookies in a single layer in a freezer-safe container or zip-top bag, separating layers with parchment paper. Freeze for up to 3 months. To thaw, leave them at room temperature for about 30 minutes. You can also freeze the unbaked dough balls — just scoop them onto a baking sheet, freeze until solid, then transfer to a freezer bag. Bake from frozen, adding 2-3 minutes to the baking time.
Reheating: Pop a cookie in the microwave for 10-15 seconds for that fresh-from-the-oven experience. Or warm them in a 300°F oven for 5 minutes if you’re reheating a batch.
Nutritional Information & Benefits
Let’s be real — these are a treat, not a health food. But here’s what you can expect per cookie (based on 28 cookies):
| Nutrient | Amount Per Cookie |
|---|---|
| Calories | 185 |
| Total Fat | 9g |
| Saturated Fat | 5g |
| Cholesterol | 25mg |
| Sodium | 95mg |
| Total Carbohydrates | 24g |
| Dietary Fiber | 1g |
| Sugars | 16g |
| Protein | 2g |
Health Benefits: Dark chocolate contains antioxidants called flavonoids that may support heart health. Peppermint has been shown to aid digestion and can help soothe an upset stomach — which is convenient, because you might eat too many of these cookies. The butter and eggs provide some protein and healthy fats, though honestly, these are a comfort food and should be enjoyed as such. Life is about balance, and sometimes balance means eating a cookie.
Dietary Considerations: This recipe contains dairy, eggs, and gluten. For dairy-free, use plant-based butter and dairy-free chocolate. For gluten-free, use a 1:1 gluten-free flour blend. Always check your peppermint bark label for potential allergens.
Conclusion
These Ultimate Peppermint Bark Chocolate Chip Cookies are everything I wanted them to be — and more. They’re the cookie I keep coming back to, the one I make for every holiday gathering, the one that makes people close their eyes and smile. They’re not complicated or fancy. They’re just really, really good.
I hope you make these cookies and find your own moment of connection — whether it’s with a memory, a person, or just the pure joy of biting into something warm and chocolatey and minty all at once. Feel free to play around with the variations and make them your own. That’s the beauty of baking — you can always tweak and adjust until it feels right.
If you make these, I’d love to hear about it. Drop a comment below and tell me how they turned out, or share a photo of your cookies on Pinterest. Don’t forget to tag me so I can see your beautiful creations. Happy baking, friends — and Merry Christmas (or happy Tuesday, no judgment here).
Frequently Asked Questions
Can I use homemade peppermint bark instead of store-bought?
Absolutely. If you want to go the extra mile, make your own peppermint bark by layering melted dark chocolate and white chocolate, then topping with crushed candy canes. Let it set completely before chopping. It takes a little more time, but the flavor is incredible.
Why did my cookies spread too much?
This usually happens for one of three reasons: your butter was too soft or melted, you didn’t use enough flour (remember to spoon and level), or your baking sheet was too warm. Make sure your butter is softened, not melted, and let your baking sheets cool completely between batches.
Can I make the dough ahead of time?
Yes! You can refrigerate the dough for up to 48 hours before baking. Just wrap it tightly in plastic wrap or store it in an airtight container. Let it sit at room temperature for 10-15 minutes before scooping — it will be too firm to scoop straight from the fridge.
Can I leave out the peppermint extract?
You can, but the cookies won’t have that distinct peppermint flavor. The peppermint bark alone adds some mintiness, but the extract really makes it pop. If you’re sensitive to peppermint, start with 1/4 teaspoon and see how you like it.
How do I crush candy canes without making a mess?
Place the candy canes in a zip-top bag and seal it, removing as much air as possible. Use a rolling pin or the bottom of a heavy pan to gently crush them. This contains the mess and prevents tiny candy shards from flying everywhere. Just be careful not to poke holes in the bag.
Pin This Recipe!

Best Easy Peppermint Bark Chocolate Chip Cookies

Soft and chewy chocolate chip cookies loaded with peppermint bark and chocolate chips, topped with extra peppermint bark for a festive crunch. No chilling required and ready in under 30 minutes.
- Prep Time: 15 minutes
- Cook Time: 12 minutes
- Total Time: 27 minutes
- Yield: 28 cookies 1x
- Category: Dessert
- Cuisine: American
Ingredients
- 1 cup (2 sticks) unsalted butter, softened
- 3/4 cup (150g) granulated sugar
- 3/4 cup (150g) light brown sugar, packed
- 2 large eggs, room temperature
- 2 teaspoons vanilla extract
- 1/2 teaspoon peppermint extract
- 2 1/4 cups (280g) all-purpose flour
- 1 teaspoon baking soda
- 1/2 teaspoon fine sea salt
- 1 cup (175g) semi-sweet chocolate chips
- 1 1/2 cups chopped peppermint bark, divided
- 1/4 cup crushed candy canes (optional, for topping)
Instructions
- Preheat oven to 350°F (175°C). Line two baking sheets with parchment paper or silicone mats.
- In a large mixing bowl, beat softened butter, granulated sugar, and brown sugar together on medium speed until light and fluffy, about 3-4 minutes. Scrape down sides halfway through.
- Add eggs one at a time, beating well after each. Add vanilla extract and peppermint extract, beat until just combined.
- In a separate bowl, whisk together flour, baking soda, and salt.
- Gradually add flour mixture to wet ingredients in three batches, mixing on low speed just until combined. Do not overmix.
- Switch to a rubber spatula. Gently fold in chocolate chips and 1 cup of chopped peppermint bark. Reserve remaining 1/2 cup for topping.
- Using a cookie scoop (about 2 tablespoons), portion dough and place 2 inches apart on prepared baking sheets. Do not flatten.
- Press a few pieces of reserved chopped peppermint bark onto the top of each dough ball. Sprinkle with crushed candy canes if using.
- Bake one sheet at a time in center of oven for 10-12 minutes, until edges are golden brown and centers still look slightly underdone.
- Cool on baking sheet for 5 minutes, then transfer to a cooling rack to cool completely.
Notes
For perfectly round cookies, use a round cookie cutter or glass rim to gently scoot edges into a circle while still warm. If dough feels too soft, chill for 10 minutes before scooping. Store in an airtight container at room temperature for up to 5 days; place a slice of bread in container to keep soft. Freeze baked cookies for up to 3 months or unbaked dough balls for up to 3 months.
Nutrition
- Serving Size: 1 cookie
- Calories: 185
- Sugar: 16
- Sodium: 95
- Fat: 9
- Saturated Fat: 5
- Carbohydrates: 24
- Fiber: 1
- Protein: 2
Keywords: peppermint bark, chocolate chip cookies, Christmas cookies, holiday cookies, easy cookies, no chill cookies


