The holiday cookie swap was in less than twelve hours, and I’d completely forgotten. My neighbor Sarah had texted me the reminder that morning, and my stomach dropped. Everyone else would be bringing those perfectly decorated sugar cookies with royal icing, or those intricate little French things that take three days. I had a block of cream cheese, a jar of molasses that was gathering dust, and about an hour of actual free time before my kids got home from school. Not exactly the makings of a showstopper.
I stood in my kitchen, staring at my pantry like it owed me an answer. And then, honestly, I just started grabbing things. Ginger, cinnamon, some brown sugar. I had this vague idea of a cheesecake bar in my head, but I wasn’t even sure it would work. I was basically making it up as I went along, which is always a little terrifying when you know you have to face a room full of people who actually plan their baking.
I’ll spare you the messy details, but let’s just say my kitchen looked like a gingerbread bomb went off. I got batter on the ceiling fan — don’t ask — and I almost used salt instead of sugar in the crust. I caught myself at the last second, which felt like a small miracle. But somehow, these Ultimate Gingerbread Cheesecake Bars with Molasses Crust came together. They smelled incredible, all warm and spicy, and they set up perfectly in the fridge overnight. The next day, I walked into that swap feeling like a fraud carrying a pan of bars, while everyone else had these elaborate displays. You can guess the ending, right? They vanished. Someone asked me for the recipe before I even put the pan down. And honestly, that’s why I keep making them. It’s not just a recipe; it’s a little bit of Christmas magic that comes together when you least expect it.
Why You’ll Love This Recipe
Listen, I’ve tested a lot of holiday desserts over the years. Some are gorgeous but taste like cardboard. Others taste amazing but take three days to make. These gingerbread cheesecake bars? They hit that sweet spot where simple meets spectacular. You get that rich, creamy cheesecake layer everyone craves, but it’s sitting on top of a crust that tastes like the holidays in every single bite.
Here is why this recipe has become my go-to for every Christmas party and cookie exchange:
- Quick & Easy: You only need about 30 minutes of active prep time. The oven does the rest of the work for you.
- Simple Ingredients: No weird specialty items here. You probably have most of this in your pantry right now.
- Perfect for the Holidays: These bars are made for cookie swaps, Christmas brunch, or a cozy dessert after a big family dinner.
- Crowd-Pleaser: I have yet to meet someone who doesn’t love these. Kids grab them. Adults hoard them.
- Unbelievably Delicious: The combination of tangy cheesecake and warm gingerbread spices is just next-level comfort food.
What makes this different from other recipes? It’s the molasses crust. Most gingerbread cheesecake bars use a regular graham cracker crust with some ginger thrown in. But this recipe starts with a real molasses cookie crust that has actual texture and depth. It’s not just a base — it’s the foundation of the whole experience. Plus, the cheesecake filling is perfectly balanced. It’s not too sweet, not too tangy, and it has just the right amount of spice to make you feel like you’re wrapped in a warm blanket by the fire.
This is the kind of dessert that makes people close their eyes after the first bite. It’s comfort food reimagined — faster, easier, but with the same soul-soothing satisfaction. Perfect for impressing guests without the stress, or turning a simple holiday gathering into something truly memorable.
What Ingredients You Will Need
This recipe uses simple, honest ingredients to create that perfect holiday flavor. Most of these are pantry staples, which is exactly what you want when you’re baking on a busy December afternoon. Let’s break down what you need and why each ingredient matters.
For the Molasses Crust
- 1 ½ cups all-purpose flour — (spooned and leveled, not scooped)
- ½ cup brown sugar, packed — (light or dark both work; dark gives deeper flavor)
- 1 teaspoon ground ginger
- 1 teaspoon ground cinnamon
- ¼ teaspoon ground cloves
- ¼ teaspoon salt
- ½ cup unsalted butter, cold and cut into small cubes
- 3 tablespoons molasses — (use unsulphured molasses for best results; I prefer Grandma’s brand)
For the Cheesecake Filling
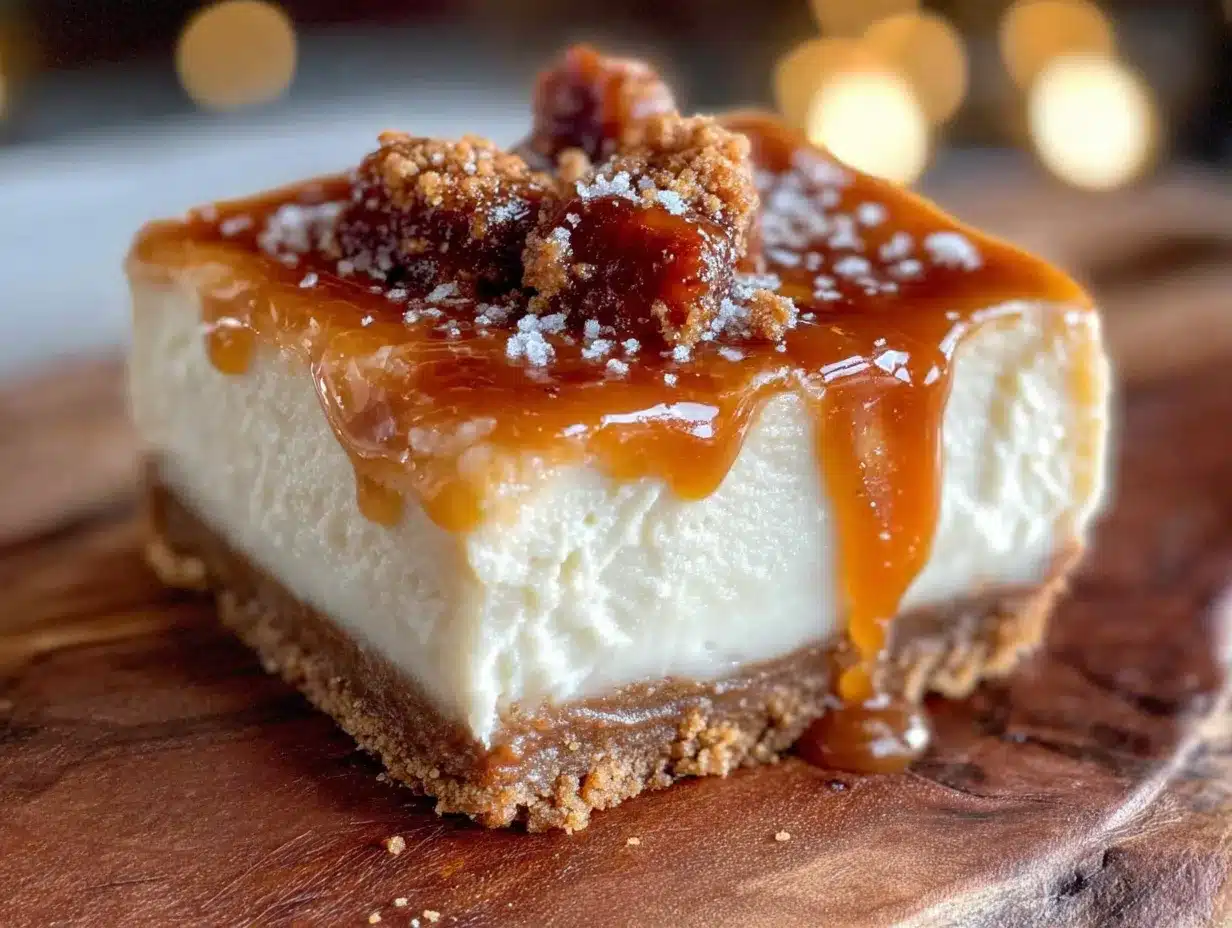
- 16 ounces cream cheese, softened — (two blocks, full-fat is best for texture)
- ½ cup granulated sugar
- ¼ cup brown sugar, packed
- 2 large eggs, room temperature
- ¼ cup sour cream — (adds richness and keeps the cheesecake creamy)
- 1 teaspoon vanilla extract
- 1 teaspoon ground ginger
- ½ teaspoon ground cinnamon
- ¼ teaspoon ground nutmeg
- Pinch of salt
Ingredient Tips: For the cream cheese, make sure it’s really softened. I leave mine out on the counter for at least an hour. If you try to mix cold cream cheese, you’ll end up with lumps that never quite go away. For the molasses, don’t use blackstrap molasses here — it’s too bitter and intense. Regular unsulphured molasses gives you that classic gingerbread flavor without overpowering everything else. And if you’re out of sour cream, plain Greek yogurt works great as a substitute.
Equipment Needed
You don’t need a professional bakery setup for these bars. Here is what you’ll need to pull this off:
- 9×9-inch baking pan — (an 8×8 works too, but your bars will be slightly thicker and need a few extra minutes of baking time)
- Parchment paper — (seriously, don’t skip this. It makes lifting the bars out so much easier)
- Electric mixer — (hand mixer or stand mixer both work fine)
- Large mixing bowls — (one for the crust, one for the filling)
- Food processor — (optional but helpful for the crust; you can also use a pastry cutter or your fingers)
- Spatula — (for scraping every last bit of cheesecake filling into the pan)
- Measuring cups and spoons
- Sharp knife — (for clean cuts; run it under hot water between slices)
If you don’t have a food processor, don’t worry. I’ve made this crust using my hands to work the butter into the flour, and it turns out just as good. It just takes a little more elbow grease. And honestly, using your hands to make the crust feels more like real baking anyway.
Preparation Method
Alright, let’s get into the kitchen and make these bars. I’ll walk you through every step so you know exactly what to look for. Trust me, if I can pull this off in a panic, you can nail it with a clear head.
- Preheat and prepare your pan. Preheat your oven to 350°F (175°C). Line your 9×9-inch baking pan with parchment paper, leaving some overhang on two sides. This creates little handles that make lifting the bars out a breeze later. Lightly spray the parchment with non-stick spray just to be safe.
- Make the crust. In a food processor, combine the flour, brown sugar, ginger, cinnamon, cloves, and salt. Pulse a few times to mix everything together. Add the cold butter cubes and pulse until the mixture looks like coarse sand with a few pea-sized butter pieces remaining. Drizzle in the molasses and pulse again until the dough starts to clump together. If you’re doing this by hand, use a pastry cutter or your fingertips to work the butter into the dry ingredients, then stir in the molasses with a fork.
- Press the crust into the pan. Dump the crust mixture into your prepared pan. Press it down firmly and evenly using your fingers or the bottom of a measuring cup. Make sure to get the edges and corners. This crust is your foundation, so take an extra minute to press it really well. Bake for 12-15 minutes, until the edges are just starting to turn golden and the kitchen smells amazing. Set it aside to cool slightly while you make the filling.
- Beat the cream cheese. In a large bowl, beat the softened cream cheese with an electric mixer on medium speed until it’s smooth and creamy — about 2 minutes. Scrape down the sides of the bowl with a spatula. This step is important because you don’t want any lumps hiding in there.
- Add the sugars. Add the granulated sugar and brown sugar to the cream cheese. Beat on medium speed until well combined and smooth, about 1 minute. Scrape the bowl again.
- Add the eggs one at a time. Crack one egg into the mixture and beat on low speed just until incorporated. Add the second egg and do the same. Over-mixing at this stage can add too much air and cause cracks later, so go slow and stop as soon as the yolk disappears.
- Add the remaining filling ingredients. Add the sour cream, vanilla extract, ginger, cinnamon, nutmeg, and pinch of salt. Mix on low speed until everything is combined and smooth. Give it one final scrape and stir by hand to make sure everything is evenly mixed.
- Pour the filling over the crust. Pour the cheesecake filling over the slightly cooled crust. Use your spatula to spread it evenly into the corners. Give the pan a gentle tap on the counter to release any air bubbles.
- Bake the bars. Place the pan in the preheated oven and bake for 30-35 minutes. The edges should be set and slightly puffed, but the center should still have a slight jiggle when you gently shake the pan. That jiggle is your friend — it means the center will be perfectly creamy after chilling.
- Cool completely. Remove the pan from the oven and place it on a wire rack. Let the bars cool at room temperature for about an hour. Then, carefully transfer the pan to the refrigerator and chill for at least 4 hours, but overnight is even better. This is the hardest part, I know, but the wait is worth it.
- Slice and serve. Once fully chilled, use the parchment handles to lift the entire block out of the pan. Place it on a cutting board and use a sharp knife to slice into squares. For the cleanest cuts, run your knife under hot water and wipe it dry between each slice.
Cooking Tips & Techniques
I’ve made these bars more times than I can count, and I’ve learned a few things the hard way. Here are my best tips to make sure yours turn out perfect every time.
Don’t over-bake the cheesecake. This is the number one mistake people make. That slight jiggle in the center is not a sign of undercooking — it’s the key to a creamy texture. If you bake until the center is completely firm, you’ll end up with a dry, crumbly cheesecake that cracks all over. Trust the jiggle.
Room temperature ingredients matter. I know it’s tempting to use cold eggs and cold cream cheese straight from the fridge, but trust me on this. Cold ingredients don’t blend smoothly, and you’ll end up with a lumpy filling. Set everything out on the counter at least an hour before you start baking. If you’re in a hurry, you can soften cream cheese in the microwave for about 15 seconds, but watch it carefully so it doesn’t start to melt.
Press that crust firmly. A loose crust will crumble when you try to cut the bars. I use the bottom of a flat measuring cup to really press it down into the pan. Get the edges and corners especially — those are the first places that tend to fall apart.
Use a water bath if you’re nervous about cracks. I don’t always use one, but if you want that perfectly smooth top, place your baking pan inside a larger roasting pan and pour hot water halfway up the sides of the smaller pan. The steam helps the cheesecake bake more gently. Just make sure your pan is wrapped tightly in foil so water doesn’t seep in.
Patience is a virtue. I once tried to cut into these bars after only two hours of chilling. It was a disaster. The cheesecake was still soft, and the slices looked like a mess. Let them chill the full four hours, or overnight if you can. The texture firms up beautifully, and the flavors have time to meld together.
Variations & Adaptations
One of the best things about this recipe is how easy it is to tweak. Here are some variations I’ve tried and loved.
Gluten-Free Version: Swap the all-purpose flour in the crust with a 1:1 gluten-free baking flour blend. I’ve used Bob’s Red Mill with great results. The crust will be slightly more crumbly, so press it extra firmly. The cheesecake filling is naturally gluten-free, so you’re almost there already.
Pumpkin Spice Twist: Add ¼ cup of pumpkin puree to the cheesecake filling and reduce the sour cream to 2 tablespoons. Swap the ginger and cinnamon for pumpkin pie spice. This gives you a pumpkin-gingerbread hybrid that’s perfect for Thanksgiving.
Chocolate Gingerbread: Melt 4 ounces of semi-sweet chocolate and swirl it into the cheesecake filling before baking. Use a knife to create a marbled effect. The chocolate pairs beautifully with the warm gingerbread spices, and it looks stunning on a dessert table.
Vegan Option: Use vegan cream cheese and vegan sour cream (I like Tofutti or Kite Hill). Substitute the eggs with ¼ cup of cornstarch mixed with ½ cup of water. The texture won’t be exactly the same, but it’s surprisingly close and still delicious.
Extra Spicy: If you like your gingerbread with a kick, add an extra ½ teaspoon of fresh grated ginger to the filling and a pinch of black pepper to the crust. It sounds weird, but black pepper actually enhances the warmth of the other spices.
Serving & Storage Suggestions
These bars are incredibly versatile when it comes to serving. Here is how I like to present and store them.
Serving: These bars are best served cold straight from the fridge. The cheesecake is firm and creamy, and the crust holds together perfectly. If you want to dress them up, add a dollop of whipped cream, a drizzle of caramel sauce, or a light dusting of powdered sugar. For a festive touch, I sometimes add a few fresh cranberries and a sprig of mint on top.
Pairings: These bars pair beautifully with a cup of hot coffee, a spiced chai latte, or a glass of cold milk. If you’re serving them as a dessert after a holiday meal, they go great with a scoop of vanilla bean ice cream or a side of warm apple compote.
Storage: Store the bars in an airtight container in the refrigerator for up to 5 days. I like to layer them between sheets of parchment paper so they don’t stick together. The flavors actually deepen after a day or two, so don’t be surprised if they taste even better on day three.
Freezing: These bars freeze beautifully. Wrap each individual bar tightly in plastic wrap, then place them in a freezer-safe bag or container. They’ll keep for up to 3 months. When you’re ready to enjoy one, just thaw it in the refrigerator overnight. I love having a stash in the freezer for unexpected guests or late-night cravings.
Reheating: I actually prefer these bars cold, but if you want a warm dessert, you can microwave a single bar for about 15-20 seconds. The cheesecake will soften slightly, and the spices will become more aromatic. Just don’t overdo it, or the cheesecake can get soupy.
Nutritional Information & Benefits
Let’s be real — these are a treat, not a health food. But here is the nutritional breakdown for one bar (based on 16 servings) so you know what you’re working with.
| Nutrient | Amount Per Serving |
|---|---|
| Calories | 285 |
| Total Fat | 16g |
| Saturated Fat | 9g |
| Cholesterol | 65mg |
| Sodium | 180mg |
| Total Carbohydrates | 32g |
| Dietary Fiber | 1g |
| Sugars | 22g |
| Protein | 5g |
On the bright side, ginger is known for its anti-inflammatory properties and can help with digestion. Cinnamon may help regulate blood sugar levels. And molasses contains some iron, calcium, and potassium. So while these bars are definitely a dessert, they’re not completely devoid of redeeming qualities. Everything in moderation, right?
Dietary Considerations: This recipe contains gluten, dairy, and eggs. For gluten-free and vegan options, see the variations section above. These bars are not suitable for a low-carb or keto diet due to the sugar content.
Conclusion
These Ultimate Gingerbread Cheesecake Bars with Molasses Crust have become my holiday secret weapon. They’re the dessert that looks like you spent hours on it, but really comes together in about 30 minutes of actual work. The combination of that buttery, spiced crust and the creamy, tangy cheesecake filling is just unbeatable. Every time I make them, someone asks for the recipe. And honestly, I love sharing it.
I hope you give these bars a try, whether you’re bringing them to a cookie swap, serving them at Christmas dinner, or just treating yourself on a cozy winter evening. Feel free to customize them to your taste — add more spice, try the chocolate swirl, or make them gluten-free. That’s the beauty of a good recipe. It’s a starting point, not a rulebook.
I’d love to hear how yours turn out! Drop a comment below and let me know if you tried any variations, or tag me in your photos on social media. Happy baking, friends. May your kitchen smell like gingerbread and your holidays be full of joy.
Frequently Asked Questions
Can I use a different size pan?
Yes, you can use an 8×8-inch pan, but your bars will be slightly thicker. You’ll need to increase the baking time by about 5-8 minutes. A 9×13-inch pan will give you thinner bars, and you should reduce the baking time by about 5 minutes. Just keep an eye on that center jiggle.
Can I make these bars ahead of time?
Absolutely. In fact, I recommend it. These bars need at least 4 hours to chill, but they actually taste better after a day or two in the fridge. You can make them up to 3 days in advance and store them covered in the refrigerator.
Why did my cheesecake crack?
Cracks usually happen from over-baking or from a sudden change in temperature. Make sure you don’t bake past that slight jiggle in the center, and let the bars cool gradually at room temperature before refrigerating. A water bath can also help prevent cracks.
Can I freeze these bars?
Yes, they freeze beautifully. Wrap each bar individually in plastic wrap, then place them in a freezer bag. They’ll keep for up to 3 months. Thaw overnight in the refrigerator before serving.
Can I use light cream cheese instead of full-fat?
You can, but the texture won’t be as rich and creamy. Light cream cheese has more water content, which can make the filling slightly less firm. If you’re watching calories, you can use a mix of half full-fat and half light cream cheese for a decent compromise.
Pin This Recipe!
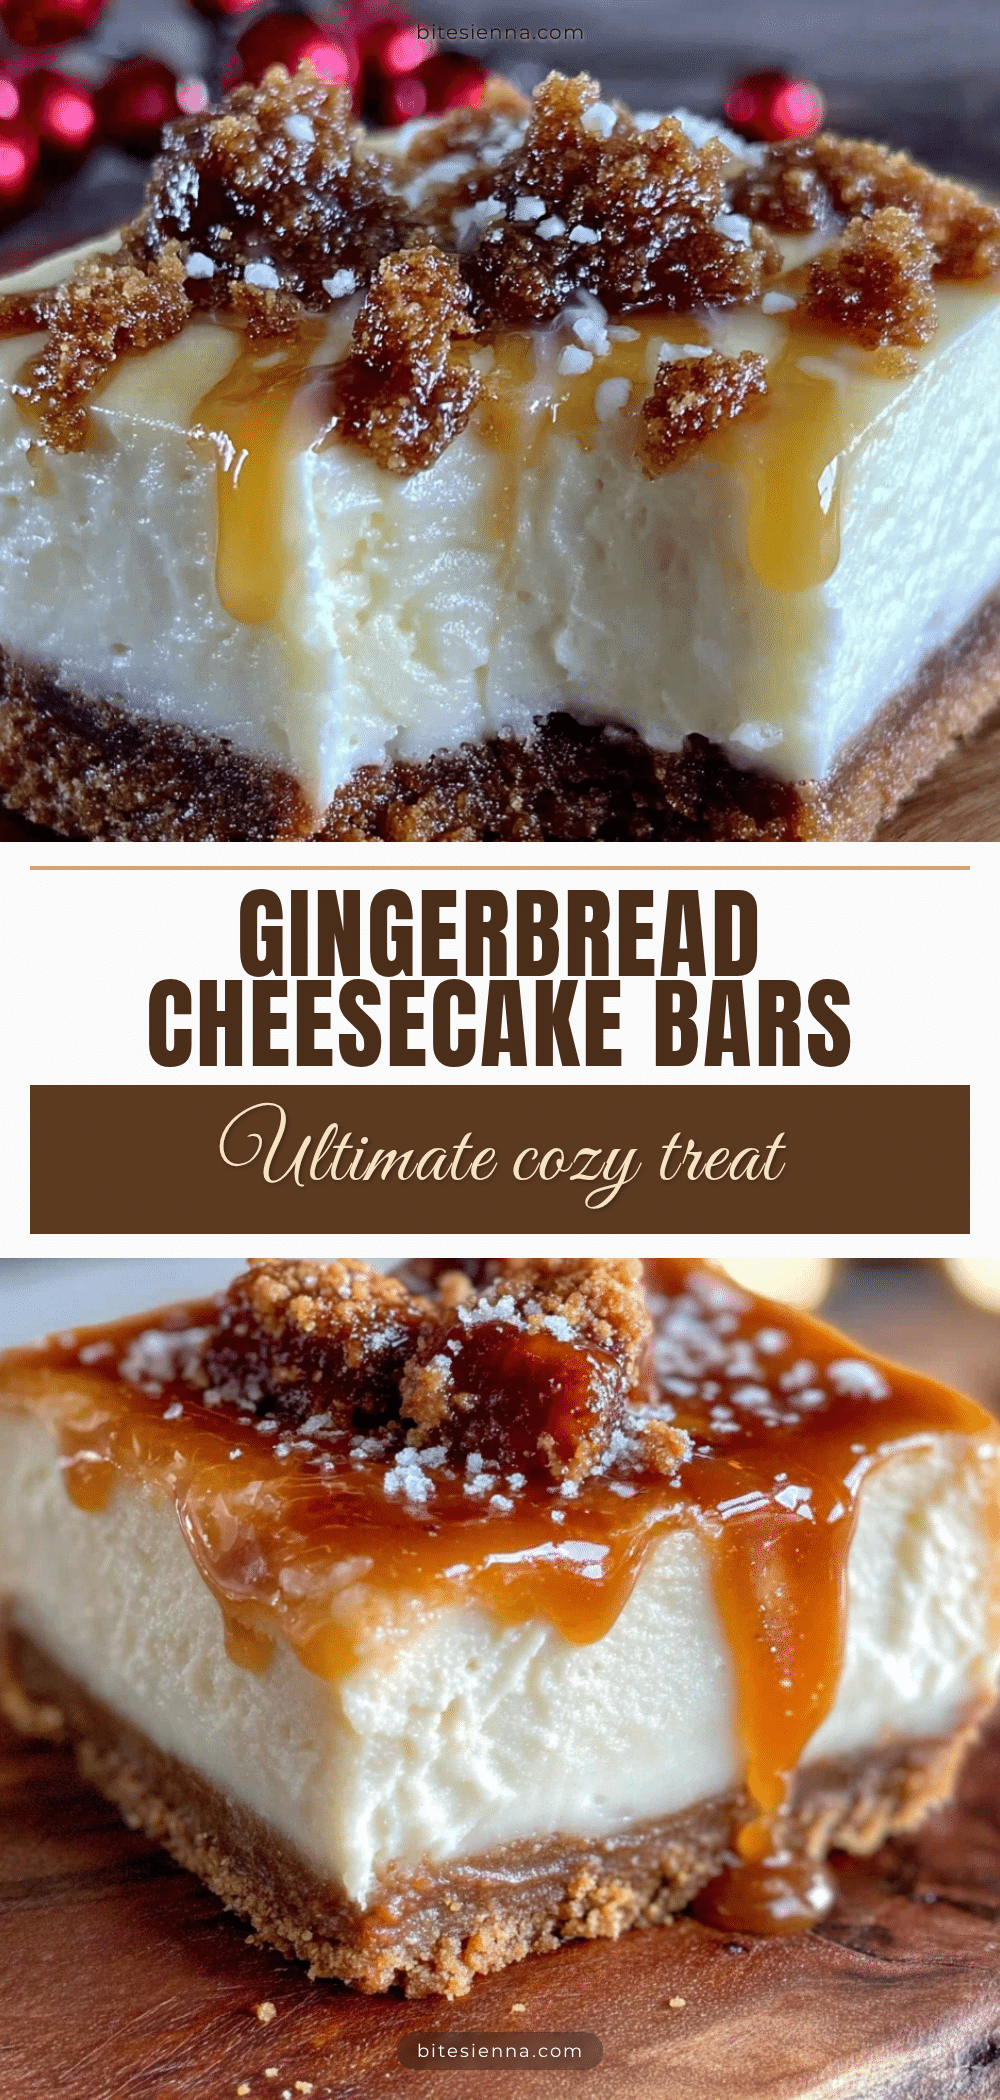
Ultimate Gingerbread Cheesecake Bars with Molasses Crust
These Ultimate Gingerbread Cheesecake Bars feature a rich, creamy cheesecake layer on a real molasses cookie crust, perfect for holiday cookie swaps, Christmas brunch, or a cozy dessert. Quick and easy to make with simple ingredients, they’re a crowd-pleasing treat that tastes like Christmas magic.
- Prep Time: 30 minutes
- Cook Time: 30 minutes
- Total Time: 4 hours 30 minutes (includes chilling)
- Yield: 16 servings 1x
- Category: Dessert
- Cuisine: American
Ingredients
- 1 ½ cups all-purpose flour (spooned and leveled)
- ½ cup brown sugar, packed (light or dark)
- 1 teaspoon ground ginger
- 1 teaspoon ground cinnamon
- ¼ teaspoon ground cloves
- ¼ teaspoon salt
- ½ cup unsalted butter, cold and cut into small cubes
- 3 tablespoons unsulphured molasses (e.g., Grandma’s brand)
- 16 ounces cream cheese, softened (two blocks, full-fat)
- ½ cup granulated sugar
- ¼ cup brown sugar, packed
- 2 large eggs, room temperature
- ¼ cup sour cream
- 1 teaspoon vanilla extract
- 1 teaspoon ground ginger
- ½ teaspoon ground cinnamon
- ¼ teaspoon ground nutmeg
- Pinch of salt
Instructions
- Preheat oven to 350°F (175°C). Line a 9×9-inch baking pan with parchment paper, leaving overhang on two sides. Lightly spray with non-stick spray.
- Make the crust: In a food processor, combine flour, brown sugar, ginger, cinnamon, cloves, and salt. Pulse to mix. Add cold butter cubes and pulse until mixture resembles coarse sand with a few pea-sized butter pieces. Drizzle in molasses and pulse until dough starts to clump together. (Alternatively, use a pastry cutter or fingertips to work butter into dry ingredients, then stir in molasses with a fork.)
- Press crust mixture firmly and evenly into prepared pan using fingers or bottom of a measuring cup. Bake for 12-15 minutes until edges are just golden. Set aside to cool slightly.
- Beat softened cream cheese with an electric mixer on medium speed until smooth and creamy, about 2 minutes. Scrape down sides of bowl.
- Add granulated sugar and brown sugar; beat on medium speed until well combined and smooth, about 1 minute. Scrape bowl again.
- Add eggs one at a time, beating on low speed just until incorporated after each addition. Do not over-mix.
- Add sour cream, vanilla extract, ginger, cinnamon, nutmeg, and pinch of salt. Mix on low speed until combined and smooth. Scrape and stir by hand.
- Pour cheesecake filling over slightly cooled crust; spread evenly. Tap pan gently on counter to release air bubbles.
- Bake for 30-35 minutes until edges are set and slightly puffed, but center still has a slight jiggle when shaken.
- Cool at room temperature for about 1 hour, then refrigerate for at least 4 hours (overnight is best).
- Use parchment handles to lift bars out of pan. Slice into squares with a sharp knife (run knife under hot water and wipe dry between slices for clean cuts).
Notes
Don’t over-bake the cheesecake; the center should jiggle slightly. Use room temperature ingredients for a smooth filling. Press the crust firmly to prevent crumbling. For a perfectly smooth top, use a water bath (place pan in a larger roasting pan with hot water halfway up sides, wrapped in foil). Chill at least 4 hours or overnight for best texture. Store in an airtight container in the refrigerator for up to 5 days. Freeze individual bars wrapped in plastic wrap for up to 3 months.
Nutrition
- Serving Size: 1 bar
- Calories: 285
- Sugar: 22
- Sodium: 180
- Fat: 16
- Saturated Fat: 9
- Carbohydrates: 32
- Fiber: 1
- Protein: 5
Keywords: gingerbread cheesecake bars, holiday dessert, cookie swap, Christmas dessert, molasses crust, cheesecake bars, gingerbread


