I wasn’t trying to invent anything new. Honestly, I was just staring at a half-eaten bag of candy corn on my counter last October, feeling a little guilty about ignoring it. I’d bought it on a whim at the grocery store because the display was just so cheerful, you know? But candy corn straight from the bag? It’s fine, but it’s not exactly a showstopper. I was about to make my usual sugar cookie bars for a casual get-together at my neighbor’s place when my eyes landed on that bag again. And then, it just clicked. What if I didn’t just eat the candy corn—what if I baked it right into something?
So, I did. I chopped up a handful of those little tri-colored triangles and pressed them into my standard cookie dough. I slid the pan into the oven, not really sure what to expect. When I pulled them out, the kitchen smelled like butter and vanilla, and the candy corn had melted into these gorgeous, jewel-toned pockets of color. It looked like autumn had exploded in my baking dish. My neighbor, a woman named Carol who has been making the same pumpkin roll for thirty years and doesn’t think twice about it, took one bite and just stopped talking for a second. She just looked at the bar, then at me, and said, “Well, that’s clever.” Coming from Carol, that’s a five-star review.
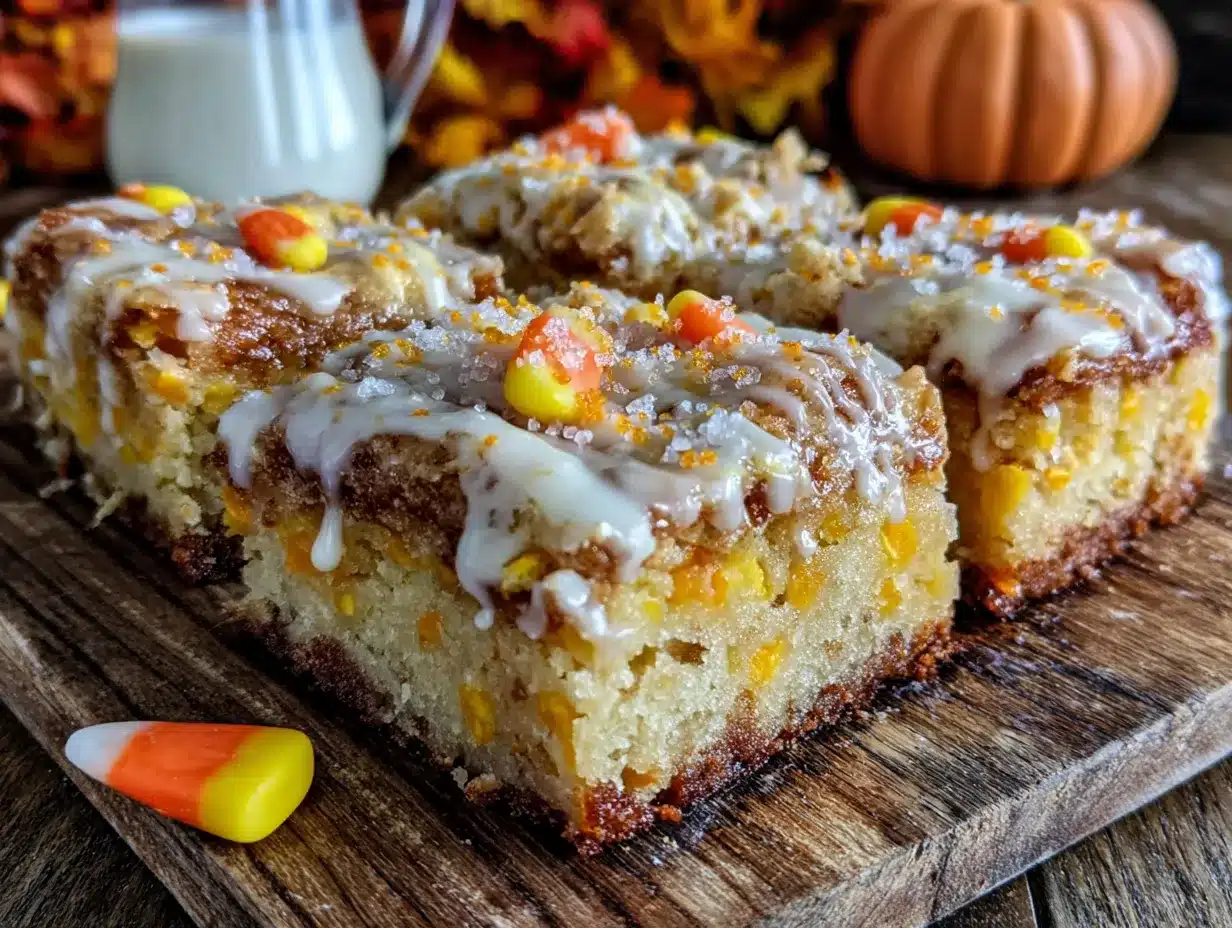
These Easy Candy Corn Sugar Cookie Bars are exactly that—a clever, no-fuss way to turn a polarizing Halloween candy into something everyone fights over. You get the soft, buttery, chewy texture of a classic sugar cookie bar, but studded with little bursts of sweet, slightly waxy candy corn that melts into the most wonderful gooey pockets. It’s the kind of dessert that makes people smile before they even taste it. And the best part? You don’t need a mixer, you don’t need any fancy techniques, and you probably already have everything in your pantry except the candy corn. Let me tell you, if you’ve been looking for a way to use up that leftover candy without just eating it by the handful, this is your recipe.
Why You’ll Love This Recipe
I’ve tested this recipe about five times to get the texture just right, and let me tell you, it was a delicious journey. The first batch came out a little too cakey, and the candy corn sank to the bottom. The second batch was too flat. But the third? That was the sweet spot. Here’s why these bars are going to become your new fall go-to:
- Quick & Easy: From start to finish, these come together in about 35 minutes. No chilling the dough, no rolling out, no cookie cutters. Just mix, press, and bake. It’s perfect for those after-school baking sessions or when a craving hits out of nowhere.
- Simple Ingredients: You need basic baking staples—butter, sugar, flour, an egg, vanilla, and a bag of candy corn. That’s it. No trips to a specialty store for weird extracts or hard-to-find decorations.
- Perfect for Halloween Parties & Fall Gatherings: These bars are a total showstopper on any dessert table. They’re festive without being over-the-top, and they’re a great alternative to cupcakes that always seem to get squished. Plus, they’re easy to cut into neat squares for a crowd.
- Unbelievably Delicious: The texture is incredible. You get a soft, tender crumb with these delightful pockets of melted candy corn that turn into a sort of fruity, sweet caramel. It’s a flavor and texture combo that just works.
- Crowd-Pleaser: I brought a batch to my book club, and even the self-proclaimed “candy corn haters” were reaching for seconds. There’s something about it being baked into a buttery cookie that changes the whole game. It becomes less about the candy and more about the overall experience.
Honestly, this recipe isn’t just good—it’s the kind that makes you close your eyes after the first bite. It’s comfort food with a playful, nostalgic twist. And it’s perfect for when you want to impress people without breaking a sweat.
What Ingredients You Will Need
This recipe relies on a simple, foolproof sugar cookie base. The magic happens when you add the candy corn, which softens and melts into little pools of sweetness as it bakes. Here’s everything you’ll need:
- Unsalted Butter: 1/2 cup (1 stick or 113g), melted and slightly cooled. Using melted butter is the secret to these bars’ dense, chewy texture. It also means you don’t need a stand mixer.
- Light Brown Sugar: 1 cup (200g), packed. I prefer brown sugar over white here because it adds a subtle molasses flavor that plays beautifully with the candy corn and keeps the bars incredibly moist. You can use dark brown sugar for an even deeper flavor.
- Granulated Sugar: 1/4 cup (50g). This helps with the structure and gives the bars a slightly crispier top edge.
- Large Egg: 1, at room temperature. This binds everything together and adds richness. If you forget to take it out of the fridge, just place it in a bowl of warm water for 5 minutes.
- Vanilla Extract: 1 teaspoon. Pure vanilla extract is best for that classic cookie flavor. I prefer Nielsen-Massey for its rich, floral notes.
- All-Purpose Flour: 1 and 3/4 cups (220g). Spoon and level it into your measuring cup—don’t scoop directly from the bag, or you’ll end up with dry bars.
- Baking Soda: 1/2 teaspoon. This helps the bars spread just a little and become tender.
- Salt: 1/2 teaspoon. A necessary ingredient to balance the sweetness. I use fine sea salt.
- Candy Corn: 1 and 1/2 cups (about 225g), roughly chopped. You don’t need to chop them super fine—just halve or quarter them so they distribute evenly. If you skip the chopping, the larger pieces can sometimes create air pockets or melt unevenly. I recommend Brach’s for the classic flavor that holds up well during baking.
Substitution Guidance:
- For a gluten-free version, substitute the all-purpose flour with a 1:1 gluten-free baking blend that contains xanthan gum. King Arthur Measure for Measure works perfectly here.
- If you’re not a fan of candy corn, you can swap it for chopped-up candy pumpkins, or even butterscotch chips for a different fall flavor profile.
- To make these dairy-free, use a plant-based butter stick (like Miyoko’s or Country Crock Plant Butter).
Equipment Needed
You don’t need a fancy kitchen to make these bars. Here’s what you’ll need to have on hand:
- 8×8-inch Square Baking Pan: This is the perfect size for thick, fluffy bars. A 9×9-inch pan will work, but your bars will be thinner and will bake faster, so start checking them around 17 minutes.
- Parchment Paper: Non-negotiable! Lining your pan with parchment paper with overhanging edges makes it so easy to lift the entire slab of bars out for clean cutting. I’ve tried greasing the pan, and the bars always stick a little. Parchment paper is your best friend here.
- Mixing Bowls: One medium bowl for the wet ingredients and one large bowl for the dry ingredients.
- Whisk: For combining the wet ingredients and for mixing the dry ingredients.
- Rubber Spatula: For folding the dry ingredients into the wet and for pressing the dough into the pan.
- Sharp Knife or Bench Scraper: For chopping the candy corn. A chef’s knife works great, but a bench scraper is easier to clean the sticky residue off.
- Cooling Rack: Essential for letting the bars cool completely before you cut them. Cutting them while they’re warm is a recipe for a crumbly mess.
Preparation Method
- Preheat and Prep: Preheat your oven to 350°F (175°C). Line your 8×8-inch baking pan with a sheet of parchment paper, leaving about 2 inches of overhang on two opposite sides. This will be your “handle” to lift the bars out later.
- Chop the Candy Corn: Take your 1 and 1/2 cups of candy corn and give them a rough chop. Don’t stress about making them perfect—just cut each piece in half or into thirds. You’ll get some sticky bits on your knife; that’s totally normal. Just wipe it off with a paper towel between batches. Set the chopped candy corn aside.
- Mix the Wet Ingredients: In a medium bowl, combine the 1/2 cup of melted (and slightly cooled) butter with 1 cup of packed light brown sugar and 1/4 cup of granulated sugar. Whisk them together until they are well combined and the mixture looks like wet sand. It should be smooth and glossy.
- Add Egg and Vanilla: Crack the large egg into the butter-sugar mixture and add the 1 teaspoon of vanilla extract. Whisk vigorously for about 30 seconds until everything is fully incorporated and the batter looks a little lighter in color. This step is important—it helps create a nice, shiny top on your bars.
- Combine Dry Ingredients: In a separate, larger bowl, whisk together 1 and 3/4 cups of all-purpose flour, 1/2 teaspoon of baking soda, and 1/2 teaspoon of salt. Make sure there are no lumps of baking soda.
- Bring It Together: Pour the wet ingredients into the bowl with the dry ingredients. Using a rubber spatula, fold everything together gently. Mix just until you no longer see streaks of flour. Overmixing here will make your bars tough. The dough will be very thick and a little sticky—that’s exactly what you want.
- Fold in the Candy Corn: Add the chopped candy corn to the dough. Fold it in with your spatula, making sure it’s evenly distributed throughout the dough. You might feel like the candy corn is just sitting on top, but keep folding—it will incorporate itself.
- Press into the Pan: Transfer the dough to your prepared baking pan. It will be thick, so use your spatula or your fingers (lightly dampened with water to prevent sticking) to press it into an even layer. Make sure it reaches all the corners. The dough will be about 3/4-inch thick.
- Bake: Place the pan on the middle rack of your preheated oven. Bake for 20 to 25 minutes. The edges should be golden brown and set, and the center should look just slightly underdone and puffy. A toothpick inserted into the center should come out with a few moist crumbs, but not wet batter. My oven runs a little hot, so I start checking at 18 minutes.
- Cool Completely: This is the hardest part! Place the pan on a wire cooling rack and let the bars cool completely in the pan. This takes about 1 to 2 hours. The bars are very fragile when warm because the candy corn is still molten. Cutting them too early will result in a gooey, sticky mess. Once completely cool, use the parchment paper overhangs to lift the entire slab out of the pan. Place it on a cutting board.
- Cut and Serve: Using a sharp chef’s knife, slice the slab into 9 large squares or 16 smaller bars. Wipe the knife clean between cuts for the neatest edges.
Cooking Tips & Techniques
I’ve made a few mistakes with these bars so you don’t have to. Here are the things I learned the hard way:
- Don’t Skip the Chop: The first time I made these, I just threw whole candy corns into the dough. Big mistake. They created weird, hollow pockets in the bars where the candy melted away. Chopping them ensures they distribute evenly and melt into thin, delicious layers rather than leaving empty spaces.
- Use a Light Touch: When you’re mixing the dough, stop as soon as the flour disappears. The more you mix, the more gluten develops, and the tougher your bars will be. We’re going for tender, not tough.
- The Toothpick Test is Tricky: Because of the melted candy corn, a toothpick inserted into the center can sometimes come out looking wet even when the bars are done. Look for visual cues: the edges should be a deep golden brown, and the center should look puffed and set, not jiggly. The top will have a slight sheen from the melted candy.
- Patience is a Virtue: I know, I know. The smell is incredible. But cutting these bars while they’re still warm is a guaranteed way to ruin them. The candy corn acts like hot glue. Let them cool completely, and I promise you’ll be rewarded with perfect, clean squares.
- For Cleaner Cuts: If you’re a perfectionist, chill the entire slab in the refrigerator for 15 minutes after it’s cooled to room temperature. Then, use a long, sharp knife and wipe it clean with a damp paper towel between each cut. You’ll get bakery-level edges.
Variations & Adaptations
This recipe is a fantastic base for all sorts of fun twists. Here are a few ways I’ve played around with it:
- Chocolate Drizzle: After the bars have cooled completely, melt 1/2 cup of semi-sweet chocolate chips with 1 teaspoon of coconut oil in the microwave in 30-second bursts. Drizzle it over the bars for a beautiful presentation and a delicious flavor contrast. The slight bitterness of the chocolate is perfect against the sweet candy corn.
- Spiced Up: Add 1 teaspoon of pumpkin pie spice or apple pie spice to the dry ingredients. This gives the bars a warm, cozy fall flavor that complements the candy corn beautifully. I did this for a Thanksgiving potluck, and they vanished.
- Funfetti Style: Swap the candy corn for 1/2 cup of rainbow sprinkles or fall-themed sprinkles. This is a great option if you want the soft sugar cookie bar texture without the candy corn. Kids absolutely love this version.
- Peanut Butter Swirl: Warm up 1/4 cup of creamy peanut butter in the microwave for about 15 seconds so it’s drizzle-able. Drop spoonfuls of it on top of the dough in the pan, then use a knife to gently swirl it in before baking. The salty peanut butter is a fantastic foil for the sweet candy corn.
- Gluten-Free Adaptation: As mentioned, swap the all-purpose flour for a 1:1 gluten-free baking blend. I’ve tested this with King Arthur Measure for Measure, and the texture was spot on—soft, chewy, and not at all gritty.
Serving & Storage Suggestions
Serving: These bars are best served at room temperature. The texture is perfectly soft and chewy. You can serve them on a pretty platter for a Halloween party, or just grab one straight from the pan with a glass of cold milk (my preferred method). They’re fantastic on their own, but a scoop of vanilla ice cream on the side takes them to another level.
Storage: Store any leftover bars in an airtight container at room temperature for up to 4 days. I like to place a piece of bread in the container with them—it absorbs excess moisture and keeps the bars soft. The bread will get hard, but your bars will stay perfect.
Freezing: These bars freeze beautifully! Once they are completely cooled and cut, place them in a single layer on a baking sheet and freeze for about an hour until solid. Then, transfer the frozen bars to a freezer-safe zip-top bag or container. They will keep for up to 3 months. To thaw, just leave them on the counter for about 30 minutes. You can also pop a frozen bar in the microwave for about 15 seconds for a warm, gooey treat.
Flavor Development: Honestly, these bars taste even better the day after they’re baked. The flavors meld together, and the texture becomes even more tender. So feel free to make them a day ahead of your party!
Nutritional Information & Benefits
Let’s be real—these are a treat, and they’re meant to be enjoyed as such. But here’s a rough estimate for one bar (based on 9 servings):
Estimated Nutritional Values (per bar):
- Calories: ~380
- Fat: 12g
- Carbohydrates: 65g
- Sugar: 45g
- Protein: 3g
While these aren’t a health food, there is a small upside. The butter provides a little vitamin A, and the egg adds a bit of protein. From a wellness perspective, I love that this recipe uses simple, recognizable ingredients. There’s nothing artificial or weird in the base dough. The candy corn is the only processed element, and honestly, a little bit of nostalgic fun is good for the soul.
Dietary Considerations:
- Contains: Wheat (gluten), Dairy, Eggs.
- Can be made gluten-free and dairy-free with the substitutions listed above.
My personal take? Food is about joy and connection. A batch of these bars shared with friends or family is a beautiful thing. Balance is key, and these are perfect for a special occasion or a weekend treat.
Conclusion
So there you have it—Easy Candy Corn Sugar Cookie Bars that are bound to become a new fall tradition in your kitchen. They’re everything you want in a dessert: easy to make, ridiculously delicious, and just a little bit playful. I love how they take a candy that people either love or hate and turn it into something universally adored. It’s like a little magic trick in a baking pan.
I’d love for you to try this recipe and make it your own. Maybe you’ll add a sprinkle of sea salt on top, or maybe you’ll swap in some chocolate chips. The beauty of a simple base recipe like this is that it invites customization. Don’t be afraid to experiment!
If you do make them, please come back and let me know how they turned out in the comments below. Did you try a fun variation? Did your kids love them? I read every single comment, and your stories are what make this whole blogging thing so worthwhile. Happy baking, and here’s to a fall full of sweet, buttery moments!
Frequently Asked Questions
1. Can I use salted butter instead of unsalted?
Yes, you can! Just reduce the added salt in the recipe to 1/4 teaspoon. Salted butter can vary in saltiness between brands, so this is a safe way to avoid an overly salty dough.
2. My candy corn sank to the bottom of the pan. What did I do wrong?
This usually happens if the dough is too thin or wet. Make sure you’re using the correct amount of flour (spooned and leveled) and that your butter isn’t too hot. If the dough is very soft, you can pop it in the fridge for 15 minutes before baking to help the candy corn stay suspended.
3. Can I use a different size pan?
A 9×9-inch pan will work, but your bars will be thinner and will bake faster—start checking for doneness around 17 minutes. A 9×13-inch pan will make very thin bars and is not recommended for this recipe.
4. My bars came out very dry. How can I fix this?
Overbaking is the most common culprit. Oven temperatures can vary wildly, so I always recommend checking your bars a few minutes before the suggested time. Also, make sure you’re measuring your flour correctly—scooping directly from the bag can pack in too much flour, leading to dry bars.
5. Can I make the dough ahead of time?
Absolutely! You can prepare the dough, press it into the lined pan, cover it tightly with plastic wrap, and refrigerate it for up to 2 days before baking. You may need to add a couple of extra minutes to the baking time since you’re starting with a cold pan of dough.
Pin This Recipe!
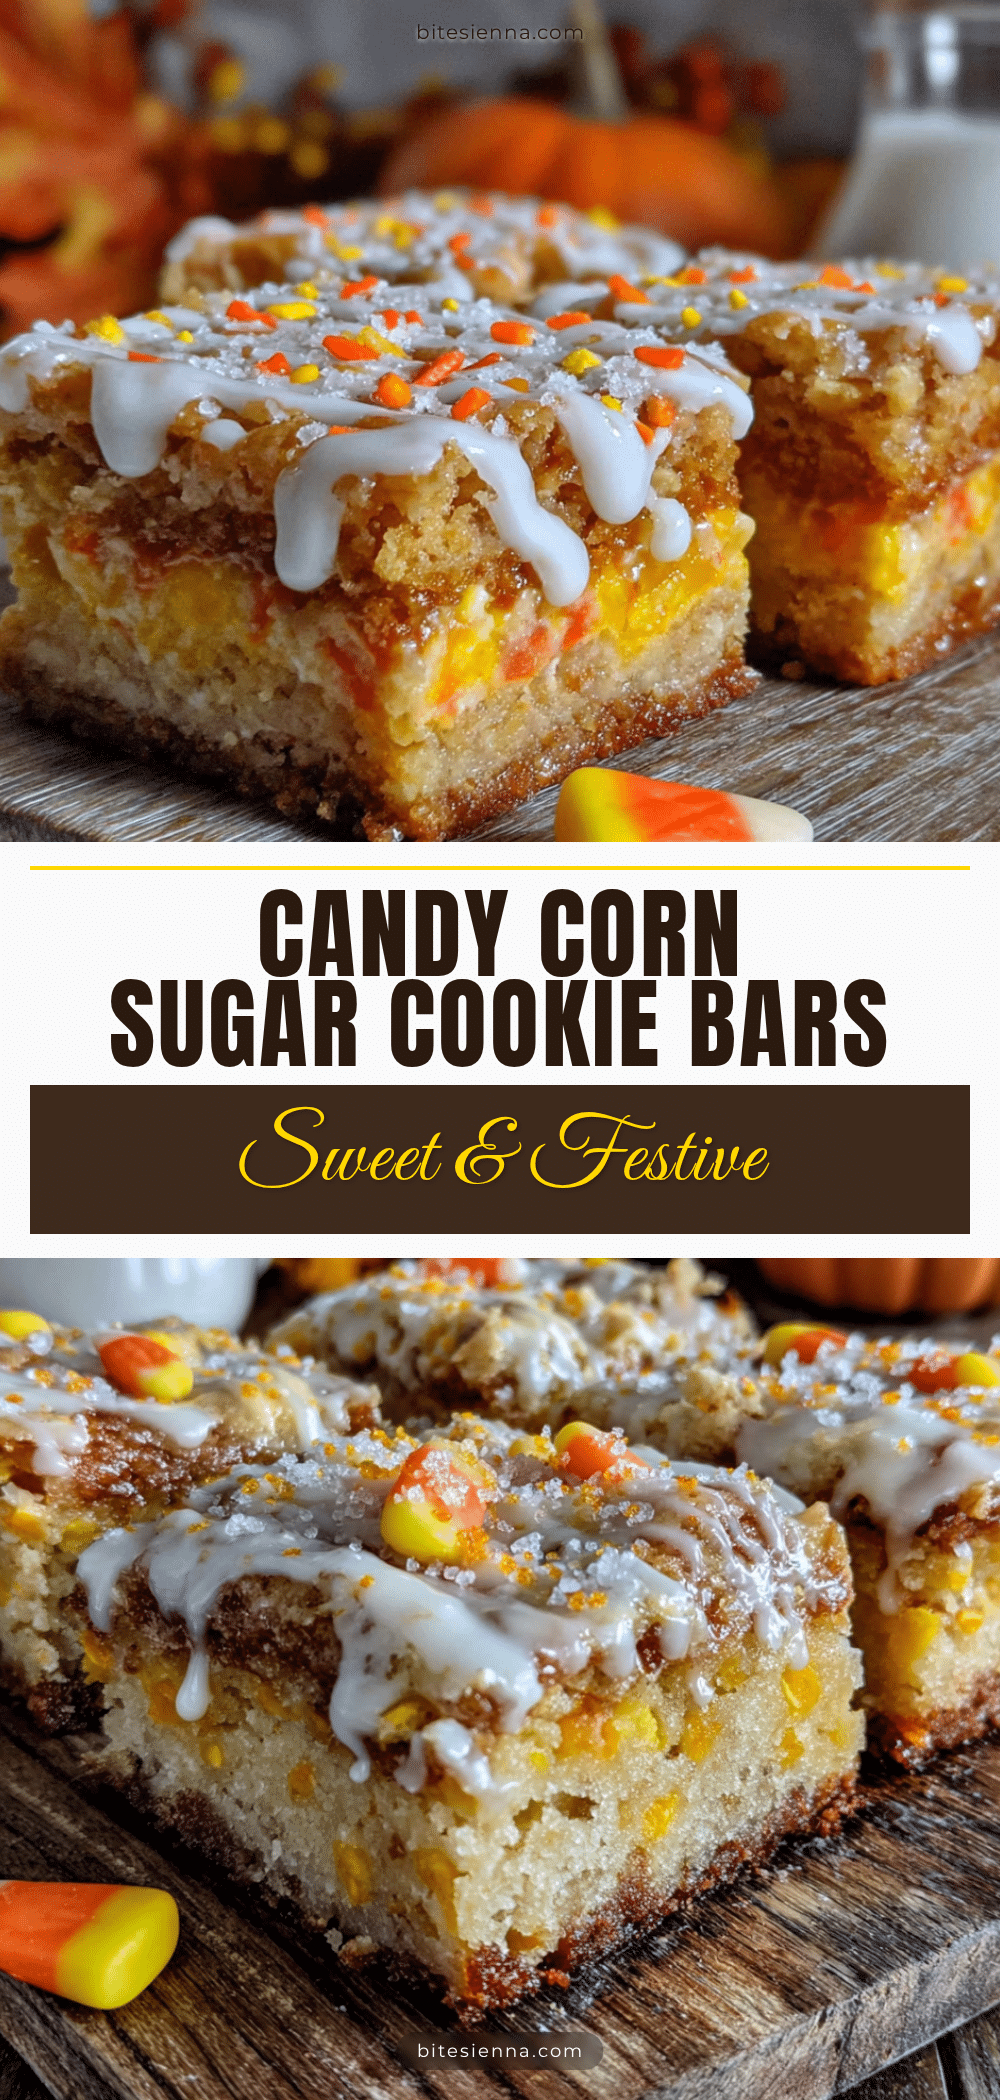
Easy Candy Corn Sugar Cookie Bars: Perfect Fall Dessert
These Easy Candy Corn Sugar Cookie Bars are a clever, no-fuss way to turn a polarizing Halloween candy into something everyone fights over. You get the soft, buttery, chewy texture of a classic sugar cookie bar, studded with little bursts of sweet candy corn that melts into wonderful gooey pockets.
- Prep Time: 10 minutes
- Cook Time: 25 minutes
- Total Time: 35 minutes
- Yield: 9 servings 1x
- Category: Dessert
- Cuisine: American
Ingredients
- 1/2 cup (1 stick or 113g) unsalted butter, melted and slightly cooled
- 1 cup (200g) light brown sugar, packed
- 1/4 cup (50g) granulated sugar
- 1 large egg, at room temperature
- 1 teaspoon vanilla extract
- 1 and 3/4 cups (220g) all-purpose flour
- 1/2 teaspoon baking soda
- 1/2 teaspoon salt
- 1 and 1/2 cups (about 225g) candy corn, roughly chopped
Instructions
- Preheat your oven to 350°F (175°C). Line an 8×8-inch baking pan with parchment paper, leaving about 2 inches of overhang on two opposite sides.
- Roughly chop the candy corn into halves or thirds. Set aside.
- In a medium bowl, whisk together the melted butter, light brown sugar, and granulated sugar until well combined and smooth.
- Add the egg and vanilla extract, whisk vigorously for about 30 seconds until fully incorporated and the batter looks slightly lighter in color.
- In a separate large bowl, whisk together the flour, baking soda, and salt.
- Pour the wet ingredients into the dry ingredients. Fold together with a rubber spatula until just combined and no streaks of flour remain. The dough will be thick and slightly sticky.
- Fold in the chopped candy corn until evenly distributed.
- Transfer the dough to the prepared pan. Press it into an even layer using a spatula or lightly dampened fingers.
- Bake on the middle rack for 20 to 25 minutes, until the edges are golden brown and the center looks puffy and slightly underdone. A toothpick inserted into the center should come out with a few moist crumbs.
- Cool the bars completely in the pan on a wire rack, about 1 to 2 hours.
- Once cool, use the parchment paper overhangs to lift the slab out of the pan. Place on a cutting board and slice into 9 large squares or 16 smaller bars.
Notes
Don’t skip chopping the candy corn to avoid hollow pockets. Use a light touch when mixing to keep bars tender. Let bars cool completely before cutting to avoid a sticky mess. For cleaner cuts, chill the slab for 15 minutes before slicing.
Nutrition
- Serving Size: 1 bar (based on 9 se
- Calories: 380
- Sugar: 45
- Sodium: 220
- Fat: 12
- Saturated Fat: 7
- Carbohydrates: 65
- Fiber: 1
- Protein: 3
Keywords: candy corn, sugar cookie bars, fall dessert, Halloween dessert, easy cookie bars


