My neighbor asked why I couldn’t just make the pumpkin pie filling and bake it in a pan lined with crushed cookies instead of fussing with a traditional crust. I started to explain why that wouldn’t work — then stopped. Honestly, I had no good reason. I’d just never thought to try it.
That was two Septembers ago, right when the leaves started turning and the grocery stores began stacking canned pumpkin into those glorious pyramids that signal fall is officially here. I was prepping for our annual block party dessert table, and I had already burned through three pie crusts that morning. They kept cracking, shrinking, or just looking sad. My neighbor watched me curse at the fourth one and casually suggested I just skip the whole rolling pin drama. I almost laughed it off. But there was something about her confidence that made me pause.
So I grabbed a box of gingersnaps — the kind I usually eat straight from the bag while standing in front of the pantry — and crushed them with my hands (because who has time to find the food processor?). I mixed them with butter, pressed the crumbs into a 9×13 pan, and poured my standard pumpkin pie filling right on top. I mean, I was fully prepared for a crumbly, soggy mess. But let me tell you, when those bars came out of the oven, the kitchen smelled like a bakery and a holiday party had a beautiful baby. The crust held together perfectly. The filling set up smooth and creamy. And the best part? I made them on a Wednesday and served them on a Saturday, and they were somehow even better.
You know that feeling when you stumble onto something so simple you can’t believe it took you this long to figure it out? That’s exactly what these Perfect Make-Ahead Pumpkin Pie Bars with Gingersnap Crust are. They’ve become my non-negotiable fall dessert, the one I bring to every gathering, and the one people ask for by name. I keep making them because they taste like the season, minus the stress.
Why You’ll Love This Recipe
Let’s be real for a second — traditional pumpkin pie is wonderful, but it’s also kind of a diva. The crust can crack, the filling can weep, and you’re stuck babysitting the oven when you’d rather be visiting with guests. These Perfect Make-Ahead Pumpkin Pie Bars with Gingersnap Crust solve every single one of those problems. I’ve tested this recipe at least a dozen times across different ovens, different pans, and different levels of distracted multitasking. It works every single time.
- Make-Ahead Magic : These bars actually improve after a day or two in the fridge. The flavors meld together, the crust stays perfectly firm, and you can cross dessert off your list 48 hours before your party starts.
- No Rolling Pin Required : The gingersnap crust comes together in about five minutes with just your hands or a food processor. No chilling, no rolling, no patching cracks.
- Perfect for Crowds : A 9×13 pan yields 24 generous bars, which means you can feed a whole Thanksgiving table without making multiple pies.
- Simple Ingredients : You probably already have most of these in your pantry. The gingersnaps are the only specialty item, and they’re available at any grocery store.
- Foolproof Texture : The filling sets up beautifully every time — no cracks, no weeping, just silky smooth pumpkin goodness on top of a crunchy, spiced crust.
What makes these bars different from every other pumpkin bar recipe out there is the crust-to-filling ratio. Most recipes give you a thin layer of crust that gets soggy. I spent weeks tweaking the proportions until the gingersnap layer stayed crunchy even after three days in the fridge. The secret is a slightly higher butter-to-crumb ratio and a quick pre-bake that locks everything in place.
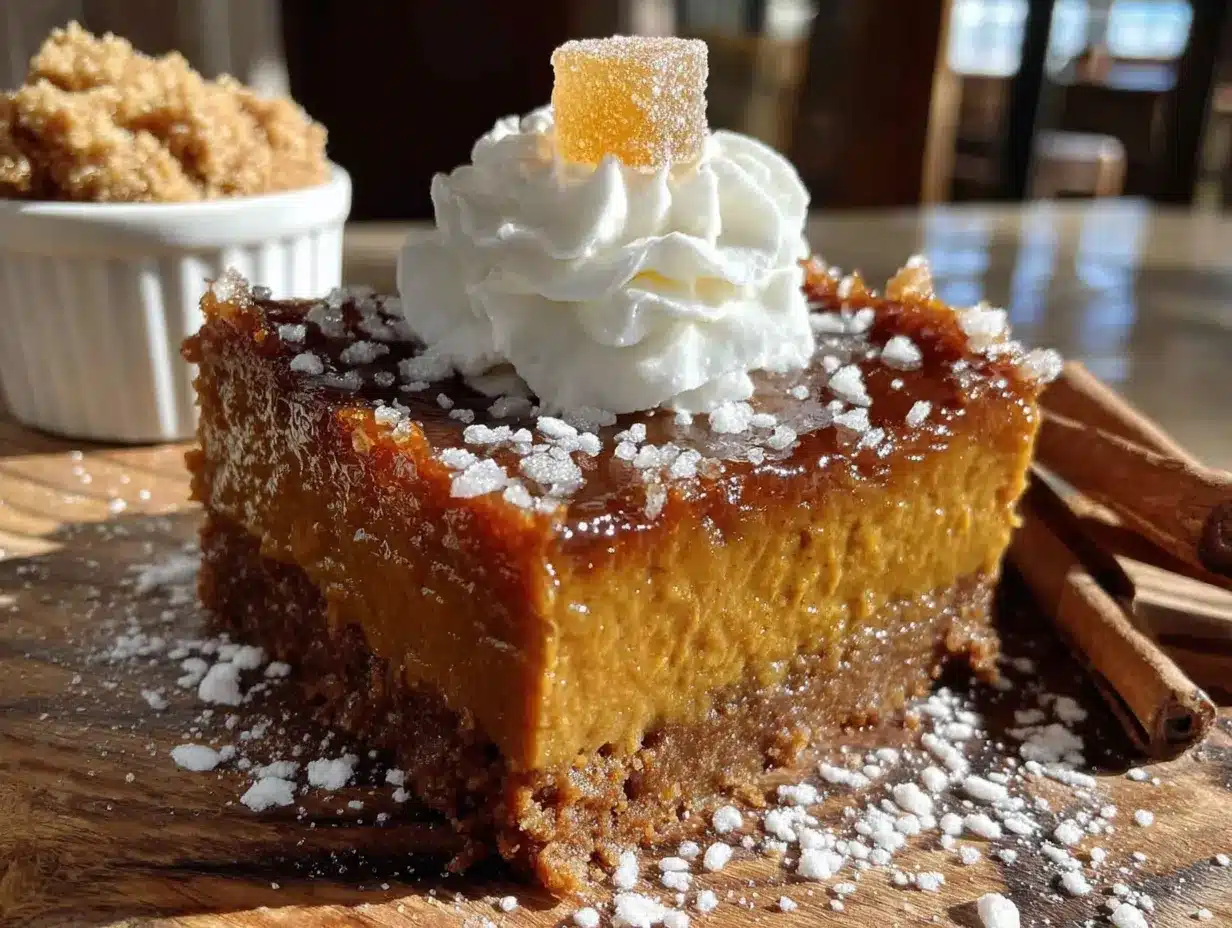
These bars are the kind of dessert that makes people close their eyes after the first bite. It’s familiar enough to feel like comfort food, but the gingersnap crust adds this warm, peppery kick that makes it feel special. Perfect for Thanksgiving, Friendsgiving, or just a random Tuesday when you need a little fall joy.
What Ingredients You Will Need
This recipe uses simple, honest ingredients to create something that tastes far more complicated than it actually is. Most of these items are fall pantry staples, and the few that aren’t are easy to find.
For the Gingersnap Crust
- 2 ½ cups gingersnap cookie crumbs (about 8 ounces or 225g — I use Nabisco or Mi-Del for gluten-free option)
- ½ cup unsalted butter, melted (1 stick or 113g — use salted butter if that’s what you have, just reduce the added salt elsewhere)
- 2 tablespoons granulated sugar (25g — this helps the crust hold together and adds a tiny bit of sweetness)
- ¼ teaspoon salt (skip if your gingersnaps are already salty)
For the Pumpkin Filling
- 1 can (15 ounces or 425g) pure pumpkin purée (not pumpkin pie filling — I recommend Libby’s for consistent texture)
- 1 can (14 ounces or 396g) sweetened condensed milk (this is the secret to the silky texture, no substitutes work quite as well)
- 2 large eggs, room temperature (cold eggs can make the filling lumpy)
- 1 teaspoon vanilla extract (pure vanilla, not imitation, if you can swing it)
- 1 ½ teaspoons pumpkin pie spice (store-bought or homemade — recipe below)
- ½ teaspoon ground cinnamon (I add extra because I’m a cinnamon fanatic)
- ¼ teaspoon ground ginger (this reinforces the crust flavor beautifully)
- ¼ teaspoon salt (brings all the flavors into focus)
For the Topping (Optional But Recommended)
- 1 cup heavy whipping cream (240ml)
- 2 tablespoons powdered sugar (15g)
- ½ teaspoon vanilla extract
- Crushed gingersnaps for garnish
Ingredient Selection Tips : When buying gingersnaps, look for cookies that are firm and crunchy, not soft or chewy. The texture matters for the crust. If you can only find soft ginger cookies, spread them on a baking sheet and toast them at 300°F for 5-7 minutes to dry them out before crushing.
Substitution Guidance : For a gluten-free version, use gluten-free gingersnaps (Mi-Del makes a great one). For a dairy-free crust, substitute the butter with melted coconut oil or a plant-based butter stick. The filling is harder to make dairy-free since the sweetened condensed milk is key, but you can find dairy-free versions at specialty stores — just note the texture will be slightly less creamy.
Equipment Needed
You don’t need a professional kitchen to make these bars, but a few specific tools will make your life easier.
- 9×13-inch baking pan — Metal or glass works fine. If using glass, reduce the oven temperature by 25°F to prevent over-browning.
- Food processor or rolling pin — For crushing the gingersnaps. I’ve done both, and honestly, the food processor is faster and gives you more even crumbs. But if you need a stress outlet, a rolling pin and a zip-top bag work great too.
- Mixing bowls — One medium for the crust, one large for the filling.
- Whisk — For smoothing out the filling. A fork works in a pinch but gives you less control.
- Parchment paper — This is non-negotiable for easy removal. Leave overhang on two sides to create “handles.”
- Cooling rack — Helps the bars cool evenly and prevents a soggy bottom.
- Stand mixer or hand mixer — For the whipped cream topping. You can whip by hand if you’re feeling ambitious, but your arm will thank you for using a mixer.
I bought my 9×13 pan at a discount store for twelve dollars, and it’s been going strong for years. You really don’t need expensive equipment here. The one thing I’d splurge on is good parchment paper — the cheap stuff can stick and tear, which is devastating when you’ve spent time on a beautiful batch of bars.
Preparation Method
Take your time with these steps. The actual hands-on work is minimal, but each stage matters for the final result.
- Preheat the oven to 350°F (175°C). Line your 9×13 pan with parchment paper, leaving about 2 inches of overhang on the long sides. This will let you lift the entire block of bars out later for clean slicing.
- Make the crust. Place the gingersnaps in your food processor and pulse until you have fine, uniform crumbs. You should have about 2 ½ cups. Transfer to a medium bowl. Pour the melted butter over the crumbs, add the sugar and salt, and stir with a fork until every crumb is coated. The mixture should look like wet sand and hold together when you squeeze it in your fist.
- Press the crust into the pan. Dump the crumbs into your prepared pan. Use the bottom of a measuring cup or a flat glass to press them down firmly and evenly. Don’t skip this step — a loosely packed crust will fall apart when you cut the bars. Press hard, especially into the corners and along the edges. Pre-bake the crust for 10 minutes at 350°F. It should be fragrant and just barely starting to brown. Set aside to cool slightly while you make the filling.
- Make the filling. In a large bowl, whisk the pumpkin purée and sweetened condensed milk together until completely smooth. Add the eggs one at a time, whisking well after each addition. Stir in the vanilla, pumpkin pie spice, cinnamon, ginger, and salt. Whisk until everything is uniform — about 30 seconds of steady whisking. The mixture should be thick, glossy, and a deep orange color. Don’t over-whisk or you’ll incorporate too much air, which can cause cracks.
- Pour and bake. Pour the filling over the pre-baked crust. Gently tilt the pan to spread it evenly, or use a spatula. Tap the pan on the counter a few times to release any air bubbles. Bake at 350°F for 35-40 minutes. The bars are done when the edges are set and the center jiggles just slightly when you gently shake the pan — like Jell-O, not like liquid. A knife inserted near the center should come out mostly clean. If the top starts browning too quickly, tent loosely with foil for the last 10 minutes.
- Cool completely. Place the pan on a wire rack and let it cool to room temperature, about 2 hours. Then cover with plastic wrap and refrigerate for at least 4 hours, but preferably overnight. This is the make-ahead magic — the bars need time to fully set and for the flavors to meld. Don’t rush this step. I once tried to cut them after only 2 hours in the fridge, and it was a messy, disappointing situation.
- Slice and serve. Once fully chilled, use the parchment handles to lift the entire block of bars out of the pan. Place on a cutting board and use a sharp knife to slice into squares. For clean cuts, wipe the knife clean between each slice. I usually get 24 bars (6 rows by 4 rows).
- Make the whipped cream (just before serving). Pour the cold heavy cream, powdered sugar, and vanilla into a chilled bowl. Whip on medium-high speed until soft peaks form — about 2-3 minutes with a hand mixer. Don’t over-whip or you’ll end up with butter. Dollop or pipe onto each bar and sprinkle with crushed gingersnaps.
Sensory Cues : When you press the crust, it should feel compact and slightly resistant, like packed sand. The filling should pour in a thick ribbon that slowly settles flat. When baked, the top will be matte, not shiny, and the edges will pull slightly away from the pan. The smell is pure autumn — ginger, cinnamon, and warm pumpkin.
Cooking Tips & Techniques
I’ve made this recipe enough times to know exactly where things can go wrong. Here’s what I’ve learned the hard way so you don’t have to.
Don’t skip the pre-bake. I tried skipping it once because I was in a hurry, and the crust turned into a soggy mess. That 10-minute pre-bake is what keeps the gingersnap layer crunchy even after days in the fridge. It’s non-negotiable.
Room temperature eggs matter. Cold eggs can seize up the filling and create lumps that won’t whisk out. Leave your eggs on the counter for 30 minutes before starting, or place them in a bowl of warm water for 5 minutes.
Watch the bake time carefully. Every oven runs differently. Start checking at 30 minutes. The center should still have a slight wobble — it will continue to set as it cools. Over-baking leads to cracks and a dry, rubbery texture. I’ve definitely over-baked a batch before and it was still edible, but it lost that silky, luxurious texture that makes these bars special.
Use a sharp knife for slicing. A dull knife will drag through the filling and mess up the crust. Run the knife under hot water, dry it, and slice. Wipe clean between each cut. This takes an extra minute but gives you Instagram-worthy bars.
Plan your timing. These bars need at least 4 hours of chilling, but overnight is better. I usually make them two days before I need them. The flavors actually improve with time — the ginger from the crust infuses into the pumpkin filling, and everything becomes more cohesive.
One failure I’ll admit to : I once forgot to add the sugar to the crust. The bars still tasted fine, but the crust was a little bland and didn’t hold together as well. That tiny bit of sugar makes a real difference in structure and flavor. Don’t skip it.
Variations & Adaptations
This recipe is wonderfully flexible. Here are some variations I’ve tried and loved.
Gluten-Free Version : Use gluten-free gingersnaps for the crust. Mi-Del makes a fantastic option that tastes just like the real thing. Everything else in the recipe is naturally gluten-free, so this swap is seamless.
Vegan Adaptation : This one takes a bit more work. Use a dairy-free sweetened condensed milk (Nature’s Charm makes a good one), substitute the eggs with 2 flax eggs (2 tablespoons ground flaxseed mixed with 6 tablespoons water), and use melted coconut oil instead of butter in the crust. The texture is slightly less creamy but still delicious.
Spice It Up : If you love a kick, add ¼ teaspoon of cayenne pepper or black pepper to the filling. The heat plays beautifully with the sweet pumpkin and spicy gingersnaps. I tried this for a Friendsgiving and it was a hit with the adventurous eaters.
Chocolate Drizzle : Melt ½ cup of dark chocolate chips with 1 teaspoon of coconut oil and drizzle over the finished bars. The chocolate and ginger combination is surprisingly wonderful. My kids beg for this version.
Pecan Praline Topping : Before serving, top each bar with a spoonful of pecan praline or candied pecans. The crunch adds a lovely contrast to the smooth filling.
Individual Servings : Make these in a muffin tin for individual portions. Press the crust into greased muffin cups, fill, and bake for about 20-22 minutes. Perfect for parties where people want grab-and-go desserts.
Serving & Storage Suggestions
These bars are incredibly versatile when it comes to serving. Here’s how to get the most out of them.
Serving Temperature : I prefer these bars cold, straight from the fridge. The filling is firm and creamy, and the crust is at its crunchiest. But they’re also lovely at room temperature — just let them sit out for 15-20 minutes before serving. The filling softens slightly and becomes almost mousse-like.
Presentation Ideas : Arrange the bars on a large wooden board or a white platter. Add a dollop of whipped cream to each bar just before serving, then sprinkle with crushed gingersnaps and a light dusting of cinnamon. For a fall tablescape, surround the platter with mini pumpkins, cinnamon sticks, and fresh rosemary sprigs.
Complementary Dishes : These bars pair beautifully with a cup of hot apple cider, a spiced chai latte, or a bold cup of coffee. For a full dessert spread, serve alongside pecan pie bites, apple crisp, or a cheese board with sharp cheddar and dried figs.
Storage Instructions : Store the bars (without whipped cream) in an airtight container in the refrigerator for up to 5 days. Place a sheet of parchment paper between layers to prevent sticking. The bars also freeze beautifully — wrap individual portions tightly in plastic wrap, then place in a freezer-safe bag. They’ll keep for up to 3 months. Thaw overnight in the refrigerator before serving.
Reheating Tips : I don’t recommend reheating these bars — they’re meant to be served cold or at room temperature. But if you want a warm dessert experience, microwave an individual bar for about 10-15 seconds. The crust will soften slightly, and the filling will become warm and comforting. Top with vanilla ice cream for a truly indulgent treat.
Flavor Development : Like many pumpkin desserts, these bars taste better on day two or three. The spices mellow and blend together, and the crust absorbs just a hint of moisture from the filling, creating a perfect texture. If you can resist eating them right away, you’ll be rewarded.
Nutritional Information & Benefits
Let’s be honest — these are a dessert, not a health food. But they do offer some surprising nutritional benefits.
Estimated Nutritional Values (per bar, without whipped cream) :
- Calories: 215
- Total Fat: 11g
- Saturated Fat: 6g
- Cholesterol: 45mg
- Sodium: 180mg
- Total Carbohydrates: 28g
- Dietary Fiber: 1g
- Sugars: 19g
- Protein: 3g
Health Benefits : Pumpkin is packed with vitamin A (over 200% of your daily needs per serving), which supports eye health and immune function. It also contains fiber, which aids digestion, and antioxidants like beta-carotene. The ginger in the crust has anti-inflammatory properties and can help soothe an upset stomach — which might come in handy after a big Thanksgiving meal.
Dietary Considerations : This recipe is vegetarian. For gluten-free and vegan options, see the variations section above. It contains dairy (butter, sweetened condensed milk, cream) and gluten (gingersnaps), so it’s not suitable for those with allergies to those ingredients without modifications.
My Personal Take : I believe in balance. These bars are a treat, and they should be enjoyed without guilt. The fact that they contain real pumpkin and real spices means you’re getting some nutritional value along with the sugar and butter. And honestly, the joy of sharing a homemade dessert with people you love has its own health benefits. So go ahead, have two bars. I won’t tell anyone.
Conclusion
These Perfect Make-Ahead Pumpkin Pie Bars with Gingersnap Crust have become my fall signature for a reason. They deliver all the nostalgic flavors of traditional pumpkin pie without the stress, the fuss, or the cracked crusts. The gingersnap crust adds a spicy, crunchy element that transforms a classic into something truly special. And the fact that you can make them days ahead of time? That’s the kind of kitchen win that makes you feel like a genius.
I hope you’ll try this recipe and make it your own. Maybe you’ll add extra cinnamon like I do, or maybe you’ll experiment with the chocolate drizzle or pecan topping. That’s the beauty of a good base recipe — it invites you to play. If you do try it, I’d love to hear how it turned out. Drop a comment below and let me know if these bars made it to your holiday table, or if you ate them all yourself while standing in front of the fridge (no judgment, I’ve been there).
Happy baking, friends. Here’s to a fall season filled with good food, good company, and desserts that actually let you enjoy the party.
Frequently Asked Questions
Can I use fresh pumpkin instead of canned?
Yes, you can. Roast a sugar pumpkin (not a carving pumpkin) at 400°F until tender, then purée the flesh until smooth. You’ll need about 1 ¾ cups of purée. Just be aware that fresh pumpkin has more water than canned, so your filling might be slightly looser. To compensate, cook the purée in a skillet over medium heat for 5-7 minutes to evaporate some moisture before using.
Can I make these bars without a food processor?
Absolutely. Place the gingersnaps in a large zip-top bag, seal it, and crush them with a rolling pin or even the bottom of a heavy skillet. It takes a few extra minutes and is a great way to release some frustration. Just make sure the crumbs are fairly uniform — large chunks can make the crust uneven.
Why did my filling crack on top?
Cracks usually happen from over-baking or over-whisking. The filling should still have a slight jiggle in the center when you take it out of the oven — it will continue to set as it cools. Also, avoid whisking too vigorously; you don’t want to incorporate excess air. If cracks do appear, don’t worry — the whipped cream topping covers them beautifully.
Can I freeze these bars with the whipped cream on top?
I don’t recommend it. Whipped cream becomes watery and loses its texture when frozen and thawed. Freeze the bars without any topping, then add fresh whipped cream just before serving. The bars themselves freeze wonderfully for up to 3 months.
How far ahead can I make these bars?
You can make them up to 3 days in advance and keep them in the refrigerator. The flavors actually improve over time. For longer storage, freeze them (without topping) for up to 3 months. Just thaw overnight in the fridge before serving. I’ve even made them a week ahead for a large event, and they were still perfect.
Pin This Recipe!
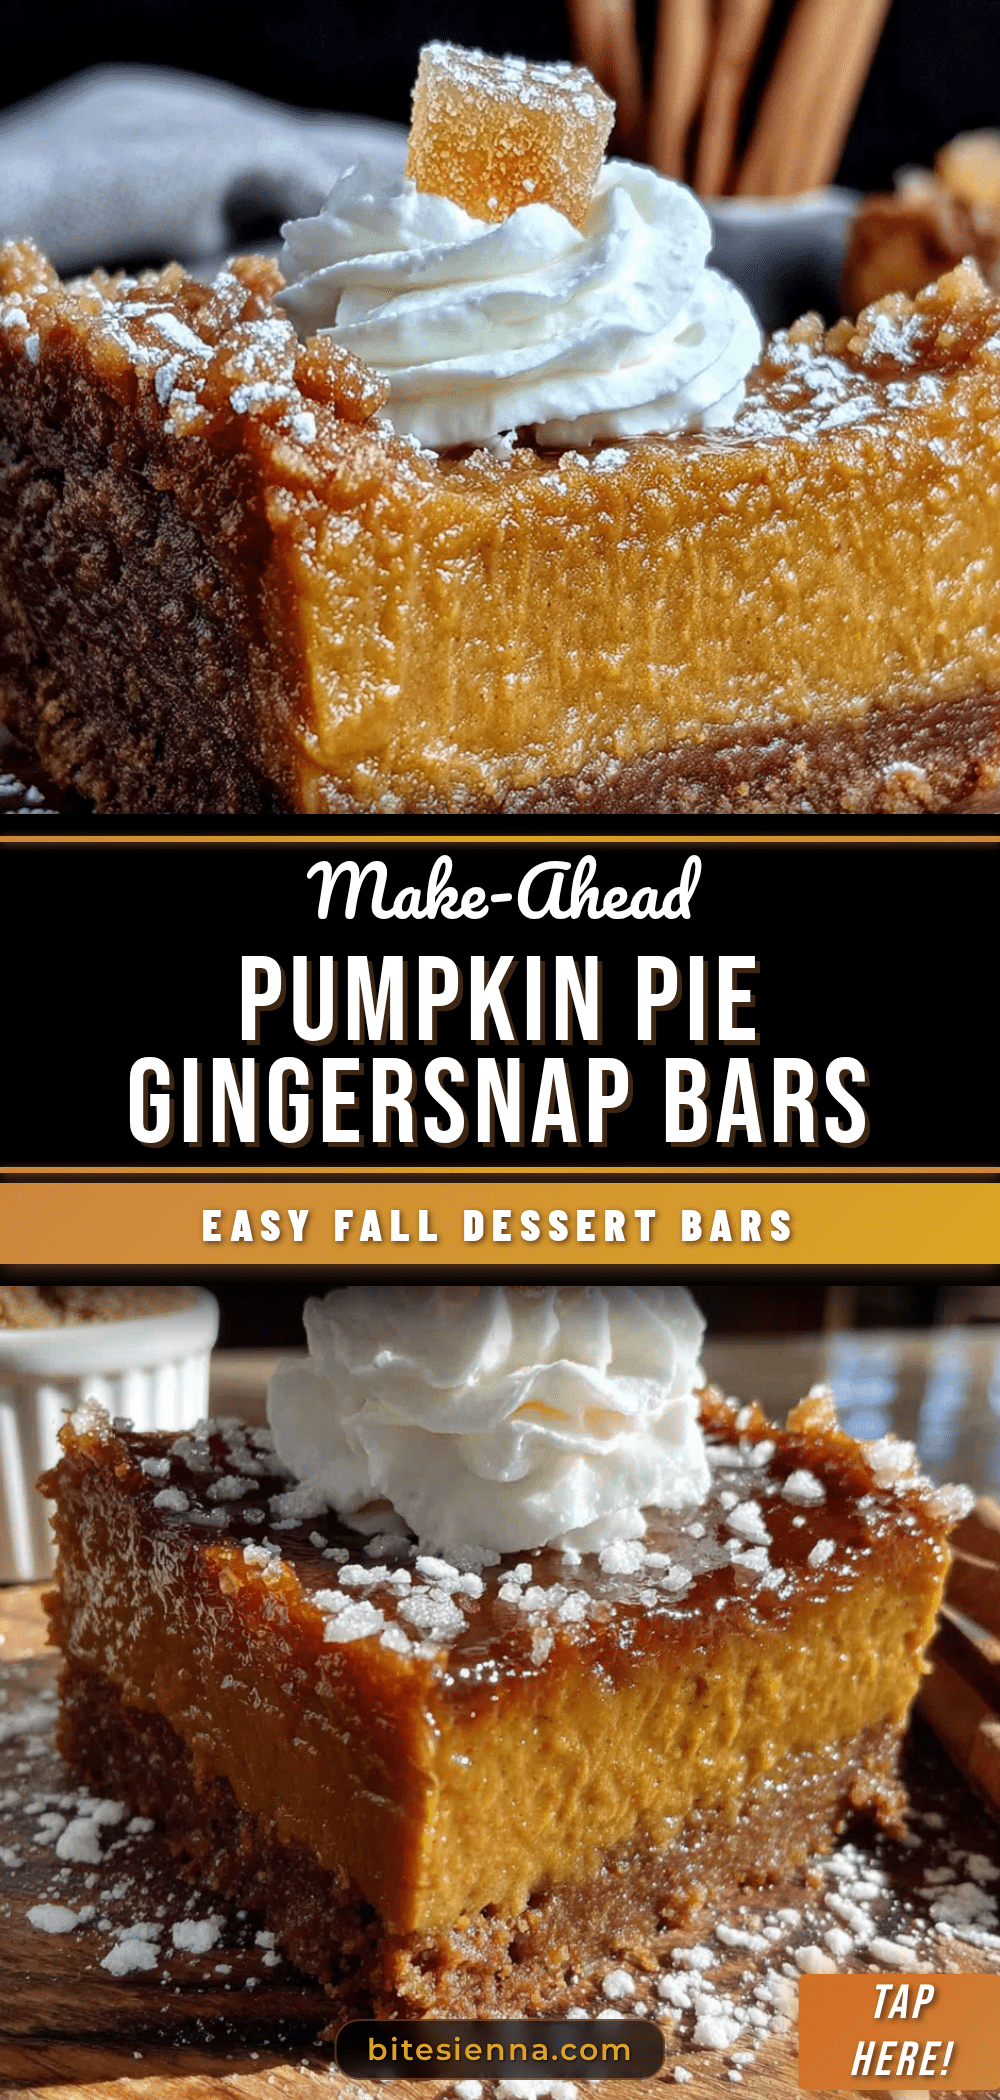
Perfect Make-Ahead Pumpkin Pie Bars with Gingersnap Crust
These pumpkin pie bars feature a crunchy gingersnap crust and a silky pumpkin filling, all made ahead of time for stress-free entertaining. Perfect for fall gatherings, they deliver classic pumpkin pie flavor without the fuss of a traditional crust.
- Prep Time: 20 minutes
- Cook Time: 40 minutes
- Total Time: 5 hours (includes cooling and chilling)
- Yield: 24 bars 1x
- Category: Dessert
- Cuisine: American
Ingredients
- 2 ½ cups gingersnap cookie crumbs (about 8 ounces or 225g)
- ½ cup unsalted butter, melted (1 stick or 113g)
- 2 tablespoons granulated sugar (25g)
- ¼ teaspoon salt
- 1 can (15 ounces or 425g) pure pumpkin purée
- 1 can (14 ounces or 396g) sweetened condensed milk
- 2 large eggs, room temperature
- 1 teaspoon vanilla extract
- 1 ½ teaspoons pumpkin pie spice
- ½ teaspoon ground cinnamon
- ¼ teaspoon ground ginger
- ¼ teaspoon salt
- 1 cup heavy whipping cream (240ml)
- 2 tablespoons powdered sugar (15g)
- ½ teaspoon vanilla extract
- Crushed gingersnaps for garnish
Instructions
- Preheat the oven to 350°F (175°C). Line a 9×13-inch baking pan with parchment paper, leaving about 2 inches of overhang on the long sides.
- Make the crust: Place the gingersnaps in a food processor and pulse until fine crumbs form. Transfer to a medium bowl. Pour the melted butter over the crumbs, add the sugar and salt, and stir with a fork until every crumb is coated. The mixture should look like wet sand and hold together when squeezed.
- Press the crust into the prepared pan using the bottom of a measuring cup or flat glass to press firmly and evenly. Pre-bake the crust for 10 minutes at 350°F. Set aside to cool slightly.
- Make the filling: In a large bowl, whisk the pumpkin purée and sweetened condensed milk together until completely smooth. Add the eggs one at a time, whisking well after each addition. Stir in the vanilla, pumpkin pie spice, cinnamon, ginger, and salt. Whisk until uniform, about 30 seconds.
- Pour the filling over the pre-baked crust. Gently tilt the pan to spread evenly, or use a spatula. Tap the pan on the counter a few times to release air bubbles. Bake at 350°F for 35-40 minutes, until the edges are set and the center jiggles slightly when shaken. If the top browns too quickly, tent loosely with foil for the last 10 minutes.
- Cool completely on a wire rack, about 2 hours. Then cover with plastic wrap and refrigerate for at least 4 hours, preferably overnight.
- Once fully chilled, use the parchment handles to lift the entire block of bars out of the pan. Place on a cutting board and slice into 24 squares (6 rows by 4 rows) using a sharp knife, wiping clean between cuts.
- Just before serving, make the whipped cream: In a chilled bowl, whip the cold heavy cream, powdered sugar, and vanilla on medium-high speed until soft peaks form, about 2-3 minutes. Dollop or pipe onto each bar and sprinkle with crushed gingersnaps.
Notes
For gluten-free version, use gluten-free gingersnaps. For dairy-free crust, substitute butter with melted coconut oil. The bars improve after a day or two in the fridge. Do not skip pre-baking the crust to prevent sogginess. Use room temperature eggs to avoid lumps. Over-baking can cause cracks; the center should still jiggle slightly when done.
Nutrition
- Serving Size: 1 bar
- Calories: 215
- Sugar: 19
- Sodium: 180
- Fat: 11
- Saturated Fat: 6
- Carbohydrates: 28
- Fiber: 1
- Protein: 3
Keywords: pumpkin pie bars, gingersnap crust, make-ahead dessert, fall dessert, Thanksgiving dessert, pumpkin bars


