My sister-in-law, Claire, had avoided red velvet cake for over a decade. She claimed the flavor was nothing but artificial dye and overly sweet cream cheese frosting masking a bland chocolate base. Honestly, I used to nod along because, let’s be fair, some grocery store versions can taste like they were made in a factory. Then last Tuesday, I made this batch of soft chewy red velvet crinkle cookies “just for myself” to test a new cocoa blend, and found them standing at my counter, picking at the last one with their eyes closed.
It wasn’t a dramatic confession. It was just a quiet moment of surrender. Claire had been complaining about the dry holiday cookies for years, the ones that shatter when you bite them and leave powder on their shirt. I didn’t try to sell her on the idea. I just slid a warm, crimson-dusted cookie onto a napkin and went back to washing dishes. The silence that followed was loud.
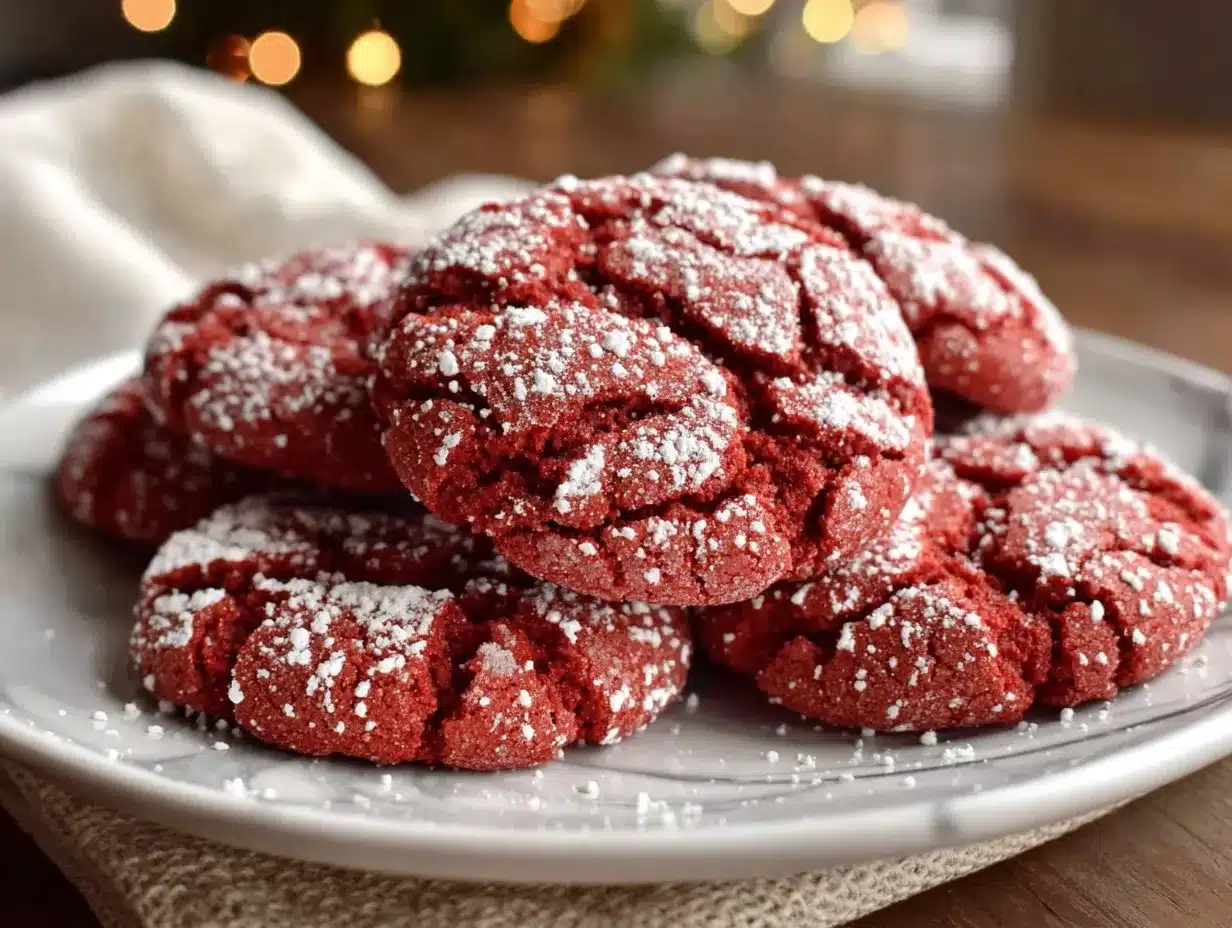
When I finally turned around, she was holding out her hand for another. “Okay,” she said, wiping a smudge of red from her lip. “You win. But only because these don’t taste like chemicals.” That is the magic of this recipe. It transforms that polarizing dessert into something that feels sophisticated yet deeply comforting. The texture is the real trick here—chewy in the center, crisp on the edges, and coated in that snowy sugar that makes you look like a kid again.
I remember the first time I made these, I accidentally left the dough out too long in the humid kitchen. The cookies spread into flat, ugly discs. I almost threw them away, but they still tasted amazing. It taught me that even mistakes can be delicious if you have the right base recipe. That’s what I love about these cookies. They forgive a lot of errors, but when you get them right, they are pure magic.
Maybe you’ve been there, staring at a jar of red food coloring wondering if it’s worth the effort. I promise you, it is. These soft chewy red velvet crinkle cookies bridge the gap between a fancy dessert and a simple snack. They are perfect for bringing to office parties, leaving on the porch for Santa, or just eating straight out of the tin while wearing pajamas. I keep making them because they remind me that food doesn’t have to be complicated to be special. It just has to be made with a little care and a lot of butter.
Why You’ll Love This Recipe
I have spent years testing cookie recipes, from the flaky pie crusts to the dense brownies. This recipe stands out because it hits that perfect sweet spot between a cake and a traditional drop cookie. Here is why this batch is going to become a staple in your kitchen:
- Quick & Easy: You can have these ready to bake in under 30 minutes if your butter is already softened. The dough comes together in one bowl, which means less cleanup and more time eating. It is perfect for those busy weeknights when you need a dessert that feels special but requires zero stress.
- Simple Ingredients: You likely already have most of this in your pantry. All-purpose flour, cocoa powder, baking soda, and red food coloring are the stars. No fancy imported ingredients or obscure spices. It relies on basic staples to create a complex flavor profile.
- Perfect for the Holidays: Whether it is Christmas, Valentine’s Day, or just a random Tuesday in February, these cookies fit the bill. The red color is festive without being overly thematic, making them versatile for any celebration.
- Crowd-Pleaser: Kids love the bright color, and adults appreciate the subtle cocoa notes. I have served these to picky eaters and dessert snobs alike, and the reaction is always the same: surprise followed by second helpings.
- Unbelievably Delicious: The crinkle effect isn’t just for show. It creates a beautiful contrast in texture. The outside has a slight crunch from the sugar coating, while the inside remains soft and chewy. It is comfort food reimagined.
What makes this version different from the rest is the balance of acidity. I use a touch of buttermilk and a splash of vinegar to activate the baking soda and tenderize the gluten. This ensures the cookie stays soft for days, rather than turning hard and brittle. It is a small detail that makes a huge difference. This isn’t just another red cookie; it is a carefully engineered bite of joy.
What Ingredients You Will Need
This recipe uses simple, wholesome ingredients to deliver bold flavor and satisfying texture without the fuss. The key to a great red velvet cookie is quality cocoa and the right balance of wet to dry ingredients. Here is what you need to get started:
- Unsalted Butter (1 cup / 226g): Softened to room temperature. This provides the richness and helps the cookies spread correctly. I recommend using high-quality European-style butter if you can find it for a deeper flavor.
- Granulated Sugar (1 cup / 200g): For sweetness and structure. This helps create the crinkle cracks on the surface.
- Vegetable Oil (1/2 cup / 120ml): This is the secret weapon. Oil stays soft at room temperature, whereas butter solidifies. Using oil ensures your cookies remain chewy even after they cool down completely.
- Large Eggs (2): Room temperature eggs emulsify better with the butter and oil. This creates a smooth, uniform dough.
- Vanilla Extract (1 tablespoon): Use pure vanilla extract, not imitation. It adds depth and rounds out the sweet flavors.
- All-Purpose Flour (2 1/2 cups / 315g): The base of the cookie. Do not use cake flour unless you adjust the liquid, as it will make the cookies too delicate.
- Cocoa Powder (2 tablespoons / 10g): Unsweetened natural cocoa powder. This gives the cookie its subtle chocolate backbone without overpowering the red velvet identity.
- Baking Soda (1/2 teaspoon): Acts as the leavening agent. It helps the cookies rise slightly and creates that tender crumb.
- Red Food Coloring (1-2 tablespoons): Gel food coloring works best for vibrant color without adding extra liquid. Liquid coloring works too, but you may need to use a bit more.
- Cream of Tartar (1/2 teaspoon): This adds a slight tang and helps stabilize the egg whites, contributing to the soft texture.
- Salt (1/2 teaspoon): Essential for balancing the sweetness and enhancing the cocoa flavor.
- Granulated Sugar (1/2 cup / 100g): For rolling the dough balls in. This creates the signature white crinkle effect against the red dough.
Equipment Needed
To make these soft chewy red velvet crinkle cookies, you will need a few basic tools. A large mixing bowl is essential for combining the wet and dry ingredients. An electric hand mixer or stand mixer with a paddle attachment will save you arm fatigue and ensure the butter and sugar are creamed properly. You will also need a silicone spatula to scrape down the sides of the bowl and fold in the flour gently.
A wire cooling rack is necessary to prevent the cookies from steaming and getting soggy on the bottom. Parchment paper or silicone baking mats are highly recommended to prevent sticking and ensure even baking. If you don’t have a cookie scoop, a tablespoon works, but a scoop ensures uniform size for even baking. Avoid non-stick baking sheets if possible, as they can cause cookies to spread too much; light-colored aluminum sheets are best.
Preparation Method
Start by preheating your oven to 350°F (175°C). Line two large baking sheets with parchment paper. This step is crucial for easy cleanup and even heat distribution.
In a large mixing bowl, combine the softened unsalted butter, vegetable oil, and granulated sugar. Using an electric mixer on medium speed, beat these ingredients together for about 3-4 minutes. You want the mixture to become light, fluffy, and pale in color. This process incorporates air, which helps the cookies rise. If you are doing this by hand, it will take about 5-7 minutes of vigorous stirring.
Add the eggs one at a time, beating well after each addition. Mix in the vanilla extract and the red food coloring. If you are using gel coloring, add it gradually until you reach your desired shade of red. The mixture should be smooth and vibrant.
In a separate medium bowl, whisk together the all-purpose flour, cocoa powder, baking soda, cream of tartar, and salt. Sifting these dry ingredients is optional but recommended to remove any lumps and ensure a smooth texture.
Gradually add the dry ingredients to the wet ingredients, mixing on low speed. Stop mixing as soon as the flour disappears. Overmixing at this stage can lead to tough cookies. The dough will be quite sticky at this point, which is normal. Cover the bowl with plastic wrap and refrigerate the dough for at least 1 hour, or up to 24 hours. Chilling the dough is the most important step for achieving the perfect crinkle effect. It prevents the cookies from spreading too thin and allows the flavors to meld.
Once the dough is chilled, take it out and let it sit for 10 minutes to soften slightly. Scoop the dough into 1.5-inch balls. Roll each ball in the extra granulated sugar, ensuring they are fully coated. Place the sugared dough balls on the prepared baking sheets, leaving about 2 inches of space between them for spreading.
Bake for 10-12 minutes. The edges should be set and slightly crisp, while the centers should still look soft and puffy. Do not overbake, or they will lose their chewiness. Let the cookies cool on the baking sheet for 5 minutes before transferring them to a wire rack to cool completely.
Cooking Tips & Techniques
The biggest mistake people make is skipping the chilling step. I know it is tempting to bake them right away, but warm dough spreads too quickly in the oven, resulting in flat, greasy cookies. Chilling firms up the fat, which controls the spread. If you are in a rush, you can freeze the dough balls for 30 minutes instead of refrigerating for an hour.
Another tip is to use a cookie scoop. It ensures that every cookie is the same size, which means they all bake in the same amount of time. If you scoop by hand, try to keep them as uniform as possible. Also, rotate your baking sheets halfway through the bake time. Ovens often have hot spots, and rotating ensures even browning.
Do not open the oven door too often during the first 8 minutes. The sudden drop in temperature can cause the cookies to collapse before they have set. Trust the process. When you take them out, they will look undercooked in the middle. This is exactly what you want. They will continue to cook on the hot baking sheet as they cool.
Variations & Adaptations
You can easily customize these cookies to suit your taste. For a white chocolate red velvet variation, add 1/2 cup of white chocolate chips to the dough. This adds a creamy sweetness that pairs beautifully with the cocoa.
If you want a more intense red color, use a combination of red and pink gel food coloring. Start with less and add more until you get the perfect shade. Remember that the color will darken slightly as the cookies bake.
For a dairy-free version, swap the butter for a high-quality vegan butter stick and use coconut oil instead of vegetable oil. The texture will be slightly different but still delicious.
You can also add a cream cheese filling. After baking and cooling, sandwich two cookies together with a small amount of sweetened cream cheese frosting. This turns them into mini red velvet cakes.
Serving & Storage Suggestions
These cookies are best served at room temperature, where the chewy texture is most apparent. They pair wonderfully with a cold glass of milk or a hot cup of coffee. The contrast between the warm cookie and the cold drink is satisfying.
Store leftover cookies in an airtight container at room temperature for up to 5 days. Place a piece of bread in the container with the cookies; the bread will release moisture and keep the cookies soft for longer. If you need to store them for longer, freeze the baked cookies in a freezer-safe bag for up to 3 months. Thaw them at room temperature before serving.
You can also freeze the dough balls. Scoop and roll them in sugar, then freeze on a baking sheet. Once solid, transfer them to a bag. Bake from frozen, adding 1-2 minutes to the baking time.
Nutritional Information & Benefits
Each cookie contains approximately 180 calories. They are a source of carbohydrates from the flour and sugar, and fats from the butter and oil. While they are a treat, using cocoa powder adds antioxidants. The recipe is not gluten-free or dairy-free by default, but adaptations are possible as noted above. Enjoy these as a special indulgence rather than an everyday snack.
Conclusion
These soft chewy red velvet crinkle cookies are a testament to the joy of baking. They are visually stunning, delicious, and surprisingly easy to make. I hope you try this recipe and find it as comforting as I do. Feel free to adjust the sweetness or add your own twists. I would love to see your creations, so please share your results in the comments below. Happy baking!
FAQs
Can I use liquid food coloring instead of gel?
Yes, but you may need to use more of it to get a vibrant red color. Be careful not to add too much liquid, as it can affect the dough consistency. If the dough becomes too wet, add a little extra flour.
Why did my cookies spread too much?
This usually happens if the dough was not chilled long enough or if the butter was too warm. Make sure your butter is softened but not melted. Chill the dough for at least an hour before baking.
Can I make these cookies gluten-free?
Yes, you can substitute the all-purpose flour with a 1:1 gluten-free flour blend. Ensure the blend contains xanthan gum for better texture, or add 1/2 teaspoon of xanthan gum to the dry ingredients.
How do I get the best crinkle effect?
The key is rolling the dough balls in sugar before baking and chilling the dough thoroughly. The sugar coating cracks as the cookie expands in the oven, creating the crinkle pattern.
Can I freeze the baked cookies?
Absolutely. Let them cool completely, then place them in an airtight container or freezer bag. They will last for up to 3 months in the freezer. Thaw at room temperature before eating.
Pin This Recipe!

Soft Chewy Red Velvet Crinkle Cookies
These soft chewy red velvet crinkle cookies feature a crisp, sugary exterior and a tender, cake-like center. They are easy to make, require simple ingredients, and are perfect for holiday gatherings or everyday snacking.
- Prep Time: 30 minutes
- Cook Time: 12 minutes
- Total Time: 42 minutes
- Yield: Approximately 24 cookies 1x
- Category: Dessert
- Cuisine: American
Ingredients
- 1 cup (226g) unsalted butter, softened to room temperature
- 1 cup (200g) granulated sugar
- 1/2 cup (120ml) vegetable oil
- 2 large eggs, room temperature
- 1 tablespoon pure vanilla extract
- 2 1/2 cups (315g) all-purpose flour
- 2 tablespoons (10g) unsweetened natural cocoa powder
- 1/2 teaspoon baking soda
- 1–2 tablespoons red food coloring (gel preferred)
- 1/2 teaspoon cream of tartar
- 1/2 teaspoon salt
- 1/2 cup (100g) granulated sugar (for rolling)
Instructions
- Preheat oven to 350°F (175°C) and line two large baking sheets with parchment paper.
- In a large mixing bowl, combine softened butter, vegetable oil, and 1 cup granulated sugar. Beat on medium speed for 3-4 minutes until light and fluffy.
- Add eggs one at a time, beating well after each addition. Mix in vanilla extract and red food coloring until smooth and vibrant.
- In a separate medium bowl, whisk together flour, cocoa powder, baking soda, cream of tartar, and salt.
- Gradually add dry ingredients to wet ingredients on low speed, mixing just until flour disappears. Do not overmix.
- Cover dough and refrigerate for at least 1 hour (or up to 24 hours) to firm up.
- Remove dough from fridge and let sit for 10 minutes. Scoop into 1.5-inch balls.
- Roll each dough ball in the remaining 1/2 cup granulated sugar until fully coated.
- Place sugared dough balls on prepared baking sheets, leaving 2 inches of space between them.
- Bake for 10-12 minutes until edges are set and slightly crisp, but centers still look soft.
- Let cookies cool on the baking sheet for 5 minutes before transferring to a wire rack to cool completely.
Notes
Chilling the dough is crucial for preventing excessive spreading and achieving the crinkle effect. If in a rush, freeze dough balls for 30 minutes. Do not overbake; cookies will continue to cook on the hot sheet. For dairy-free, swap butter for vegan butter and oil for coconut oil. For gluten-free, use a 1:1 gluten-free flour blend with xanthan gum.
Nutrition
- Serving Size: 1 cookie
- Calories: 180
- Sugar: 18
- Sodium: 120
- Fat: 9
- Saturated Fat: 5
- Carbohydrates: 26
- Fiber: 1
- Protein: 2
Keywords: red velvet cookies, crinkle cookies, holiday baking, soft cookies, easy dessert, chocolate cookies, festive treats


