I wasn’t expecting to get life-changing ice cream advice from a tax accountant, but there I was, sweating through a mid-July heatwave at a backyard barbecue, listening to my neighbor Frank explain exactly how to make the creamiest no-churn ice cream without a machine. Frank is the kind of guy who wears clip-on ties to work and alphabetizes his spice rack—not exactly your typical culinary inspiration. But with the temperature hitting 95°F and the store-bought ice cream melting into a puddle in my bowl, I was all ears. He told me about a tiny, handwritten recipe card he’d kept for years, tucked inside an old cookbook his grandmother gave him. It was for salted caramel ice cream, and he swore it was the only thing that got his family through every summer. Honestly, I was skeptical. I mean, a tax accountant? But then he handed me a spoonful, and let me tell you, that first bite was like a cold, sweet miracle. The caramel was rich, the salt was perfect, and the texture was so creamy you’d never guess it skipped the ice cream maker. I might have dropped my phone in the grass trying to get a picture. I’ve been tweaking his version ever since, and now this no-churn salted caramel ice cream is my go-to for every summer party. Maybe you’ve been there, stuck with icy, store-bought options that just don’t hit the spot. This recipe is the fix you didn’t know you needed.
Why You’ll Love This Recipe
This isn’t just another ice cream recipe. It’s the one that will make you feel like a kitchen wizard, even when it’s too hot to turn on the oven. I’ve tested this method more times than I can count, and I’ve learned a few tricks to make sure it comes out perfect every single time. Here’s why this will be your new summer staple:
- No Machine Needed: You don’t need a fancy ice cream maker. Just a whisk, a bowl, and a freezer. It’s that simple.
- Simple Ingredients: You probably already have heavy cream, sweetened condensed milk, and sugar in your pantry. No weird stabilizers or hard-to-find items.
- Perfect for Summer Heatwaves: When the temperature spikes, this is the only dessert you’ll crave. It’s cool, creamy, and instantly refreshing.
- Crowd-Pleaser: I’ve brought this to potlucks and family dinners, and it always disappears first. Kids and adults fight over the last scoop.
- Unbelievably Creamy Texture: The secret is in how you whip the cream and fold in the caramel. It creates a texture that rivals any premium brand.
What makes this recipe different from the rest? It’s the perfect balance of sweet and salty, and the caramel is made from scratch with just sugar, butter, and cream. No corn syrup, no artificial flavors. It’s comfort food reimagined—healthier, faster, but with the same soul-soothing satisfaction. This is the kind of dessert that makes you close your eyes after the first bite.
What Ingredients You Will Need
This recipe uses simple, wholesome ingredients to deliver bold flavor and a velvety texture. Most of these are pantry staples, which makes this the perfect last-minute treat for a hot summer day.
- For the Salted Caramel Sauce:
- 1 cup (200g) granulated sugar (I prefer Domino for a clean melt)
- 6 tablespoons (85g) unsalted butter, cut into cubes (use a good brand like Kerrygold for richness)
- 1/2 cup (120ml) heavy cream, room temperature (this prevents the caramel from seizing)
- 1 teaspoon flaky sea salt (like Maldon), plus more for sprinkling
- 1 teaspoon vanilla extract
- For the Ice Cream Base:
- 2 cups (480ml) cold heavy cream (look for one with at least 36% milk fat for the best whip)
- 1 can (14 ounces or 397g) sweetened condensed milk (I use Eagle Brand for consistent results)
- 1 teaspoon vanilla extract
- Pinch of salt
Ingredient Selection Tips: For the best caramel, use a heavy-bottomed saucepan to prevent burning. The butter should be unsalted so you can control the salt level. If you’re in a pinch, you can use a good quality store-bought caramel sauce, but making it from scratch really takes this recipe to the next level. For a dairy-free version, you can try using full-fat coconut cream and a dairy-free sweetened condensed milk alternative, but the texture will be slightly different.
Equipment Needed
You don’t need much to make this happen, which is the beauty of a no-churn recipe. Here’s what you’ll need:
- Electric Mixer: A stand mixer or hand mixer works great. You can also whisk by hand, but your arm will get a serious workout.
- Large Mixing Bowls: One for whipping the cream, one for the caramel.
- Heavy-Bottomed Saucepan: This is key for making the caramel evenly without burning.
- Loaf Pan or Freezer-Safe Container: A standard 9×5-inch loaf pan works perfectly for the final freeze.
- Spatula: A good rubber spatula for folding everything together.
- Parchment Paper: Optional, but it makes lifting the ice cream out for serving a breeze.
If you don’t have a hand mixer, a whisk and some elbow grease will do the trick—just make sure your cream is very cold. I learned that the hard way when I tried to whip room-temperature cream and ended up with butter!
Preparation Method
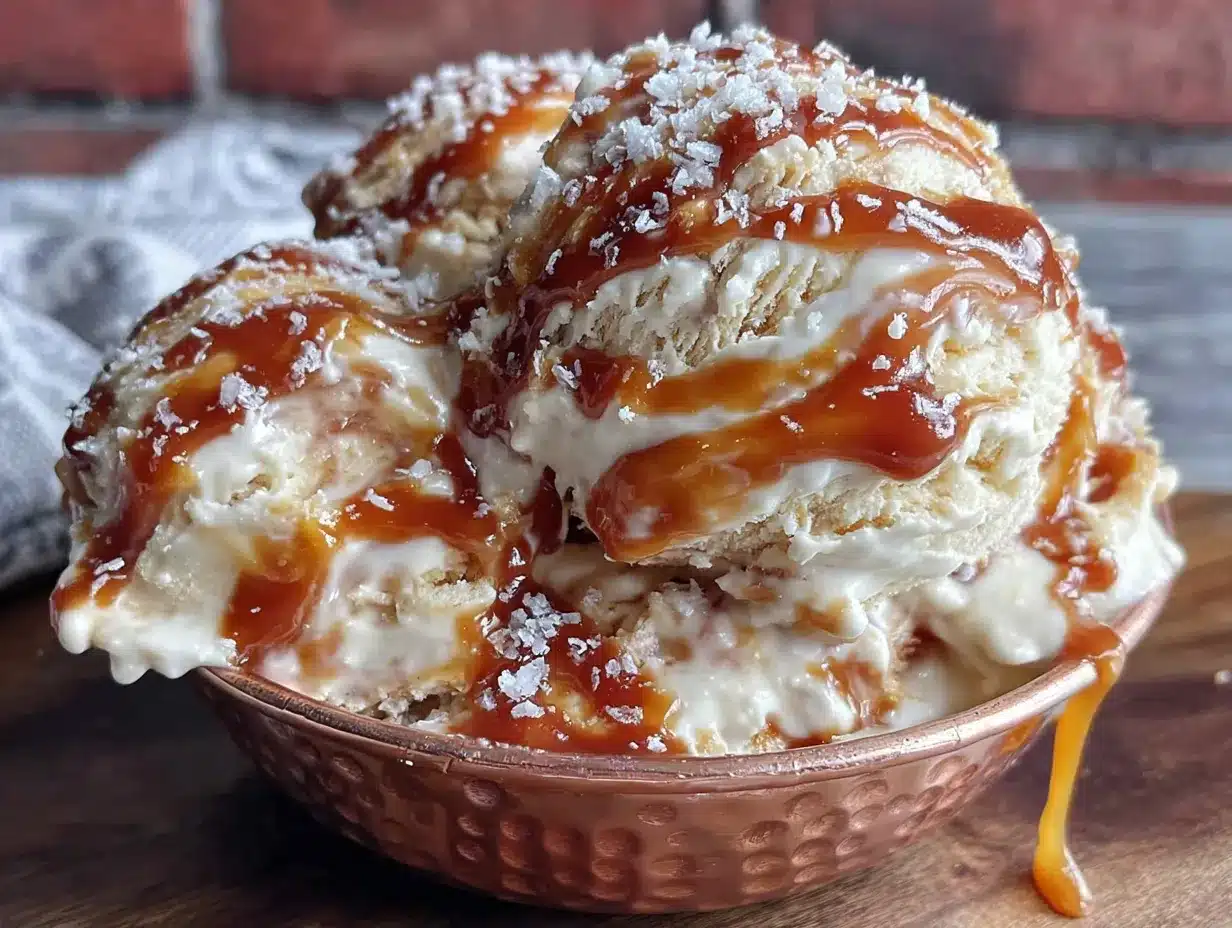
Making this no-churn salted caramel ice cream is easier than you think. Just follow these steps, and you’ll have a summer dessert that beats anything from the store.
- Make the Salted Caramel Sauce: In a heavy-bottomed saucepan over medium heat, melt the 1 cup of granulated sugar. Stir it constantly with a wooden spoon or heatproof spatula. It will clump up first, then melt into a deep amber liquid. This takes about 6-8 minutes. Watch it carefully—once it turns amber, it can burn in seconds. Remove it from the heat immediately.
- Add the Butter: Carefully whisk in the 6 tablespoons of cubed butter. The mixture will bubble up violently, so be careful. Keep whisking until the butter is fully melted and incorporated.
- Add the Cream: Slowly pour in the 1/2 cup of room-temperature heavy cream while whisking. It will bubble up again. Whisk until smooth. If you have any lumps, return the pan to low heat and whisk gently until they dissolve.
- Finish the Caramel: Remove from heat and stir in 1 teaspoon of flaky sea salt and 1 teaspoon of vanilla extract. Let the caramel cool completely to room temperature. You can speed this up by placing the pan in an ice bath. It will thicken as it cools.
- Whip the Cream: In a large mixing bowl, pour in 2 cups of cold heavy cream. Using an electric mixer, whip it on medium-high speed until stiff peaks form. This takes about 3-4 minutes. You’ll know it’s ready when you lift the beaters and the cream stands up straight. Be careful not to over-whip, or you’ll end up with butter.
- Combine the Base: In a separate large bowl, whisk together the 14-ounce can of sweetened condensed milk, 1 teaspoon of vanilla extract, and a pinch of salt. Gently fold in about 1/3 of the whipped cream to lighten the mixture. Then, fold in the remaining whipped cream until just combined. Don’t overmix—you want it to stay airy.
- Layer the Ice Cream: Pour half of the cream mixture into your loaf pan. Drizzle a generous amount of the cooled salted caramel sauce over the top. Use a knife to swirl it gently. Repeat with the remaining cream mixture and another drizzle of caramel. Save a little caramel for serving later.
- Freeze: Cover the pan with plastic wrap or a lid and place it in the freezer. Freeze for at least 6 hours, but overnight is better. The longer it freezes, the creamier it gets.
- Serve: Let the ice cream sit at room temperature for 5-10 minutes before scooping. This makes it easier to scoop and brings out the creamy texture. Drizzle with the reserved caramel and a sprinkle of flaky sea salt.
Cooking Tips & Techniques
After making this recipe more times than I can count, I’ve picked up a few tricks that make all the difference. Here’s what I’ve learned—sometimes the hard way.
- The Caramel Color is Key: Don’t be shy about cooking the sugar until it’s a deep amber color. A pale caramel will taste sweet but not complex. Aim for the color of a new penny. I once took it off too early and ended up with caramel that was just sugary—not worth it.
- Room Temperature Cream for Caramel: This is non-negotiable. If you add cold cream to hot caramel, it will seize up and form hard lumps. I learned this the hard way and had to start over. Let your cream sit out for 20 minutes before you start.
- Don’t Over-Whip the Cream: Stiff peaks are perfect, but if you go too far, you’ll get a grainy texture. Stop as soon as the cream holds its shape. If you see it starting to look a little curdled, you’ve gone too far.
- Swirl, Don’t Stir: When adding the caramel to the cream base, use a gentle swirling motion with a knife. If you stir it too much, you’ll lose the beautiful ribbons of caramel and end up with a uniform color.
- Patience is a Virtue: The hardest part is waiting for it to freeze. I know you want to dig in after a few hours, but letting it freeze overnight gives it the best texture. Trust me on this one.
Variations & Adaptations
This recipe is a fantastic base for all kinds of creative twists. Here are a few of my favorite ways to change it up:
- Chocolate Salted Caramel: Add 1/2 cup of unsweetened cocoa powder to the sweetened condensed milk before folding in the cream. The chocolate and salted caramel combo is absolutely divine.
- Vegan Version: Use full-fat coconut cream instead of heavy cream, and a dairy-free sweetened condensed coconut milk. The caramel can be made with vegan butter and coconut cream. It’s a little less rich, but still incredibly creamy.
- Nutty Caramel Crunch: Fold in 1/2 cup of toasted pecans or salted peanuts just before freezing. The crunch adds a wonderful texture contrast to the smooth ice cream.
- Boozy Caramel: Add 2 tablespoons of bourbon or dark rum to the caramel sauce after you remove it from the heat. It adds a warm, complex flavor that’s perfect for adult gatherings.
- Seasonal Swirls: In the summer, swirl in some fresh strawberry puree or crushed raspberries along with the caramel. It adds a bright, fruity note that cuts through the richness.
I once tried a version with a swirl of peanut butter, and it was a huge hit with my family. The salty, nutty flavor paired perfectly with the caramel.
Serving & Storage Suggestions
This ice cream is best served straight from the freezer, but with a few minutes of resting time. Here’s how to make the most of it:
- Serving Temperature: Let the ice cream sit at room temperature for 5-10 minutes before scooping. This softens it just enough for easy scooping without it melting into a puddle.
- Presentation: Serve in chilled bowls or cones. Drizzle with extra salted caramel sauce and a sprinkle of flaky sea salt. A few chocolate shavings or a sprig of mint add a nice touch.
- Complementary Dishes: This ice cream is amazing on its own, but it also pairs beautifully with a warm brownie, a slice of apple pie, or a simple shortbread cookie. For a summer party, try serving it alongside a fresh berry salad.
- Storage: Store the ice cream in an airtight container in the freezer. Press a layer of plastic wrap directly onto the surface before sealing to prevent ice crystals from forming. It will keep well for up to 2 weeks, but it rarely lasts that long in my house.
- Reheating the Caramel: If your leftover caramel sauce has thickened in the fridge, just microwave it in 10-second bursts, stirring in between, until it’s pourable again.
The flavors actually deepen after a day or two in the freezer, so don’t be afraid to make it ahead of time for a party.
Nutritional Information & Benefits
While this is definitely a treat, it’s made with real, whole ingredients. Here’s a quick look at what you’re getting in a typical 1/2 cup serving:
- Calories: Approximately 350-400 calories per serving.
- Fat: 25g (mostly from the heavy cream and butter, which provide satiety).
- Carbohydrates: 35g (from the sugar and condensed milk).
- Protein: 4g.
- Calcium: A good source from the dairy products.
Health Benefits of Key Ingredients: The heavy cream contains fat-soluble vitamins like A, D, and E. The salt in the caramel can help replenish electrolytes on a hot summer day. And honestly, sometimes the best thing you can do for your mental health is enjoy a bowl of homemade ice cream. This recipe is a great way to control what goes into your food, avoiding the preservatives and stabilizers found in many store-bought brands. For those watching their sugar intake, you can try using a sugar substitute in the caramel, but the texture will be slightly different.
Conclusion
This no-churn salted caramel ice cream is more than just a recipe—it’s a little piece of summer magic. It’s the kind of dessert that turns an ordinary hot day into something special. I love how simple it is to make, yet how impressive it feels to serve. The combination of rich, buttery caramel and a hint of sea salt is just irresistible. I really hope you give this a try. Don’t be afraid to make it your own—add your favorite mix-ins, adjust the salt level, or just enjoy it as is. And when you do, please come back and let me know how it turned out. Leave a comment below or share your creation on social media. I love seeing your versions! Happy summer, and happy scooping!
Frequently Asked Questions
Can I use store-bought caramel sauce instead of making it from scratch?
Yes, you can use a high-quality store-bought salted caramel sauce to save time. Just make sure it’s a thick, rich sauce, not a thin syrup. The texture and flavor won’t be quite as deep, but it’s a great shortcut for busy days.
Why did my caramel turn into a hard, sugary lump?
This usually happens if the sugar crystallizes. To prevent this, make sure your pan and utensils are completely clean and free of any residue. You can also add a teaspoon of corn syrup or lemon juice to the sugar before heating to help prevent crystallization.
Can I make this recipe dairy-free?
Absolutely! Use full-fat coconut cream in place of the heavy cream, and look for a dairy-free sweetened condensed coconut milk. For the caramel, use vegan butter and coconut cream. The texture will be slightly different—a bit more like a sorbet—but it’s still delicious.
How long does this ice cream need to freeze?
For the best texture, freeze it for at least 6 hours. Overnight is even better. The longer it freezes, the creamier and more scoopable it becomes. If you try to serve it too early, it will be too soft.
My ice cream has ice crystals. What did I do wrong?
Ice crystals usually form when the ice cream isn’t stored in an airtight container, or if it’s been in the freezer for more than a couple of weeks. To prevent this, press a layer of plastic wrap directly onto the surface of the ice cream before sealing the container. This keeps air from getting to it.
Pin This Recipe!
Easy No-Churn Salted Caramel Ice Cream Recipe

This no-churn salted caramel ice cream is the perfect summer treat—creamy, rich, and made without an ice cream maker. With a homemade salted caramel sauce and simple ingredients, it’s a crowd-pleaser that beats any store-bought version.
- Prep Time: 20 minutes
- Cook Time: 10 minutes
- Total Time: 6 hours 30 minutes (including freezing time)
- Yield: 8 servings 1x
- Category: Dessert
- Cuisine: American
Ingredients
- 1 cup (200g) granulated sugar
- 6 tablespoons (85g) unsalted butter, cut into cubes
- 1/2 cup (120ml) heavy cream, room temperature
- 1 teaspoon flaky sea salt, plus more for sprinkling
- 1 teaspoon vanilla extract
- 2 cups (480ml) cold heavy cream (at least 36% milk fat)
- 1 can (14 ounces or 397g) sweetened condensed milk
- 1 teaspoon vanilla extract
- Pinch of salt
Instructions
- Make the Salted Caramel Sauce: In a heavy-bottomed saucepan over medium heat, melt the 1 cup of granulated sugar. Stir constantly with a wooden spoon or heatproof spatula. It will clump up first, then melt into a deep amber liquid. This takes about 6-8 minutes. Watch carefully—once it turns amber, remove from heat immediately.
- Add the Butter: Carefully whisk in the 6 tablespoons of cubed butter. The mixture will bubble up violently. Keep whisking until the butter is fully melted and incorporated.
- Add the Cream: Slowly pour in the 1/2 cup of room-temperature heavy cream while whisking. It will bubble up again. Whisk until smooth. If lumps form, return the pan to low heat and whisk gently until they dissolve.
- Finish the Caramel: Remove from heat and stir in 1 teaspoon of flaky sea salt and 1 teaspoon of vanilla extract. Let the caramel cool completely to room temperature. You can speed this up by placing the pan in an ice bath. It will thicken as it cools.
- Whip the Cream: In a large mixing bowl, pour in 2 cups of cold heavy cream. Using an electric mixer, whip on medium-high speed until stiff peaks form, about 3-4 minutes. Be careful not to over-whip.
- Combine the Base: In a separate large bowl, whisk together the 14-ounce can of sweetened condensed milk, 1 teaspoon of vanilla extract, and a pinch of salt. Gently fold in about 1/3 of the whipped cream to lighten the mixture. Then, fold in the remaining whipped cream until just combined.
- Layer the Ice Cream: Pour half of the cream mixture into a loaf pan. Drizzle a generous amount of the cooled salted caramel sauce over the top. Use a knife to swirl it gently. Repeat with the remaining cream mixture and another drizzle of caramel. Save a little caramel for serving later.
- Freeze: Cover the pan with plastic wrap or a lid and place in the freezer. Freeze for at least 6 hours, but overnight is better.
- Serve: Let the ice cream sit at room temperature for 5-10 minutes before scooping. Drizzle with the reserved caramel and a sprinkle of flaky sea salt.
Notes
For the best caramel, cook the sugar to a deep amber color (like a new penny). Use room-temperature cream for the caramel to prevent seizing. Do not over-whip the cream—stop at stiff peaks. Swirl the caramel gently to create ribbons. Freeze overnight for the creamiest texture. Store in an airtight container with plastic wrap pressed onto the surface to prevent ice crystals.
Nutrition
- Serving Size: 1/2 cup
- Calories: 375
- Sugar: 33
- Sodium: 220
- Fat: 25
- Saturated Fat: 16
- Carbohydrates: 35
- Protein: 4
Keywords: no-churn ice cream, salted caramel, homemade ice cream, summer dessert, easy ice cream, no machine


