The neighborhood Halloween block party was in six hours and I’d completely forgotten. Everyone else would be bringing elaborate themed desserts—I’d seen the previews on the neighborhood app. Hand-painted sugar cookies shaped like tombstones, a cake that looked like a severed hand, cupcakes with fondant spiders that probably took three days to make. I had a bag of pretzel rods, a block of white chocolate I’d bought for a different project that never happened, and about forty-five minutes before I needed to leave. Not exactly prime baking material.
I stood in my kitchen, staring at the pretzel rods like they might magically transform themselves. My cat, Mabel, rubbed against my ankle, probably wondering why I was just standing there. I mean, let me tell you, I’ve been in tighter spots before, but this one felt particularly hopeless. I almost grabbed my keys to run to the store, but the rain had started—that drizzly, cold October rain that makes you want to crawl back into bed. So I opened the pantry, hoping for a miracle, and saw the slivered almonds I’d bought for a salad last week. And that’s when it clicked.
I started dipping pretzel rods in melted white chocolate, sticking an almond on the end for a fingernail, and squeezing a tiny dollop of raspberry jam at the base for a bloody cuticle. Honestly, I was just trying to make them look vaguely creepy, not win any awards. I wasn’t even sure they’d hold together. But something about the way the white chocolate set, the almond looking exactly like a witch’s long fingernail, the jam pooling just right—it worked. I packed them up, still a little embarrassed by how simple they were, and headed to the party.
You know that feeling when you bring something to a gathering and you’re half-afraid to put it on the table? That was me. But these cozy witch finger pretzel rods with white chocolate disappeared within fifteen minutes. People kept coming up to me, asking for the recipe. One neighbor, a woman named Delia who actually does the hand-painted cookies, told me these were her favorite thing on the table. “They’re so clever,” she said, “and they actually look like you made them with love, not with a paintbrush.” I’ve been making them every Halloween since, and they’ve never let me down.
Why You’ll Love This Recipe
This is one of those recipes that feels like a secret weapon. I’ve tested it more times than I can count—tweaking the chocolate temperature, trying different nut options, figuring out the best way to get that creepy fingernail look without the almond sliding off. It’s chef-tested in the sense that I’ve made it in a friend’s professional kitchen during a Halloween prep session, and it held up beautifully. And it’s family-approved because my niece, who is notoriously picky about anything “weird,” ate four of them in one sitting.
- Quick & Easy: Comes together in under 45 minutes, most of which is waiting for the chocolate to set. Perfect for last-minute Halloween prep or a cozy night in.
- Simple Ingredients: No fancy grocery trips needed. Pretzel rods, white chocolate, slivered almonds, and a bit of food coloring or jam. That’s it.
- Perfect for Halloween Parties: Great for potlucks, classroom treats, office parties, or just making your own evening feel a little spooky and special.
- Crowd-Pleaser: I’ve never brought these anywhere without someone asking for the recipe. Kids love them, adults love them, even people who “don’t do Halloween” sneak a few.
- Unbelievably Delicious: The salty-sweet combination is next-level comfort food. The crunch of the pretzel, the creamy white chocolate, the nutty almond—it’s a textural dream.
What makes this recipe different from all the other witch finger pretzel rods out there? It’s the little details. I use a specific technique for melting the white chocolate so it doesn’t seize up (because let me tell you, I’ve ruined more batches than I’d like to admit). I also add a tiny pinch of salt to the chocolate to balance the sweetness, which makes a huge difference. And the raspberry jam “blood” at the cuticle—it adds a pop of color and a hint of fruitiness that cuts through the richness. It’s not just another version; it’s the version that makes you close your eyes after the first bite.
This recipe isnt just good—it is the kind that makes you feel like you’ve pulled off something magical, even when you’re short on time and energy. It’s comfort food reimagined for the spooky season, with the same soul-soothing satisfaction as a warm cookie but with a creepy twist. Perfect for impressing guests without stress, or turning a simple evening into something memorable.
What Ingredients You Will Need
This recipe uses simple, wholesome ingredients to deliver that perfect salty-sweet crunch with a creepy, cozy Halloween vibe. The magic is in how they come together, not in fancy specialty items.
- Pretzel rods: 1 standard bag (about 12-16 rods). Look for thick, sturdy rods that won’t break easily when dipped. I prefer the Snyder’s of Hanover brand for their consistent thickness, but any brand works. (Pro tip: Avoid the thin, brittle ones—they’ll snap under the chocolate weight.)
- White chocolate: 12 ounces (340g). Use good quality white chocolate, not white candy melts. I recommend Ghirardelli or Lindt bars for the smoothest melt and creamiest flavor. Avoid white chocolate chips, as they often contain stabilizers that prevent smooth melting. (If you must use chips, add a teaspoon of coconut oil to help them melt.)
- Slivered almonds: 1/2 cup (about 60g). These become the witch’s fingernails. Look for whole slivered almonds, not the chopped ones. The shape is important—you want that long, pointed end. (For a nut-free version, use small pretzel sticks cut to size, but the look won’t be as convincing.)
- Raspberry jam or red food coloring: 2 tablespoons jam or 1/4 teaspoon gel food coloring. The jam gives a more realistic “blood” effect and adds a hint of fruitiness. I prefer seedless raspberry jam for a smoother look. If using food coloring, use gel-based for the most vibrant red without thinning the chocolate.
- Coconut oil: 1 teaspoon (optional, but recommended). This helps thin the white chocolate for easier dipping and gives a beautiful shine. It also prevents the chocolate from seizing if you overheat it slightly.
- Salt: A pinch of flaky sea salt (like Maldon) for sprinkling on top. It balances the sweetness and adds a professional touch. Skip this if your pretzels are already heavily salted.
For the “blood” effect (optional but recommended): A small squeeze of red gel food coloring mixed with a tiny bit of corn syrup creates a glossy, realistic blood effect that doesn’t run. I’ve tried just using jam, and while it tastes great, it can look a bit flat. The corn syrup trick gives it that shiny, wet look that makes people do a double-take.
Substitution guidance: If you don’t have white chocolate, you can use dark or milk chocolate for a different flavor profile—just adjust the sweetness level. For a dairy-free version, use a high-quality dairy-free white chocolate alternative (I like the Enjoy Life brand). The almond fingernails can be swapped for cashew pieces or even small slivers of dried apple for a fruitier twist. And if you’re not a fan of raspberry, strawberry jam or even a dot of caramel works beautifully for the “blood” effect.
Equipment Needed
You don’t need a fancy kitchen to pull these off. Here’s what you’ll need, along with a few tricks I’ve learned the hard way.
- Baking sheet: A standard half-sheet pan works perfectly. Line it with parchment paper or a silicone baking mat. (I’ve used wax paper in a pinch, but it can stick if the chocolate gets warm.)
- Double boiler or microwave-safe bowl: A double boiler gives you the most control over the chocolate temperature, but a microwave works fine if you’re careful. I use a glass Pyrex bowl for microwaving—it heats evenly and doesn’t get too hot too fast.
- Small offset spatula or butter knife: For spreading the chocolate smoothly on the pretzels. A butter knife works, but an offset spatula gives you better control and a cleaner finish.
- Toothpicks: For applying the raspberry jam or food coloring to the cuticle area. You can also use a small paintbrush if you have one, but toothpicks are easier to clean up.
- Cooling rack: Optional, but it helps the chocolate set evenly without pooling underneath. If you don’t have one, just use the parchment-lined baking sheet—it works fine.
- Piping bag or small zip-top bag: For drizzling any extra chocolate or jam. A zip-top bag with the corner snipped off works perfectly and saves you from buying a piping bag.
Budget-friendly tip: If you don’t have a double boiler, you can make one by placing a heat-safe bowl over a pot of simmering water. Just make sure the bowl doesn’t touch the water. And if you don’t have a cooling rack, flip a muffin tin upside down and balance the pretzels across the bumps—it works surprisingly well.
Maintenance tip: White chocolate can be finicky. If it starts to seize (get grainy and clumpy), don’t panic. Stir in a teaspoon of coconut oil or vegetable shortening, and it should smooth right out. I’ve saved many a batch this way.
Preparation Method
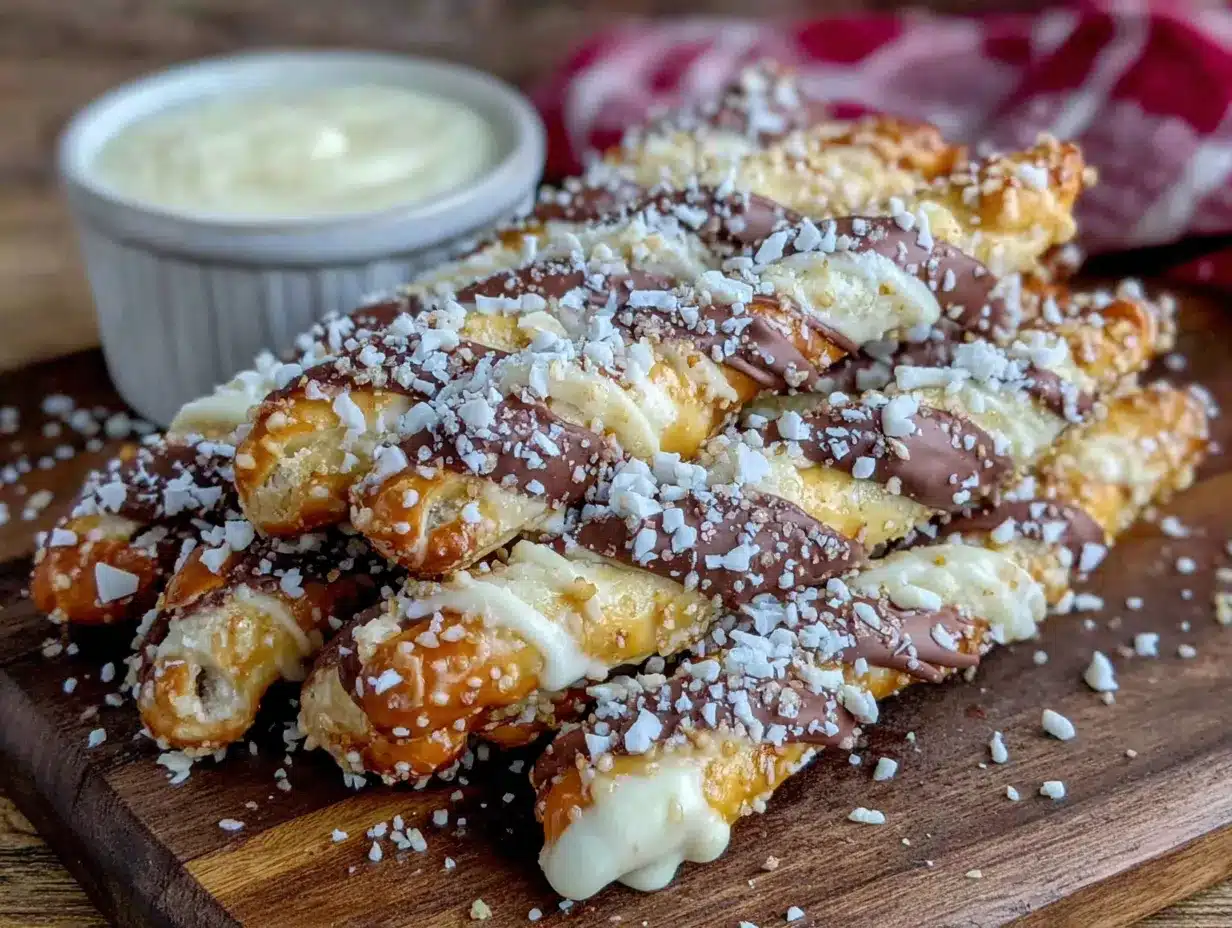
Let me walk you through this step by step. I’ve made these so many times that I’ve got the process down to a science, but I’ll share all the little tricks I’ve picked up along the way.
- Prep your workspace: Line a baking sheet with parchment paper or a silicone mat. Make sure you have enough space to lay out all the pretzel rods without them touching. (I learned this the hard way—crowded pretzels stick together and ruin the chocolate coating.)
- Melt the white chocolate: Break the white chocolate into small, even pieces. Place them in a microwave-safe bowl and microwave in 30-second intervals at 50% power, stirring thoroughly between each interval. It usually takes about 2-3 minutes total. The key is to stop heating while there are still a few small chunks—the residual heat will melt them completely. If you’re using a double boiler, keep the water at a gentle simmer and stir constantly. (I once overheated white chocolate on high power and ended up with a grainy mess. Low and slow is the way to go.)
- Add the coconut oil: Once the chocolate is smooth, stir in the teaspoon of coconut oil (if using). This thins the chocolate slightly, making it easier to dip and giving it a beautiful shine. Add a pinch of salt and stir to combine.
- Prepare the “blood”: If using raspberry jam, warm it slightly in the microwave for 10 seconds to make it easier to spread. If using food coloring, mix a few drops with a tiny bit of corn syrup to create a glossy, thick liquid. Set aside.
- Dip the pretzels: Hold a pretzel rod by one end and dip it into the melted white chocolate, rotating to coat about three-quarters of the rod. Let the excess chocolate drip off back into the bowl. (Don’t worry if it’s not perfectly smooth—the imperfections add to the creepy look.) Place the dipped pretzel on the prepared baking sheet.
- Add the fingernail: While the chocolate is still wet, press a slivered almond onto the tip of the pretzel, pointed end facing outward. The almond should be positioned so it looks like a long, witchy fingernail extending from the chocolate. Gently press it in to make sure it sticks. (If the chocolate has started to set, dip the almond in a bit of melted chocolate before attaching it.)
- Create the cuticle effect: Using a toothpick, dab a small amount of raspberry jam or red food coloring mixture at the base of the almond where it meets the chocolate. This creates the illusion of a bloody cuticle. Don’t overdo it—a little goes a long way, and too much will look messy rather than creepy.
- Add the “blood” drip: For an extra creepy touch, use a clean toothpick to drag a tiny line of jam or food coloring from the cuticle down the side of the pretzel, mimicking a drip of blood. This is optional but highly effective for the spooky factor.
- Sprinkle with salt: While the chocolate is still wet, sprinkle a tiny pinch of flaky sea salt over the chocolate-covered portion of the pretzel. This enhances the salty-sweet contrast and adds a professional finish.
- Let them set: Allow the pretzels to set at room temperature for about 30 minutes, or place them in the refrigerator for 15 minutes if you’re in a hurry. The chocolate should be firm and matte when fully set. (Don’t rush this step—if the chocolate isn’t fully set, the almonds may slide off when you move them.)
- Repeat: Continue with the remaining pretzel rods. You may need to reheat the chocolate briefly if it starts to thicken as it cools. Just microwave for 10 seconds and stir.
Sensory cues: The chocolate should be smooth and glossy when melted, not thick or grainy. When you dip the pretzel, you should hear a faint click as the chocolate coats the surface. The almond should feel secure when pressed into the chocolate, not like it’s going to fall off. And the jam should look like a tiny, glossy pool of blood at the base of the nail—dark red and slightly translucent.
Troubleshooting tip: If the chocolate starts to thicken before you’re done dipping, don’t add more heat directly. Instead, place the bowl in a warm water bath for a minute, stirring gently. This will bring it back to the right consistency without risking overheating.
Cooking Tips & Techniques
I’ve made more mistakes with this recipe than I care to admit, so let me save you the trouble. Here are the things I wish someone had told me the first time.
The temperature of your white chocolate matters more than you think. I once tried to rush the process and melted the chocolate on high power. It seized into a grainy, clumpy mess that I couldn’t salvage. Now I always use 50% power and stir every 30 seconds. If you’re using a double boiler, keep the water at a gentle simmer, not a rolling boil. The steam should be barely visible. And here’s a pro tip: if your chocolate does seize, stir in a teaspoon of vegetable shortening or coconut oil. It won’t be as smooth as a perfect melt, but it’ll be usable.
Don’t skip the coconut oil. The first few times I made these, I skipped it because I thought it was unnecessary. The chocolate was thicker, harder to work with, and didn’t set as smoothly. The coconut oil makes a world of difference—it thins the chocolate just enough for easy dipping and gives it that beautiful, glossy finish that makes these pretzels look professional.
The almond placement is everything. I’ve had almonds fall off, slide sideways, or just look wrong. The trick is to press the almond into the chocolate while it’s still very wet, and to make sure the almond is centered on the tip of the pretzel. If the chocolate has started to set, dip the almond in a bit of melted chocolate first—it acts like glue. And don’t use whole almonds; they’re too big and look like a toe, not a fingernail. Slivered almonds are the perfect size and shape.
Multitasking is your friend. While the chocolate is melting, I lay out all the pretzel rods on the baking sheet so I can work quickly. I also have the almonds and jam ready to go. Once you start dipping, you don’t want to be fumbling for ingredients. And if you’re making a large batch, work in batches of 4-6 pretzels at a time to prevent the chocolate from setting before you add the details.
Consistency comes from practice. My first batch looked like a horror movie in the worst way—lumpy, uneven, with almonds pointing in every direction. But by the third batch, I had a rhythm. Don’t be discouraged if your first few aren’t perfect. The beauty of these is that the imperfections add to the creepy factor. A slightly crooked almond? That’s a witch with a bent fingernail. A bit too much jam? That’s a particularly gruesome cuticle. Embrace the chaos.
Variations & Adaptations
One of the best things about this recipe is how easy it is to adapt. I’ve tried several variations over the years, and here are my favorites.
Dark Chocolate Witch Fingers: Swap the white chocolate for dark chocolate (70% cacao or higher) for a richer, less sweet version. The dark chocolate pairs beautifully with the salty pretzel and gives the fingers a more gothic, sinister look. Use sliced almonds for the fingernails, and for the “blood,” try a dollop of cherry preserves instead of raspberry. The deep red against the dark chocolate is stunning.
Vegan & Dairy-Free Version: Use a high-quality dairy-free white chocolate alternative (I like the Enjoy Life brand). The process is exactly the same, but you may need to add an extra teaspoon of coconut oil to help it melt smoothly. For the fingernails, you can use slivered almonds as usual, or try small pieces of dried apple for a fruitier twist. The jam “blood” is naturally vegan, so no changes needed there.
Spiced Pumpkin Witch Fingers: Add 1/2 teaspoon of pumpkin pie spice and a pinch of cinnamon to the melted white chocolate before dipping. This gives the pretzels a warm, cozy fall flavor that’s perfect for Halloween. The spice pairs beautifully with the white chocolate and adds a subtle complexity that makes these feel extra special. I made these for a pumpkin carving party last year, and they were a hit.
Gluten-Free Adaptation: This recipe is naturally gluten-free if you use gluten-free pretzel rods. I’ve tested this with both Snyder’s of Hanover and Glutino brands, and both work well. Just be aware that gluten-free pretzels can be more brittle, so handle them gently during the dipping process. The rest of the ingredients are naturally gluten-free.
Personal variation I love: For a truly over-the-top version, I sometimes drizzle a bit of melted dark chocolate over the set white chocolate to create a marbled effect. It looks like the fingers have been stained with dirt or age, and it adds an extra layer of flavor. I also like to add a tiny sprinkle of edible gold dust to the almond fingernails for a glamorous witch vibe. It sounds silly, but it’s surprisingly beautiful.
Serving & Storage Suggestions
These pretzels are best served at room temperature, which is convenient because that’s how they’ll naturally be after setting. Arrange them on a platter with the almond fingernails pointing outward for maximum creepy effect. I like to place them on a black or dark purple serving tray to make the white chocolate pop. For an extra spooky touch, arrange them in a fan pattern like a hand reaching out from the platter.
What to serve with them: These pair beautifully with a warm cup of spiced apple cider or a hot chocolate with a cinnamon stick. For a grown-up Halloween party, they’re fantastic with a glass of mulled wine or a pumpkin spice latte. If you’re serving them as part of a dessert table, they go well with other Halloween treats like pumpkin cupcakes, caramel apples, or ghost-shaped cookies.
Storage instructions: Store the pretzels in an airtight container at room temperature for up to 5 days. Do not refrigerate them, as the moisture in the fridge can cause the chocolate to bloom (develop white streaks) and lose its shine. If you need to store them longer, you can freeze them for up to 2 months. Place them in a single layer in a freezer-safe container, with parchment paper between layers to prevent sticking. Thaw at room temperature for about 30 minutes before serving.
Reheating tip: These don’t need reheating, but if you want to refresh the chocolate’s shine, you can place them in a 200°F oven for 2-3 minutes. Watch them carefully—white chocolate burns easily. Alternatively, just let them come to room temperature if they’ve been chilled.
How flavors develop: These are actually best after they’ve sat for a few hours or overnight. The chocolate sets fully, the flavors meld together, and the pretzel stays perfectly crunchy. I’ve found that the almond flavor infuses into the chocolate slightly over time, creating a more complex taste. So don’t be afraid to make them a day ahead—they’ll be even better.
Nutritional Information & Benefits
Let’s be real—these are a treat, not a health food. But they’re made with simple, recognizable ingredients, and there are a few surprising benefits hidden in that spooky exterior.
Estimated nutritional values per serving (1 pretzel rod): Calories: 180, Fat: 9g, Saturated Fat: 5g, Carbohydrates: 22g, Sugar: 16g, Protein: 3g, Sodium: 200mg. These are estimates based on standard ingredients and may vary depending on the brands you use.
Health benefits of key ingredients: Almonds are a great source of healthy fats, vitamin E, and magnesium, which supports heart health and brain function. White chocolate, while not as nutrient-dense as dark chocolate, does contain calcium and a small amount of protein from the milk solids. And pretzels, while high in carbs, provide quick energy—perfect for a Halloween party where you’ll be on your feet.
Dietary considerations: This recipe can be made gluten-free (use gluten-free pretzel rods), dairy-free (use dairy-free white chocolate), and vegan (use dairy-free white chocolate). It is not nut-free due to the almonds, but you can substitute with small pretzel sticks or dried fruit pieces. The recipe contains dairy and gluten in its standard form.
Potential allergens: Dairy (white chocolate), gluten (pretzels), tree nuts (almonds). Always check your ingredient labels if you’re serving these to someone with allergies.
Personal wellness perspective: I believe in balance. These pretzels are a fun, indulgent treat that’s perfect for a special occasion. They’re not something you’d eat every day, but they’re made with real ingredients and a lot of love. And honestly, the joy they bring—both in making them and sharing them—is a form of wellness in itself. Sometimes a little bit of spooky sweetness is exactly what the soul needs.
Conclusion
These cozy witch finger pretzel rods with white chocolate have become my go-to Halloween recipe for a reason. They’re simple enough to throw together in a pinch, but clever enough to impress even the most dedicated Halloween enthusiast. The salty-sweet crunch, the creepy-cute fingernail detail, the little pop of red at the cuticle—it all comes together to create something that feels both nostalgic and new.
I hope you’ll give them a try, and more than that, I hope you’ll make them your own. Add a sprinkle of cinnamon, swap the jam for caramel, drizzle with dark chocolate—whatever feels right to you. That’s the beauty of a simple recipe like this. It’s a canvas for your own creativity.
For me, these pretzels have become a tradition. Every Halloween, I stand in my kitchen, melting white chocolate and pressing almonds into place, and I think about that rainy afternoon when I was scrambling for a last-minute contribution. I never expected that panicked moment to turn into one of my favorite recipes. But that’s how the best things happen, isn’t it? When you’re not trying too hard, when you’re just making do with what you have, and something wonderful comes out of it.
So go ahead—make a batch for your next Halloween gathering, or just for a cozy night in with a scary movie. And if you come up with your own twist on these witch fingers, I’d love to hear about it. Drop a comment below, tag me in your photos, or share your variations. After all, the best recipes are the ones we pass along and make our own.
Happy Halloween, and happy snacking!
Frequently Asked Questions
Can I make these witch finger pretzel rods ahead of time?
Absolutely! In fact, they’re even better after they’ve sat for a few hours or overnight. Store them in an airtight container at room temperature for up to 5 days. Just don’t refrigerate them, as the moisture can cause the chocolate to bloom.
My white chocolate seized and got grainy. Can I fix it?
Yes, don’t panic! Stir in a teaspoon of coconut oil or vegetable shortening, and the chocolate should smooth out. If it’s still grainy, you can try adding a few drops of hot water (not cold!) and stirring vigorously. The key is to prevent it from seizing in the first place by using low heat and stirring frequently.
What can I use instead of almonds for the fingernails?
If you’re nut-free or just don’t have almonds, you can use small pretzel sticks cut to size, dried apple pieces, or even white chocolate chips shaped into a nail. The look won’t be as convincing, but it’ll still be delicious. For a fun twist, try using pistachios for green fingernails!
How do I get the chocolate to stay smooth and not clump?
The secret is low and slow heat. Melt the white chocolate at 50% power in the microwave, stirring every 30 seconds. Stop heating while there are still a few small chunks—the residual heat will melt them. Adding a teaspoon of coconut oil also helps keep the chocolate smooth and workable.
Can I use candy melts instead of white chocolate?
You can, but I don’t recommend it. Candy melts are designed to be more stable, but they don’t have the same creamy flavor as real white chocolate. The taste is noticeably different, and the texture can be waxy. If you’re in a pinch, go ahead, but for the best results, stick with good quality white chocolate like Ghirardelli or Lindt.
Pin This Recipe!

Cozy Witch Finger Pretzel Rods – Easy White Chocolate Recipe

These creepy-cute witch finger pretzel rods are made with white chocolate, slivered almond fingernails, and a raspberry jam ‘blood’ cuticle. They’re quick, easy, and perfect for Halloween parties.
- Prep Time: 15 minutes
- Cook Time: 30 minutes (setting time)
- Total Time: 45 minutes
- Yield: 12-16 servings 1x
- Category: Dessert
- Cuisine: American
Ingredients
- 1 standard bag (about 12-16) pretzel rods
- 12 ounces (340g) white chocolate (e.g., Ghirardelli or Lindt)
- 1/2 cup (about 60g) slivered almonds
- 2 tablespoons raspberry jam or 1/4 teaspoon red gel food coloring
- 1 teaspoon coconut oil (optional, recommended)
- A pinch of flaky sea salt (e.g., Maldon)
- For the ‘blood’ effect (optional): a small squeeze of red gel food coloring mixed with a tiny bit of corn syrup
Instructions
- Prep your workspace: Line a baking sheet with parchment paper or a silicone mat. Make sure you have enough space to lay out all the pretzel rods without them touching.
- Melt the white chocolate: Break the white chocolate into small, even pieces. Place them in a microwave-safe bowl and microwave in 30-second intervals at 50% power, stirring thoroughly between each interval. It usually takes about 2-3 minutes total. Stop heating while there are still a few small chunks—the residual heat will melt them completely.
- Add the coconut oil: Once the chocolate is smooth, stir in the teaspoon of coconut oil (if using). This thins the chocolate slightly, making it easier to dip and giving it a beautiful shine. Add a pinch of salt and stir to combine.
- Prepare the ‘blood’: If using raspberry jam, warm it slightly in the microwave for 10 seconds to make it easier to spread. If using food coloring, mix a few drops with a tiny bit of corn syrup to create a glossy, thick liquid. Set aside.
- Dip the pretzels: Hold a pretzel rod by one end and dip it into the melted white chocolate, rotating to coat about three-quarters of the rod. Let the excess chocolate drip off back into the bowl. Place the dipped pretzel on the prepared baking sheet.
- Add the fingernail: While the chocolate is still wet, press a slivered almond onto the tip of the pretzel, pointed end facing outward. The almond should be positioned so it looks like a long, witchy fingernail extending from the chocolate. Gently press it in to make sure it sticks. (If the chocolate has started to set, dip the almond in a bit of melted chocolate before attaching it.)
- Create the cuticle effect: Using a toothpick, dab a small amount of raspberry jam or red food coloring mixture at the base of the almond where it meets the chocolate. This creates the illusion of a bloody cuticle. Don’t overdo it—a little goes a long way.
- Add the ‘blood’ drip: For an extra creepy touch, use a clean toothpick to drag a tiny line of jam or food coloring from the cuticle down the side of the pretzel, mimicking a drip of blood. This is optional but highly effective.
- Sprinkle with salt: While the chocolate is still wet, sprinkle a tiny pinch of flaky sea salt over the chocolate-covered portion of the pretzel.
- Let them set: Allow the pretzels to set at room temperature for about 30 minutes, or place them in the refrigerator for 15 minutes if you’re in a hurry. The chocolate should be firm and matte when fully set.
- Repeat: Continue with the remaining pretzel rods. You may need to reheat the chocolate briefly if it starts to thicken as it cools. Just microwave for 10 seconds and stir.
Notes
Use good quality white chocolate for best results. If chocolate seizes, stir in a teaspoon of coconut oil. For a nut-free version, use small pretzel sticks or dried apple pieces instead of almonds. Store in an airtight container at room temperature for up to 5 days; do not refrigerate.
Nutrition
- Serving Size: 1 pretzel rod
- Calories: 180
- Sugar: 16
- Sodium: 200
- Fat: 9
- Saturated Fat: 5
- Carbohydrates: 22
- Protein: 3
Keywords: Halloween, witch fingers, pretzel rods, white chocolate, easy recipe, party snack, spooky treats


