My sister claimed she hated charcuterie boards for years. “Too fussy,” she’d say. “All that arranging for something that disappears in ten minutes.” Then I caught her at her own Friendsgiving last November, standing alone in the corner of her kitchen, meticulously rearranging the apple slices on a board she’d clearly spent an hour assembling. She didn’t even notice me watching. I mean, the woman had a tiny pair of tongs for the pickles.
Honestly, I get the hesitation. The first time I tried to make one, I used a cutting board that was way too small, and everything slid off into a sad pile on the counter. My dog was thrilled, but my guests were not. That’s when I realized it doesn’t have to be a stressful art project. This Easy Friendsgiving Charcuterie Board with Fall Fruits is the result of that mess. It’s proof that you don’t need a fancy slate platter or a culinary degree to put out something that makes people stop and stare (and then grab a handful).
Maybe you’ve been there—standing in the grocery store aisle, paralyzed by the sheer number of cheese options, wondering if you really need three kinds of crackers. Let me tell you, you don’t. This board is built on a simple formula: a few good cheeses, some salty meats, and the best fall produce you can find. It’s the kind of spread that feels special without making you late to your own party. And honestly, that’s the whole point of Friendsgiving, right? Good food, good people, and zero kitchen meltdowns.
Why You’ll Love This Recipe
This isn’t just another cheese board. This is the one that your friends will text you about the next day. Here’s why it works so well for a busy weeknight or a last-minute gathering.
- Quick & Easy: You can have this on the table in under 20 minutes. No cooking, no complicated steps. Just slice, arrange, and serve.
- Simple Ingredients: Most of these items are pantry staples or easy to find at any grocery store. No fancy trips to a specialty market required.
- Perfect for Friendsgiving: It’s the ultimate shareable appetizer. Everyone can graze while the main dishes finish cooking, or it can be the star of a casual potluck.
- Crowd-Pleaser: With a mix of savory, sweet, salty, and tangy, there’s literally something for everyone. Even your picky cousin who “doesn’t like cheese” will find something to nibble on.
- Unbelievably Delicious: The combination of creamy brie, sharp cheddar, salty prosciutto, and sweet, crisp apple slices is pure comfort food. It’s the kind of bite that makes you close your eyes for a second.
What makes this different from every other charcuterie board out there? It’s the focus on seasonal fall fruits. Instead of just grapes and strawberries, we’re using crisp apples, juicy pears, and maybe some dried figs. It’s a subtle shift that makes the whole board feel like autumn on a plate. It’s comfort food reimagined—faster, simpler, but with the same soul-soothing satisfaction. Perfect for impressing your friends without the stress.
What Ingredients You Will Need
This recipe uses simple, wholesome ingredients to deliver big flavor without the fuss. You likely already have some of these in your fridge or pantry. The key is to pick things you actually like to eat—don’t buy a cheese just because it looks fancy if you hate it.
- Cheeses (about 3-4 varieties):
- Brie or Camembert: A soft, creamy cheese that everyone loves. Let it come to room temperature for the best texture. (I like Président or a local creamery brand.)
- Aged Cheddar: Sharp, crumbly, and adds a nice contrast. Look for a block you can slice yourself.
- Manchego or Gouda: A semi-hard cheese with a nutty flavor that pairs beautifully with fruit. (Smoked Gouda is a fun twist!)
- Blue Cheese (optional): For the adventurous eater. A small wedge of Point Reyes or Gorgonzola adds a tangy punch.
- Meats (about 2-3 varieties):
- Prosciutto: Thinly sliced and salty. Let it drape loosely for a rustic look.
- Salami or Soppressata: Hard, dry-cured sausage that’s easy to slice or buy pre-sliced.
- Capicola or Speck: Adds a little spice and variety.
- Fall Fruits (the star of the show):
- Apples: Honeycrisp, Fuji, or Granny Smith. Slice them right before serving to prevent browning. (Toss with a little lemon juice if you’re prepping ahead.)
- Pears: Bosc or Bartlett. They’re sweet and juicy.
- Dried Figs or Dates: Adds a chewy, sweet element. Medjool dates are especially good.
- Pomegranate Seeds: For a pop of color and tartness. You can buy them pre-seeded!
- Crunches & Spreads:
- Crackers: A mix of plain water crackers, whole wheat, and something seedy (like Raincoast Crisps).
- Bread: Sliced baguette or crostini. Toasted is even better.
- Nuts: Candied pecans or Marcona almonds are a game-changer. (I use the ones from Trader Joe’s.)
- Honey or Fig Jam: For drizzling over the brie or pairing with the cheddar.
- Pickles & Olives (for balance):
- Cornichons: Tiny, tangy pickles that cut through the richness.
- Kalamata Olives or Castelvetrano: Briny and buttery. (I’m partial to Castelvetrano—they’re mild and everyone eats them.)
Equipment Needed
You don’t need a lot of fancy gear for this. A wooden cutting board or a large slate platter works perfectly. I’ve used a baking sheet in a pinch—just line it with parchment paper for a rustic look. A couple of small bowls for the olives and jam are helpful, and a good sharp knife for slicing the cheese and fruit is non-negotiable. If you have cheese knives, great, but a standard paring knife does the job. I also like to keep a small spreader for the brie. And honestly, a damp paper towel under the board keeps it from sliding around on the counter. Budget-friendly tip: thrift stores are goldmines for unique platters and little dishes.
Preparation Method
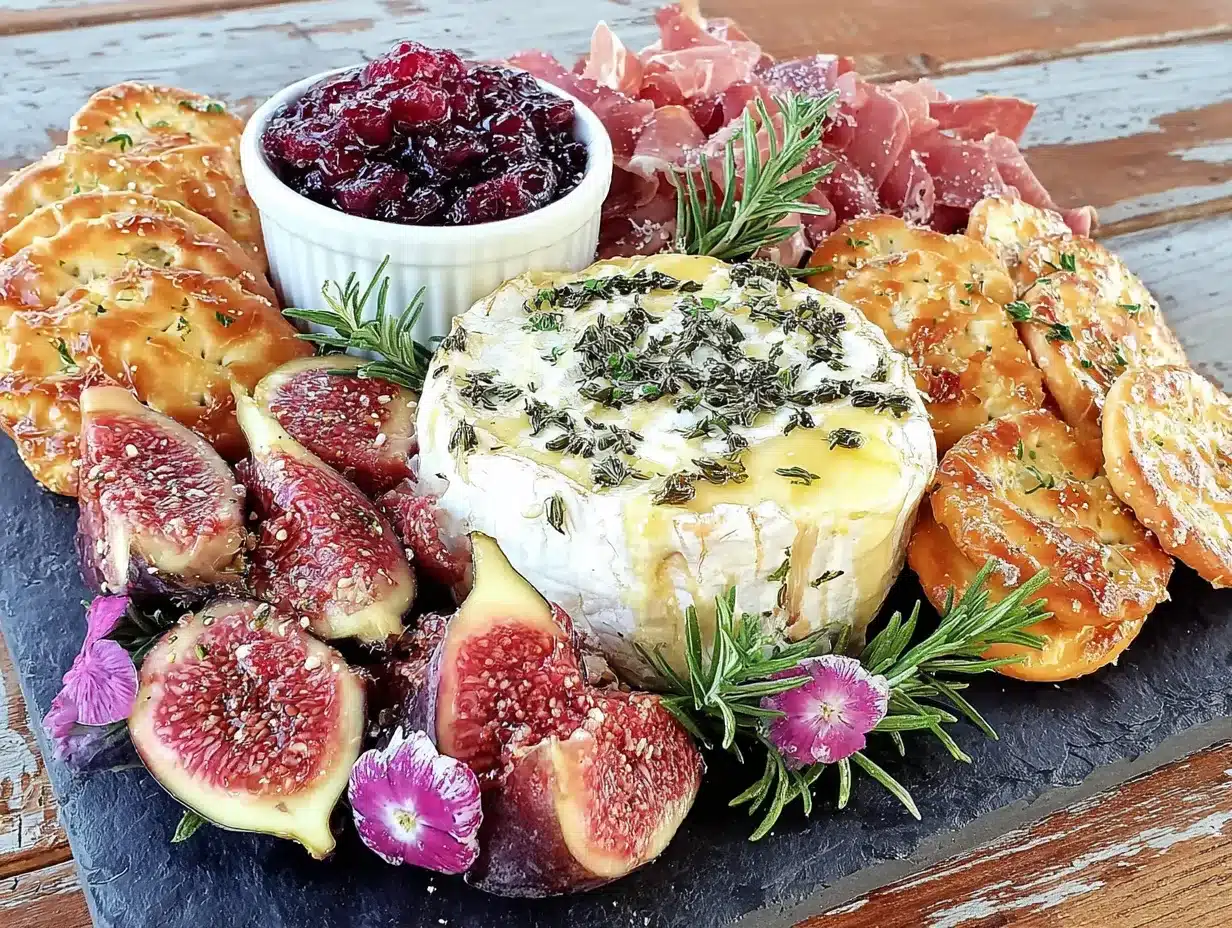
Let’s put this together. It’s more about arranging than cooking, so take a deep breath and have fun with it.
- Set the Stage (5 minutes): Grab your board or platter. Place your small bowls for olives, jam, and honey first. This anchors the layout. I like to put them in a triangle pattern.
- Place the Cheeses (5 minutes): Cut your hard cheeses (cheddar, manchego) into slices or cubes. Place the brie whole on the board. Space them out so there’s a cheese in every “zone” of the board. This ensures everyone can reach something without reaching over the salami.
- Add the Meats (3 minutes): Fold or drape the prosciutto into loose ribbons. Pile the salami slices in a small stack or fan them out. Place them near the cheeses they pair best with—prosciutto near the brie, salami near the cheddar.
- Scatter the Fruits (4 minutes): This is where the fall magic happens. Slice your apples and pears right before serving (or toss in lemon juice). Arrange them in little clusters or overlapping fans. Sprinkle the pomegranate seeds around like tiny jewels. Tuck the dried figs in the gaps.
- Fill the Gaps (3 minutes): Now, fill in any empty spaces with your crackers, nuts, and bread. Don’t be afraid to overlap things. A full board looks inviting. Pile the crackers in a few spots rather than lining them up like soldiers.
- Add the Finishing Touches (2 minutes): Spoon the jam into its bowl. Drizzle a little honey over the brie. Place the cornichons and olives in their bowls. A final sprinkle of fresh rosemary or thyme sprigs around the board adds a beautiful green touch and a hint of aroma.
- The Final Check (1 minute): Step back. Look for any bare spots. Fill them with a few extra nuts or another cracker. You want it to look abundant, not sparse. Then, set it out and watch it disappear.
Cooking Tips & Techniques
Here are a few things I’ve learned the hard way so you don’t have to.
- Room temperature is your friend: Take the cheeses out of the fridge 30 minutes before serving. Cold cheese is flavorless cheese. Trust me on this.
- Don’t slice everything: Leave some cheese in a wedge. It looks more rustic and allows guests to cut their own portions. Plus, it dries out slower.
- The “one-bite” rule: Try to make sure every item on the board can be eaten in one or two bites. Nobody wants to wrestle with a giant hunk of cheddar.
- Prep ahead, but assemble last minute: You can slice the cheese, wash the fruit, and portion the nuts hours ahead. Just keep everything covered in the fridge. Assemble the board right before guests arrive so the crackers stay crunchy and the apples don’t brown.
- My biggest failure: I once put a warm, gooey baked brie on a board with cold grapes. The temperature contrast was a disaster. Now, if I’m serving a baked cheese, I keep the fruit and crackers separate until the last minute.
Variations & Adaptations
This board is incredibly flexible. Here are a few ways to switch it up.
- Vegetarian-Friendly: Skip the meats entirely and double up on the cheeses, nuts, and fruits. Add some marinated artichoke hearts or roasted red peppers for extra flavor.
- Nut-Free Option: Replace the nuts with roasted chickpeas or pretzel sticks. You still get the crunch without the allergens.
- Seasonal Swap: In the summer, swap the apples and pears for fresh figs, stone fruits, and berries. In the winter, add clementine segments and dried cranberries.
- Spicy Twist: Add a drizzle of hot honey over the brie or some pickled jalapeños for a sweet-heat kick. It’s surprisingly good with the sharp cheddar.
- My personal variation: I once added a small bowl of dark chocolate chips and some sea salt flakes. It was a huge hit. Don’t be afraid to throw in something unexpected.
Serving & Storage Suggestions
Serve this board at room temperature. It’s best enjoyed within an hour of assembling. For presentation, I like to place it in the center of the table with small plates and napkins on the side. It pairs beautifully with a crisp white wine like Sauvignon Blanc or a light red like Pinot Noir. A hard cider is also a fantastic fall choice.
As for storage, this board doesn’t keep well once assembled. The crackers get stale and the fruit oxidizes. If you have leftovers, separate the components and store them in airtight containers in the fridge. The cheese will keep for a week, the meats for a few days, and the fruit for a day or two (use it in oatmeal or a salad). The flavors of the cheese actually improve overnight, so don’t throw it out! For reheating, just let the cheese come to room temperature again before serving.
Nutritional Information & Benefits
This is a treat, so I won’t pretend it’s a health food. But it does have some redeeming qualities. The cheese is a great source of calcium and protein. The nuts provide healthy fats and fiber. The apples and pears are packed with vitamins and antioxidants. A serving (about a handful of items) is roughly 300-400 calories, depending on your choices. It’s also naturally gluten-free if you use gluten-free crackers. The main allergens are dairy (cheese) and nuts, so be sure to label those clearly if you’re serving a crowd. My personal take? A little bit of everything is the way to go. It’s about balance, not restriction.
Conclusion
This Easy Friendsgiving Charcuterie Board with Fall Fruits is the kind of recipe that makes you look like a hero with almost zero effort. It’s forgiving, flexible, and always a hit. I love it because it lets the season’s best produce shine, and it’s a dish that encourages people to gather around and share. Don’t be afraid to play with the ingredients based on what you love or what you find at the store. The best board is the one you actually want to eat.
I’d love to hear how yours turns out! Drop a comment below with your favorite fall fruit combo, or tag me in your photos. Happy Friendsgiving, and happy snacking!
Frequently Asked Questions
Can I make this board ahead of time?
You can prep the ingredients up to a day ahead, but assemble the board no more than an hour before serving to keep everything fresh and crunchy.
What if I don’t like blue cheese?
No problem! Just leave it out. The beauty of a charcuterie board is that you can customize it to your taste. Try a creamy goat cheese or a smoky gouda instead.
How do I keep the apple slices from turning brown?
Toss them in a little lemon juice or lime juice right after slicing. It won’t affect the flavor much and will keep them looking pretty for hours.
How much food do I need per person?
For a Friendsgiving appetizer, plan on about 2-3 ounces of cheese and 2 ounces of meat per person. For the fruit and crackers, a generous handful per person is a good rule of thumb.
Can I use a baking sheet instead of a wooden board?
Absolutely! A clean baking sheet lined with parchment paper works great. It’s actually a popular, rustic look. Just make sure it’s big enough to hold everything without it spilling over.
Pin This Recipe!
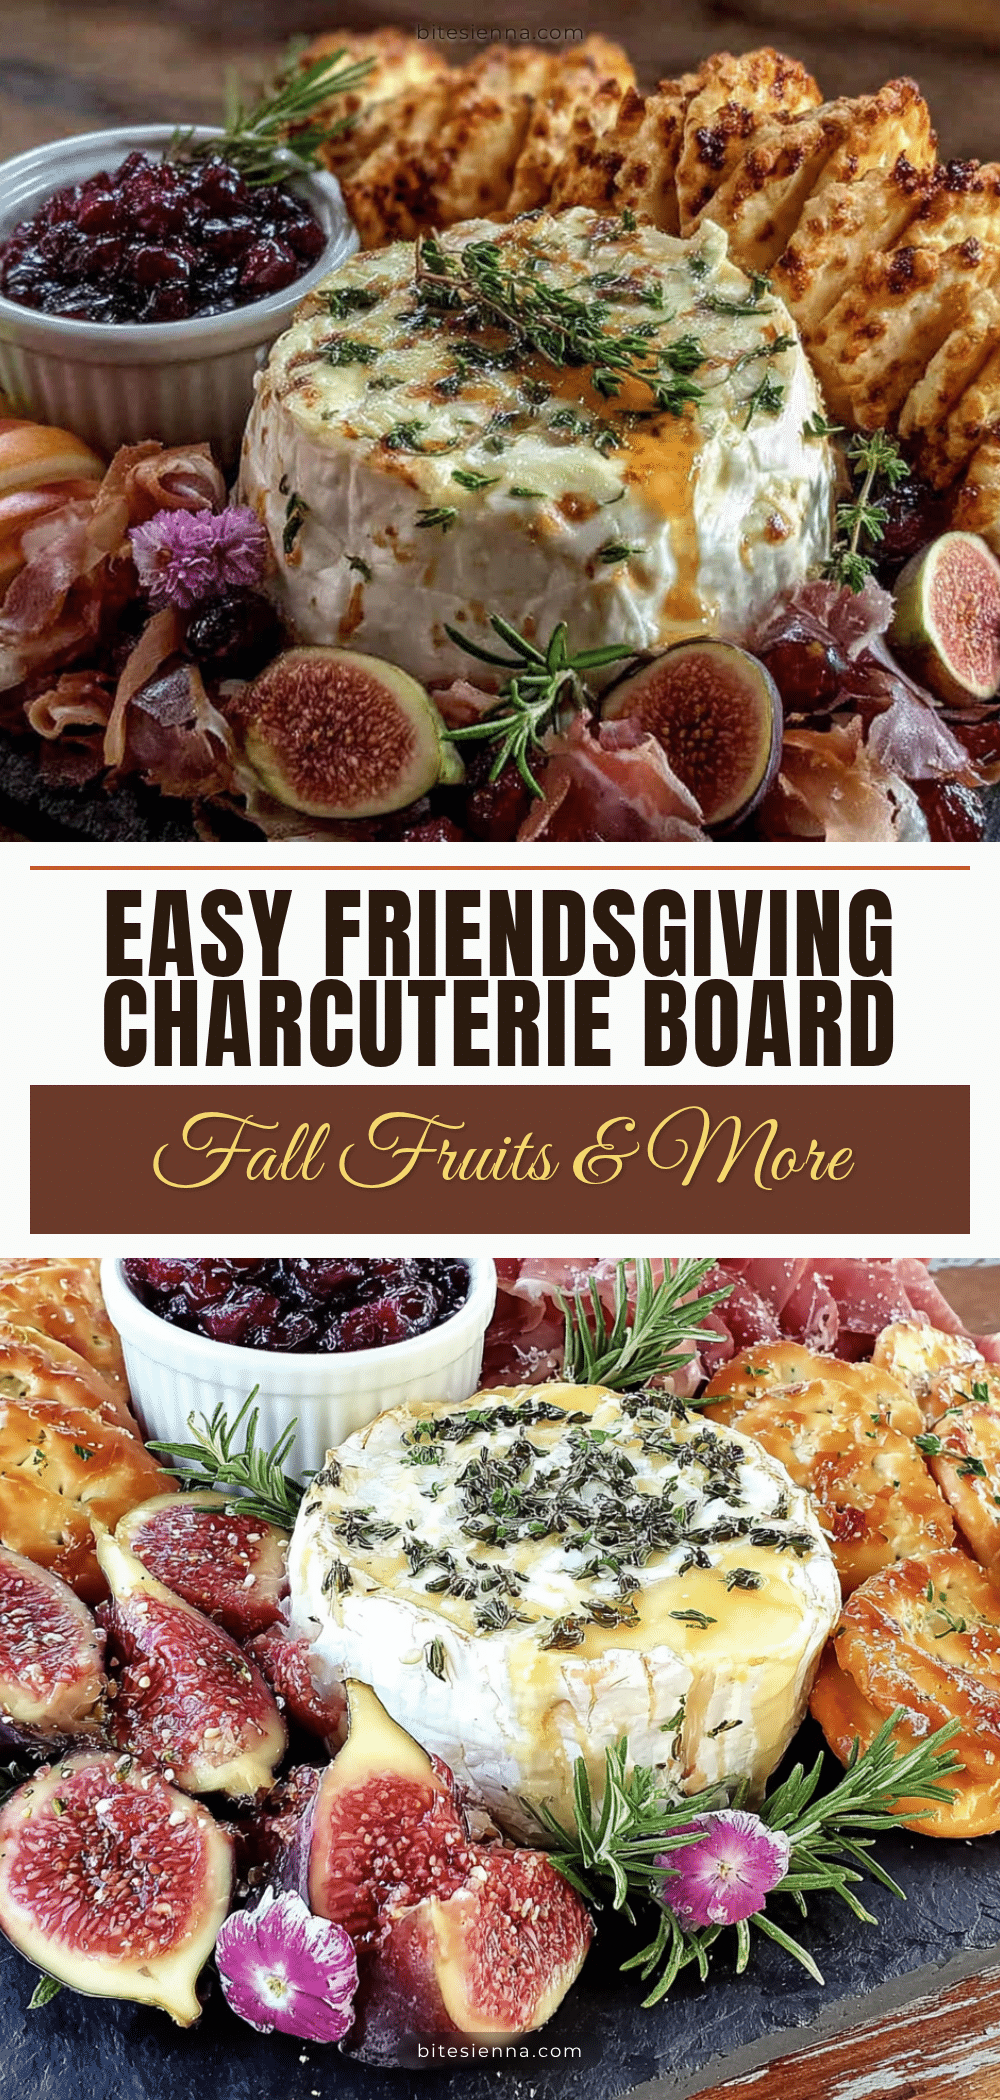
Easy Friendsgiving Charcuterie Board with Fall Fruits
A simple, no-fuss charcuterie board featuring seasonal fall fruits, cheeses, and meats. Perfect for Friendsgiving or any gathering, this board comes together in under 20 minutes and is sure to impress.
- Prep Time: 20 minutes
- Cook Time: 0 minutes
- Total Time: 20 minutes
- Yield: 8 servings
- Category: Appetizer
- Cuisine: American
Ingredients
- Brie or Camembert (1 wheel)
- Aged Cheddar (8 oz block)
- Manchego or Gouda (8 oz block)
- Blue cheese (optional, 4 oz wedge)
- Prosciutto (4 oz, thinly sliced)
- Salami or Soppressata (4 oz, sliced)
- Capicola or Speck (4 oz, optional)
- Apples (2-3, Honeycrisp, Fuji, or Granny Smith)
- Pears (2, Bosc or Bartlett)
- Dried figs or dates (1/2 cup)
- Pomegranate seeds (1/2 cup)
- Crackers (assorted, 8 oz)
- Baguette or crostini (1 small baguette, sliced and toasted)
- Candied pecans or Marcona almonds (1/2 cup)
- Honey or fig jam (1/4 cup)
- Cornichons (1/2 cup)
- Kalamata olives or Castelvetrano olives (1/2 cup)
- Fresh rosemary or thyme sprigs (for garnish)
Instructions
- Set the Stage (5 minutes): Grab your board or platter. Place small bowls for olives, jam, and honey first in a triangle pattern to anchor the layout.
- Place the Cheeses (5 minutes): Cut hard cheeses (cheddar, manchego) into slices or cubes. Place brie whole on the board. Space cheeses evenly across the board.
- Add the Meats (3 minutes): Fold or drape prosciutto into loose ribbons. Pile salami slices in a small stack or fan them out. Place meats near complementary cheeses.
- Scatter the Fruits (4 minutes): Slice apples and pears just before serving (toss with lemon juice if prepping ahead). Arrange in clusters or overlapping fans. Sprinkle pomegranate seeds around. Tuck dried figs in gaps.
- Fill the Gaps (3 minutes): Fill empty spaces with crackers, nuts, and bread. Overlap items for a full, inviting look. Pile crackers in a few spots.
- Add the Finishing Touches (2 minutes): Spoon jam into its bowl. Drizzle honey over brie. Place cornichons and olives in bowls. Garnish with fresh rosemary or thyme sprigs.
- The Final Check (1 minute): Step back and look for bare spots. Fill with extra nuts or crackers. Serve immediately.
Notes
Take cheeses out of fridge 30 minutes before serving for best flavor. Don’t slice all cheese; leave some in wedges. Prep ingredients ahead but assemble board no more than 1 hour before serving. Toss apple slices with lemon juice to prevent browning. For a vegetarian version, skip meats and double up on cheeses, nuts, and fruits.
Nutrition
- Serving Size: 1 serving (about a h
- Calories: 350
- Sugar: 16
- Sodium: 800
- Fat: 22
- Saturated Fat: 10
- Carbohydrates: 28
- Fiber: 4
- Protein: 14
Keywords: charcuterie board, Friendsgiving, fall fruits, appetizer, cheese board, easy, no-cook


