This was supposed to be a fancy layered trifle for a spring brunch. I had it all planned out—angel food cake, fresh strawberries, a vanilla bean custard that I was going to make from scratch. Then the power went out halfway through whipping the custard. I stood there in the dark kitchen, staring at a bowl of half-set goo, and I just laughed. Honestly, what else could I do? I grabbed the wrong box of pudding from the pantry (chocolate instead of vanilla), crushed up some Oreos I had stashed for a totally different purpose, and threw it all together in some clear cups I found under the sink. It looked ridiculous. It looked like dirt. And then I took a bite.
Let me tell you, that first spoonful was a revelation. It was creamy, crunchy, and just the right amount of sweet. I didn’t have a fancy brunch dish. I had Easy Oreo Dirt Cups, and they were better than anything I’d planned. Maybe you’ve been there—you know that feeling when a kitchen disaster turns into a happy little accident? That’s this recipe. It’s the dessert that came from a moment of total frustration, and now it’s the one I make every time I want something fun, fast, and guaranteed to make people smile.
I keep making these dirt cups because they’re not just easy. They’re a little bit silly, a little bit spooky, and absolutely perfect for a spring celebration that needs a playful twist. There’s something about eating “dirt” with a spoon that just makes everyone laugh—and that’s exactly the kind of energy I want at my table.
Why You’ll Love This Recipe
These Easy Oreo Dirt Cups are the kind of dessert that feels like a secret weapon. They look impressive, but they take almost no effort. Here’s why they’ve become my go-to for any spring gathering that needs a spooky touch.
- Quick & Easy: You can throw these together in about 15 minutes. No baking, no complicated steps, just a few simple moves and you’re done.
- Simple Ingredients: You probably have everything you need in your pantry right now. Chocolate pudding, Oreos, cream cheese, and some gummy worms. That’s it.
- Perfect for a Spooky Spring Celebration: Whether it’s an Easter brunch, a spring birthday, or just a fun weekend treat, these cups fit right in. They’re creepy without being too scary.
- Crowd-Pleaser: Kids absolutely lose their minds over these. Adults pretend to be too cool, but I’ve watched them sneak seconds when they think no one is looking.
- Unbelievably Delicious: The combination of creamy pudding, tangy cream cheese, and crunchy Oreo crumbs is next-level comfort food. It’s like a deconstructed cheesecake in a cup.
What makes this recipe different from the rest is the cream cheese. A lot of dirt cup recipes just use pudding and Oreos, but adding that layer of cream cheese gives it a richness and a slight tang that makes it taste way more expensive than it is. It’s not just another version—it’s the best version.
This recipe is the kind that makes you close your eyes after the first bite. It’s comfort food reimagined—faster, simpler, but with the same soul-soothing satisfaction. Perfect for impressing guests without stress, or turning a simple spring afternoon into something memorable.
What Ingredients You Will Need
This recipe uses simple, pantry-friendly ingredients to deliver bold flavor and satisfying texture without any fuss. Most of these are things you probably already have on hand, which is exactly how I like my desserts.
For the Cream Cheese Layer
- 8 oz cream cheese, softened (I use Philadelphia—it gives the smoothest texture)
- 1/2 cup powdered sugar (adds sweetness without grittiness)
- 1 teaspoon vanilla extract (pure, not imitation, for the best flavor)
- 1 cup heavy cream, cold (or use Cool Whip for a shortcut—no judgment here)
For the Pudding Layer
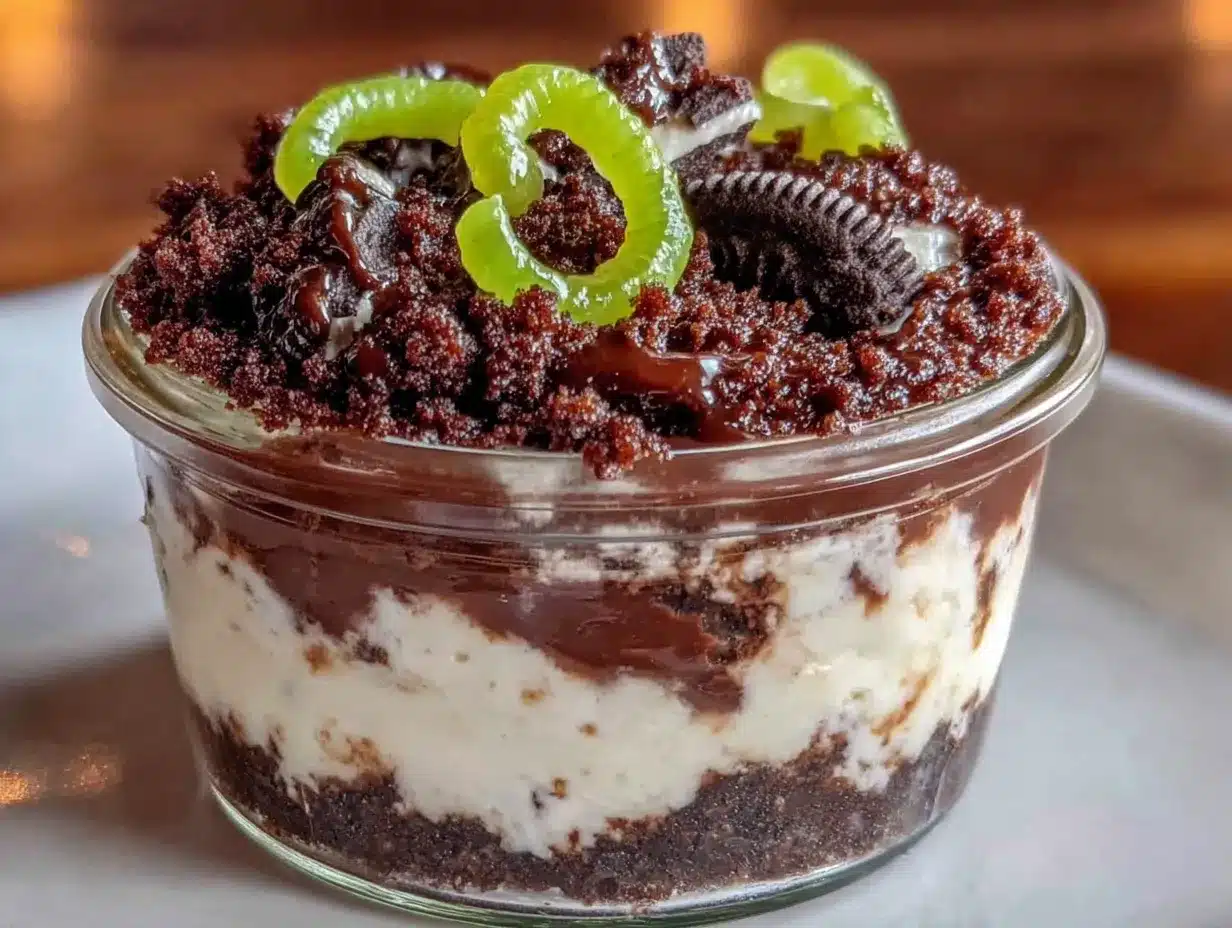
- 1 (3.9 oz) box instant chocolate pudding mix (I prefer Jell-O brand for consistency)
- 2 cups cold milk (whole milk gives the creamiest result, but 2% works fine)
For the Dirt and Decorations
- 1 (14.3 oz) package Oreo cookies (regular, not Double Stuf—you want that dark crumb)
- Gummy worms (about 12-15, for that spooky garden look)
- Optional: Green food coloring (for tinting the cream cheese layer to look like grass)
- Optional: Small flowers or edible flowers (for a spring garden vibe)
I recommend using full-fat cream cheese for the best texture. Low-fat versions can get a little watery and won’t hold up as well in the layers. Also, make sure your heavy cream is really cold—it whips up much faster and stays fluffy longer.
For a dairy-free option, you can use vegan cream cheese and coconut cream instead of heavy cream. The texture will be slightly different, but it still tastes amazing. If you’re gluten-free, use gluten-free chocolate sandwich cookies—there are some good options out there now.
Equipment Needed
You don’t need any fancy gadgets for these dirt cups. Here’s what you’ll need:
- 6-8 clear cups or small jars (I like using 8 oz plastic cups for parties, but mason jars work great too)
- Mixing bowls (one large, one medium)
- Electric hand mixer or stand mixer (you can whisk by hand, but your arm will thank you for the mixer)
- Spatula (for scraping every last bit of cream cheese goodness)
- Rolling pin or food processor (for crushing Oreos into fine crumbs)
- Ziploc bag (if you’re using a rolling pin—less mess)
- Measuring cups and spoons
If you don’t have a food processor, don’t worry. Just put the Oreos in a Ziploc bag and go at them with a rolling pin. It’s a great way to release some stress, honestly. I’ve done it more times than I can count.
For the cups, clear ones are best so you can see the layers. It’s half the fun of eating these—watching that dirt and cream cheese and pudding stack up like a little garden scene.
Preparation Method
Let’s get to the fun part. Here’s how to make these Easy Oreo Dirt Cups step by step.
- Crush the Oreos. Place all the Oreos in a food processor and pulse until you get fine crumbs. If you’re using a Ziploc bag, seal it tight and crush with a rolling pin until there are no large chunks. You want a texture that looks like real dirt. Set aside about 1/4 cup for garnish on top.
- Make the cream cheese layer. In a large mixing bowl, beat the softened cream cheese with an electric mixer until it’s smooth and fluffy—about 2 minutes. Add the powdered sugar and vanilla extract, and beat again until everything is combined and creamy. Scrape down the sides of the bowl with your spatula.
- Whip the heavy cream. In a separate medium bowl, beat the cold heavy cream on high speed until stiff peaks form. This takes about 3-4 minutes with a hand mixer. You’ll know it’s ready when you lift the beaters and the cream stands up straight. If you’re using Cool Whip, skip this step and just fold in 1 1/2 cups.
- Fold it together. Gently fold the whipped cream into the cream cheese mixture using your spatula. Be careful not to overmix—you want it light and airy. If you’re adding green food coloring for a grass effect, stir in a few drops now until you get the shade you want.
- Make the pudding. In a medium bowl, whisk together the instant chocolate pudding mix and cold milk for about 2 minutes. It will start to thicken quickly. Let it sit for 5 minutes to set up completely. It should be thick and glossy.
- Layer the cups. Now for the fun part. Start with a layer of Oreo crumbs at the bottom of each cup—about 2 tablespoons per cup. Add a layer of the cream cheese mixture on top of the crumbs, using about 1/4 cup per cup. Next, add a layer of chocolate pudding, also about 1/4 cup per cup. Repeat the layers: another layer of crumbs, then cream cheese, then pudding. End with a final sprinkle of Oreo crumbs on top.
- Add the worms. Gently poke 2-3 gummy worms into the top of each cup, letting some hang over the edge like they’re crawling out of the dirt. This is the best part—kids go wild for it.
- Chill before serving. Place the cups in the refrigerator for at least 2 hours, or overnight if you have time. This lets the layers set and the flavors meld together. The longer they sit, the better they taste.
A quick note: If you’re making these for a party, you can prep everything the night before and assemble the cups the next morning. Just keep the Oreo crumbs separate until you’re ready to layer—otherwise they’ll get soggy.
Cooking Tips & Techniques
I’ve made these dirt cups more times than I can count, and I’ve learned a few things along the way. Let me share what works.
Don’t skip softening the cream cheese. I know it’s tempting to use it straight from the fridge, but cold cream cheese will leave you with lumpy layers. Let it sit on the counter for 30 minutes before you start. If you’re in a rush, microwave it for 10-15 seconds—just check it every 5 seconds so it doesn’t melt.
Crush the Oreos finely. Big chunks of cookie don’t look like dirt. They look like, well, chunks of cookie. Pulse them in the food processor until they’re almost powdery. If you’re using a bag and rolling pin, really go to town on them.
Use instant pudding, not cook-and-serve. Cook-and-serve pudding needs to be heated and cooled, which takes forever. Instant pudding sets up in minutes and gives you that perfect creamy texture. Trust me on this one—I learned the hard way.
Let the pudding set before layering. If you pour the pudding in while it’s still runny, it’ll mix with the cream cheese layer and you’ll lose those beautiful stripes. Wait the full 5 minutes until it’s thick and glossy.
Chill thoroughly. These taste best when they’ve had time to sit. The cookies soften slightly, the cream cheese firms up, and everything comes together into one cohesive bite. I always make them at least 4 hours before serving.
One mistake I made early on was using too much cream cheese mixture. The layers got all muddled and it was just a creamy mess. Keep the layers even—about 1/4 cup each—and you’ll get that perfect striped look every time.
Variations & Adaptations
These dirt cups are super flexible. Here are some ways to make them your own.
Spooky Spring Garden: Use green food coloring in the cream cheese layer to look like grass. Top with a few edible flowers or small candy flowers for a garden scene. It’s perfect for an Easter brunch or spring baby shower.
Halloween Version: Swap the gummy worms for candy eyeballs or plastic spiders. Use orange food coloring in the cream cheese layer for a pumpkin patch vibe. Add a few candy pumpkins on top for extra spookiness.
Dairy-Free Adaptation: Use vegan cream cheese, coconut cream (chilled and whipped), and dairy-free chocolate pudding mix. The texture will be a bit lighter, but it’s still delicious. I’ve made this for a friend with dairy allergies and she couldn’t tell the difference.
Gluten-Free Option: Use gluten-free chocolate sandwich cookies. There are several brands that work well, and the taste is nearly identical. Just check the label on your pudding mix too—some contain gluten.
No-Bake Cheesecake Version: Omit the pudding layer entirely and double the cream cheese mixture. Fold in some melted chocolate for a richer flavor. It turns into a no-bake cheesecake dirt cup, and honestly, it’s incredible.
I once tried a version with crushed graham crackers instead of Oreos, and it was good—but it wasn’t the same. The dark color of the Oreos really makes the “dirt” effect work. Stick with the cookies if you can.
Serving & Storage Suggestions
These dirt cups are best served cold, straight from the fridge. The contrast between the cool, creamy layers and the slightly softened Oreo crumbs is pure magic.
For presentation: Arrange the cups on a tray with a few extra gummy worms scattered around. If you’re going for a spooky spring theme, add some small fake flowers or plastic bugs around the base of the cups. It makes the whole thing feel like a little garden scene.
What to serve with them: These are rich enough to stand alone, but they pair beautifully with a cup of hot coffee or a glass of cold milk. If you’re serving them at a party, set out a bowl of extra Oreo crumbs and gummy worms so guests can customize their cups.
Storage: Cover each cup with plastic wrap or a lid and store in the refrigerator for up to 3 days. The layers will soften over time, but they still taste great. I actually think they’re even better on day two—the flavors meld together beautifully.
Freezing: You can freeze these, but I don’t recommend it. The cream cheese layer can get icy and the texture changes. If you absolutely must freeze them, do it before adding the gummy worms, and thaw in the refrigerator overnight.
Reheating: Don’t. These are meant to be eaten cold. If you want a warm dessert, this isn’t it.
The flavors develop nicely over time, so don’t be afraid to make them a day ahead. Just wait to add the gummy worms until right before serving—they can get a little slimy if they sit in the fridge too long.
Nutritional Information & Benefits
Let’s be real—these are a treat, not a health food. But here’s what you’re looking at per serving (based on 8 servings):
- Calories: Approximately 420
- Fat: 24g
- Carbohydrates: 48g
- Protein: 6g
- Sugar: 34g
On the plus side, the cream cheese provides a good amount of calcium and protein. The Oreos… well, they provide joy. And sometimes that’s exactly what you need.
This recipe is not gluten-free or dairy-free in its standard form, but as I mentioned above, you can adapt it easily. It contains dairy and gluten, so keep that in mind if you’re serving guests with allergies.
My personal philosophy is that desserts like this are about connection and celebration. One serving of dirt cups isn’t going to derail a healthy lifestyle. It’s about balance—enjoying the treat, savoring the moment, and moving on. Life’s too short to skip dessert.
Conclusion
These Easy Oreo Dirt Cups are proof that sometimes the best recipes come from the biggest disasters. They’re fun, they’re fast, and they’re absolutely perfect for a spooky spring celebration. Whether you’re making them for Easter, a spring birthday, or just a random Tuesday that needs a little magic, they deliver every single time.
I love that I can make these with my kids in under 20 minutes, and they look like I spent hours on them. I love that I can customize them for any occasion—just swap the decorations and you’ve got a whole new dessert. But most of all, I love that they make people smile. There’s something about eating “dirt” that brings out the kid in everyone.
So go ahead—grab some Oreos, some pudding, and a pack of gummy worms. Make a mess in your kitchen. Laugh when you spill crumbs everywhere. And when you take that first spoonful of creamy, crunchy, chocolatey goodness, remember that sometimes the best things in life are the ones you never planned.
I’d love to hear how yours turn out! Drop a comment below and let me know what variations you tried. Did you add candy flowers? Use a different pudding flavor? I’m always looking for new ideas. And if you loved this recipe, share it with a friend who needs a little spooky spring fun in their life.
Frequently Asked Questions
Can I make these Oreo dirt cups ahead of time?
Absolutely! You can assemble them up to 24 hours in advance. Just wait to add the gummy worms until right before serving so they stay firm and don’t get slimy.
Can I use Cool Whip instead of heavy cream?
Yes, you can substitute 1 1/2 cups of Cool Whip for the heavy cream. Just fold it into the cream cheese mixture instead of whipping the cream from scratch. It saves time and works perfectly.
How do I get the layers to look so neat?
The key is letting the pudding set completely before layering. Also, use a spoon to gently spread each layer rather than pouring it in. Take your time—it’s worth it for that Instagram-worthy look.
Can I use a different type of cookie?
You can, but the dark color of Oreos is what makes the “dirt” effect work. If you use golden Oreos or graham crackers, it will look more like sand than dirt. Still tasty, just different visually.
How long do these keep in the fridge?
They’ll stay fresh for up to 3 days in the refrigerator. The Oreo crumbs will soften over time, but the flavor actually improves as the layers meld together. Just keep them covered so they don’t absorb any fridge odors.
Pin This Recipe!
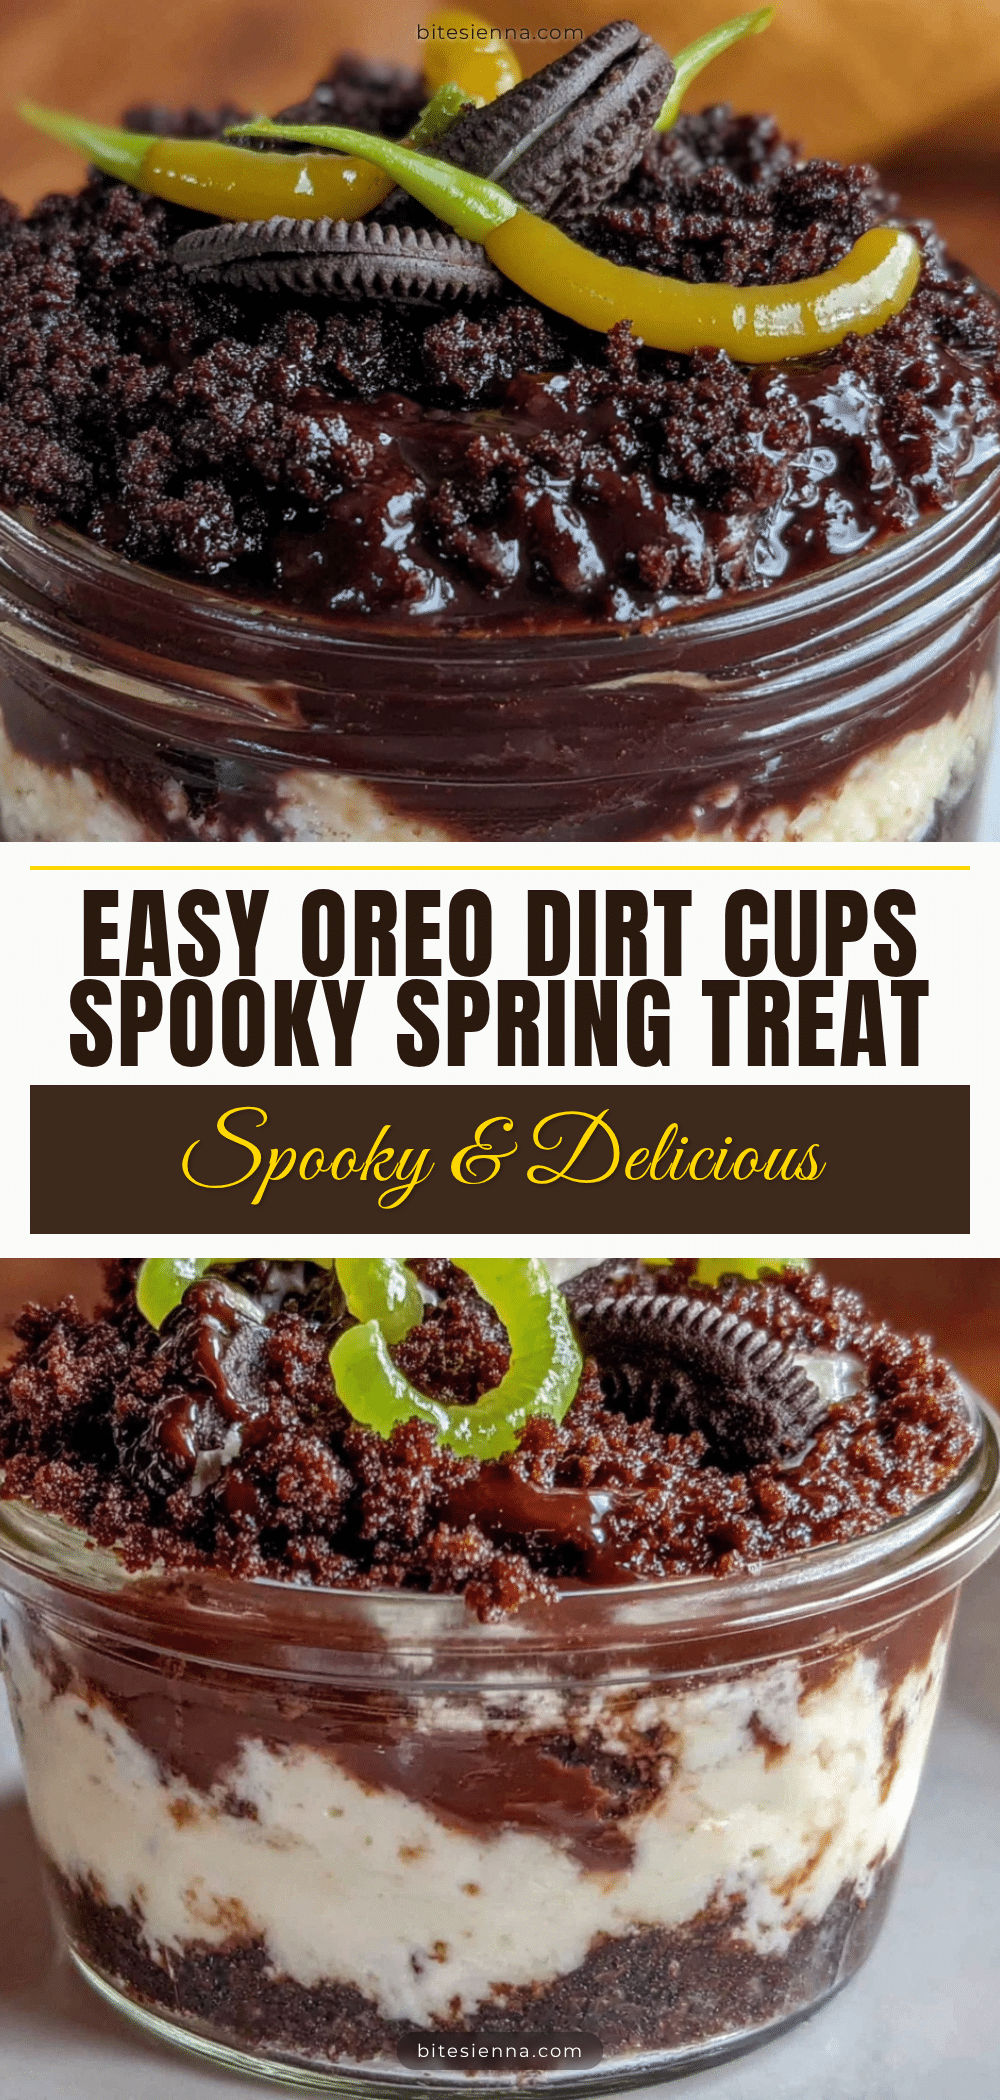
Easy Oreo Dirt Cups: The Best Spooky Spring Dessert
These Easy Oreo Dirt Cups are a fun, no-bake dessert with creamy layers of chocolate pudding, tangy cream cheese, and crunchy Oreo crumbs, topped with gummy worms for a spooky spring treat. Perfect for Easter, birthdays, or any celebration that needs a playful twist.
- Prep Time: 15 minutes
- Cook Time: 0 minutes
- Total Time: 2 hours 15 minutes (includes chilling)
- Yield: 6-8 servings 1x
- Category: Dessert
- Cuisine: American
Ingredients
- 8 oz cream cheese, softened
- 1/2 cup powdered sugar
- 1 teaspoon vanilla extract
- 1 cup heavy cream, cold (or 1 1/2 cups Cool Whip)
- 1 (3.9 oz) box instant chocolate pudding mix
- 2 cups cold milk
- 1 (14.3 oz) package Oreo cookies (regular, not Double Stuf)
- 12–15 gummy worms
- Optional: Green food coloring
- Optional: Small flowers or edible flowers
Instructions
- Crush the Oreos: Place all Oreos in a food processor and pulse until fine crumbs form. Alternatively, seal in a Ziploc bag and crush with a rolling pin. Set aside about 1/4 cup for garnish.
- Make the cream cheese layer: In a large bowl, beat softened cream cheese with an electric mixer until smooth and fluffy (about 2 minutes). Add powdered sugar and vanilla extract, beat until combined and creamy. Scrape down sides.
- Whip the heavy cream: In a separate bowl, beat cold heavy cream on high speed until stiff peaks form (about 3-4 minutes). If using Cool Whip, skip this step and fold in 1 1/2 cups.
- Fold it together: Gently fold whipped cream into cream cheese mixture using a spatula until light and airy. If using green food coloring, stir in a few drops now.
- Make the pudding: In a medium bowl, whisk together instant chocolate pudding mix and cold milk for about 2 minutes. Let sit for 5 minutes until thick and glossy.
- Layer the cups: Start with 2 tablespoons Oreo crumbs at the bottom of each cup. Add 1/4 cup cream cheese mixture, then 1/4 cup chocolate pudding. Repeat layers: crumbs, cream cheese, pudding. End with a final sprinkle of Oreo crumbs on top.
- Add the worms: Gently poke 2-3 gummy worms into the top of each cup, letting some hang over the edge.
- Chill before serving: Refrigerate for at least 2 hours, or overnight, to let layers set and flavors meld.
Notes
For best results, use full-fat cream cheese and cold heavy cream. Let cream cheese soften at room temperature for 30 minutes before starting. Crush Oreos finely for a dirt-like texture. Use instant pudding, not cook-and-serve. Let pudding set fully before layering to keep layers distinct. Chill at least 4 hours for best flavor. Store covered in refrigerator for up to 3 days. Add gummy worms just before serving to prevent sliminess. For dairy-free, use vegan cream cheese and coconut cream. For gluten-free, use gluten-free chocolate sandwich cookies.
Nutrition
- Serving Size: 1 cup (8 oz)
- Calories: 420
- Sugar: 34
- Sodium: 380
- Fat: 24
- Saturated Fat: 14
- Carbohydrates: 48
- Fiber: 2
- Protein: 6
Keywords: Oreo dirt cups, spooky dessert, spring dessert, no-bake dessert, chocolate pudding, cream cheese, gummy worms, Easter dessert, kid-friendly dessert