Introduction
My neighbor wasn’t trying to impress anyone. I’d stopped by to pick up a package that had been misdelivered to her house, and the smell hit me before I even knocked on her screen door. It wasn’t the typical vanilla-and-sugar scent I expected from a baking afternoon. It was darker somehow, almost like rich chocolate with a hint of something mysterious. She opened the door with flour on her nose and a cookie sheet in her hand, completely unfazed by the fact that she’d just created the most striking black cookies I’d ever seen.
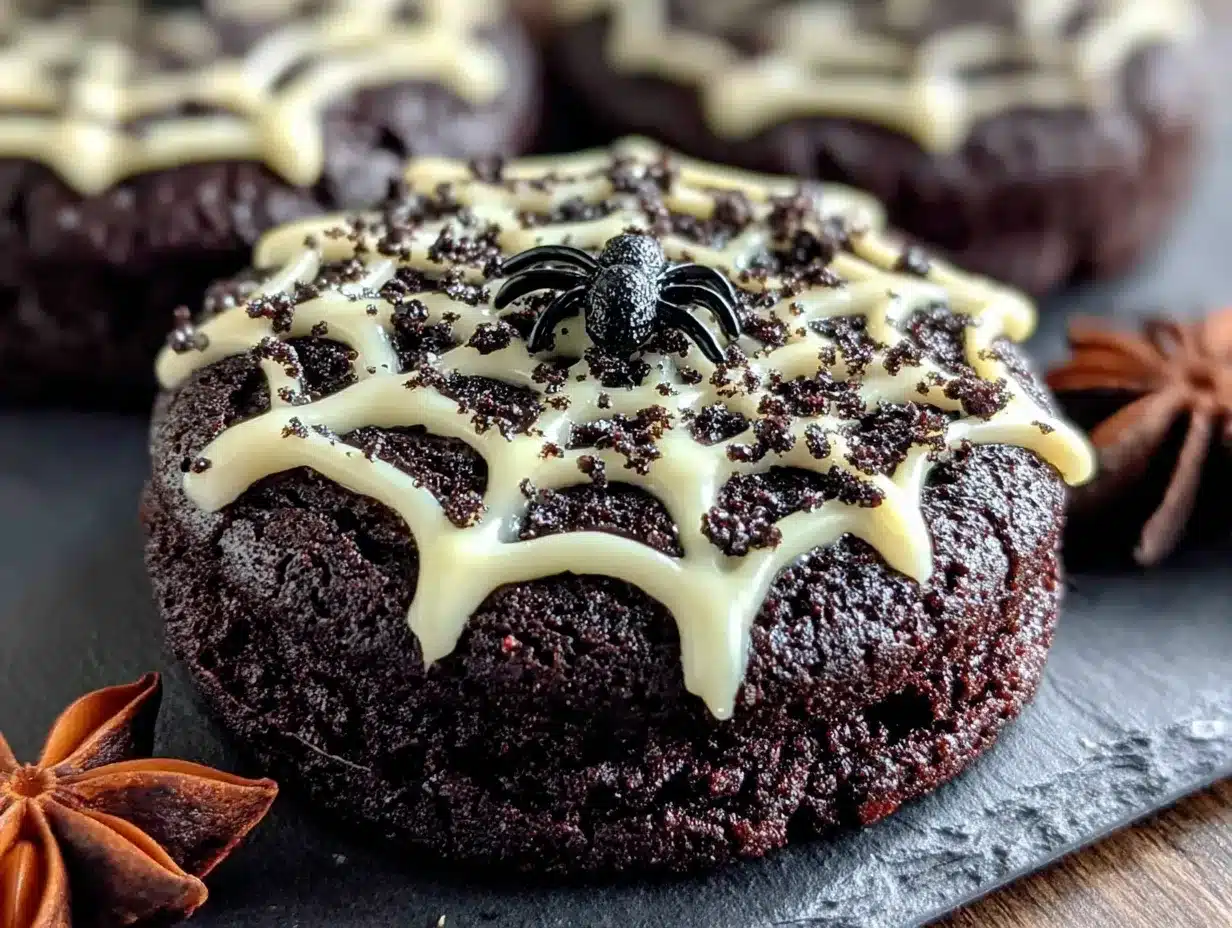
“Oh, these are just for the kids’ Halloween party,” she said, shrugging like she’d whipped up a batch of plain sugar cookies. But these weren’t plain. They were jet black, perfectly shaped like bats and ghosts, with a subtle crunch that gave way to a tender, buttery middle. I stood there holding my package, completely distracted, watching her youngest daughter sneak one off the cooling rack when she thought no one was looking.
Honestly, I think I mumbled something about needing to go, but my brain was already racing. How did she get them so black without burning them? Was it food coloring? Some special trick? The casualness of the whole thing was what got me. She wasn’t doing anything special in her mind, but to me, she’d just unlocked the secret to the perfect Halloween cookie. Maybe you’ve been there, standing in someone else’s kitchen, realizing you’re about to ask for a recipe before you’ve even tasted it.
I did ask, and she laughed and told me the secret was black cocoa powder. I’d never even heard of it. That day changed my Halloween baking forever, and now I’m sharing the exact method so you can have that same moment in your own kitchen.
Why You’ll Love This Recipe
These Black Cocoa Halloween Sugar Cookies aren’t just another sugar cookie recipe. They solve real problems that come up when you’re feeding a family on a sensible budget during the spooky season.
- Kid-Approved and Picky Eater Friendly: The deep black color is a total win with kids. They think it’s magical, and the chocolate flavor is mild enough that even the pickiest eaters won’t complain. I’ve tested these on my own niece who normally won’t touch anything “fancy,” and she ate three.
- Budget-Friendly Ingredients: No expensive specialty items here. Black cocoa powder is the one star ingredient, and a bag lasts forever. Everything else is pantry staples you probably already have on hand.
- Easy Enough for Busy Weeknights: The dough comes together in about 15 minutes. No complicated techniques, no chilling required if you’re in a rush (though it does help). Perfect for those evenings when your kid announces they need cookies for tomorrow’s class party.
- Leftovers That Reheat Well: These cookies stay soft for days in an airtight container. You can even freeze the baked cookies or the raw dough, making them perfect for planning ahead.
- Unbelievably Delicious: The black cocoa gives them this rich, almost Oreo-like flavor that’s completely different from regular sugar cookies. The texture is soft with slightly crisp edges, and the flavor combo is next-level comfort food.
What makes this recipe different from all the other Halloween cookie recipes out there is the black cocoa powder. It’s not just about the color. It adds a depth of flavor that food coloring can’t touch. Plus, this recipe has been tested by actual kids and busy parents, so you know it works in real life.
What Ingredients You Will Need
This recipe uses simple, wholesome ingredients to deliver that striking black color and satisfying texture without the fuss. Most of these are pantry staples you probably already have in your kitchen.
For the Cookies
- 2 ½ cups (312g) all-purpose flour – Spoon and level for best results. Too much flour makes tough cookies.
- ½ cup (40g) black cocoa powder – This is the star. I recommend Rodelle or King Arthur brands for the deepest color.
- 1 teaspoon baking powder – Helps them rise just enough without spreading too thin.
- ½ teaspoon salt – Balances the sweetness and brings out the chocolate flavor.
- 1 cup (226g) unsalted butter, softened – Let it sit out for 30 minutes. Cold butter won’t cream properly.
- 1 cup (200g) granulated sugar – Regular white sugar works best for that classic sugar cookie texture.
- 1 large egg, room temperature – Crack it into a bowl first in case you get shell pieces.
- 1 teaspoon vanilla extract – Pure vanilla makes a difference, but imitation works fine too.
For the Icing (Optional but Recommended)
- 2 cups (240g) powdered sugar
- 3 tablespoons milk or cream – Add more if needed for drizzling consistency.
- ½ teaspoon vanilla extract
- Orange and purple gel food coloring – For decorating. Americolor brand gives bright colors without thinning the icing.
Ingredient Tips and Substitutions
If you can’t find black cocoa powder, you can use Dutch-process cocoa powder mixed with a tiny bit of black gel food coloring. It won’t be quite as dark, but it’ll still be impressive. For a dairy-free version, swap the butter with vegan butter sticks (not margarine) and use plant-based milk in the icing. I’ve tried this with almond flour for a gluten-free option, and it works if you add ¼ teaspoon of xanthan gum to help with texture.
Equipment Needed
You don’t need a professional bakery setup to make these cookies. Here’s what you’ll actually use:
- Mixing bowls – One large and one medium. Glass or metal works best.
- Electric hand mixer or stand mixer – You can cream butter and sugar by hand, but it takes longer. I’ve done both, and the mixer saves your arm.
- Whisk and rubber spatula – For combining dry ingredients and scraping down the bowl.
- Cookie cutters – Halloween shapes are fun, but round works too. I found a set of six at the dollar store that’s lasted years.
- Baking sheets – Two standard half-sheet pans. Line them with parchment paper for easy cleanup.
- Cooling rack – Helps cookies cool evenly without soggy bottoms.
- Rolling pin – A regular one works fine. If you don’t have one, a wine bottle works in a pinch (I’ve been there).
- Piping bags or zip-top bags – For the icing. Snip a tiny corner off a zip-top bag for a quick piping tool.
Maintenance tip: Wash your cookie cutters by hand. They can rust in the dishwasher, and nobody wants rusty ghost cookies.
Preparation Method
Let’s get to the fun part. This method is straightforward, but I’ve included all the little details I’ve learned from making these cookies at least a dozen times.
- Preheat your oven to 350°F (175°C). Line two baking sheets with parchment paper. Don’t skip the parchment – it prevents sticking and makes cleanup a breeze.
- Whisk the dry ingredients together. In a medium bowl, combine the flour, black cocoa powder, baking powder, and salt. Whisk until everything is evenly distributed. The cocoa powder can be clumpy, so break up any lumps with the whisk. Set this aside.
- Cream the butter and sugar. In a large bowl, beat the softened butter and granulated sugar together until light and fluffy. This takes about 3 minutes with an electric mixer on medium speed. You’ll know it’s ready when it looks pale and slightly increased in volume. Scrape down the sides of the bowl halfway through.
- Add the egg and vanilla. Beat in the egg and vanilla extract until just combined. Don’t overmix here. The mixture might look a little separated, and that’s fine. It’ll come together when you add the dry ingredients.
- Mix in the dry ingredients. Add the flour mixture to the wet ingredients in two batches. Mix on low speed until just combined. The dough will be thick and dark, almost like black playdough. If it seems too dry, add a teaspoon of milk. If it’s too sticky, add a tablespoon of flour.
- Chill the dough (optional but helpful). Wrap the dough in plastic wrap and refrigerate for 30 minutes. This makes it easier to roll out and helps the cookies hold their shape better. If you’re in a rush, you can skip this step, but the cookies might spread a little more.
- Roll out the dough. On a lightly floured surface, roll the dough to about ¼-inch thickness. I like to roll between two sheets of parchment paper to avoid adding too much extra flour. The dough should be smooth and easy to work with.
- Cut out your shapes. Use your Halloween cookie cutters to cut out shapes. Press straight down and lift up without twisting. Twisting can seal the edges and prevent the cookies from rising properly. Re-roll the scraps and cut more shapes until all the dough is used.
- Bake for 8-10 minutes. Place the cookies about 2 inches apart on the prepared baking sheets. Bake for 8 minutes for softer cookies or 10 minutes for slightly crisper edges. The cookies will look set on the edges but still soft in the center. They’ll continue to firm up as they cool.
- Cool completely before decorating. Let the cookies cool on the baking sheet for 5 minutes, then transfer to a cooling rack. Wait until they’re completely cool before adding icing. Warm cookies will turn your icing into a melty mess.
Cooking Tips & Techniques
I’ve made plenty of mistakes with these cookies so you don’t have to. Here’s what I’ve learned the hard way.
Don’t overbake. The black color makes it hard to tell when they’re done. Trust the timer, not your eyes. Overbaked black cocoa cookies taste bitter and dry. Set a timer for 8 minutes and check them. They should look slightly puffed and set around the edges.
Watch your flour measurement. Too much flour makes the cookies tough and dry. Use the spoon-and-level method: spoon flour into your measuring cup and level it off with a knife. Don’t scoop directly with the measuring cup, or you’ll pack in too much flour.
Keep the dough cool. If the dough gets too warm while you’re rolling and cutting, it becomes sticky and hard to work with. Pop it back in the fridge for 10 minutes if needed. I learned this the hard way when my bat shapes turned into blobs.
Use a light touch with the rolling pin. Pressing too hard can make the cookies dense. Roll gently and evenly. If you see cracks forming on the edges, the dough is too dry. Knead in a tiny bit of butter or milk to fix it.
Plan your decorating strategy. If you’re making these with kids, prepare the icing and sprinkles before you start baking. Once the cookies are cool, set up a little assembly line. It keeps the chaos manageable and makes the whole experience more fun.
Variations & Adaptations
This recipe is flexible, and I’ve tried several variations depending on what I have on hand or who I’m feeding.
Dietary Adaptations: For a gluten-free version, substitute the all-purpose flour with a 1:1 gluten-free baking blend. Add ¼ teaspoon of xanthan gum if your blend doesn’t already include it. For dairy-free, use vegan butter sticks and plant-based milk in the icing. I’ve made these for a friend’s dairy-free kid, and they disappeared faster than the regular ones.
Flavor Twists: Add ½ teaspoon of peppermint extract for a black-and-white cookie vibe. Or mix in ¼ cup of mini chocolate chips for extra chocolatey goodness. One time I added a teaspoon of orange zest, and it gave the cookies this amazing subtle citrus note that paired perfectly with the dark cocoa.
Different Cooking Methods: If you don’t want to roll and cut, you can scoop the dough into balls and flatten them slightly with a glass. They’ll be round, but you can press a candy corn or chocolate chip into the center for a festive touch. I’ve also made these as sandwich cookies with a cream cheese filling, and they were incredible.
Seasonal Variations: These cookies aren’t just for Halloween. Use Christmas cookie cutters and red and green icing for December. Heart shapes for Valentine’s Day. The black cocoa gives them a sophisticated look that works for any occasion where you want something a little different.
Serving & Storage Suggestions
These cookies are best served at room temperature. The texture is soft and tender, with just a little crunch on the edges. If you’re serving them at a party, arrange them on a platter with some orange and purple napkins for a festive look.
Storage: Keep baked cookies in an airtight container at room temperature for up to 5 days. Layer them with parchment paper between each layer to prevent sticking, especially if you’ve added icing. The flavor actually gets better after a day or two as the cocoa settles.
Freezing: You can freeze both the baked cookies and the raw dough. For baked cookies, freeze in a single layer on a baking sheet, then transfer to a freezer bag. They’ll keep for up to 3 months. Thaw at room temperature for about 30 minutes before serving. For raw dough, wrap tightly in plastic wrap and freeze for up to 3 months. Thaw in the fridge overnight before rolling and cutting.
Reheating: If you want that fresh-from-the-oven taste, pop a cookie in the microwave for 10 seconds. It softens them up beautifully. For a whole batch, warm them in a 300°F oven for 5 minutes.
Gift Giving: These cookies make fantastic homemade gifts. Pack them in a clear cellophane bag tied with orange ribbon. Attach a tag with the recipe, and you’ve got a thoughtful, budget-friendly present that shows you care.
Nutritional Information & Benefits
Here’s the approximate nutritional breakdown for one cookie (based on 24 cookies per batch, without icing):
| Nutrient | Amount |
|---|---|
| Calories | 145 |
| Total Fat | 8g |
| Saturated Fat | 5g |
| Carbohydrates | 17g |
| Sugar | 9g |
| Protein | 2g |
| Fiber | 1g |
While these are definitely a treat, the black cocoa powder actually contains antioxidants and minerals like iron and magnesium. It’s also lower in fat than regular cocoa powder because it’s processed differently. That said, the butter and sugar make this an occasional indulgence, not an everyday snack. If you’re watching sugar intake, you can reduce the sugar by a quarter cup without affecting the texture too much.
These cookies are not gluten-free, dairy-free, or vegan in their standard form, but substitutions are easy as noted above. They do contain eggs, wheat, and dairy, so keep that in mind for allergies.
Conclusion
These Black Cocoa Halloween Sugar Cookies have become a staple in my kitchen every October, and I think they’ll become one in yours too. They’re proof that you don’t need fancy ingredients or complicated techniques to create something truly memorable. The black cocoa powder does all the heavy lifting, giving you cookies that look impressive and taste even better.
I love this recipe because it brings people together. Whether you’re baking with your kids on a rainy Saturday or sending a batch to school for a class party, these cookies create those little moments of joy that make the holiday season special. The best part? You can customize them however you want. Different shapes, different icing colors, different sprinkles. Make them your own.
I’d love to hear how yours turn out. Drop a comment below with your favorite Halloween cookie cutter shape or any fun variations you tried. Share this recipe with a friend who loves baking with their kids, and tag me in your cookie photos. Happy Halloween baking, friend. You’ve got this.
Frequently Asked Questions
Can I use regular cocoa powder instead of black cocoa?
You can, but the cookies won’t be black. They’ll be a dark brown. For the black color, you really need black cocoa powder. If you can’t find it, mix regular cocoa with a tiny bit of black gel food coloring.
Why did my cookies spread too much?
This usually happens when the dough is too warm or the butter was too soft. Chill the dough for at least 30 minutes before rolling. Also, make sure your baking sheets are cool before putting the next batch on.
Can I make the dough ahead of time?
Absolutely. The dough can be refrigerated for up to 3 days or frozen for up to 3 months. Just wrap it tightly in plastic wrap. Let it sit at room temperature for 10 minutes before rolling if it’s too firm.
How do I get the icing to stick without making a mess?
Make sure the cookies are completely cool. If your icing is too thin, add more powdered sugar. Too thick, add a drop of milk. Pipe the icing in a thin outline first, then fill it in. Let the icing set for at least an hour before stacking the cookies.
Can I make these cookies without a mixer?
Yes, you can. Cream the butter and sugar with a wooden spoon until smooth. It takes a little more elbow grease, but it works. Just make sure the butter is really soft before you start.
Pin This Recipe!
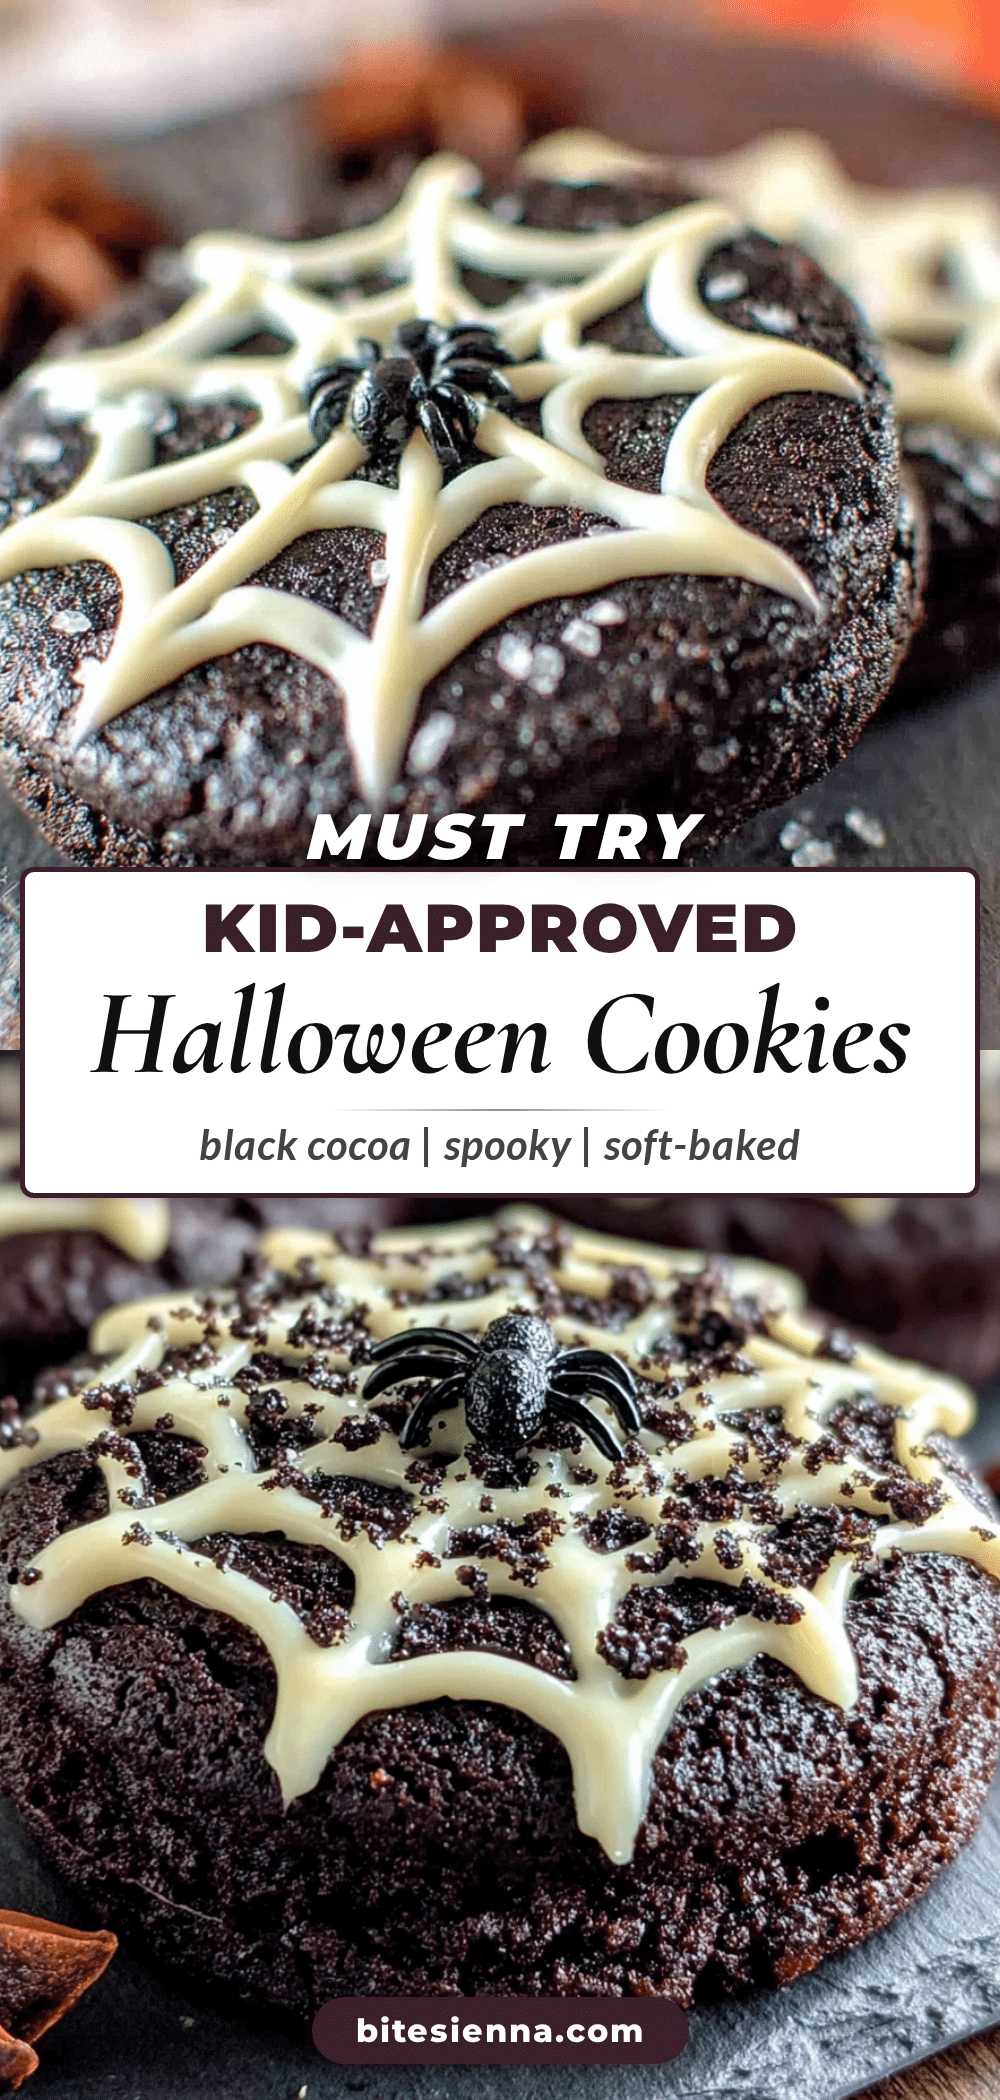
Black Cocoa Halloween Sugar Cookies: Easy Kid-Approved Recipe
These Black Cocoa Halloween Sugar Cookies are jet black, perfectly shaped like bats and ghosts, with a subtle crunch that gives way to a tender, buttery middle. Made with black cocoa powder for a rich, Oreo-like flavor, they’re kid-approved and budget-friendly.
- Prep Time: 15 minutes
- Cook Time: 8-10 minutes
- Total Time: 55 minutes (including optional 30-minute chill time)
- Yield: 24 cookies 1x
- Category: Dessert
- Cuisine: American
Ingredients
- 2 ½ cups (312g) all-purpose flour
- ½ cup (40g) black cocoa powder
- 1 teaspoon baking powder
- ½ teaspoon salt
- 1 cup (226g) unsalted butter, softened
- 1 cup (200g) granulated sugar
- 1 large egg, room temperature
- 1 teaspoon vanilla extract
- 2 cups (240g) powdered sugar (for icing)
- 3 tablespoons milk or cream (for icing)
- ½ teaspoon vanilla extract (for icing)
- Orange and purple gel food coloring (for decorating)
Instructions
- Preheat your oven to 350°F (175°C). Line two baking sheets with parchment paper.
- In a medium bowl, whisk together the flour, black cocoa powder, baking powder, and salt until evenly distributed. Break up any lumps with the whisk. Set aside.
- In a large bowl, beat the softened butter and granulated sugar together until light and fluffy, about 3 minutes with an electric mixer on medium speed. Scrape down the sides of the bowl halfway through.
- Beat in the egg and vanilla extract until just combined. The mixture might look a little separated; that’s fine.
- Add the flour mixture to the wet ingredients in two batches. Mix on low speed until just combined. The dough will be thick and dark. If it seems too dry, add a teaspoon of milk. If too sticky, add a tablespoon of flour.
- Wrap the dough in plastic wrap and refrigerate for 30 minutes (optional but helpful for easier rolling and better shape retention).
- On a lightly floured surface, roll the dough to about ¼-inch thickness. Roll between two sheets of parchment paper to avoid adding too much extra flour.
- Use Halloween cookie cutters to cut out shapes. Press straight down and lift up without twisting. Re-roll scraps and cut more shapes until all dough is used.
- Place cookies about 2 inches apart on the prepared baking sheets. Bake for 8-10 minutes: 8 minutes for softer cookies, 10 minutes for slightly crisper edges. Cookies will look set on edges but soft in center; they’ll firm up as they cool.
- Let cookies cool on the baking sheet for 5 minutes, then transfer to a cooling rack. Cool completely before decorating.
- For the icing: In a small bowl, whisk together powdered sugar, milk or cream, and vanilla extract until smooth. Divide icing into bowls and tint with orange and purple gel food coloring as desired. Pipe or drizzle onto cooled cookies.
Notes
Don’t overbake; the black color makes it hard to tell when done, so trust the timer. Use the spoon-and-level method for flour to avoid tough cookies. If dough gets too warm while rolling, refrigerate for 10 minutes. For best results, chill dough for 30 minutes before rolling. Cookies stay soft for up to 5 days in an airtight container. Can freeze baked cookies or raw dough for up to 3 months.
Nutrition
- Serving Size: 1 cookie
- Calories: 145
- Sugar: 9
- Sodium: 75
- Fat: 8
- Saturated Fat: 5
- Carbohydrates: 17
- Fiber: 1
- Protein: 2
Keywords: black cocoa, Halloween cookies, sugar cookies, kid-friendly, easy recipe, spooky cookies, black cookies, Halloween baking