I was standing in the frozen food aisle last October, staring at a box of hot dogs like they held the secrets to the universe. My kid had been asking for a Halloween party for weeks, and I kept putting it off because, honestly, the thought of elaborate themed snacks made me tired just thinking about them. Then this little kid—maybe five years old—ran past me, dragging his mom by the hand, shouting “Mummy dogs! Mummy dogs!” and pointing at a box I hadn’t even noticed. And I just stood there, watching them grab it, and felt this weird little pang in my chest.
I didn’t buy that box. Instead, I went home and decided to make my own. Partly because I’m stubborn like that, and partly because I wanted something that didn’t taste like cardboard and regret. I wanted that feeling—you know the one—where your kid takes a bite and their whole face lights up because it’s fun and delicious. So I grabbed some crescent roll dough, a bag of cheese sticks, and a pack of hot dogs, and I started wrapping. The first few looked like a toddler had tried to bandage a sausage, but by the fifth one, I had this little rhythm going. And when they came out of the oven, golden and oozing cheese, I actually laughed out loud.
That’s the thing about this recipe. It’s not fancy, and it’s not complicated, but it has this way of making a regular Tuesday night in October feel like a celebration. I’ve made them for three Halloweens now, and every time I pull that baking sheet out of the oven, I think about that kid in the frozen food aisle. I hope his mom’s version was good. But I’m pretty sure mine are better.
Why You’ll Love This Recipe
Look, I’ve tested a lot of Halloween recipes over the years. Some are all show and no flavor. Others taste great but take forever to assemble. These easy cheesy mummy hot dogs? They’re the sweet spot where fun meets actually delicious food. Here’s why they’ve become a staple in my kitchen:
- Quick & Easy: From fridge to table in under 25 minutes. Seriously. You can make these after work, before a party, or when the kids are already hyped up on candy and need something real to eat.
- Simple Ingredients: Hot dogs, cheese sticks, crescent roll dough, and a little mustard for the eyes. That’s it. No weird specialty items you’ll never use again.
- Perfect for Halloween: Whether it’s a classroom party, a family gathering, or just a spooky movie night, these little mummies fit right in. They’re cute without being fussy.
- Crowd-Pleaser: I’ve served these to kids, adults, and even that one picky uncle who claims he doesn’t like “fun food.” They disappeared in minutes every single time.
- Unbelievably Delicious: The cheese gets all melty and stretches when you pull the mummies apart. The dough gets golden and flaky. And the hot dog? It’s the salty, savory anchor that ties it all together. It’s comfort food in costume.
What makes this version different from all the other mummy hot dog recipes out there? Two things. First, I use string cheese instead of sliced cheese—it stays put inside the dough and gives you that perfect cheese pull. Second, I brush the dough with a little melted butter before baking. It sounds small, but it makes the mummies look golden and glossy, like they actually came from a bakery. I’ve tried it both ways, and the butter-washed version always wins.
This is the kind of recipe that makes you feel like a Halloween hero without actually having to work for it. And honestly? That’s my favorite kind of recipe.
What Ingredients You Will Need
This recipe uses simple, everyday ingredients that you probably already have in your kitchen. The magic happens when you wrap them together. Here’s what you’ll need:
- 8 hot dogs (I prefer beef hot dogs for richer flavor, but any kind works—turkey, chicken, or even plant-based)
- 4 string cheese sticks, each cut in half crosswise (mozzarella is classic, but cheddar or provolone work great too)
- 1 can (8 oz) refrigerated crescent roll dough (I use Pillsbury, but store brands work fine—just make sure it’s the sheet-style or the perforated triangles)
- 1 tablespoon unsalted butter, melted (for brushing—this gives the mummies that golden, glossy finish)
- Mustard (yellow or Dijon) for the eyes (you can also use ketchup or small dots of sriracha for a spicy twist)
- Optional: Everything bagel seasoning or sesame seeds for sprinkling on top (adds a little crunch and visual interest)
A few notes on ingredients. For the hot dogs, I recommend going with full-size ones rather than cocktail sausages—they hold the cheese better and look more like actual mummies. If you’re using plant-based hot dogs, look for ones that are firm enough to hold their shape during baking. I’ve tried a few brands, and the firmer ones work best.
For the crescent roll dough, you can use the perforated triangles or the seamless sheet. I actually prefer the perforated ones for this recipe because the pre-cut triangles make it easier to create the mummy strips. Just separate them along the perforations and cut each triangle into thin strips lengthwise. If you use the sheet, you’ll need to cut your own strips—aim for about 1/2-inch wide.
The string cheese is key here. I’ve tried using shredded cheese, and it just melts out and makes a mess. String cheese stays contained inside the dough and gives you that satisfying cheese pull when you bite into it. Cut each stick in half crosswise so you have two shorter pieces per stick—one for each end of the hot dog.
And the butter? Don’t skip it. I know it’s an extra step, but it makes the dough golden and flaky instead of pale and sad. Your mummies will look like they came from a bakery, not a rushed weeknight kitchen.
Equipment Needed
You don’t need a lot of fancy equipment for this recipe, which is part of why I love it. Here’s what you’ll need:
- Baking sheet (a standard half-sheet pan works perfectly—line it with parchment paper for easy cleanup)
- Parchment paper (optional but highly recommended—the cheese can leak a little, and parchment keeps things from sticking)
- Sharp knife or pizza cutter (for cutting the crescent roll dough into strips—a pizza cutter makes this super quick)
- Small pastry brush (for brushing the melted butter onto the dough—a silicone brush works great and is easy to clean)
- Cutting board (for assembling the mummies—I like to do it right on the board and then transfer them to the baking sheet)
- Small bowl (for melting the butter—microwave-safe is fine)
- Toothpicks (optional, for securing the dough ends if they start to unroll—I’ve only needed these once or twice)
If you don’t have a pastry brush, you can use a paper towel dipped in melted butter. It’s not as elegant, but it works. And if you don’t have parchment paper, you can grease the baking sheet with a little butter or non-stick spray. Just keep an eye on the bottoms—they can brown faster on a greased pan.
Preparation Method
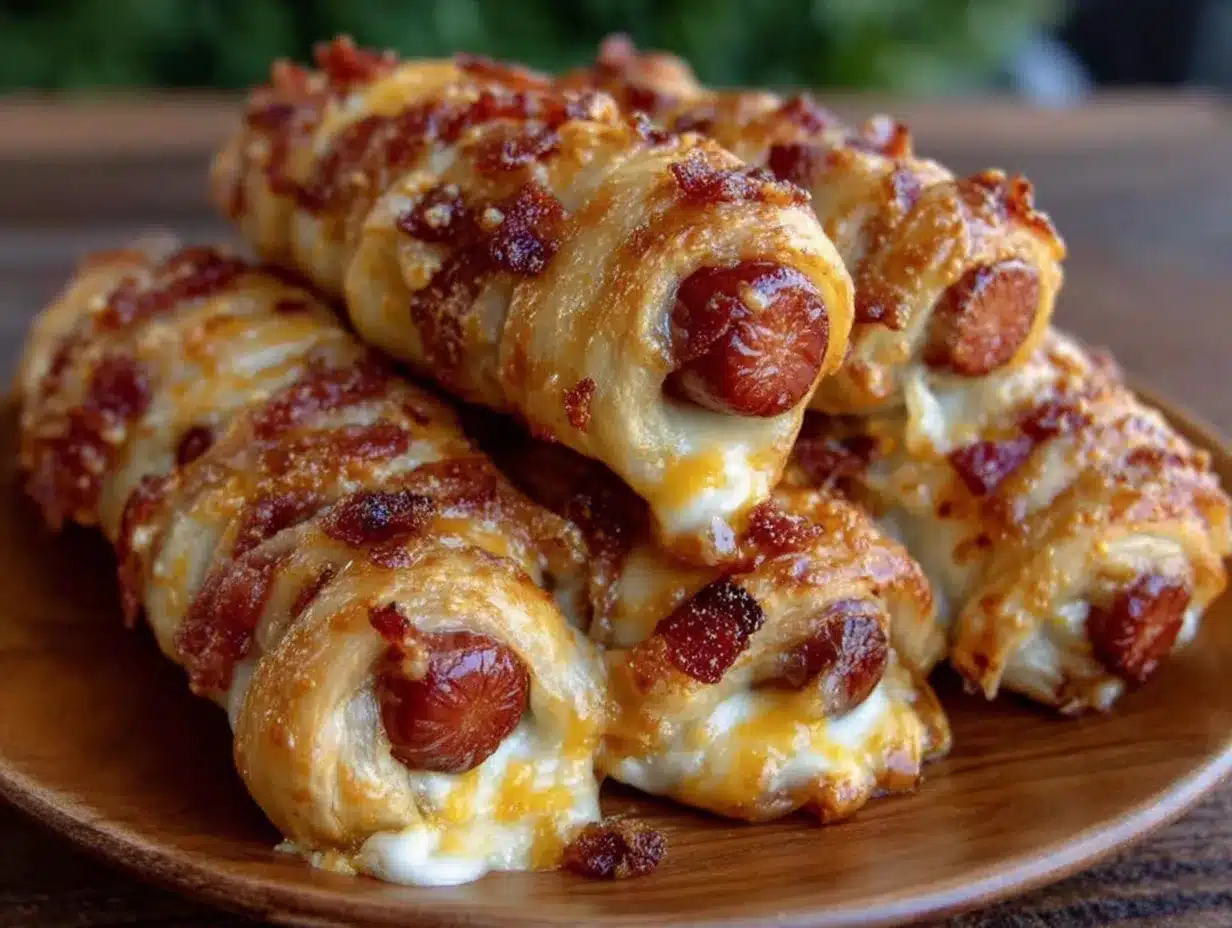
Alright, let’s make some mummies. This whole process takes about 15 minutes of active time and 10-12 minutes of baking. Here’s how it goes:
- Preheat your oven to 375°F (190°C). Line a baking sheet with parchment paper and set it aside. Getting the oven hot before you start assembling is key—you want it ready to go as soon as the mummies are wrapped.
- Prepare the crescent roll dough. Open the can and unroll the dough onto a cutting board. If you’re using perforated crescent rolls, separate them along the perforations so you have 8 triangles. Use a sharp knife or pizza cutter to cut each triangle lengthwise into thin strips—aim for about 1/2-inch wide. You should get 4-5 strips per triangle, depending on how precise you are. Don’t worry if they’re not perfect; the mummies look better with slightly uneven bandages anyway.
- Cut the cheese. Take your 4 string cheese sticks and cut each one in half crosswise. You’ll end up with 8 pieces, each about 2 inches long. Set them aside near your work station.
- Assemble the mummies. Take one hot dog and place a piece of string cheese at one end, pressing it gently against the hot dog. Starting at that end, wrap a strip of dough around the hot dog and cheese, overlapping slightly as you go. Leave a small gap near the top of the cheese end—this will be the mummy’s face. Repeat with the remaining hot dogs and cheese pieces. I like to do all the wrapping assembly-line style: wrap all eight hot dogs, then place them on the baking sheet.
- Brush with butter. Melt the butter in a small microwave-safe bowl (about 15-20 seconds on high). Using a pastry brush, gently brush the melted butter over the dough strips on each mummy. This is what gives them that golden, glossy finish. Don’t soak the dough—just a light coating is enough.
- Bake. Place the baking sheet in the preheated oven and bake for 10-12 minutes, or until the dough is golden brown and the cheese is melted and bubbly. Keep an eye on them after 10 minutes—ovens vary, and you don’t want the bottoms to burn.
- Add the eyes. Remove the mummies from the oven and let them cool on the baking sheet for 2-3 minutes. Using a toothpick or the tip of a knife, dab small dots of mustard onto the exposed cheese to create the mummy’s eyes. You can also use ketchup for a different look, or even small black sesame seeds for a more subtle effect.
- Serve immediately. These are best enjoyed warm, when the cheese is still stretchy and the dough is flaky. Place them on a platter and watch them disappear.
A few things to watch for. If the dough strips start to unroll while you’re wrapping, don’t panic—just tuck the end underneath the hot dog when you place it on the baking sheet. The heat of the oven will seal it. Also, if any cheese leaks out during baking, that’s totally normal. Just scrape it off the parchment paper if you want clean-looking mummies, or leave it on for a more rustic look. I usually leave it—it adds character.
Cooking Tips & Techniques
After making these mummy hot dogs more times than I can count, I’ve picked up a few tricks that make the process smoother and the results better. Here’s what I’ve learned:
Don’t overwork the dough. Crescent roll dough is delicate, and if you handle it too much, it can become tough. Cut your strips quickly and wrap gently. If the dough starts to feel sticky or warm, pop it in the fridge for a few minutes to firm up.
Leave room for the face. When you’re wrapping the dough, stop about 1/2 inch from the top of the cheese piece. This exposes the cheese so you can add the mustard eyes after baking. If you wrap all the way to the top, the mummy won’t have a face—and that’s just sad.
Space them out on the baking sheet. These mummies need a little breathing room. Place them about 2 inches apart so the heat can circulate evenly. If they’re too close together, the dough can turn out pale and doughy instead of golden and flaky.
Watch the baking time. I’ve made the mistake of overbaking these, and the cheese can get hard and rubbery. Pull them out when the dough is golden brown and the cheese is just starting to bubble. The residual heat will continue to cook them on the baking sheet.
Use a toothpick for the eyes. Dip a toothpick in mustard and then dab it onto the cheese. This gives you more control than trying to squeeze mustard directly from the bottle. You can make two small dots for a classic mummy look, or get creative with different expressions.
One time, I forgot to cut the string cheese in half and just wrapped whole sticks around the hot dogs. The cheese was so thick that it didn’t melt properly, and the mummies looked like they had giant tumors. Lesson learned: cut the cheese in half. It’s the right amount for a balanced bite.
Variations & Adaptations
One of the best things about this recipe is how easy it is to customize. Here are some variations I’ve tried and loved:
- Spicy Mummies: Swap the regular hot dogs for spicy jalapeño or chipotle-flavored ones. You can also add a thin slice of pickled jalapeño under the cheese for an extra kick. My husband loves these—he says they taste like “Halloween with a punch.”
- Veggie Mummies: Use plant-based hot dogs and dairy-free cheese sticks. I’ve tried this with several brands, and it works beautifully. Just make sure the cheese alternative is firm enough to hold its shape—some vegan cheeses melt into a puddle.
- Breakfast Mummies: Replace the hot dogs with breakfast sausages and use cheddar cheese sticks. Serve them with maple syrup for dipping. I made these for a Halloween morning breakfast once, and the kids lost their minds.
- Pizza Mummies: Before wrapping, brush a little pizza sauce onto the hot dog and cheese. Sprinkle with dried oregano or Italian seasoning. After baking, serve with extra marinara for dipping. These are perfect for a Halloween party where you want something a little more substantial.
- Mini Mummies: Use cocktail sausages and cut the string cheese into quarters instead of halves. Reduce the baking time to 8-10 minutes. These are great for appetizers or for little hands that can’t handle a full-size mummy.
I’ve also experimented with different doughs. Puff pastry works, but it’s richer and takes longer to bake. Biscuit dough can be used in a pinch, but it doesn’t get as crispy. Crescent roll dough is really the sweet spot—flaky, buttery, and quick to bake.
Serving & Storage Suggestions
These mummy hot dogs are best served warm, right out of the oven. The cheese is stretchy, the dough is flaky, and the hot dog is juicy. Here’s how to make the most of them:
Serving: Arrange the mummies on a platter with a small bowl of mustard, ketchup, or marinara sauce for dipping. You can also add some “spooky” sides like carrot sticks (disguised as witch fingers) or a bowl of popcorn (ghost poo, as my kid calls it). For a Halloween party, I like to serve them alongside a bowl of candy corn or a pumpkin-shaped cheese ball.
Storage: If you have leftovers (unlikely, but possible), let the mummies cool completely, then store them in an airtight container in the refrigerator for up to 3 days. The dough will soften a bit, but they’ll still taste great.
Reheating: To bring back the crispiness, reheat the mummies in a 350°F (175°C) oven for 5-7 minutes. You can also use an air fryer at 350°F for 3-4 minutes. I don’t recommend the microwave—it makes the dough soggy and the cheese rubbery.
Freezing: You can freeze the assembled, unbaked mummies. Place them on a baking sheet and freeze until solid, then transfer to a freezer bag. When you’re ready to bake, add 2-3 minutes to the baking time—no need to thaw first. I’ve done this for Halloween parties, and it’s a lifesaver.
One thing I’ve noticed: the flavors actually meld together a bit after a day in the fridge. The cheese and hot dog kind of become one, and the dough absorbs some of the savory goodness. They’re not as pretty the next day, but they’re still delicious.
Nutritional Information & Benefits
Let’s be real—these are not health food. But they’re not junk food either, if you’re smart about your ingredients. Here’s the breakdown for one mummy hot dog (using standard ingredients):
- Calories: Approximately 280-320
- Protein: 12-15 grams (from the hot dog and cheese)
- Fat: 18-22 grams (mostly from the cheese and dough)
- Carbohydrates: 18-22 grams (from the crescent roll dough)
- Sodium: 700-900 mg (hot dogs are salty—choose lower-sodium options if needed)
If you’re looking to lighten them up, use turkey hot dogs and reduced-fat cheese sticks. You can also swap the crescent roll dough for a whole wheat version if you can find it. I’ve tried it, and it works—the texture is a little denser, but the flavor is still good.
On the plus side, you’re getting protein from the hot dog and calcium from the cheese. And because these are baked (not fried), you’re avoiding the extra fat and calories that come with deep-frying. Plus, making them at home means you control the ingredients—no preservatives or weird additives.
I’m not here to tell you these are a health food. They’re a fun Halloween treat. But if you’re going to indulge, this is a pretty balanced way to do it. You get protein, you get calcium, and you get a moment of pure joy when you bite into a cheesy mummy face. That’s worth something.
Conclusion
These easy cheesy mummy hot dogs have become a Halloween tradition in my house, and I have a feeling they’ll become one in yours too. They’re simple enough to make on a busy weeknight, but fun enough to steal the show at a party. And honestly? There’s something deeply satisfying about watching people’s faces light up when they see a platter of little mummies staring up at them.
I love that this recipe lets me be creative without being stressed. I can make the mummies look goofy or spooky or somewhere in between. I can add different cheeses or spices or dipping sauces. And every single time, they disappear within minutes. That’s the kind of recipe that earns a permanent spot in your rotation.
So grab some hot dogs, a can of crescent rolls, and a few cheese sticks. Give these mummies a try. And when you do, I’d love to hear how they turned out. Did you add your own twist? Did the kids help wrap them? Did you accidentally make one that looks like a zombie instead of a mummy? (I’ve been there.) Drop a comment below and let me know—I read every single one.
Happy Halloween, friends. May your mummies be cheesy and your memories be sweet.
Frequently Asked Questions
Can I make these mummy hot dogs ahead of time?
Absolutely. You can assemble the mummies up to 24 hours in advance and keep them covered in the refrigerator. Just add a couple of minutes to the baking time since they’ll be cold going into the oven. You can also freeze them unbaked for up to 3 months—bake straight from frozen, adding 2-3 minutes to the cooking time.
What if I don’t have crescent roll dough?
No problem. You can use puff pastry (cut into thin strips), refrigerated pizza dough, or even homemade pie crust. Each will give a slightly different texture—puff pastry is flakier, pizza dough is chewier, and pie crust is more buttery. Adjust the baking time as needed since different doughs cook at different rates.
Can I use a different type of cheese?
Yes! While mozzarella string cheese is classic, you can use cheddar, provolone, or even pepper jack for a spicy kick. Just make sure it’s a firm cheese that will hold its shape when cut. Avoid soft cheeses like brie or goat cheese—they’ll melt all over the place.
How do I keep the dough from unrolling while baking?
If your dough strips are unrolling, tuck the end of the strip underneath the hot dog when you place it on the baking sheet. The weight of the hot dog will hold it in place. You can also use a toothpick to secure the end, but remember to remove it before serving.
Can I make these gluten-free?
Yes, with a few swaps. Use gluten-free hot dogs (many brands are naturally gluten-free, but check the label) and gluten-free crescent roll dough. Several brands now make gluten-free puff pastry or pizza dough that works well. The texture will be slightly different, but the flavor is still delicious.
Pin This Recipe!
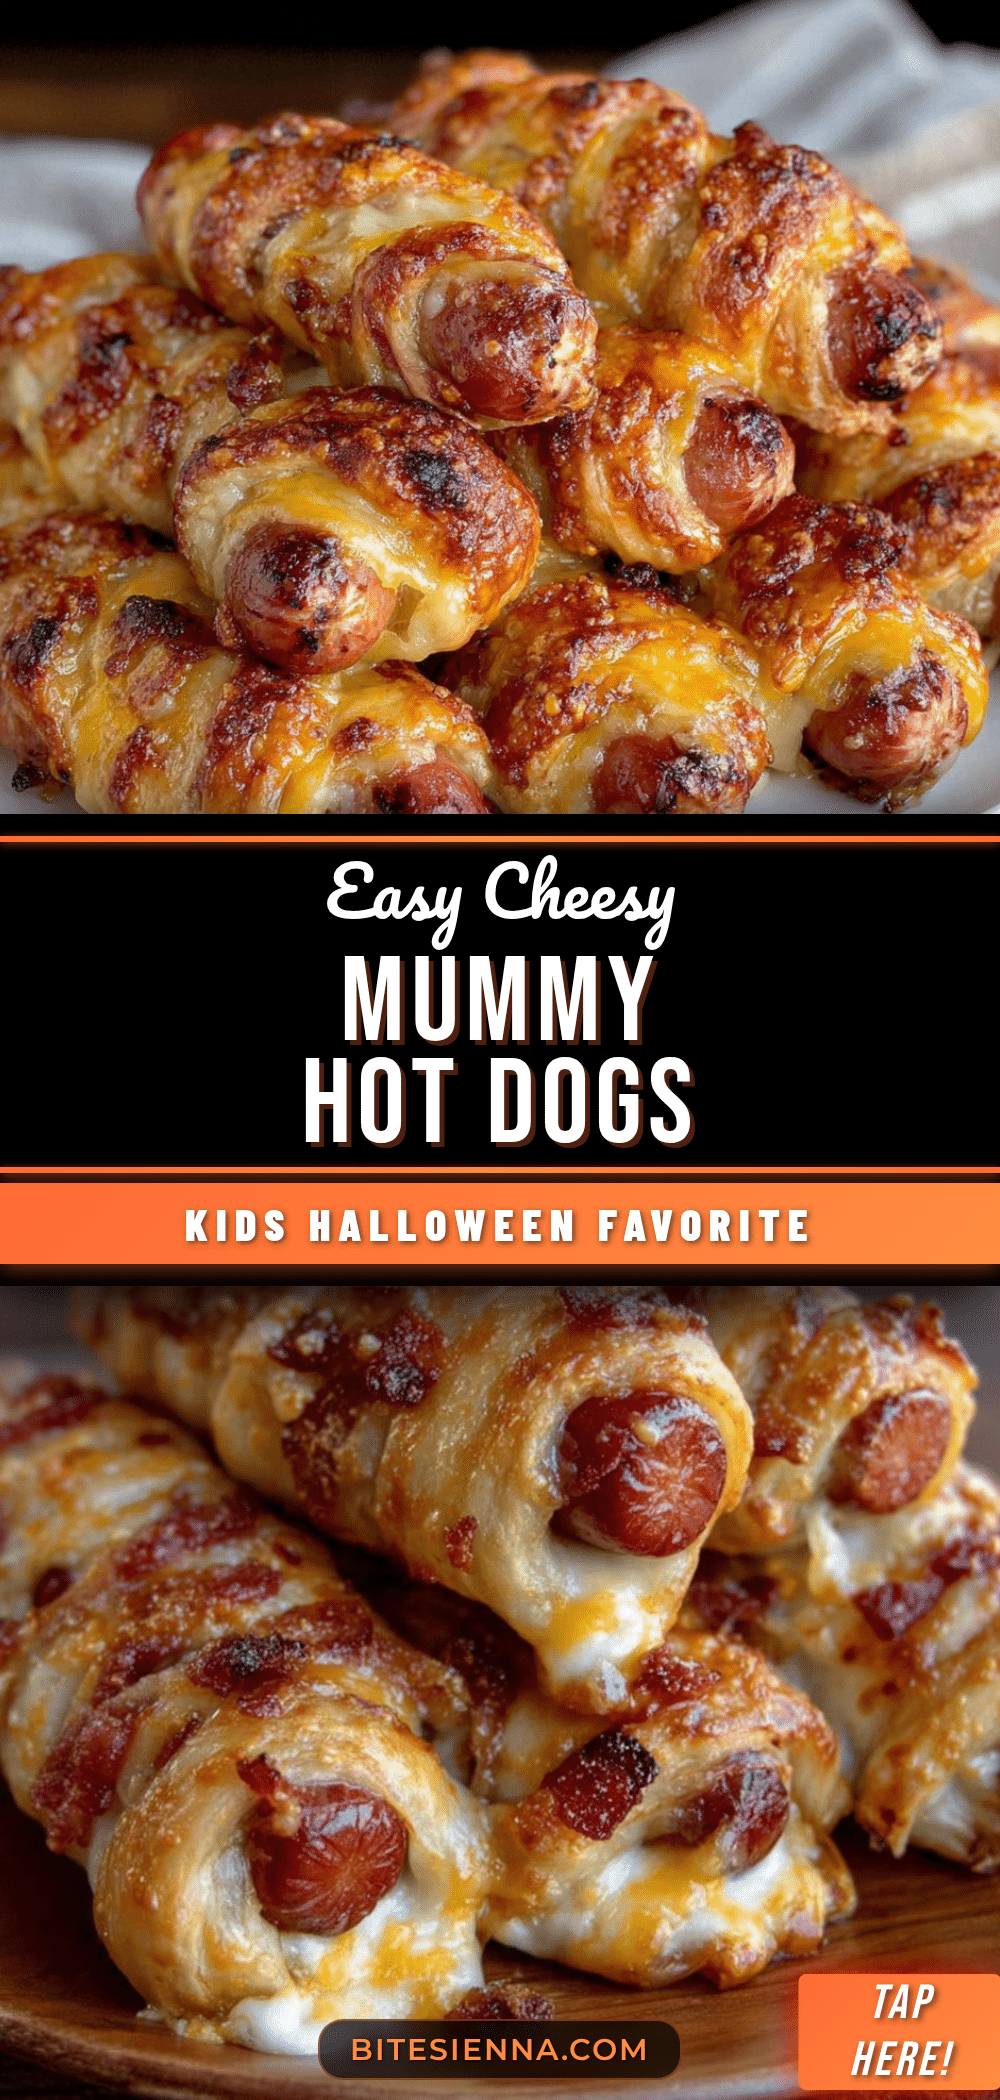
Best Easy Cheesy Mummy Hot Dogs – Perfect Halloween Snack
These easy cheesy mummy hot dogs are a fun and delicious Halloween snack made with hot dogs, string cheese, and crescent roll dough. Ready in under 25 minutes, they’re perfect for parties, movie nights, or a spooky weeknight treat.
- Prep Time: 15 minutes
- Cook Time: 12 minutes
- Total Time: 27 minutes
- Yield: 8 servings 1x
- Category: Appetizer
- Cuisine: American
Ingredients
- 8 hot dogs (beef, turkey, chicken, or plant-based)
- 4 string cheese sticks (mozzarella, cheddar, or provolone), each cut in half crosswise
- 1 can (8 oz) refrigerated crescent roll dough
- 1 tablespoon unsalted butter, melted
- Mustard (yellow or Dijon) for the eyes
- Optional: Everything bagel seasoning or sesame seeds for sprinkling
Instructions
- Preheat your oven to 375°F (190°C). Line a baking sheet with parchment paper.
- Open the can of crescent roll dough and unroll it onto a cutting board. Separate into 8 triangles if perforated. Cut each triangle lengthwise into thin strips, about 1/2-inch wide (4-5 strips per triangle).
- Cut each string cheese stick in half crosswise to make 8 pieces, each about 2 inches long.
- Assemble the mummies: Place a piece of string cheese at one end of a hot dog, pressing gently. Starting at that end, wrap a strip of dough around the hot dog and cheese, overlapping slightly. Leave a small gap near the top of the cheese for the mummy’s face. Repeat with remaining hot dogs and cheese.
- Place wrapped mummies on the prepared baking sheet. Brush the dough strips lightly with melted butter.
- Bake for 10-12 minutes, until the dough is golden brown and the cheese is melted and bubbly.
- Remove from oven and let cool for 2-3 minutes. Using a toothpick, dab small dots of mustard onto the exposed cheese to create eyes.
- Serve immediately while warm and cheesy.
Notes
For best results, use full-size hot dogs and firm string cheese. If dough strips unroll, tuck the end under the hot dog on the baking sheet. For a golden finish, brush with melted butter before baking. Add mustard eyes after baking for best presentation.
Nutrition
- Serving Size: 1 mummy hot dog
- Calories: 300
- Sugar: 4
- Sodium: 800
- Fat: 20
- Saturated Fat: 8
- Carbohydrates: 20
- Protein: 13
Keywords: mummy hot dogs, Halloween snack, easy Halloween recipe, cheesy hot dogs, crescent roll hot dogs, spooky snacks, kid-friendly Halloween


