My niece asked why I couldn’t just arrange the veggies on a big platter shaped like a pumpkin instead of carving out an actual pumpkin bowl. I started to explain why that wouldn’t work — the moisture would make the cut vegetables slide around, the pumpkin would weep, it would be a soggy mess. Then I stopped. Honestly, I had no good reason except that I had always done it the other way.
So I grabbed my biggest round platter — the one with the chip on the edge that I keep meaning to replace — and started arranging. Broccoli florets became the pumpkin ridges. Orange bell pepper strips formed the curved sections. A single cucumber slice became the stem. My niece stood back, tilting her head, and said, “It needs a face.” So we added baby carrots for a crooked smile and black olive circles for eyes. The whole thing looked ridiculous and wonderful.
The power went out halfway through our Halloween movie marathon that night — a transformer blew somewhere down the street. We lit candles, grabbed the veggie tray, and sat cross-legged on the living room floor eating cold carrots and ranch dip by flashlight. Maybe you have been there, sitting in the dark with people you love, eating something simple that feels like a celebration anyway. That platter became the thing everyone remembered, not the fancy decorations or the store-bought costumes.
That is why this cozy Halloween veggie tray with creamy ranch dip has become our annual tradition. It is the recipe that taught me that sometimes the student knows better than the teacher — and that a little bit of whimsy goes a long way when you are trying to make a cold, rainy October night feel special.
Why You’ll Love This Recipe
Let me tell you — this is not your average vegetable platter. I have tested this setup at three different Halloween gatherings, and it disappears every single time. Even the kids who usually push broccoli to the edge of their plates come back for seconds. There is something about the spooky presentation that makes eating vegetables feel like part of the fun.
- Quick & Easy: You can put this together in under 15 minutes. No cooking, no baking, no waiting for things to cool. Just chop, arrange, and serve.
- Simple Ingredients: Everything comes from the regular grocery store. No specialty items, no fancy cheese boards, no hunting down obscure produce.
- Perfect for Halloween Parties: Whether you are hosting a costume party, a family movie night, or a classroom celebration, this tray fits right in without being fussy.
- Crowd-Pleaser: I have watched picky eaters, health-conscious friends, and snack-obsessed teenagers all reach for the same platter. It is somehow universally loved.
- Unbelievably Delicious: The creamy ranch dip is the real star here — it is tangy, herbaceous, and way better than anything from a bottle. Paired with crisp, cold vegetables, it is next-level comfort food disguised as a healthy snack.
What makes this recipe different from every other veggie tray you have seen? It is the thoughtfulness behind the arrangement. Instead of just throwing vegetables on a plate, we are creating a scene — a pumpkin face, a spider web, a graveyard scene. It turns snacking into an activity. Plus, the homemade ranch dip uses buttermilk and fresh herbs, which gives it a brightness that powdered mixes just cannot match.
This is the kind of recipe that makes you close your eyes after the first bite. It is comfort food reimagined — healthier, faster, but with the same soul-soothing satisfaction. Perfect for impressing guests without stress, or turning a simple snack into something memorable.
What Ingredients You Will Need
This recipe uses simple, wholesome ingredients to deliver bold flavor and satisfying crunch without the fuss. Most of these are pantry staples or easy to find at any grocery store. Here is what you will need:
For the Halloween Veggie Tray
- Broccoli florets — 2 cups, cut into small bite-sized pieces (look for crowns with tight, dark green buds)
- Cauliflower florets — 2 cups, cut into small pieces (white or purple for extra color)
- Orange bell peppers — 2 large, sliced into thin strips (these create the pumpkin ridges)
- Baby carrots — 1 cup (use these for pumpkin face features or graveyard fence posts)
- Cucumber — 1 large, sliced into rounds or cut into bat shapes (use a small cookie cutter)
- Black olives — 1 can, pitted (slice into circles for eyes and mouths)
- Cherry tomatoes — 1 cup (use as “spider bodies” or “goblin eyes”)
- Celery sticks — 4-5 stalks, cut into 3-inch pieces (great for skeleton bones or fence posts)
- Snow peas or sugar snap peas — 1 cup (use as “witches fingers” or grass)
For the Creamy Ranch Dip
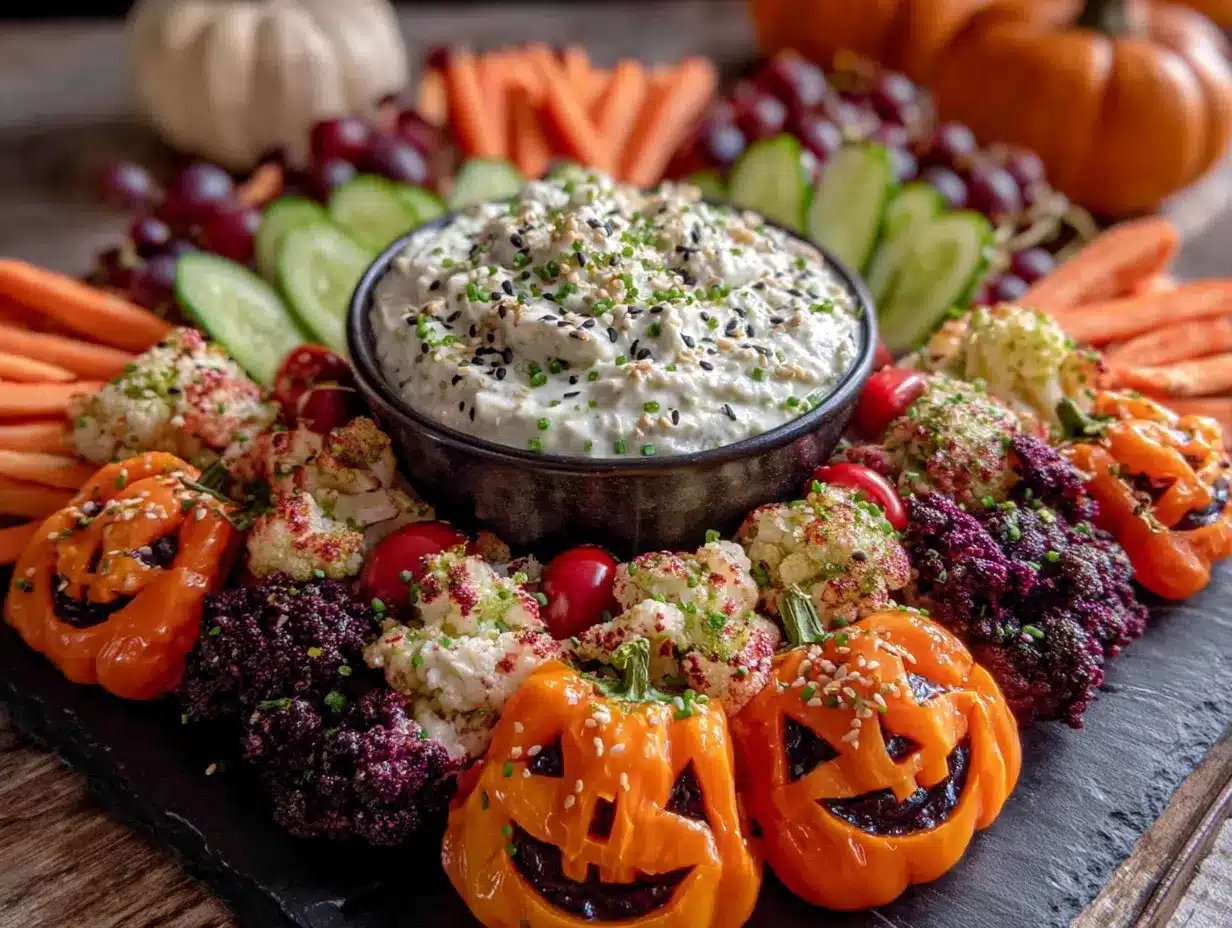
- Mayonnaise — ½ cup (I recommend Hellmann’s or Duke’s for best texture)
- Sour cream — ½ cup (full-fat works best, but Greek yogurt is a fine substitute)
- Buttermilk — ¼ cup (adds tanginess; use regular milk plus 1 teaspoon lemon juice if needed)
- Fresh dill — 2 tablespoons, finely chopped (dried works too, use 2 teaspoons)
- Fresh parsley — 2 tablespoons, finely chopped (Italian flat-leaf is best)
- Fresh chives — 1 tablespoon, finely chopped (or green onion tops)
- Garlic powder — 1 teaspoon (not garlic salt)
- Onion powder — 1 teaspoon
- Salt — ½ teaspoon (or to taste)
- Black pepper — ¼ teaspoon, freshly ground
- Lemon juice — 1 teaspoon, fresh squeezed (brightens everything up)
For the dip, I have tested this with both fresh and dried herbs. Fresh herbs give a brighter, more vibrant flavor that really stands out against the cold vegetables. But if you are in a pinch, dried herbs work just fine — just reduce the amount by half since dried herbs are more concentrated.
You can also swap the sour cream for dairy-free coconut yogurt if needed, though the flavor will be slightly different. The buttermilk is key for that signature ranch tang, but if you do not have it, stir 1 tablespoon of white vinegar into ¼ cup of regular milk and let it sit for 5 minutes. It works perfectly.
Equipment Needed
You do not need much for this recipe, which is part of the charm. Here is what I use:
- Large round or rectangular platter — At least 12 inches across. A wooden cutting board works beautifully too. I have used both my grandmother’s old ceramic platter and a cheap bamboo board from Target — both work fine.
- Sharp chef’s knife — A good 8-inch knife makes cutting vegetables quick and safe. Dull knives are actually more dangerous because they slip.
- Cutting board — Preferably two: one for vegetables, one for herbs. Keeps things clean and prevents cross-contamination.
- Small mixing bowl — For the ranch dip. A medium glass bowl works perfectly.
- Whisk — For combining the dip ingredients smoothly. A fork works in a pinch.
- Small cookie cutters — Optional but fun. Bat, ghost, and pumpkin shapes turn cucumbers and cheese into Halloween decorations. I found a set of three at the dollar store.
- Serving bowl or ramekin — For the dip. A small hollowed-out bell pepper makes a cute serving vessel.
- Paper towels — For drying vegetables after washing. Wet veggies make the dip watery and slide around on the platter.
If you do not have a large platter, a baking sheet lined with parchment paper works surprisingly well. I have done it more times than I would like to admit. Just make sure to pat everything dry first so the vegetables do not leave moisture marks on the paper.
Preparation Method
This comes together fast, but the key is prepping everything before you start arranging. Trust me on this — I once tried to chop and arrange at the same time and ended up with a lopsided pumpkin face and ranch dip on my sweater.
- Wash and dry all vegetables thoroughly. This is the most important step. Wet vegetables make the dip watery and cause everything to slide around on the platter. Spread them on a clean kitchen towel and pat them dry. Let them sit for 5 minutes if you have time.
- Make the creamy ranch dip. In a small mixing bowl, combine ½ cup mayonnaise, ½ cup sour cream, and ¼ cup buttermilk. Whisk until smooth. Add 2 tablespoons fresh dill, 2 tablespoons fresh parsley, 1 tablespoon fresh chives, 1 teaspoon garlic powder, 1 teaspoon onion powder, ½ teaspoon salt, ¼ teaspoon black pepper, and 1 teaspoon lemon juice. Whisk again until everything is well combined. Taste and adjust salt or herbs as needed. Cover and refrigerate for at least 15 minutes — this lets the flavors meld together. The dip will thicken slightly as it chills.
- Prepare the vegetables for the pumpkin design. Cut the orange bell peppers into thin strips, about ½ inch wide and 3 inches long. These will form the curved ridges of the pumpkin. Cut the broccoli and cauliflower into small florets — not too big, or they will look clunky on the platter. Slice the cucumber into rounds, about ¼ inch thick. If using cookie cutters, press them into the cucumber slices now. Cut the celery into 3-inch sticks. Leave the baby carrots whole.
- Arrange the pumpkin base. Place your serving bowl or ramekin for the dip in the center of the platter. This will be the “center” of the pumpkin. Arrange the orange bell pepper strips in a circular pattern around the bowl, like the lines of a pumpkin. Curve them slightly so they look natural. Leave small gaps between each strip.
- Fill in the pumpkin sections. Fill the spaces between the pepper strips with broccoli and cauliflower florets. Alternate colors for visual interest — green broccoli next to white cauliflower creates a nice contrast. Press them in gently so they stay in place. This should take about 2 cups of each.
- Create the pumpkin face. Use baby carrots to form a crooked smile — arrange them in a curve below the dip bowl. Use black olive slices for eyes — two circles placed above the smile. You can also add a small triangle of orange pepper for a nose if you want. This is where you can get creative.
- Add the stem. Place a cucumber slice or a piece of celery at the very top of the pumpkin, above the dip bowl, to look like a stem. A small piece of green bell pepper also works.
- Add spooky details around the platter. Arrange cherry tomatoes around the edges to look like “spider bodies.” Place celery sticks radiating outward like skeleton bones. Scatter snow peas or snap peas to look like witches fingers or grass. Add extra cucumber rounds with bat shapes if you made them.
- Fill the dip bowl. Spoon the chilled ranch dip into the serving bowl or ramekin. Smooth the top with the back of a spoon. You can sprinkle a little extra fresh dill or paprika on top for color.
- Final check. Step back and look at your platter. Fill in any bare spots with extra vegetables. Make sure the face is visible and the design reads as a pumpkin. Adjust anything that looks lopsided. Serve immediately or cover with plastic wrap and refrigerate for up to 4 hours.
One thing I learned the hard way — do not put the dip on the platter too early if you are making this ahead. The moisture from the dip can make the surrounding vegetables soggy. I usually make the dip and arrange the vegetables separately, then combine them right before serving.
Cooking Tips & Techniques
After making this veggie tray for three Halloweens in a row, I have collected a few tricks that make the whole process easier and more impressive.
Patience with drying. I cannot stress this enough — wet vegetables are the enemy of a good veggie tray. The moisture makes the dip watery, causes vegetables to slide around, and can even make the platter look messy within 20 minutes. I wash everything, spread it on a clean towel, and let it air dry for 10 minutes before I even think about cutting.
Cut vegetables the same size. This is the secret to a professional-looking platter. If your broccoli florets are all roughly the same size, they fit together like puzzle pieces. Same with the bell pepper strips and cucumber rounds. Uneven pieces create gaps that make the whole thing look sloppy. I know it feels fussy, but it takes an extra 2 minutes and makes a huge difference.
Use the dip bowl as an anchor. Place your dip bowl in the center before you start arranging anything else. This gives you a clear focal point and prevents you from running out of space. I made the mistake of arranging vegetables first once and ended up having to squeeze the dip bowl into a tiny corner.
Make the dip a day ahead. The ranch dip actually gets better after sitting in the fridge overnight. The herbs have time to infuse, and the flavors become more rounded. I always make it the night before and just give it a quick stir before serving. This also frees up time on the day of your party.
Keep it cold. Vegetables taste best when they are cold and crisp. If you are making this for a party, keep the platter in the fridge until the last possible minute. I have even placed the platter on a bed of ice for outdoor Halloween gatherings — just put a layer of ice in a larger tray and set the veggie platter on top.
One failure I will never forget. The first year I made this, I used a hollowed-out pumpkin as the bowl. It looked amazing for about 10 minutes. Then the moisture from the pumpkin seeped into the dip, making it runny, and the vegetables started sliding off into a sad pile on the table. My niece looked at me and said, “Auntie, it melted.” She was right. Stick with a regular bowl.
Variations & Adaptations
This recipe is endlessly adaptable. Here are some variations I have tried and loved:
Spider Web Design. Instead of a pumpkin, arrange the vegetables in a circular spider web pattern. Use thin strips of yellow bell pepper for the web lines, and place a large black olive in the center as the spider. Arrange cherry tomatoes in a spiral pattern around the center. This is surprisingly easy and looks very dramatic.
Graveyard Scene. Use rectangular platter and arrange vegetables to look like a graveyard. Stand celery sticks upright as tombstone markers (cut a small slit in the bottom so they stand). Use baby carrots as fence posts. Arrange broccoli florets as trees. Place small cucumber rounds as “graves.” This one takes a little more time but is always a hit with kids.
Dairy-Free Ranch Dip. Substitute the mayonnaise with vegan mayo, the sour cream with dairy-free coconut yogurt, and the buttermilk with unsweetened almond milk plus 1 teaspoon lemon juice. The flavor is slightly different — a bit tangier and less creamy — but still delicious. I have served this to dairy-free friends and they raved about it.
Spicy Ranch Dip. Add 1 teaspoon of smoked paprika and ½ teaspoon of cayenne pepper to the ranch dip. This gives it a warm, smoky kick that pairs beautifully with the cold vegetables. I tried this on a whim one year and now it is my secret weapon for adult parties.
Seasonal Vegetable Swaps. In the fall, use purple cauliflower, rainbow carrots, and delicata squash slices (raw, they are crunchy and edible). In the spring, swap in asparagus spears, radishes, and sugar snap peas. The design stays the same, but the colors change with the season.
Individual Serving Cups. For parties where people are standing and mingling, skip the big platter and make individual cups. Layer dip at the bottom of small clear cups, then add vegetables arranged like tiny pumpkins or spiders. These are portable, mess-free, and adorable.
Serving & Storage Suggestions
This veggie tray is best served cold, straight from the fridge. The contrast between the crisp, cold vegetables and the creamy, herbaceous dip is what makes it so satisfying. I recommend pulling it out of the fridge just 5-10 minutes before serving — any longer and the vegetables start to lose their crunch.
For presentation, I like to place the platter on a dark tablecloth or black serving board. The orange, green, and white vegetables pop beautifully against a dark background. Add a few battery-operated tea lights around the platter for a cozy, spooky glow. Trust me, it looks like something from a magazine.
This tray pairs wonderfully with other Halloween snacks. Serve it alongside a bowl of warm spiced cider, some crispy garlic chicken wings for heartier appetites, or a plate of pumpkin chocolate chip cookies for dessert. The savory vegetables balance out the sweetness of fall treats beautifully.
Storage: If you have leftovers (which honestly, rarely happens in my house), store the vegetables and dip separately. Place the vegetables in an airtight container lined with paper towels — the paper towels absorb excess moisture and keep everything crisp. The dip goes in a separate container. Both will keep in the refrigerator for up to 3 days.
Reheating: You do not need to reheat anything here. The vegetables are meant to be eaten cold. If the dip has thickened too much after refrigeration, stir in a teaspoon of buttermilk or milk to loosen it up.
Flavor development: The dip actually tastes better on day two. The herbs have more time to meld together, and the garlic and onion flavors mellow out into something more rounded. So if you are making this for a party, definitely make the dip a day ahead.
Nutritional Information & Benefits
This veggie tray is one of those rare recipes that feels indulgent but is actually packed with good-for-you ingredients. Here is a rough estimate per serving (about 1 cup of vegetables with 2 tablespoons of dip):
| Nutrient | Amount per Serving |
|---|---|
| Calories | 180 |
| Total Fat | 12g |
| Saturated Fat | 3g |
| Carbohydrates | 14g |
| Fiber | 4g |
| Sugar | 6g |
| Protein | 4g |
| Sodium | 350mg |
| Vitamin C | 80% DV |
| Vitamin A | 60% DV |
| Calcium | 6% DV |
| Iron | 8% DV |
The vegetables provide a wide range of vitamins and antioxidants. Broccoli and cauliflower are rich in vitamin C and fiber, which support immune health and digestion. Orange bell peppers are loaded with vitamin A for eye health. The herbs in the ranch dip — dill, parsley, and chives — contain anti-inflammatory compounds and add flavor without extra calories.
This recipe is naturally gluten-free and can easily be made dairy-free with the substitutions mentioned above. It is also vegetarian and can be made vegan with plant-based swaps. The only potential allergen is dairy in the dip, so if you are serving someone with a dairy allergy, just use the dairy-free version.
From a personal perspective, I love that this recipe makes vegetables feel like a treat instead of a chore. It is a great way to get kids (and adults) to eat more produce without feeling like they are being forced. And honestly, on a cold October night, sitting down with a plate of crunchy vegetables and creamy dip feels like a small act of self-care.
Conclusion
This cozy Halloween veggie tray with creamy ranch dip has become one of those recipes I look forward to all year. It is simple enough to throw together on a busy weeknight but special enough to serve at a party. It makes vegetables feel fun and festive, which is no small feat.
I hope you try this recipe and make it your own. Swap in your favorite vegetables, experiment with the dip, create your own spooky designs. That is the beauty of a recipe like this — it is more of a template than a strict set of rules. The best version is the one that makes you and the people you are serving happy.
I would love to hear how yours turns out. Did you do the pumpkin design or try something different? Did you add any unexpected ingredients? Drop a comment below or tag me in your photos — I genuinely get excited seeing other people’s creations. And if you are looking for more cozy fall recipes, check out our creamy pumpkin soup or apple cider donuts for the full autumn experience.
Until next time, happy snacking — and happy Halloween.
Frequently Asked Questions
Can I make this veggie tray the night before?
Yes, but with one important caveat. You can wash and cut all the vegetables the night before and store them in separate airtight containers lined with paper towels. Make the dip the night before too. But do not assemble the platter until just before serving. The vegetables will stay much crisper if they are not sitting on the platter overnight.
What if I do not have buttermilk for the ranch dip?
No problem at all. You can make a quick substitute by adding 1 tablespoon of white vinegar or lemon juice to ¼ cup of regular milk. Let it sit for 5 minutes, and it will thicken and become tangy, just like buttermilk. I have used this trick dozens of times and it works perfectly.
How long will the dip last in the refrigerator?
The homemade ranch dip will keep for up to 5 days in an airtight container in the refrigerator. The flavor actually improves after the first day as the herbs meld together. Just give it a good stir before serving, and if it has thickened too much, add a splash of buttermilk or milk to thin it out.
Can I use frozen vegetables for this tray?
I would not recommend it. Frozen vegetables release a lot of water as they thaw, which will make your platter soggy and watery. Fresh vegetables are much crisper and hold up better for the design. If you are in a pinch, you can use frozen vegetables that have been fully thawed and patted very dry, but fresh is definitely better here.
What other designs can I make besides a pumpkin?
So many options! A spider web design using yellow bell pepper strips is surprisingly easy. A graveyard scene with celery tombstones and baby carrot fences is always a hit with kids. You can also make a mummy by wrapping cucumber slices in strips of zucchini, or a monster face using cherry tomato eyes and a bell pepper mouth. The only limit is your imagination — and the vegetables in your fridge.
Pin This Recipe!
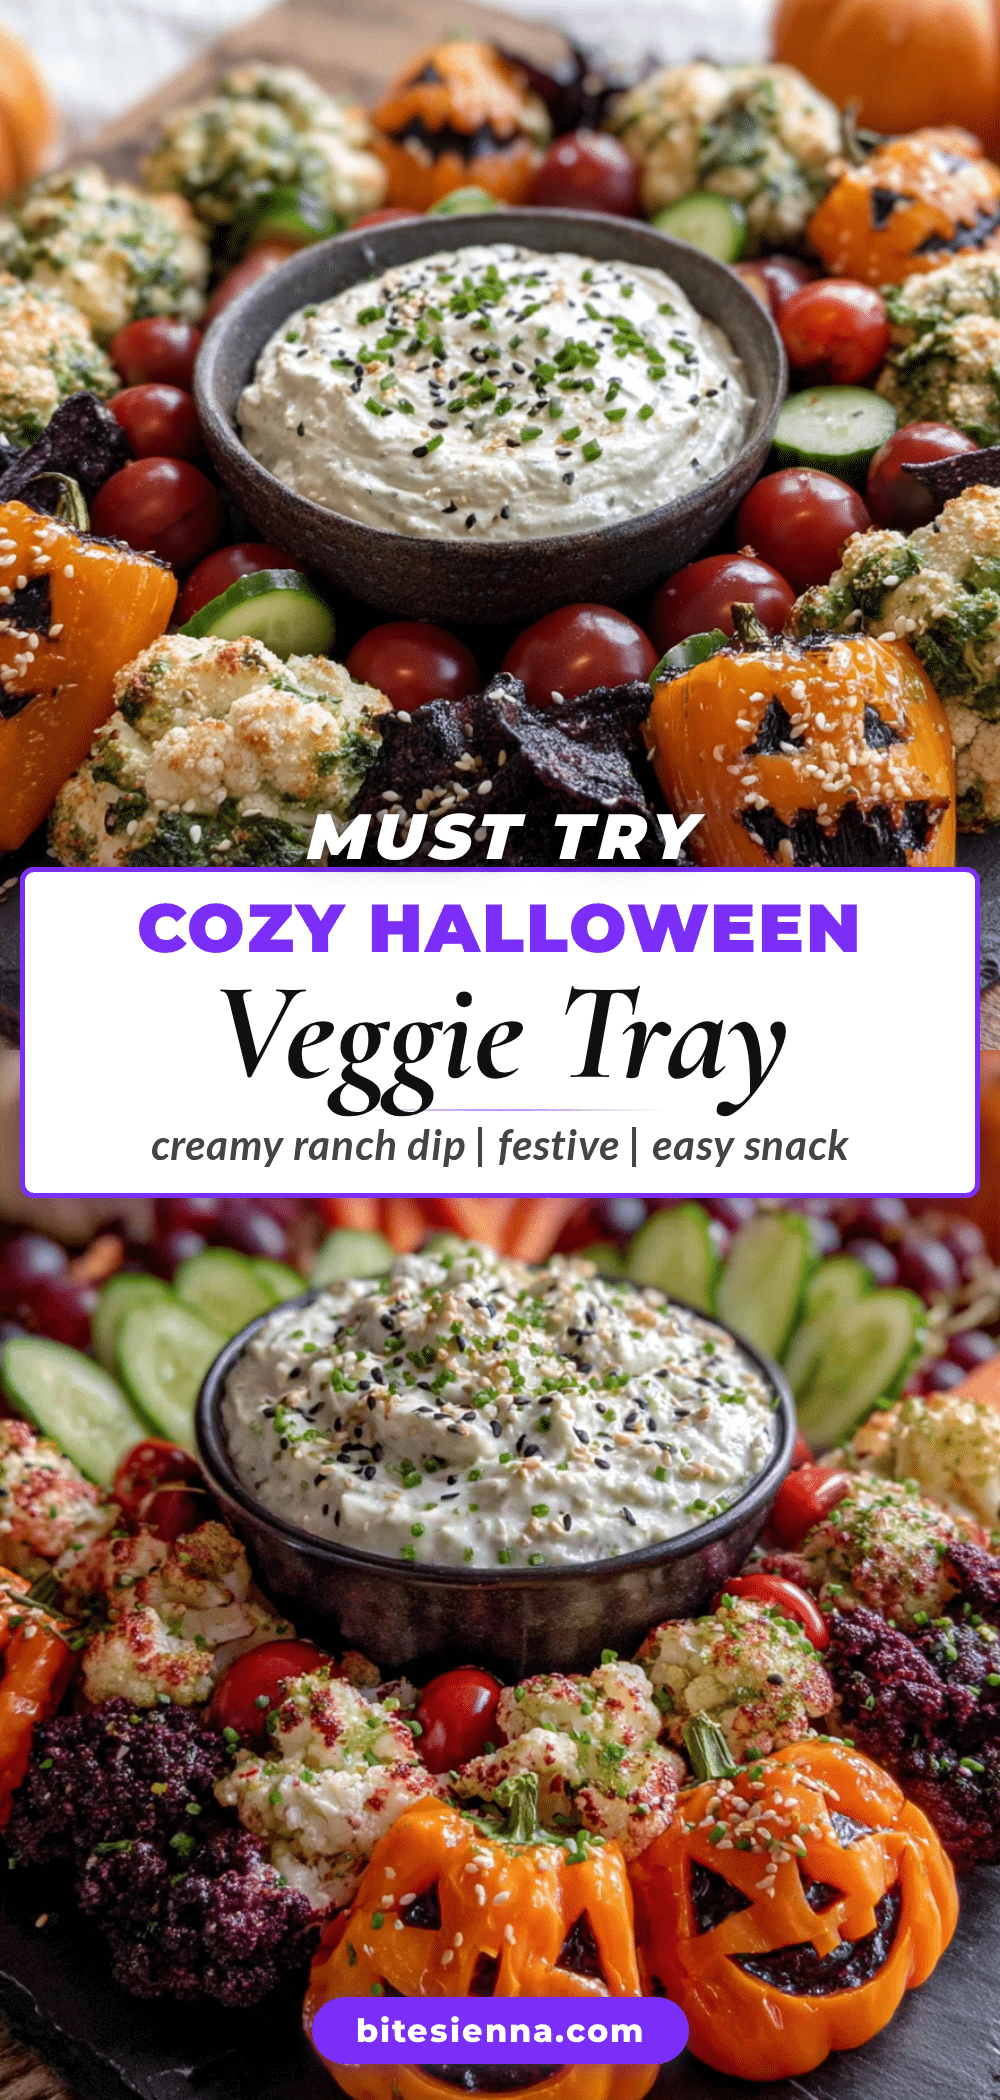
Cozy Halloween Veggie Tray with Easy Creamy Dip
A fun and festive Halloween veggie tray arranged like a pumpkin face, served with a creamy homemade ranch dip. Perfect for parties, movie nights, or any spooky celebration.
- Prep Time: 15 minutes
- Cook Time: 0 minutes
- Total Time: 15 minutes
- Yield: 8 servings 1x
- Category: Appetizer
- Cuisine: American
Ingredients
- 2 cups broccoli florets
- 2 cups cauliflower florets
- 2 large orange bell peppers, sliced into thin strips
- 1 cup baby carrots
- 1 large cucumber, sliced into rounds
- 1 can pitted black olives, sliced
- 1 cup cherry tomatoes
- 4–5 celery stalks, cut into 3-inch pieces
- 1 cup snow peas or sugar snap peas
- ½ cup mayonnaise
- ½ cup sour cream
- ¼ cup buttermilk
- 2 tablespoons fresh dill, finely chopped
- 2 tablespoons fresh parsley, finely chopped
- 1 tablespoon fresh chives, finely chopped
- 1 teaspoon garlic powder
- 1 teaspoon onion powder
- ½ teaspoon salt
- ¼ teaspoon black pepper, freshly ground
- 1 teaspoon lemon juice, fresh squeezed
Instructions
- Wash and dry all vegetables thoroughly. Spread them on a clean kitchen towel and pat dry. Let them sit for 5 minutes if you have time.
- Make the creamy ranch dip: In a small mixing bowl, combine ½ cup mayonnaise, ½ cup sour cream, and ¼ cup buttermilk. Whisk until smooth. Add 2 tablespoons fresh dill, 2 tablespoons fresh parsley, 1 tablespoon fresh chives, 1 teaspoon garlic powder, 1 teaspoon onion powder, ½ teaspoon salt, ¼ teaspoon black pepper, and 1 teaspoon lemon juice. Whisk again until well combined. Taste and adjust salt or herbs as needed. Cover and refrigerate for at least 15 minutes.
- Prepare the vegetables for the pumpkin design: Cut the orange bell peppers into thin strips, about ½ inch wide and 3 inches long. Cut the broccoli and cauliflower into small florets. Slice the cucumber into rounds, about ¼ inch thick. Cut the celery into 3-inch sticks. Leave the baby carrots whole.
- Arrange the pumpkin base: Place your serving bowl or ramekin for the dip in the center of the platter. Arrange the orange bell pepper strips in a circular pattern around the bowl, like the lines of a pumpkin. Curve them slightly so they look natural. Leave small gaps between each strip.
- Fill in the pumpkin sections: Fill the spaces between the pepper strips with broccoli and cauliflower florets. Alternate colors for visual interest. Press them in gently so they stay in place.
- Create the pumpkin face: Use baby carrots to form a crooked smile — arrange them in a curve below the dip bowl. Use black olive slices for eyes — two circles placed above the smile. You can also add a small triangle of orange pepper for a nose if you want.
- Add the stem: Place a cucumber slice or a piece of celery at the very top of the pumpkin, above the dip bowl, to look like a stem.
- Add spooky details around the platter: Arrange cherry tomatoes around the edges to look like ‘spider bodies.’ Place celery sticks radiating outward like skeleton bones. Scatter snow peas or snap peas to look like witches fingers or grass. Add extra cucumber rounds with bat shapes if you made them.
- Fill the dip bowl: Spoon the chilled ranch dip into the serving bowl or ramekin. Smooth the top with the back of a spoon. You can sprinkle a little extra fresh dill or paprika on top for color.
- Final check: Step back and look at your platter. Fill in any bare spots with extra vegetables. Make sure the face is visible and the design reads as a pumpkin. Adjust anything that looks lopsided. Serve immediately or cover with plastic wrap and refrigerate for up to 4 hours.
Notes
Do not put the dip on the platter too early if making ahead; moisture from the dip can make surrounding vegetables soggy. Make the dip a day ahead for best flavor. Keep vegetables cold and crisp by refrigerating until serving. For dairy-free, substitute mayonnaise with vegan mayo, sour cream with dairy-free coconut yogurt, and buttermilk with unsweetened almond milk plus 1 teaspoon lemon juice.
Nutrition
- Serving Size: 1 cup vegetables wit
- Calories: 180
- Sugar: 6
- Sodium: 350
- Fat: 12
- Saturated Fat: 3
- Carbohydrates: 14
- Fiber: 4
- Protein: 4
Keywords: Halloween, veggie tray, ranch dip, party appetizer, healthy snack, spooky, pumpkin design


