My neighbor June asked why I couldn’t just throw the carrots and parsnips in the oven with the beets all at once on the same pan. I started to explain why that wouldn’t work — something about different cooking times and beet juice turning everything pink. Then I stopped. She had a point, and honestly, I was being a bit of a recipe snob about it.
That Tuesday evening, I did exactly what she suggested. I chopped everything into similar-sized pieces, drizzled it all with maple syrup and oil, and slid the pan into the oven. Twenty-eight minutes later, I was eating my words — and they tasted like caramelized, buttery perfection. The beets hadn’t ruined anything. They’d actually made it better, their deep sweetness mingling with the maple in a way that felt almost intentional.
I think about that moment every time I make this cozy maple roasted root vegetables. It taught me that sometimes the best recipes come from letting go of control and trusting a suggestion from someone who just wants to keep things simple. Maybe you’ve been there — standing in your kitchen, overcomplicating something that really just needs to go in the oven and taste good. This dish is for those nights. It’s for cold evenings when you want something warm without a sink full of dishes. It’s for when you need a side dish that feels special but takes almost no effort at all.
This recipe stayed with me because it proved that simplicity wins every time. No parboiling, no separate pans, no fuss. Just root vegetables doing what they do best when you give them heat and a little sweetness. And honestly, I keep making it because it makes my kitchen smell like the kind of comfort you can’t buy.
Why You’ll Love This Recipe
This isn’t just another roasted vegetable recipe. After testing this dish at least seven times — with different oven temperatures, cutting techniques, and maple syrup brands — I can tell you with confidence that this version works every single time. Here’s why it deserves a permanent spot in your dinner rotation:
- Quick & Easy: From cutting board to table in about 35 minutes. No blanching, no marinating, no complicated steps.
- Simple Ingredients: You probably already have maple syrup and olive oil in your pantry. The vegetables are available year-round at any grocery store.
- Perfect for Cozy Nights: This side dish pairs beautifully with roasted chicken, pork chops, or even a simple grain bowl. It’s especially wonderful on cold, rainy evenings when you need something warm and grounding.
- Crowd-Pleaser: I’ve served this at Thanksgiving, weeknight dinners, and casual get-togethers. Even people who claim they don’t like beets have asked for seconds.
- Unbelievably Delicious: The maple syrup caramelizes into a sticky, sweet glaze that coats every piece of vegetable. The edges get crispy while the centers stay tender. It’s the kind of side dish that steals the show from the main course.
What makes this recipe different from the dozens of roasted vegetable recipes out there is the balance. I spent weeks figuring out the exact ratio of maple syrup to oil so the vegetables caramelize without burning. I experimented with cutting the beets slightly smaller than the carrots and parsnips so everything finishes cooking at the same time. This isn’t just another version — it’s the version I’d serve to anyone I wanted to impress.
This recipe is comfort food reimagined. It’s healthier than anything covered in cream sauce, faster than any complicated casserole, but with the same soul-soothing satisfaction. The kind of dish that makes you close your eyes after the first bite and forget about whatever made your day hard.
What Ingredients You Will Need
This recipe uses simple, wholesome ingredients to deliver bold flavor and satisfying texture without the fuss. Most of these are pantry staples or easy to find at any grocery store. Here’s what you’ll need:
For the Vegetables
- Carrots — 4 medium (about 300g), peeled and cut into 2-inch pieces. I prefer organic carrots for their sweeter flavor, but regular carrots work just fine. If your carrots are thick, halve them lengthwise before cutting into pieces.
- Parsnips — 3 medium (about 250g), peeled and cut into 2-inch pieces. Look for parsnips that are firm and not too thick. The thinner ones are sweeter and less woody in the center.
- Beets — 2 medium (about 250g), peeled and cut into 1.5-inch pieces. I recommend red beets for their beautiful color, but golden beets work well too and won’t stain everything pink. Wear gloves when peeling them unless you want pink hands for a day.
- Red onion — 1 medium, cut into wedges. The onion caramelizes beautifully and adds a savory depth that balances the sweetness of the maple syrup.
For the Glaze
- Pure maple syrup — 3 tablespoons. Use real maple syrup, not pancake syrup. Grade A dark amber works best for its robust flavor. I personally prefer Copperpot or Maple Valley brands for their rich taste.
- Olive oil — 2 tablespoons. Extra virgin olive oil adds a nice fruity note, but regular olive oil works too. You can substitute avocado oil if you prefer a neutral flavor.
- Fresh thyme — 4 sprigs, leaves stripped. Thyme adds an earthy, slightly floral note that pairs perfectly with root vegetables. Dried thyme works in a pinch — use 1 teaspoon.
- Garlic — 3 cloves, minced. Fresh garlic is non-negotiable here. The pre-minced stuff in jars won’t give you the same aromatic depth.
- Salt — 1 teaspoon, preferably kosher salt. I use Diamond Crystal brand for its clean taste and easy-to-pinch texture.
- Black pepper — ½ teaspoon, freshly ground. Don’t skip this — the pepper cuts through the sweetness and adds a subtle warmth.
Optional Garnishes
- Fresh parsley — 2 tablespoons, chopped. Adds a pop of color and freshness.
- Toasted walnuts — ¼ cup, roughly chopped. Adds crunch and nuttiness if you want extra texture.
- Goat cheese — 2 tablespoons, crumbled. The tanginess pairs beautifully with the sweet roasted vegetables. Totally optional but highly recommended.
Substitution Guidance: You can swap any of the root vegetables with what you have on hand. Sweet potatoes, turnips, or rutabaga work beautifully. For a lower-sugar option, reduce the maple syrup to 2 tablespoons and add a splash of balsamic vinegar for acidity. If you’re avoiding oil, you can roast the vegetables in vegetable broth, though they won’t get as crispy.
Equipment Needed
You don’t need a fancy kitchen to make this recipe. Here’s what you’ll need:
- Large baking sheet — 18×13 inches or similar size. A rimmed baking sheet is ideal to catch any juices. I use a Nordic Ware half-sheet pan that I’ve had for years — it’s sturdy and distributes heat evenly. If you don’t have a large sheet, use two smaller ones to avoid overcrowding.
- Parchment paper — Optional but recommended for easy cleanup. I’ve forgotten to use it before and spent 15 minutes scrubbing caramelized sugar off my pan. Learn from my mistake.
- Chef’s knife — A sharp 8-inch knife makes cutting through beets much easier. Dull knives are dangerous with hard vegetables like beets.
- Cutting board — Use a board that won’t stain easily if you’re cutting red beets. I have a separate plastic board I use just for beets to keep my wooden boards from turning pink.
- Vegetable peeler — A standard Y-peeler works great for carrots and parsnips. For beets, a regular swivel peeler is fine.
- Mixing bowl — Large enough to toss all the vegetables with the glaze.
- Measuring spoons — For accurate maple syrup and oil measurements.
That’s it. No food processor, no mandoline, no special roasting rack. Just basic kitchen tools you probably already own. If you don’t have parchment paper, you can grease the baking sheet with a little extra oil — just expect a bit more scrubbing afterward.
Preparation Method
Let me walk you through this step by step. I’ve made this recipe enough times to know exactly where things can go wrong, so I’ll share those little insider tips along the way.
- Preheat your oven to 425°F (220°C). This high heat is crucial for caramelization. While the oven heats up, position the rack in the middle. Don’t put the pan too close to the top or bottom — you want even heat distribution. I once tried roasting at 400°F to save energy, and the vegetables turned out soft instead of crispy. Trust me on the temperature.
- Prepare your vegetables. Peel the carrots, parsnips, and beets. For the carrots and parsnips, cut off the tops and tails, then slice them into 2-inch pieces. If any pieces are thicker than 1 inch, halve them lengthwise. For the beets, cut them into 1.5-inch pieces — slightly smaller than the carrots and parsnips because beets take a bit longer to cook through. Cut the red onion into 8 wedges, keeping the root end intact so the layers stay together. Important safety note: Beets can stain your cutting board and hands. I learned this the hard way when I showed up to a dinner party with pink-stained fingers. Wear kitchen gloves if you have them.
- Make the glaze. In your large mixing bowl, whisk together the maple syrup, olive oil, minced garlic, stripped thyme leaves, salt, and black pepper. Take a moment to smell it — that combination of maple and thyme is absolutely lovely. If your maple syrup is cold and thick, warm it slightly in the microwave for 10 seconds so it mixes more easily.
- Toss the vegetables. Add all the prepared vegetables to the bowl with the glaze. Use your hands or a large spoon to toss everything until every piece is evenly coated. Don’t be shy here — you want the glaze to reach every nook and cranny. I usually use my hands because I can feel when everything is coated. Just be prepared for pink fingers if you’re using red beets.
- Arrange on the baking sheet. Line your baking sheet with parchment paper for easy cleanup. Spread the vegetables in a single, even layer. This is critical — if the vegetables are crowded, they’ll steam instead of roast, and you won’t get those beautiful caramelized edges. If they don’t fit in one layer, use two baking sheets. Pro tip: Leave a little space between each piece if possible. The hot air needs to circulate around each vegetable to crisp them up.
- Roast for 25-30 minutes. Place the baking sheet in the preheated oven. Halfway through (at about 15 minutes), remove the pan and give everything a good stir with a spatula. This ensures even browning. Return the pan to the oven, rotating it front to back for even heat distribution. The vegetables are done when they’re tender enough to pierce easily with a fork and the edges are caramelized and slightly crispy. The beets should be tender all the way through — if they’re still firm in the center, give them 5 more minutes.
- Rest and garnish. Remove the pan from the oven and let the vegetables rest for 5 minutes. This allows the caramelized sugars to set slightly. Transfer to a serving platter and garnish with fresh parsley, toasted walnuts, or crumbled goat cheese if desired. The goat cheese will soften slightly from the warmth of the vegetables — that’s exactly what you want.
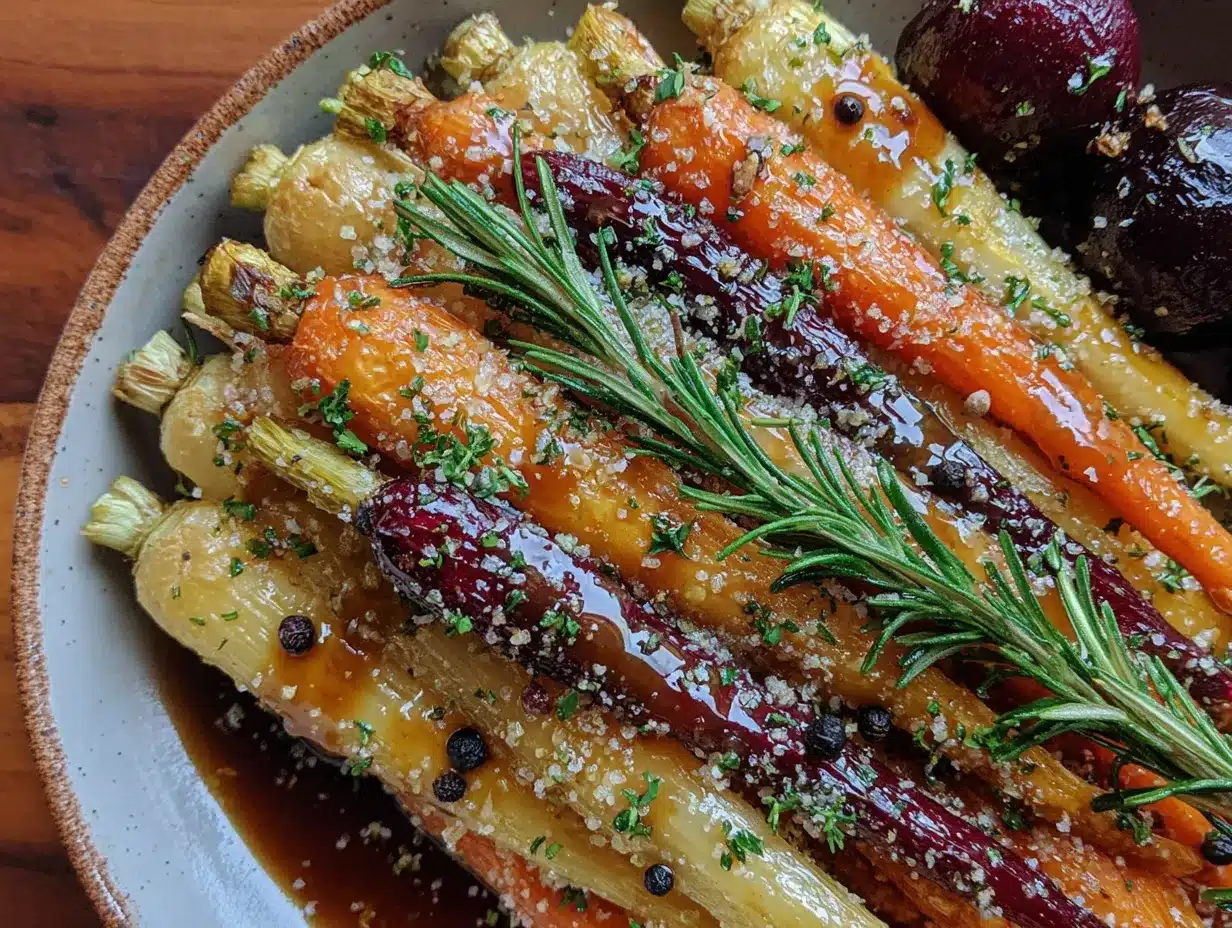
Visual cue: When done, the carrots should have deep orange-brown edges, the parsnips should be golden with brown spots, and the beets should be a deep, rich burgundy. The onions will be soft and translucent with caramelized edges. The whole pan should look glossy and slightly sticky from the maple syrup.
Cooking Tips & Techniques
After making this recipe more times than I can count, I’ve collected a few tricks that make a real difference. Here’s what I wish someone had told me when I first started roasting root vegetables:
Cut everything the same size. This is the single most important tip for even cooking. I once got lazy and cut the carrots into thick chunks while the parsnips were thin slices. The parsnips burned while the carrots were still crunchy. Take the extra 2 minutes to make everything uniform — your future self will thank you.
Don’t overcrowd the pan. I know it’s tempting to cram everything onto one sheet pan to save dishes, but overcrowding creates steam instead of dry heat. Steam means soggy vegetables. If you’re doubling the recipe, use two pans. If you only have one pan, roast in batches. The 10 extra minutes are worth it for crispy edges.
Use hot maple syrup. Cold maple syrup is thick and doesn’t coat the vegetables evenly. Warm it for 10-15 seconds in the microwave before mixing. This small step makes a noticeable difference in how evenly the glaze distributes.
Roast at the right temperature. I learned this one the hard way. 425°F is the sweet spot for caramelization without burning. At 400°F, the vegetables cook through but don’t develop that beautiful golden crust. At 450°F, the maple syrup can burn before the vegetables are tender. Stick with 425°F and you’ll get perfect results every time.
Let them rest. The resting step isn’t just for show. When the vegetables come out of the oven, the caramelized sugar is still molten and can burn your mouth. Letting them rest for 5 minutes allows the glaze to set slightly and the flavors to meld. Plus, they’re easier to handle when transferring to a serving dish.
Timing strategy: While the vegetables roast, you can prepare the rest of your meal. They take about 30 minutes, which is perfect for cooking a protein like chicken thighs or salmon fillets. I often start the vegetables first, then begin cooking the main dish after the 15-minute stir. Everything finishes around the same time.
Variations & Adaptations
One of the best things about this recipe is how adaptable it is. Here are some variations I’ve tried and loved:
Herb Swap: Not a fan of thyme? Try rosemary or sage instead. Rosemary adds a piney, aromatic note that pairs beautifully with maple. Sage gives the dish an almost Thanksgiving-like quality. Use 1 tablespoon of fresh chopped rosemary or 1 teaspoon of dried sage. I made this with rosemary last Christmas and it was a hit.
Add Some Heat: If you like a little kick, add ¼ teaspoon of red pepper flakes along with the garlic. The heat cuts through the sweetness of the maple syrup and adds a lovely warmth. I tried this on a whim one night and now it’s my preferred version when I’m cooking just for myself.
Balsamic Twist: Replace 1 tablespoon of maple syrup with balsamic vinegar. The acidity of the vinegar balances the sweetness and adds a deeper, more complex flavor. This version is excellent with roasted chicken or pork. My friend Sarah requested this variation for her dinner party and everyone asked for the recipe.
Seasonal Adaptation: In the fall, add cubed butternut squash or sweet potatoes. In the spring, swap the beets for radishes or turnips. In the summer, you can even add halved Brussels sprouts. The basic glaze works with almost any vegetable, so feel free to experiment with what’s in season.
Dietary Modifications: For a lower-sugar version, reduce the maple syrup to 2 tablespoons and add a splash of apple cider vinegar. For a completely oil-free version, toss the vegetables in vegetable broth instead of oil — they won’t get as crispy, but they’ll still be tender and flavorful. This recipe is naturally gluten-free and vegan as written.
Serving & Storage Suggestions
Serving Temperature: These vegetables are best served warm, straight from the oven. The caramelized edges are at their crispiest within the first 15 minutes. However, they’re also delicious at room temperature — I’ve been known to eat leftovers straight from the fridge, cold and all.
Presentation: Arrange the vegetables on a large, shallow platter rather than piling them in a bowl. This shows off the beautiful colors — the orange carrots, cream parsnips, and deep red beets. Sprinkle with fresh parsley for a pop of green, and add a few extra thyme sprigs for visual interest. If you’re using goat cheese, crumble it over the top just before serving so it doesn’t melt completely.
Complementary Dishes: This side dish pairs beautifully with roasted chicken, baked salmon, grilled pork chops, or a simple roasted tofu. For a complete meal, serve alongside a grain like quinoa or farro and a simple green salad with lemon vinaigrette. I also love serving these vegetables with a cozy soup like creamy tomato basil soup for a comforting winter dinner.
Storage: Store leftovers in an airtight container in the refrigerator for up to 4 days. The vegetables will soften over time, but they’ll still be delicious. I often make a double batch on Sunday and use the leftovers throughout the week in grain bowls, salads, or as a quick side for lunch.
Reheating: The best way to reheat these vegetables is in the oven or air fryer. Spread them on a baking sheet and warm at 350°F for 5-7 minutes. This restores some of the crispy edges. The microwave works in a pinch, but the vegetables will be softer. If reheating in the microwave, do it in 30-second bursts to avoid overcooking.
Freezing: These vegetables freeze surprisingly well. Spread them on a baking sheet and freeze until solid, then transfer to a freezer-safe bag. They’ll keep for up to 3 months. To reheat, spread frozen vegetables on a baking sheet and roast at 375°F for 10-12 minutes, or until heated through. The texture won’t be quite as crisp as fresh, but they’re still wonderful in soups or grain bowls.
Flavor Development: Interestingly, these vegetables taste even better the next day. The flavors meld together as they sit, and the maple glaze soaks into the vegetables more deeply. I actually prefer day-old leftovers for this reason — they’re sweeter and more complex. Just don’t tell anyone I said that.
Nutritional Information & Benefits
Here’s the estimated nutritional breakdown for one serving (about 1 cup of roasted vegetables, without optional garnishes):
| Nutrient | Amount per Serving |
|---|---|
| Calories | 185 |
| Total Fat | 7g |
| Saturated Fat | 1g |
| Carbohydrates | 30g |
| Fiber | 6g |
| Sugar | 16g |
| Protein | 3g |
| Sodium | 400mg |
| Vitamin A | 180% DV |
| Vitamin C | 25% DV |
| Potassium | 15% DV |
This dish is packed with nutrients. Carrots are rich in beta-carotene, which supports eye health and immune function. Beets are known for their nitrate content, which can help improve blood flow and lower blood pressure. Parsnips provide a good dose of fiber and folate. The olive oil adds healthy monounsaturated fats, and the maple syrup provides a natural source of energy without refined sugar.
Dietary Considerations: This recipe is naturally gluten-free, dairy-free, vegan, and nut-free (unless you add walnuts). It’s also relatively low in calories for the volume of food you get. The fiber content (6 grams per serving) helps keep you full and supports digestive health. If you’re watching your sugar intake, you can reduce the maple syrup to 2 tablespoons without sacrificing too much flavor.
From a wellness perspective, this is the kind of dish I feel good about eating regularly. It’s whole foods-based, nutrient-dense, and satisfying without being heavy. It’s the kind of comfort food that nourishes your body as much as your soul.
Conclusion
This cozy maple roasted root vegetables recipe has become a staple in my kitchen for good reason. It’s simple enough for a busy weeknight but impressive enough for a holiday table. It uses ingredients you probably already have, takes minimal effort, and delivers flavor that feels way more complex than it actually is.
I love this recipe because it reminds me that cooking doesn’t have to be complicated to be good. Sometimes the best dishes come from the simplest ideas — like trusting your neighbor’s suggestion to throw everything on one pan. It’s proof that letting go of perfection can lead to something genuinely delicious.
I’d love to hear how this recipe turns out for you. Did you try any variations? Did you add the goat cheese or keep it simple? Drop a comment below and let me know — your feedback helps me create better recipes for you. And if you loved this dish, please share it with a friend who needs a little cozy comfort in their life.
Go make some vegetables. Your taste buds will thank you, and honestly, your kitchen will smell amazing.
Frequently Asked Questions
Can I use frozen vegetables for this recipe?
Fresh vegetables work best for roasting because they have less moisture. Frozen vegetables will release water as they cook, which can make them steam instead of roast. If you’re in a pinch, you can use frozen vegetables, but pat them dry thoroughly before tossing with the glaze and increase the roasting time by 5-10 minutes.
How do I prevent the beets from staining the other vegetables?
If you want to keep the colors separate, roast the beets on one side of the pan and the carrots and parsnips on the other. Don’t stir them together until after they’re cooked. Alternatively, use golden beets instead of red beets — they have a milder flavor and won’t stain anything.
Can I make this recipe ahead of time?
Absolutely. You can prepare the vegetables and the glaze separately up to a day in advance. Store the cut vegetables in a sealed bag in the refrigerator and keep the glaze in a small jar. When you’re ready to cook, toss everything together and roast as directed. The roasted vegetables also keep well for up to 4 days in the refrigerator.
Why are my roasted vegetables soggy instead of crispy?
This usually happens for one of three reasons: the oven isn’t hot enough (make sure it’s at 425°F), the pan is overcrowded (use two pans if needed), or the vegetables weren’t dried properly after washing. Pat your vegetables dry with a clean kitchen towel before tossing them with the glaze for the best results.
Can I use honey instead of maple syrup?
Yes, honey works as a substitute for maple syrup in this recipe. Use the same amount (3 tablespoons). Keep in mind that honey has a different flavor profile — it’s more floral and less woody than maple syrup. The vegetables will still caramelize beautifully, just with a slightly different taste. Agave nectar is another good alternative for a vegan option.
I hope this recipe brings you the same warmth and comfort it has brought me. Happy cooking!
Pin This Recipe!
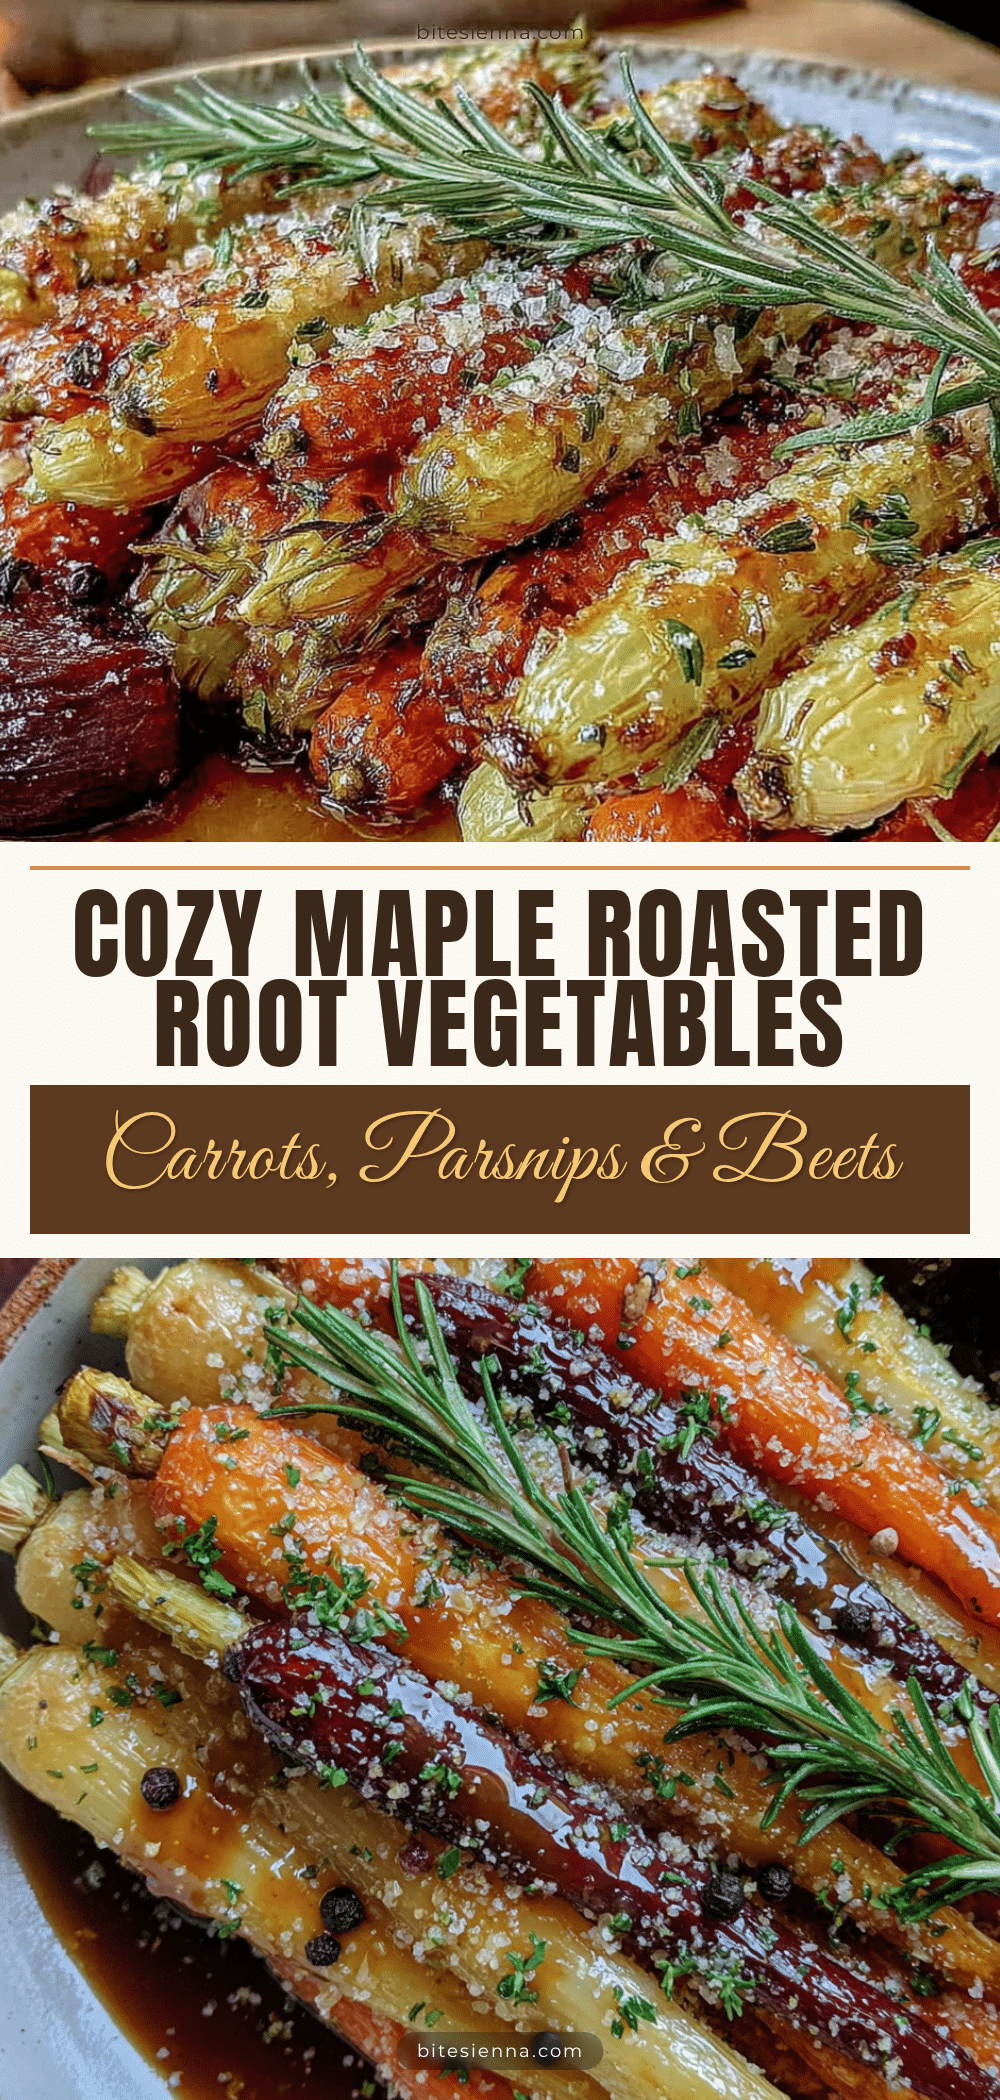
Cozy Maple Roasted Root Vegetables: Easy 30-Minute Side
A simple, quick, and delicious side dish of root vegetables roasted with a maple glaze. Perfect for cozy nights, this recipe delivers caramelized, tender vegetables with minimal effort.
- Prep Time: 10 minutes
- Cook Time: 28 minutes
- Total Time: 38 minutes
- Yield: 4 servings 1x
- Category: Side Dish
- Cuisine: American
Ingredients
- 4 medium carrots (about 300g), peeled and cut into 2-inch pieces
- 3 medium parsnips (about 250g), peeled and cut into 2-inch pieces
- 2 medium beets (about 250g), peeled and cut into 1.5-inch pieces
- 1 medium red onion, cut into wedges
- 3 tablespoons pure maple syrup
- 2 tablespoons olive oil
- 4 sprigs fresh thyme, leaves stripped (or 1 teaspoon dried thyme)
- 3 cloves garlic, minced
- 1 teaspoon kosher salt
- ½ teaspoon freshly ground black pepper
- 2 tablespoons fresh parsley, chopped (optional garnish)
- ¼ cup toasted walnuts, roughly chopped (optional garnish)
- 2 tablespoons goat cheese, crumbled (optional garnish)
Instructions
- Preheat your oven to 425°F (220°C). Position the rack in the middle of the oven.
- Prepare the vegetables: Peel the carrots, parsnips, and beets. Cut carrots and parsnips into 2-inch pieces (halve lengthwise if thick). Cut beets into 1.5-inch pieces. Cut red onion into 8 wedges, keeping the root end intact.
- Make the glaze: In a large mixing bowl, whisk together maple syrup, olive oil, minced garlic, thyme leaves, salt, and black pepper.
- Toss the vegetables: Add all prepared vegetables to the bowl with the glaze. Toss until every piece is evenly coated.
- Arrange on a baking sheet: Line a large baking sheet (18×13 inches) with parchment paper. Spread the vegetables in a single, even layer. Avoid overcrowding; use two sheets if needed.
- Roast for 25-30 minutes: Halfway through (at about 15 minutes), stir the vegetables. Roast until tender and caramelized, with crispy edges.
- Rest and garnish: Remove from oven and let rest for 5 minutes. Transfer to a serving platter and garnish with parsley, walnuts, or goat cheese if desired.
Notes
Cut vegetables into uniform sizes for even cooking. Do not overcrowd the pan to ensure crispy edges. Warm maple syrup slightly for easier mixing. Let vegetables rest for 5 minutes after roasting to allow caramelized sugars to set. For best results, use fresh vegetables and roast at 425°F.
Nutrition
- Serving Size: 1 cup
- Calories: 185
- Sugar: 16
- Sodium: 400
- Fat: 7
- Saturated Fat: 1
- Carbohydrates: 30
- Fiber: 6
- Protein: 3
Keywords: roasted root vegetables, maple roasted vegetables, easy side dish, healthy side dish, vegetarian, gluten-free, vegan, Thanksgiving side, cozy dinner


