My sister asked why I couldn’t just skip the honey and use the apple cider straight from the jug we bought at the orchard that morning. I started to explain why that wouldn’t work—something about the sugar content and caramelization. Then I stopped. Honestly, I had no good reason except that I’d always done it the other way. So I shrugged, poured in a generous splash of that cold, fresh cider, and waited for the carrots to prove me wrong.
Let me tell you, they did exactly that. The kitchen filled with this incredible smell—not just sweet, but almost woodsy, like the orchard had somehow followed us home. My sister, who is usually more interested in the finished dish than the process, kept peeking into the pot. “That actually smells amazing,” she said, and I could hear the surprise in her voice. I mean, I was surprised too, but I wasn’t about to admit it right then.
The carrots came out tender but not mushy, with this glossy glaze that clung to each slice like it belonged there. The cider had reduced down into something complex—tangy and sweet with a little depth that straight honey never quite gives you. We ate them alongside a simple roast chicken, and I remember thinking that sometimes the best ideas come from not knowing what you’re talking about. Maybe you’ve been there, where a beginner’s hunch turns out to be smarter than your years of habit. That’s this recipe for me—a humble reminder that cooking is always full of surprises, even for the person holding the spoon.
Why You’ll Love This Recipe
These Fall Apple Cider Glazed Carrots with Thyme are the kind of side dish that steals the show without trying too hard. They’re simple enough for a Tuesday night but elegant enough for your Thanksgiving table, and they come together in under thirty minutes with minimal fuss.
- Quick & Easy: From start to finish, these carrots are ready in about 25 minutes. The active prep time is maybe ten minutes, and then the stove does the rest.
- Simple Ingredients: You probably have most of these things already—carrots, butter, fresh thyme, salt, and pepper. The apple cider is the one special touch, and it’s easy to find this time of year.
- Perfect for Fall Gatherings: Whether it’s a cozy Sunday dinner, a Friendsgiving potluck, or the big Thanksgiving feast itself, these carrots fit right in. They pair beautifully with roasted meats and hearty grains.
- Crowd-Pleaser: I’ve served these to picky kids and discerning adults, and the pot always comes back empty. The sweetness is balanced by the savory thyme, so nobody feels like they’re eating dessert disguised as vegetables.
- Unbelievably Delicious: The glaze reduces into this sticky, flavorful coating that makes each carrot taste like a little piece of autumn. The thyme adds an earthy note that keeps everything grounded.
What makes this recipe different from other glazed carrots is the technique. Instead of boiling the carrots separately and then tossing them with a glaze, everything happens in one pan. The carrots cook directly in the cider and butter, which means they absorb all that flavor from the inside out. It’s not just a coating—it’s a transformation. This is comfort food that feels light and bright, perfect for the season when you want something satisfying but not heavy.
What Ingredients You Will Need
This recipe uses simple, wholesome ingredients that come together to create something truly special. The beauty is in the balance—sweet apple cider, rich butter, and fragrant thyme all work together to make humble carrots shine.
- Carrots (1½ pounds / 680 grams): Look for medium-sized carrots that are firm and bright orange. I prefer to use whole carrots and peel them myself rather than the pre-peeled baby carrots, which don’t have quite the same texture. If your carrots are thick, slice them lengthwise first to ensure even cooking.
- Apple cider (1 cup / 240 ml): This is the star of the show. Use fresh, unfiltered apple cider if you can find it—the kind that’s a little cloudy and tastes like you just pressed it yourself. I like to buy mine from a local orchard, but any good-quality cider works. Do not substitute apple juice, which is thinner and less flavorful.
- Unsalted butter (3 tablespoons / 42 grams): Butter adds richness and helps the glaze come together. I use unsalted so I can control the salt level myself. If you only have salted butter, just reduce the added salt by a pinch.
- Fresh thyme (6-8 sprigs plus extra for garnish): Fresh thyme is non-negotiable here. The dried stuff just doesn’t have the same aromatic quality. You’ll use whole sprigs during cooking and then pull them out before serving, plus a few leaves scattered on top for freshness.
- Honey (1 tablespoon / 15 ml): Just a touch to round out the sweetness and help the glaze get that glossy finish. You can substitute maple syrup if you prefer, but honey has a milder flavor that lets the cider shine.
- Salt (½ teaspoon / 3 grams): Use a fine sea salt or kosher salt. This is crucial for balancing the sweetness—don’t skip it.
- Black pepper (¼ teaspoon / 1 gram, freshly ground): Freshly ground pepper adds a subtle warmth that complements the thyme beautifully.
For the best results, I recommend using carrots that are roughly the same size so they cook evenly. If you’re shopping at a farmers’ market, look for carrots with the tops still attached—they’re usually fresher. A good brand for apple cider is Martinelli’s if you can’t get local, but honestly, any unfiltered cider from the refrigerated section of your grocery store will work beautifully.
Equipment Needed
You don’t need anything fancy for this recipe, which is part of its charm. Here’s what you’ll want to have on hand:
- Large skillet or sauté pan (12-inch / 30 cm): A wide pan gives the carrots room to cook in a single layer. A straight-sided skillet works best because it holds the liquid without splattering. I use my trusty cast iron skillet for this, but a stainless steel or nonstick pan works just as well.
- Sharp chef’s knife and cutting board: For peeling and slicing the carrots. A good vegetable peeler is also helpful if you don’t want to use a knife for that step.
- Measuring cups and spoons: For the cider, honey, and seasonings. Precision matters here because the glaze ratio is important.
- Tongs or a spatula: For turning the carrots as they cook. Tongs give you more control, but a silicone spatula works fine too.
- Small bowl: For mixing the honey and cider if you want to combine them before adding to the pan.
If you don’t have a 12-inch skillet, you can use a large saucepan or even a Dutch oven. The key is to have enough surface area so the carrots aren’t piled on top of each other. A smaller pan will work, but you might need to cook the carrots in batches or extend the cooking time slightly.
Preparation Method

Let’s get cooking. This recipe moves quickly once you start, so I like to have everything prepped and measured before I turn on the heat. Trust me on this—it makes the whole process smoother.
- Prep the carrots (5 minutes): Wash and peel your carrots, then trim off the tops and tips. Cut them on a diagonal into slices about ½-inch (1.25 cm) thick. Cutting on an angle gives you more surface area for the glaze to cling to, plus it looks prettier on the plate. If your carrots are very thick at the top, cut those pieces in half lengthwise so everything is roughly the same size.
- Combine the liquids (1 minute): In a small bowl or measuring cup, whisk together the apple cider and honey until the honey dissolves. Set this aside near the stove so you can add it quickly when the time comes.
- Start cooking (2 minutes): Place your skillet over medium-high heat and add the butter. Let it melt and start to foam, but don’t let it brown. Swirl the pan to coat the bottom evenly.
- Add the carrots (1 minute): Carefully add the sliced carrots to the pan in a single layer. They should sizzle when they hit the butter. Let them cook undisturbed for about 2 minutes, just until they start to get a little color on the bottom. You’re not trying to brown them deeply—just a light golden edge.
- Add the cider mixture and thyme (30 seconds): Pour the cider and honey mixture over the carrots. Add the fresh thyme sprigs, tucking them down into the liquid so they can infuse their flavor. Sprinkle the salt and pepper over everything.
- Simmer and reduce (12-15 minutes): Bring the liquid to a gentle boil, then reduce the heat to medium-low so it’s at a steady simmer. Cover the pan and let the carrots cook for about 8 minutes. They should be starting to get tender but still have some bite. Remove the lid and increase the heat to medium-high. Continue cooking, stirring occasionally, until the liquid has reduced to a syrupy glaze that coats the carrots. This takes another 4-7 minutes. Watch it carefully toward the end—the glaze can go from perfect to burnt very quickly.
- Check for doneness (30 seconds): Pierce a carrot with the tip of a knife. It should slide in easily but the carrot should still hold its shape. If it’s still too firm, add a splash of water and continue cooking for another minute or two.
- Finish and serve (1 minute): Remove the thyme sprigs (most of the leaves will have fallen off into the glaze, which is exactly what you want). Taste and adjust seasoning with a little more salt or pepper if needed. Transfer the carrots to a serving dish and garnish with fresh thyme leaves.
A few things to watch for as you go: If the liquid evaporates before the carrots are tender, add another splash of cider or water and continue cooking. If the glaze seems too thin at the end, let it bubble for another minute or two—it will thicken as it cools. The carrots should be glossy and coated, not swimming in liquid.
Cooking Tips & Techniques
I’ve made this recipe more times than I can count, and I’ve learned a few things along the way. Here are the tips that make the biggest difference:
Don’t crowd the pan. If you have more carrots than fit comfortably in a single layer, cook them in two batches. Crowding traps steam and makes the carrots soggy instead of letting them caramelize. I learned this the hard way when I tried to double the recipe for a Thanksgiving potluck and ended up with mushy carrots. Split them up—it’s worth the extra few minutes.
Cut your carrots consistently. Uneven pieces mean uneven cooking. Some will be perfect while others are still crunchy or already falling apart. Take the extra minute to make sure your slices are all about the same thickness. Your future self will thank you.
Watch the glaze like a hawk. The last few minutes of reduction are critical. The glaze goes from syrupy to sticky to burnt very quickly. I always pull the pan off the heat a little early rather than risk burning it. The residual heat will finish the job. One time I got distracted by my phone and ended up with a pan of carrots that tasted like caramelized regret. Don’t be me.
Use cold butter if you need to fix the glaze. If your glaze looks separated or greasy, drop in a tiny piece of cold butter and swirl the pan off the heat. It will emulsify and bring everything back together. This is a classic French technique that works like magic.
Toast the thyme for extra flavor. Before adding the liquid, you can toss the thyme sprigs in the hot butter for about 30 seconds. This releases their oils and gives the whole dish a deeper, more aromatic flavor. Just be careful not to burn them.
Prep ahead for busy days. You can peel and slice the carrots up to two days in advance. Store them in a sealed container in the refrigerator with a damp paper towel on top to keep them from drying out. The actual cooking only takes 20 minutes, so this is a great recipe to have in your back pocket for hectic weeknights.
Variations & Adaptations
This recipe is wonderfully flexible. Here are some ways to make it your own:
Maple-Bourbon Version: Replace the honey with maple syrup and add 2 tablespoons of bourbon along with the cider. The bourbon adds a warm, smoky note that pairs beautifully with the thyme. Cook as directed—the alcohol will cook off, leaving just the flavor. I made this for a Friendsgiving dinner and people were scraping the pan clean.
Herb Swap: If you don’t have fresh thyme, try rosemary or sage instead. Rosemary gives a more piney, robust flavor, while sage adds an earthy, almost buttery note. Use the same amount and remove the sprigs before serving. I’ve even used a combination of thyme and sage when I couldn’t decide, and it was fantastic.
Spiced Version: Add a cinnamon stick and a star anise to the cooking liquid along with the thyme. This gives the carrots a warm, chai-like flavor that’s perfect for holiday dinners. Just remember to remove the spices before serving. You can also add a pinch of nutmeg or allspice to the glaze at the end.
Low-Sugar Option: Skip the honey entirely and use an extra tablespoon of apple cider. The natural sweetness of the carrots and cider is usually enough, especially if you use really good, sweet carrots. You can also use a sugar-free maple syrup substitute if you’re watching your sugar intake.
Roasted Version: For a different texture, toss the sliced carrots with melted butter, salt, and pepper, then roast at 400°F (200°C) for 20 minutes. While they roast, simmer the cider and honey in a small saucepan until reduced by half. Toss the roasted carrots with the glaze and fresh thyme leaves. The roasting gives them a slightly caramelized exterior that’s lovely.
Vegan Adaptation: Replace the butter with a good-quality vegan butter or coconut oil. The flavor will be slightly different, but it still works beautifully. Use maple syrup instead of honey to keep it fully plant-based.
Serving & Storage Suggestions
These carrots are best served warm, right after you make them. The glaze is at its glossiest and most flavorful when it’s fresh. But they’re also pretty good at room temperature, which makes them great for potlucks and buffets.
How to Serve: Transfer the carrots to a warm serving platter and spoon any remaining glaze over the top. Scatter fresh thyme leaves and a pinch of flaky sea salt right before serving for a beautiful finish. They pair wonderfully with roast chicken, turkey, pork chops, or even a simple grilled salmon. For a vegetarian main, serve them alongside creamy polenta or roasted squash.
Complementary Dishes: These carrots are a natural fit for any fall menu. Try them with mashed potatoes, stuffing, or a simple green salad with a tangy vinaigrette. The sweetness of the carrots balances well with rich, savory dishes. A glass of dry hard cider or a crisp white wine like Sauvignon Blanc is a lovely accompaniment.
Storage: Leftover carrots keep well in an airtight container in the refrigerator for up to 4 days. The glaze will thicken as it cools, which is fine—it will loosen up when you reheat them.
Reheating: The best way to reheat these carrots is in a skillet over medium heat with a splash of water or apple cider. Stir gently until the glaze loosens and the carrots are hot. You can also microwave them in 30-second bursts, but the texture won’t be quite as nice. I don’t recommend freezing them—the carrots will get mushy when thawed.
Flavor Development: Interestingly, these carrots taste even better the next day. The flavors have time to meld, and the thyme becomes more pronounced. If you’re planning ahead, make them a day in advance and reheat gently before serving.
Nutritional Information & Benefits
Here’s the approximate nutritional breakdown for one serving (about ⅙ of the recipe):
- Calories: 145
- Total Fat: 6g
- Saturated Fat: 4g
- Cholesterol: 15mg
- Sodium: 240mg
- Total Carbohydrates: 22g
- Dietary Fiber: 4g
- Sugars: 14g
- Protein: 2g
- Vitamin A: 380% DV
- Vitamin C: 10% DV
- Potassium: 380mg
These carrots are a powerhouse of nutrition. Vitamin A is essential for eye health, immune function, and healthy skin, and one serving gives you nearly four times your daily needs. The fiber from the carrots supports digestive health and helps keep you full. Apple cider contains antioxidants called polyphenols, which may help reduce inflammation and support heart health. Thyme is rich in vitamin C and has antimicrobial properties.
This recipe is naturally gluten-free and can be made vegan with simple substitutions. It’s relatively low in calories for a side dish that feels indulgent, making it a smart choice for anyone watching their intake. The sweetness comes mostly from the carrots and cider, with just a touch of honey—so it’s not overly sugary despite the rich flavor.
Conclusion
These Fall Apple Cider Glazed Carrots with Thyme have become my go-to side dish for the season, and I think they’ll become yours too. They’re proof that you don’t need complicated techniques or a long list of ingredients to create something memorable. Sometimes the best dishes come from a simple idea—like letting a beginner’s instinct lead the way.
I love how versatile this recipe is. It works for a quiet weeknight dinner just as well as it does for a holiday feast. The glaze is forgiving, the flavors are forgiving, and even if you mess up a little (like I did that first time), the carrots still come out delicious. That’s the kind of recipe I want in my life.
I’d love to hear how these turn out for you. Did you try one of the variations? Did you add your own twist? Drop a comment below and let me know—I read every single one. And if you share a photo on Pinterest or Instagram, tag me so I can see your beautiful creation. Happy cooking, friends. Here’s to being wrong in the best possible way.
Frequently Asked Questions
Can I use baby carrots instead of whole carrots?
You can, but I don’t recommend it. Baby carrots are cut from larger carrots and tend to be less flavorful. They also release more water as they cook, which can make the glaze thinner. If you’re in a pinch, use them, but whole carrots give you a much better result.
Can I make this recipe ahead of time?
Absolutely. You can prep the carrots up to two days in advance and store them in the fridge. The finished dish also reheats beautifully—just add a splash of cider or water when warming to loosen the glaze. I often make these a day ahead for holiday dinners to save time on the day.
What can I use instead of fresh thyme?
Dried thyme works in a pinch, but use only 1 teaspoon and add it with the salt and pepper. Fresh rosemary or sage are also excellent substitutes. If you’re using rosemary, go easy—it’s stronger than thyme. About 2 sprigs should do it.
Can I use apple juice instead of apple cider?
You can, but the results won’t be as good. Apple juice is thinner and less concentrated in flavor. If that’s all you have, consider simmering it with a cinnamon stick to add some depth, and expect a slightly less intense glaze. Fresh cider really is worth seeking out for this recipe.
How do I know when the carrots are done?
The carrots should be tender enough that a knife slides in easily, but they should still hold their shape. You don’t want them mushy. The glaze should be thick enough to coat the back of a spoon. If the glaze is still runny, let it bubble for another minute or two. If it’s getting too thick before the carrots are done, add a splash of water and keep cooking.
Pin This Recipe!
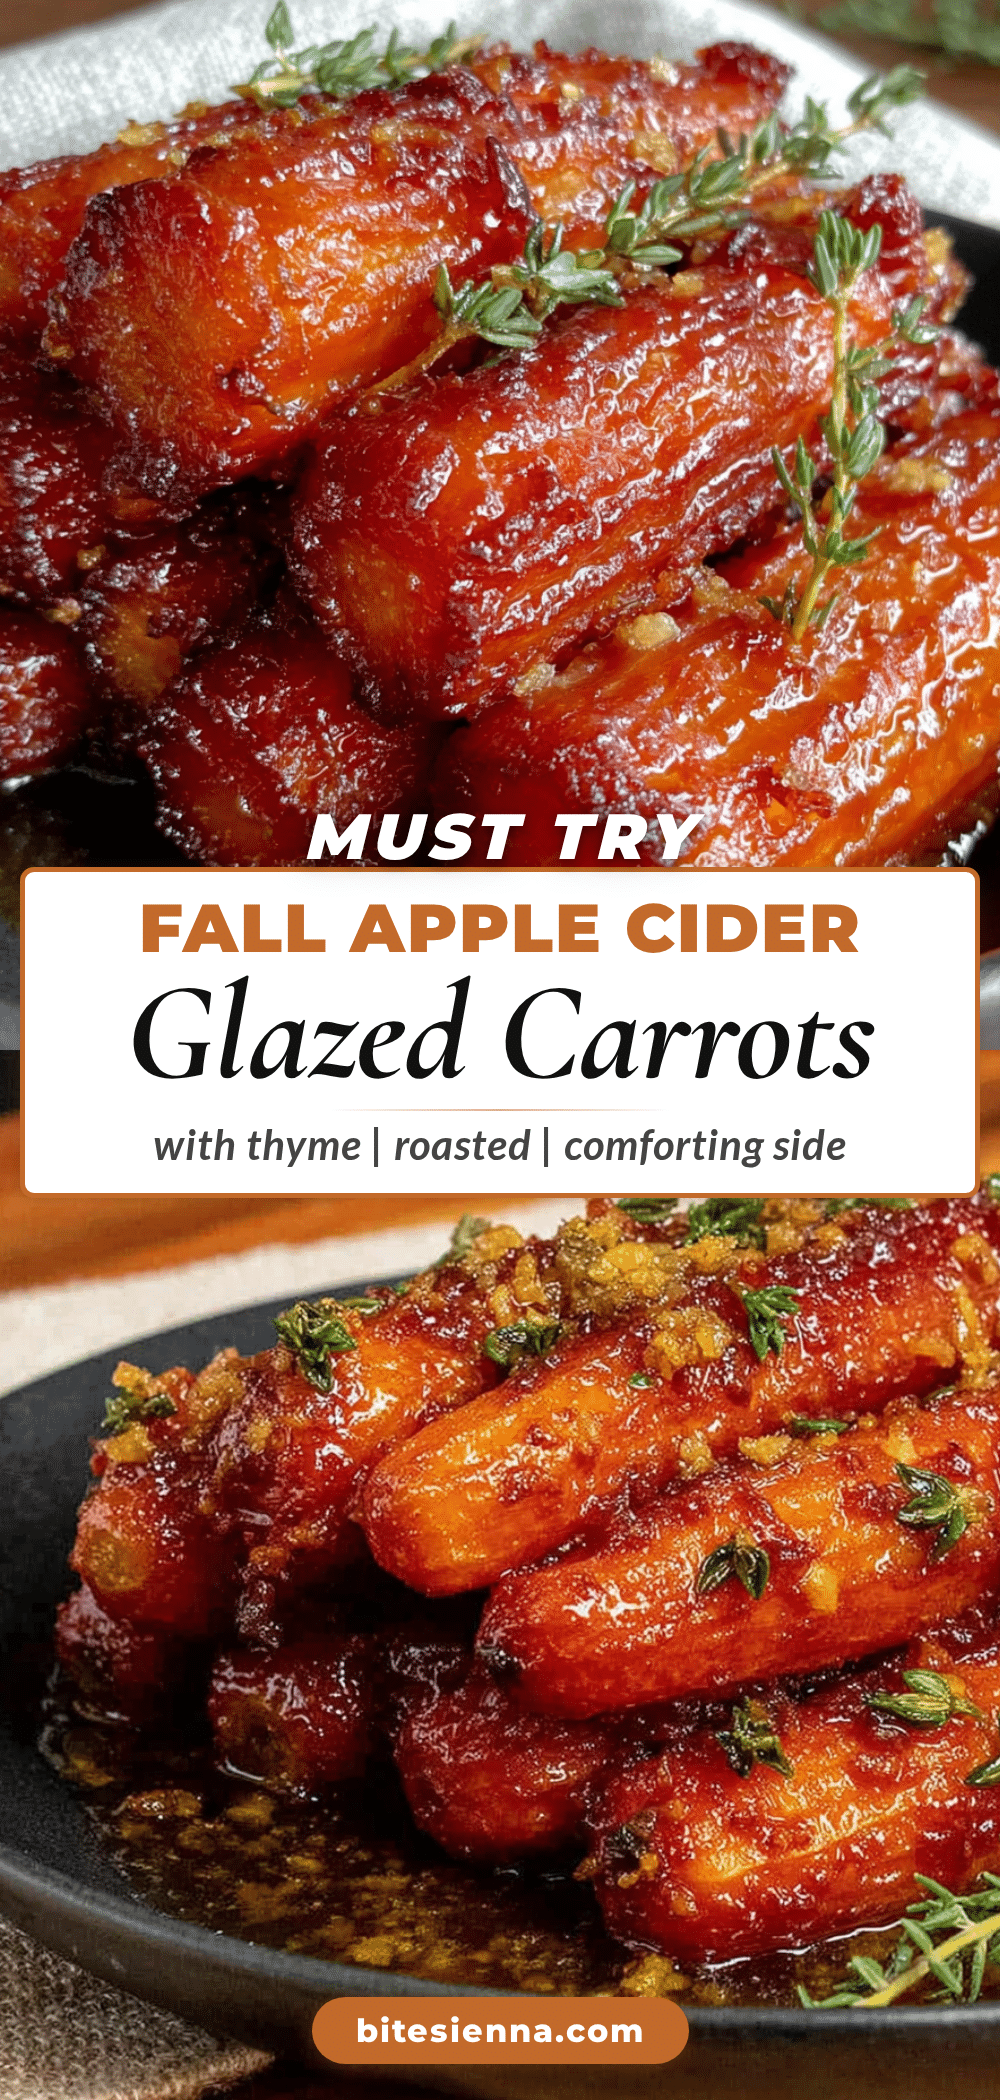
Easy Fall Apple Cider Glazed Carrots with Thyme
These tender, glossy carrots are cooked in a sweet and tangy apple cider glaze with fresh thyme, creating a simple yet elegant side dish that’s perfect for fall gatherings and weeknight dinners alike.
- Prep Time: 10 minutes
- Cook Time: 15 minutes
- Total Time: 25 minutes
- Yield: 6 servings 1x
- Category: Side Dish
- Cuisine: American
Ingredients
- 1½ pounds (680 grams) carrots, peeled and sliced ½-inch thick on the diagonal
- 1 cup (240 ml) apple cider (unfiltered preferred)
- 3 tablespoons (42 grams) unsalted butter
- 6–8 sprigs fresh thyme, plus extra for garnish
- 1 tablespoon (15 ml) honey
- ½ teaspoon (3 grams) fine sea salt or kosher salt
- ¼ teaspoon (1 gram) freshly ground black pepper
Instructions
- Wash and peel the carrots, then trim off the tops and tips. Cut them on a diagonal into slices about ½-inch (1.25 cm) thick. If carrots are very thick at the top, cut those pieces in half lengthwise so everything is roughly the same size.
- In a small bowl or measuring cup, whisk together the apple cider and honey until the honey dissolves. Set aside near the stove.
- Place a large skillet (12-inch / 30 cm) over medium-high heat and add the butter. Let it melt and start to foam, but don’t let it brown. Swirl the pan to coat the bottom evenly.
- Carefully add the sliced carrots to the pan in a single layer. Let them cook undisturbed for about 2 minutes, just until they start to get a little color on the bottom.
- Pour the cider and honey mixture over the carrots. Add the fresh thyme sprigs, tucking them down into the liquid. Sprinkle the salt and pepper over everything.
- Bring the liquid to a gentle boil, then reduce the heat to medium-low so it’s at a steady simmer. Cover the pan and let the carrots cook for about 8 minutes, until starting to get tender but still have some bite.
- Remove the lid and increase the heat to medium-high. Continue cooking, stirring occasionally, until the liquid has reduced to a syrupy glaze that coats the carrots, about 4-7 minutes. Watch carefully toward the end to avoid burning.
- Check for doneness by piercing a carrot with the tip of a knife. It should slide in easily but the carrot should still hold its shape. If too firm, add a splash of water and continue cooking for another minute or two.
- Remove the thyme sprigs. Taste and adjust seasoning with a little more salt or pepper if needed. Transfer the carrots to a serving dish and garnish with fresh thyme leaves.
Notes
For best results, use fresh, unfiltered apple cider. Do not substitute apple juice. If the liquid evaporates before carrots are tender, add a splash of cider or water. The glaze thickens as it cools. Leftovers keep in an airtight container in the refrigerator for up to 4 days. Reheat in a skillet with a splash of water or cider.
Nutrition
- Serving Size: 1 serving (about ⅙ o
- Calories: 145
- Sugar: 14
- Sodium: 240
- Fat: 6
- Saturated Fat: 4
- Carbohydrates: 22
- Fiber: 4
- Protein: 2
Keywords: apple cider glazed carrots, fall carrots, thyme carrots, easy side dish, Thanksgiving carrots, glazed carrots


