My sister-in-law Jen wasn’t trying to impress anyone that Tuesday. I’d stopped by to drop off a casserole dish she’d lent me, and the smell hit me before I even got through the screen door. It was warm and buttery, with this almost caramel-like sweetness that made no sense for a random weekday afternoon. She was standing there in her faded apron, flour on her cheek, looking at her phone while this incredible cake cooled on the counter. “Oh, that?” she said when I asked, like I’d pointed out a stray sock. “It’s just something I threw together.”
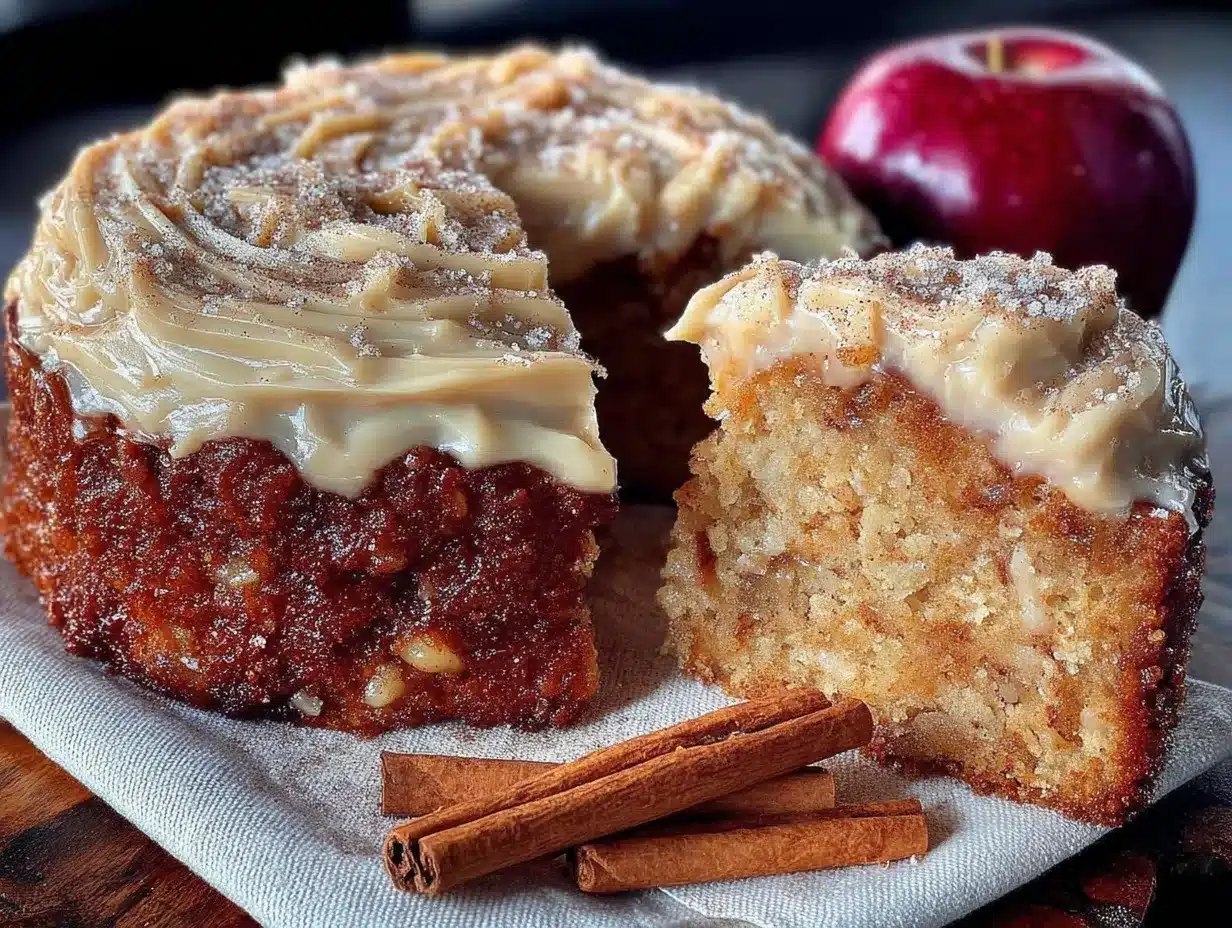
Let me tell you, that “something” changed my whole approach to fall baking. I stood there eating a slice still warm from the pan, and I honestly forgot to ask for the recipe until I was halfway home. The edges were slightly crisp, the top had that classic snickerdoodle crackle, and there was this deep, nutty flavor running through every single bite. It took me three tries and two phone calls to Jen before I realized the secret was browning the butter first. I mean, who does that on a Tuesday afternoon without making a big deal about it?
Maybe you’ve been there—you taste something at a friend’s house and you just know you’ll be thinking about it for weeks. That’s this cake for me. It’s the kind of recipe that makes you look like you spent hours in the kitchen when really, it all comes together in one bowl. No stand mixer required, no fancy techniques. Just brown butter, apple cider, and that cozy snickerdoodle magic that makes everyone happy.
Why You’ll Love This Recipe
Look, I’ve tested a lot of apple cider recipes over the years. Some were too dry, some were too fussy, and some just didn’t deliver on that warm, spiced promise. This one is different. It’s the recipe I bring to every fall gathering, and people always ask for the details. Here’s why it works so well:
- One Bowl Wonder : No stand mixer needed. You whisk the dry ingredients, whisk the wet ingredients, stir them together, and you’re done. Less dishes means more time enjoying that first slice.
- Pantry-Friendly Ingredients : You probably have most of this already. Butter, sugar, flour, cinnamon, eggs. The apple cider is the only special trip, and it’s easy to find this time of year.
- Perfect for Family Gatherings : This cake feeds a crowd without breaking the bank. It’s sturdy enough to transport, fancy enough for holidays, and simple enough for a Tuesday night.
- Picky Eater Approved : My kids don’t love apple desserts usually, but they devour this. Something about the brown butter and cinnamon combo just works.
- Leftovers That Get Better : Honestly, day two is even better. The flavors settle in, and that brown butter taste gets even deeper. It’s one of those rare cakes that improves overnight.
What makes this recipe different from every other apple cider cake out there? It’s the brown butter, hands down. That extra step—taking five minutes to cook the butter until it’s golden and smells like toasted nuts—changes everything. It adds a richness that makes the cake taste almost caramelized, without any extra sugar. Plus, the snickerdoodle topping gives it that signature crackle and a little cinnamon crunch that contrasts perfectly with the tender, moist crumb.
This recipe isn’t just good—it’s the kind that makes you close your eyes after the first bite. It’s comfort food reimagined, with that same soul-soothing satisfaction but a little more depth. Perfect for impressing guests without stress, or turning a simple Sunday afternoon into something memorable.
What Ingredients You Will Need
This recipe uses simple, wholesome ingredients to deliver bold flavor and satisfying texture without the fuss. Most of these are staples you probably already have, which is exactly how I like to cook for my family.
For the Cake
- 1 cup (2 sticks) unsalted butter — You’ll brown this first, so don’t skip that step. I like using Land O’Lakes or Kerrygold for the best flavor, but any good-quality butter works.
- 1 ½ cups granulated sugar — Regular white sugar works perfectly here. It dissolves easily and helps create that tender crumb.
- 2 large eggs — Room temperature is best, so pull them out about 30 minutes before you start. If you forget, just set them in a bowl of warm water for 5 minutes.
- 1 teaspoon vanilla extract — Pure vanilla makes a difference, but imitation works fine in a pinch. I use Nielsen-Massey when I’m feeling fancy.
- 1 cup apple cider — Not apple juice! Apple cider has that tangy, concentrated flavor that makes this cake special. Look for fresh cider in the refrigerated section.
- 2 ½ cups all-purpose flour — Spoon and level it into your measuring cup. Scooping directly from the bag packs too much flour in and makes the cake dry.
- 1 teaspoon baking powder — Make sure it’s fresh. Test it by dropping a little in hot water—if it bubbles, you’re good.
- ½ teaspoon baking soda — This helps the cake rise and stay tender.
- 1 teaspoon ground cinnamon — The star of the show, along with the brown butter. Use a good quality cinnamon like Saigon or Ceylon for the best flavor.
- ½ teaspoon ground nutmeg — Freshly grated is amazing, but pre-ground works perfectly.
- ½ teaspoon salt — Don’t skip this. It balances the sweetness and makes all the flavors pop.
For the Snickerdoodle Topping
- ¼ cup granulated sugar — For that signature crackly top.
- 1 tablespoon ground cinnamon — This gets sprinkled on top before baking. It creates that beautiful swirl and extra cinnamon kick.
Ingredient Tips and Substitutions
If you’re dairy-free, you can use a good plant-based butter like Miyoko’s for browning. It works surprisingly well. For a gluten-free version, swap the all-purpose flour with a 1:1 gluten-free baking blend like King Arthur’s. I’ve tested it, and the texture is almost identical. And if you don’t have apple cider, you can reduce regular apple juice by simmering it for about 10 minutes until it thickens slightly. It’s not exactly the same, but it’s a good backup plan.
Equipment Needed
You don’t need much for this recipe, which is exactly how I like it. Here’s what you’ll need:
- 9-inch round cake pan — A standard metal or glass pan works great. I prefer a light-colored metal pan for even browning. If you use glass, reduce the oven temperature by 25 degrees.
- Medium saucepan — For browning the butter. A light-colored pan helps you see when the butter turns golden.
- Large mixing bowl — Any bowl you have works. I use a simple glass mixing bowl.
- Whisk — For the dry ingredients and the wet ingredients. A fork works in a pinch, but a whisk is easier.
- Rubber spatula — For folding everything together and scraping the bowl clean.
- Measuring cups and spoons — Standard set works perfectly.
- Cooling rack — Helps the cake cool evenly. If you don’t have one, just let it cool in the pan for a bit longer.
I’ve made this cake with a hand mixer and without. Honestly, a whisk and some elbow grease work just as well. The batter is thin enough that you don’t need any power tools. And if you don’t have a 9-inch round pan, you can use an 8×8 square pan instead—just check it a few minutes early since it might bake faster.
Preparation Method
This recipe comes together quickly once you get started. Here’s how to do it, step by step.
- Preheat your oven to 350°F (175°C). Grease your 9-inch round cake pan with butter or cooking spray. I like to line the bottom with a circle of parchment paper for easy release, but it’s not strictly necessary.
- Brown the butter. Place the 1 cup of butter in a medium saucepan over medium heat. Let it melt completely, then continue cooking, swirling the pan occasionally. You’ll see it start to foam and bubble. After about 5-7 minutes, the foam will subside and you’ll see golden brown specks forming at the bottom. The butter will smell nutty and toasty. Remove it from the heat immediately and pour it into a heatproof bowl to stop the cooking. Let it cool for about 10 minutes. Don’t skip this cooling step—hot butter will cook your eggs!
- Mix the dry ingredients. In a large bowl, whisk together the 2 ½ cups flour, 1 teaspoon baking powder, ½ teaspoon baking soda, 1 teaspoon cinnamon, ½ teaspoon nutmeg, and ½ teaspoon salt. Set aside.
- Mix the wet ingredients. In a separate medium bowl, whisk together the 1 ½ cups sugar and the cooled brown butter until smooth. It should look like a thick paste. Add the 2 eggs one at a time, whisking well after each. Stir in the 1 teaspoon vanilla and 1 cup apple cider. The mixture will look a little curdled at first—that’s totally normal. Keep whisking until it comes together.
- Combine wet and dry. Pour the wet ingredients into the dry ingredients. Use a rubber spatula to fold everything together gently. Stir just until you don’t see any more flour streaks. A few lumps are fine—overmixing makes the cake tough. The batter will be thin, almost like a thick pancake batter. That’s exactly right.
- Prepare the topping. In a small bowl, mix together the ¼ cup sugar and 1 tablespoon cinnamon. Sprinkle about half of this mixture evenly over the bottom of your greased cake pan. This creates that lovely cinnamon crust on the bottom of the cake.
- Pour and top. Pour the batter into the prepared pan, spreading it evenly with your spatula. Sprinkle the remaining cinnamon-sugar mixture over the top. It will look like a generous layer—that’s what gives you that beautiful crackled top.
- Bake. Place the pan in the preheated oven and bake for 35-40 minutes. The cake is done when a toothpick inserted into the center comes out clean or with just a few moist crumbs. The top should be golden brown and slightly crackled. If the top is browning too quickly after 25 minutes, tent it loosely with foil.
- Cool. Let the cake cool in the pan on a wire rack for 15 minutes. Then run a knife around the edges and invert it onto the rack to cool completely. If you want to serve it warm (which I highly recommend), let it cool for at least 20 minutes before slicing.
One thing I learned the hard way: don’t rush the cooling step. I once tried to flip this cake too early, and it fell apart in my hands. The brown butter makes the cake extra tender, so it needs that 15-minute rest to set up properly. Trust me on this one.
Cooking Tips & Techniques
After making this cake more times than I can count, here are the things I wish someone had told me from the start.
The brown butter is everything. I know it seems like an extra step, but it’s the difference between a good cake and a great one. Watch it carefully—it goes from perfect to burnt in seconds. As soon as you see those brown specks and smell that nutty aroma, pull it off the heat. I’ve ruined a batch by walking away to answer the phone. Don’t be me.
Room temperature eggs matter. Cold eggs will seize up the brown butter and make your batter lumpy. If you forgot to pull them out, place them in a bowl of warm water for 5 minutes. It works every time.
Don’t overmix the batter. I know it’s tempting to keep stirring until it’s perfectly smooth, but stop as soon as the flour disappears. Overmixing develops gluten and makes the cake dense and tough. A few lumps are your friends here.
The cinnamon-sugar layer is key. Sprinkling half on the bottom of the pan creates this amazing crust that contrasts with the tender cake. It’s one of those little touches that makes people ask, “How did you get that crunchy bottom?”
Check for doneness early. Ovens vary wildly. Start checking at 33 minutes. If the toothpick comes out clean, it’s done. Overbaking dries out this cake fast. I’d rather pull it a minute early than a minute late.
Let it cool properly. I know you want to eat it immediately. I do too. But cutting into it too soon will make it crumble. Give it that 15-minute rest in the pan, then another 10 on the rack. The wait is worth it.
Variations & Adaptations
This recipe is flexible, which is exactly what I need when feeding a family with different tastes. Here are some ways to change it up.
Gluten-Free Version : I’ve tested this with King Arthur’s Measure for Measure gluten-free flour, and it works beautifully. The texture is slightly more tender, but the flavor is spot on. Just make sure to spoon and level the flour—gluten-free blends can be heavy.
Dairy-Free Version : Use Miyoko’s or another high-fat plant-based butter for browning. It won’t brown exactly the same way, but it still adds that nutty flavor. I’ve also used coconut oil, but the flavor changes quite a bit.
Apple Cider Substitute : If you don’t have apple cider, reduce 1 ½ cups of apple juice by simmering it for about 10-15 minutes until you have 1 cup. It’s not quite as tangy, but it works in a pinch. You can also use pear cider for a different twist.
Spice It Up : Add ½ teaspoon of ground ginger or cardamom to the dry ingredients for a more complex spice profile. I tried this last Thanksgiving and it was a huge hit.
Add Mix-Ins : Fold in ½ cup of chopped pecans or walnuts after mixing the batter. The nuts add a nice crunch and pair beautifully with the brown butter. You could also add ½ cup of dried cranberries for a tart contrast.
Make It a Layer Cake : Double the recipe and bake in two 9-inch pans. Layer with cream cheese frosting or a simple apple cider glaze. It’s impressive without being complicated.
Serving & Storage Suggestions
This cake is wonderful in so many ways. Here’s how to serve and store it for the best experience.
Serving Temperature : I love this cake warm, right after it’s cooled enough to slice. The brown butter flavor is most pronounced when it’s still slightly warm. If you’re serving it later, pop individual slices in the microwave for about 15 seconds. It brings back that fresh-baked magic.
Presentation : Dust the top with a little powdered sugar before serving. It makes it look fancy without any effort. You can also add a dollop of whipped cream or a scoop of vanilla ice cream on the side. The cold creaminess against the warm spiced cake is pure heaven.
What to Serve With It : A cup of hot apple cider or coffee is perfect alongside. For a bigger dessert spread, pair it with a simple vanilla bean ice cream or a drizzle of caramel sauce. It’s also amazing with a scoop of cinnamon ice cream.
Storage : Store the cake in an airtight container at room temperature for up to 3 days. If your kitchen is warm, refrigerate it—it’ll keep for about 5 days. Just let it come to room temperature before serving, or warm it slightly.
Freezing : This cake freezes beautifully. Wrap it tightly in plastic wrap, then foil, and freeze for up to 3 months. Thaw overnight in the refrigerator, then warm slices as needed. I often make two and freeze one for busy weeks.
Flavor Development : Honestly, this cake gets better on day two. The brown butter flavor deepens, and the spices meld together beautifully. If you can resist eating it all on day one, you’re in for a treat.
Nutritional Information & Benefits
I’m not a nutritionist, but I do pay attention to what goes into my family’s food. Here’s what you should know about this recipe.
Estimated Per Serving (1/8 of cake) : About 420 calories, 18g fat, 62g carbs, 5g protein, 2g fiber, 38g sugar. These are estimates and will vary based on exact ingredients used.
Health Benefits : Apple cider contains antioxidants and may support digestive health. Cinnamon is known for its anti-inflammatory properties and can help regulate blood sugar. The brown butter adds healthy fats that help you feel satisfied. And honestly, the joy of a homemade dessert with your family is good for the soul.
Dietary Considerations : This recipe contains gluten, dairy, and eggs. For gluten-free and dairy-free options, see the variations section above. It’s also relatively low in sodium compared to store-bought desserts.
Allergen Note : This recipe contains wheat, dairy, and eggs. If you have nut allergies, the recipe itself is nut-free, but check your apple cider and any mix-ins you add.
Conclusion
This brown butter apple cider snickerdoodle cake has become my go-to for every fall gathering, and I don’t see that changing anytime soon. It’s the kind of recipe that makes you look like a baking genius without actually working that hard. The brown butter adds this incredible depth, the apple cider keeps it moist, and that cinnamon-sugar topping gives it the perfect crackle.
What I love most is how it brings people together. Every time I make it, someone asks for the recipe. It’s simple enough for a weeknight dessert but special enough for Thanksgiving. And honestly, it makes my kitchen smell amazing for hours.
I’d love to hear how this turns out for you! Leave a comment below and let me know if you tried any variations or if your family loved it as much as mine does. And if you’re looking for more fall baking ideas, check out our apple cinnamon bread or pumpkin snickerdoodle cookies. Happy baking!
Frequently Asked Questions
Can I use apple juice instead of apple cider?
You can, but the flavor will be less tangy and concentrated. Apple cider has a deeper, more complex taste that really makes this cake special. If you only have juice, simmer it for about 10 minutes to reduce it slightly before using.
Can I make this cake ahead of time?
Absolutely! This cake actually tastes better on day two. Bake it a day ahead, let it cool completely, wrap it tightly, and store it at room temperature. Just warm slices before serving if you like.
Can I freeze this cake?
Yes, it freezes beautifully. Wrap it tightly in plastic wrap and then foil, and freeze for up to 3 months. Thaw overnight in the refrigerator before serving.
Why did my cake turn out dry?
Most likely, it was overbaked. Start checking at 33 minutes and pull it as soon as the toothpick comes out clean. Also, make sure you’re spooning and leveling your flour—scooping directly from the bag packs too much flour in.
Can I make this into cupcakes?
Yes! Grease a muffin tin and fill each cup about ⅔ full. Bake at 350°F for 18-22 minutes. The cinnamon-sugar topping works the same way. They’re perfect for parties or lunchbox treats.
Pin This Recipe!
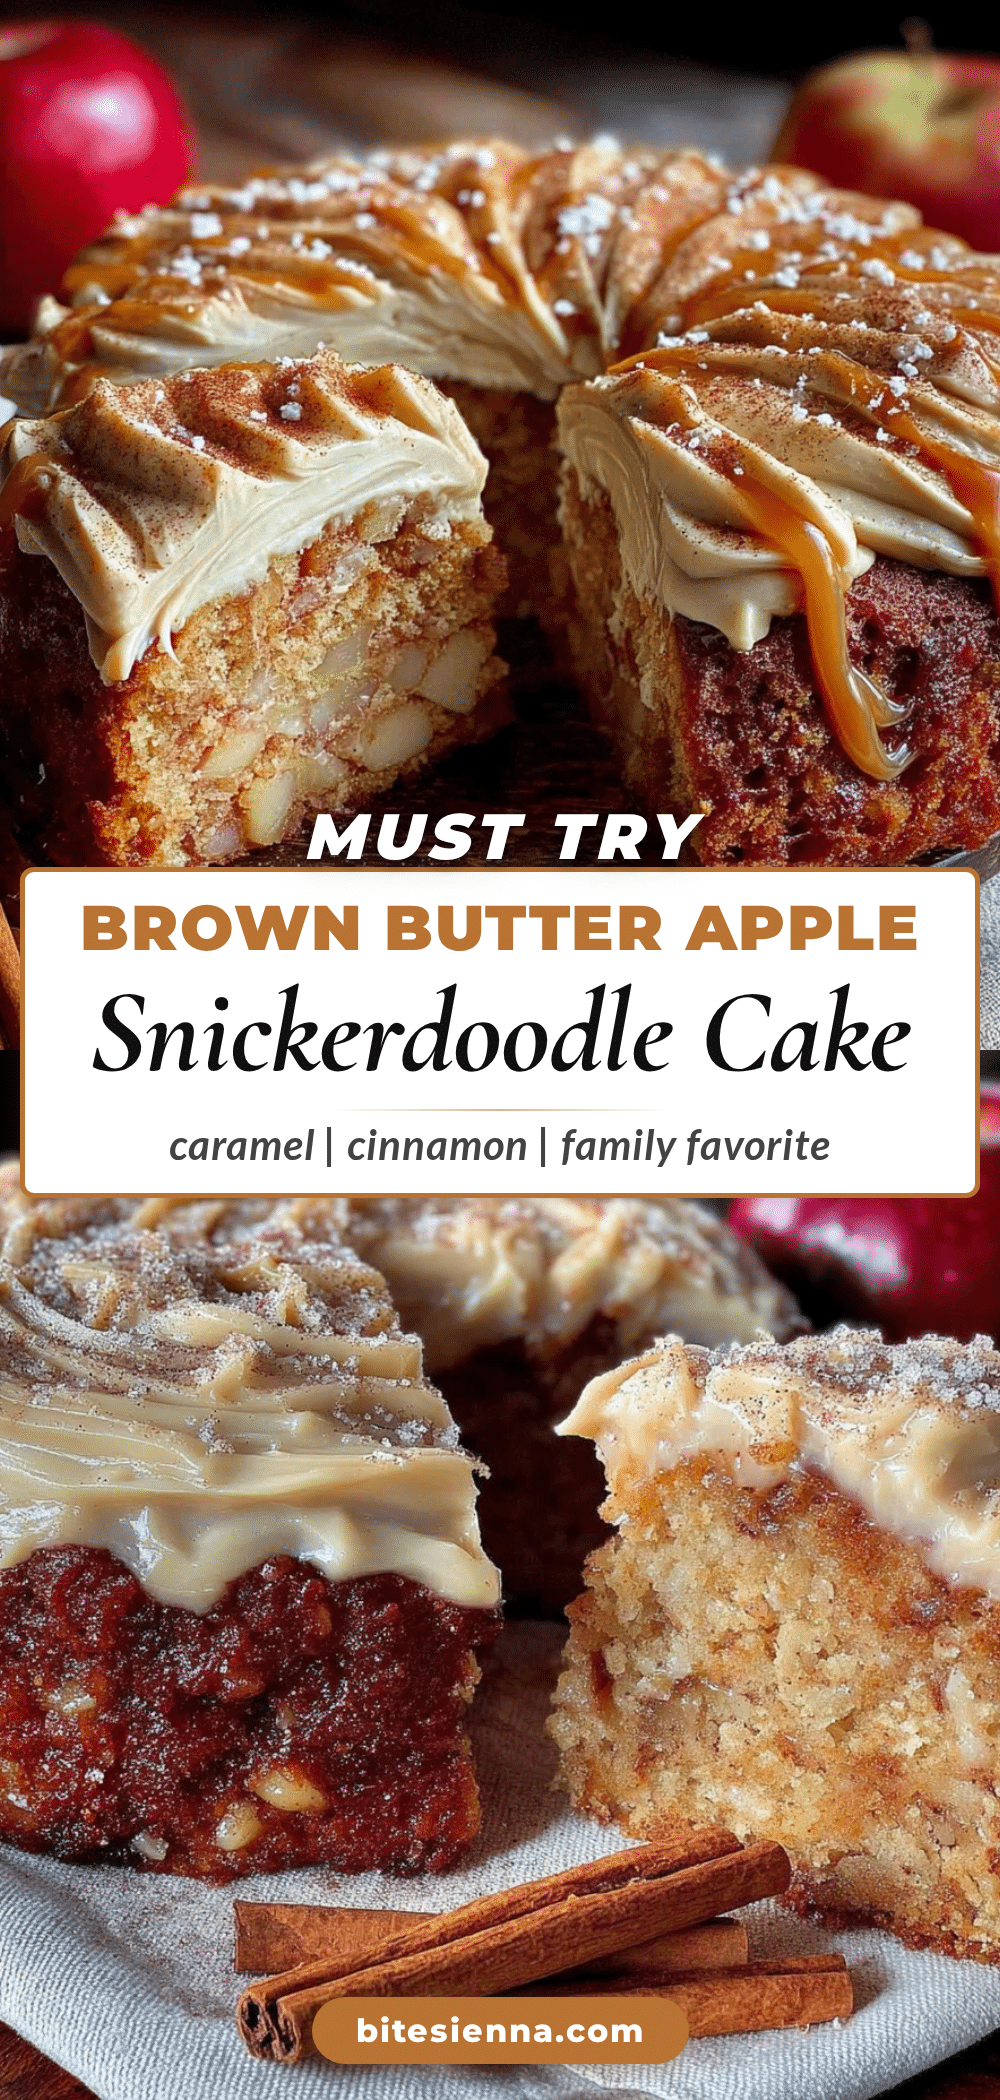
Best Easy Brown Butter Apple Cider Snickerdoodle Cake
A moist, tender cake with deep brown butter flavor, tangy apple cider, and a signature snickerdoodle crackle topping. This one-bowl wonder is perfect for fall gatherings and tastes even better on day two.
- Prep Time: 15 minutes
- Cook Time: 35-40 minutes
- Total Time: 50-55 minutes
- Yield: 8 servings 1x
- Category: Dessert
- Cuisine: American
Ingredients
- 1 cup (2 sticks) unsalted butter
- 1 ½ cups granulated sugar
- 2 large eggs, room temperature
- 1 teaspoon vanilla extract
- 1 cup apple cider
- 2 ½ cups all-purpose flour, spooned and leveled
- 1 teaspoon baking powder
- ½ teaspoon baking soda
- 1 teaspoon ground cinnamon
- ½ teaspoon ground nutmeg
- ½ teaspoon salt
- ¼ cup granulated sugar (for topping)
- 1 tablespoon ground cinnamon (for topping)
Instructions
- Preheat oven to 350°F (175°C). Grease a 9-inch round cake pan with butter or cooking spray. Optionally line the bottom with parchment paper.
- Brown the butter: Place 1 cup butter in a medium saucepan over medium heat. Melt completely, then continue cooking, swirling occasionally, until it foams, subsides, and golden brown specks form (about 5-7 minutes). Remove from heat immediately and pour into a heatproof bowl. Let cool for 10 minutes.
- Mix dry ingredients: In a large bowl, whisk together flour, baking powder, baking soda, cinnamon, nutmeg, and salt. Set aside.
- Mix wet ingredients: In a separate medium bowl, whisk together sugar and cooled brown butter until smooth. Add eggs one at a time, whisking well after each. Stir in vanilla and apple cider. The mixture may look curdled; keep whisking until smooth.
- Combine: Pour wet ingredients into dry ingredients. Fold gently with a rubber spatula until just combined (a few lumps are fine). Batter will be thin.
- Prepare topping: In a small bowl, mix ¼ cup sugar and 1 tablespoon cinnamon. Sprinkle half evenly over the bottom of the greased pan.
- Pour batter into pan and spread evenly. Sprinkle remaining cinnamon-sugar mixture over the top.
- Bake for 35-40 minutes, until a toothpick inserted in the center comes out clean or with a few moist crumbs. If top browns too quickly after 25 minutes, tent loosely with foil.
- Cool in pan on a wire rack for 15 minutes. Run a knife around edges, invert onto rack, and cool completely. Serve warm or at room temperature.
Notes
Brown butter is key—watch carefully to avoid burning. Room temperature eggs prevent lumpy batter. Don’t overmix; a few lumps are fine. Let cake cool 15 minutes in pan before inverting. For best flavor, serve slightly warm or on day two.
Nutrition
- Serving Size: 1 slice (1/8 of cake
- Calories: 420
- Sugar: 38
- Sodium: 280
- Fat: 18
- Saturated Fat: 11
- Carbohydrates: 62
- Fiber: 2
- Protein: 5
Keywords: brown butter, apple cider, snickerdoodle, cake, fall dessert, one bowl, easy baking


