The neighborhood cookie exchange was in three hours and I’d completely forgotten. Everyone else would be bringing those elaborate, three-day projects—layered bars with homemade caramel, hand-piped shortbread snowflakes, the kind of stuff that gets pinned a thousand times. I had a package of Biscoff cookies, a block of cream cheese that was about to expire, and a vague memory of something I’d seen on a food blog once. Honestly, I almost just bought a box of brownie mix and called it a day. But then I spotted the jar of Biscoff spread hiding in the back of my pantry, and a lightbulb went off. A tiny, frantic, slightly desperate lightbulb.
I threw these little cups together in a state of controlled chaos—no oven preheating, no waiting for butter to soften, just a bowl, a whisk, and a whole lot of hope. I scooped the creamy, spiced filling into little clear cups, crushed the cookies with my hands (a very professional technique, let me tell you), and layered everything like I meant to do it all along. I didn’t even have time to stress about it. I just packed them up, grabbed a spoon for tasting (quality control, obviously), and ran out the door.
You know that feeling when you bring something to a party and you’re half-embarrassed because it took fifteen minutes and zero oven time? Yeah, that was me. I sheepishly put my tray of little cheesecake cups next to the elaborate tarts and the triple-chocolate mousse cake, ready to apologize. But then people started picking them up. And then they started asking for the recipe. One woman said it was the best thing she’d eaten all month, and I had to stop myself from blurting out, “I made this while my cat was knocking things off the counter!” The simplicity won. The flavor—that cozy, brown-buttery, cinnamon-spiced magic of Biscoff—did all the heavy lifting. I’ve been making them for every gathering since, and honestly? I still feel like I’m getting away with something.
Why You’ll Love This Recipe
Let’s be real for a second. There are desserts that require planning, patience, and a whole lot of equipment. And then there are desserts like these Cozy No-Bake Biscoff Cheesecake Cups. These are the kind of recipes that make you feel like a kitchen genius with almost zero effort. Here’s why they keep ending up on my table:
- 15 Minutes, No Oven: This is the ultimate shortcut dessert. No baking, no water baths, no complicated steps. Just mix, layer, and chill. Perfect for when you need something impressive in a hurry.
- Simple Pantry Ingredients: You probably already have cream cheese and heavy cream in your fridge. A jar of Biscoff spread and a package of cookies are easy to find at any grocery store. No fancy shopping trips required.
- Perfect for Cozy Nights or Crowds: Whether you’re curled up on the couch after a rough day or hosting a holiday party, these little cups fit the bill. They feel special without being fussy.
- Guaranteed Crowd-Pleaser: I’ve served these to kids, adults, and picky in-laws. The spiced cookie flavor and creamy texture win over everyone. There are never leftovers.
- Next-Level Comfort Food: The combination of silky cheesecake filling, crunchy cookie crumbs, and that luscious Biscoff drizzle is pure soul-soothing magic. It’s the kind of dessert that makes you close your eyes after the first bite.
What makes this recipe different from all the other cheesecake cups out there? It’s the texture. By using a specific ratio of cream cheese to heavy cream, you get a filling that’s light, fluffy, and almost mousse-like—never dense or heavy. And the layering technique means every single spoonful has that perfect crunch-to-cream ratio. This isn’t just another no-bake dessert; it’s the one you’ll keep coming back to.
What Ingredients You Will Need
This recipe uses simple, wholesome ingredients to deliver that bold, spiced Biscoff flavor and a luxuriously smooth texture. Most of these are pantry staples, and the few that aren’t are incredibly easy to find. Here’s everything you need:
For the Cheesecake Filling
- 8 oz (226g) full-fat cream cheese, softened — This is non-negotiable for the creamiest texture. Low-fat cream cheese has too much water and can make the filling runny. Let it sit on the counter for about 30 minutes before you start.
- 1/2 cup (120ml) heavy cream, cold — The cold cream is what gives the filling that light, airy texture. Don’t substitute with milk or half-and-half; you need the fat content for structure.
- 1/4 cup (50g) granulated sugar — Just enough to sweeten the filling without overpowering the Biscoff flavor. You could use powdered sugar for an even smoother texture.
- 1 tsp vanilla extract — Pure vanilla extract adds warmth and depth. I personally prefer Nielsen-Massey for its rich flavor, but any good quality brand works.
- 1/4 cup (60g) Biscoff spread (cookie butter), melted — This gets mixed into the filling for that signature spiced flavor. I recommend the creamy version, not the crunchy.
For the Crust & Layers
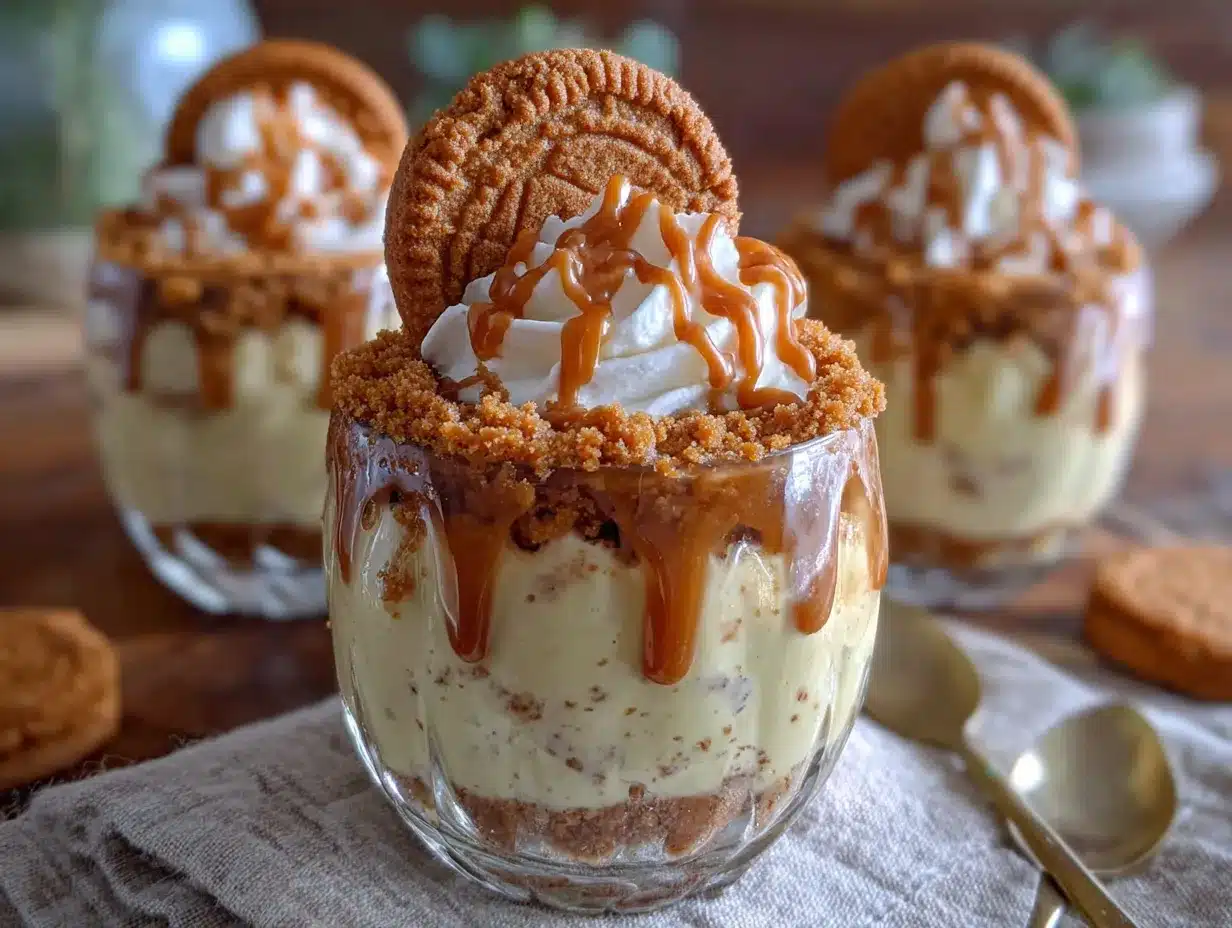
- 1 1/2 cups (about 15 cookies) Biscoff cookies, crushed into crumbs — You’ll use these for both the base and the middle layer. Crush them finely for the base, and leave a few slightly chunkier pieces for texture. (Pro tip: use a food processor for even crumbs, or a zip-top bag and a rolling pin for a little arm workout.)
- 2 tbsp (28g) unsalted butter, melted — This binds the cookie crumbs together for a firm, sliceable crust. Salted butter works too, just skip adding any extra salt.
For the Topping
- 1/4 cup (60g) Biscoff spread, warmed — For that gorgeous, glossy drizzle on top. Just microwave it in 10-second bursts until it’s pourable.
- Whipped cream (optional) — A dollop on top makes it extra special. I’ve used both homemade and store-bought, and honestly, both are delicious.
- Crushed Biscoff cookies (optional) — For a final crunchy garnish. Because you can never have too many cookies.
Substitution Notes
- Dairy-Free Option: Use a vegan cream cheese alternative (like Kite Hill or Violife), full-fat coconut cream instead of heavy cream, and a plant-based butter. The texture will be slightly different, but still delicious.
- Lower Sugar Version: Swap the granulated sugar for a monk fruit sweetener or use a sugar-free Biscoff spread. The filling will be a little less stable, so chill it for at least 4 hours.
- No Biscoff? You can use speculoos cookies and spread, or even graham crackers with a pinch of cinnamon and nutmeg for a similar spiced flavor.
Equipment Needed
The beauty of this recipe is that you don’t need a stand mixer or any fancy gadgets. Here’s what you’ll need:
- Mixing bowls (2 small, 1 medium) — One for the cookie crumbs, one for the cream cheese mixture, and one for whipping the cream. I use glass bowls because they’re easy to chill.
- Electric hand mixer or stand mixer — You can whisk the cream by hand, but it’ll take about 10 minutes and a very strong arm. An electric mixer makes it effortless. I’ve used a cheap hand mixer for years and it works perfectly.
- Spatula — For folding the whipped cream into the cream cheese mixture without deflating it. A rubber spatula is ideal.
- Measuring cups and spoons — Accuracy matters for the texture. Use dry measuring cups for the crumbs and liquid measuring cups for the cream.
- Small clear cups or glasses (4-6, about 6 oz each) — I love using small mason jars or stemless wine glasses. They show off the beautiful layers. You can also use ramekins or small bowls.
- Food processor or zip-top bag and rolling pin — For crushing the cookies. The food processor gives the most even crumbs, but the bag-and-rolling-pin method is oddly satisfying and burns a few calories.
- Small microwave-safe bowl — For melting the Biscoff spread. A glass measuring cup works well too.
Preparation Method
Alright, let’s get to the fun part. These Cozy No-Bake Biscoff Cheesecake Cups come together in just 15 minutes of active work. The hardest part? Waiting for them to chill. Here’s how to do it:
- Make the cookie crust. Place the Biscoff cookies in a food processor and pulse until you have fine crumbs. (If you’re using the bag method, seal the cookies in a zip-top bag and crush them with a rolling pin until they’re evenly broken down.) Transfer the crumbs to a small bowl. Pour the melted butter over the crumbs and stir with a fork until every crumb is coated. The mixture should look like wet sand and hold together when you press it between your fingers.
- Divide the crust among your cups. Spoon about 2 tablespoons of the crumb mixture into the bottom of each cup. Use the back of a spoon or a small shot glass to press the crumbs down firmly. You want a compact, even layer. Pop the cups in the fridge while you make the filling. This helps the crust set.
- Whip the cream. In a medium mixing bowl, pour the cold heavy cream. Using an electric hand mixer on medium-high speed, whip the cream until stiff peaks form. This takes about 2-3 minutes. You’ll know it’s ready when you lift the beaters and the cream stands up in firm peaks without collapsing. Set the bowl aside.
- Make the cream cheese base. In a separate large bowl, beat the softened cream cheese with the granulated sugar and vanilla extract until smooth and creamy. Scrape down the sides of the bowl with a spatula to make sure everything is incorporated. Add the melted Biscoff spread and beat again until the mixture is uniform and has a light, slightly fluffy texture. Make sure there are no lumps—this is the foundation of your silky filling.
- Fold it all together. Take about a third of the whipped cream and gently fold it into the cream cheese mixture using a spatula. This lightens the base and makes it easier to incorporate the rest. Then add the remaining whipped cream and fold gently until no white streaks remain. Be careful not to overmix—you want to keep as much air in the mixture as possible. The final filling should be light, airy, and spoonable.
- Layer the cups. Take the cups out of the fridge. Spoon or pipe a layer of the cheesecake filling over the crust, filling each cup about halfway. I like to use a piping bag for clean layers, but a spoon works perfectly fine. Sprinkle a thin layer of the remaining crushed cookie crumbs over the filling. Then add another layer of cheesecake filling, almost to the top of the cup. Leave a little room for the topping.
- Chill. Place the cups in the refrigerator, uncovered, for at least 2 hours. For the best texture, chill them for 4 hours or even overnight. The filling needs time to set and firm up. If you try to eat them too soon, they’ll be more like a mousse than a cheesecake—still delicious, but not as stable.
- Add the topping. Just before serving, warm the remaining Biscoff spread in a small microwave-safe bowl for 10-15 seconds until it’s thin and pourable. Drizzle it over the top of each cup. Add a dollop of whipped cream and a sprinkle of crushed cookies if you’re feeling fancy. Serve immediately.
Sensory Cue: When you fold the whipped cream into the cream cheese base, you should see a smooth, uniform mixture that looks like a thick, luscious mousse. It should hold its shape when you lift the spatula. If it looks runny or separates, your cream cheese might not have been soft enough, or you overmixed the cream.
Cooking Tips & Techniques
After making these cups about a dozen times (for science, obviously), I’ve picked up a few tricks that make a real difference. Here’s what I wish I’d known from the start:
- Soft cream cheese is crucial. I learned this the hard way. Cold cream cheese doesn’t blend smoothly, and you’ll end up with little white lumps in your filling. Let it sit on the counter for at least 30 minutes before you start. If you’re in a hurry, cut it into small cubes and microwave it for 10 seconds. Be careful not to melt it—just soften it.
- Don’t overwhip the cream. Stiff peaks are perfect. If you keep going, you’ll end up with butter. The cream should look glossy and hold its shape firmly. If it starts to look grainy or separates, you’ve gone too far. Start over with fresh cream.
- Press the crust firmly. A loose crust will crumble when you try to eat the cups. Use a small flat-bottomed glass or a shot glass to press the crumbs down evenly. I actually use the bottom of a spice jar—it’s the perfect size.
- Chill time is non-negotiable. I know it’s tempting to dig in after an hour, but the filling needs at least 2 hours to set properly. The texture goes from a soft mousse to a firm, sliceable cheesecake consistency. Overnight is even better. Patience pays off here.
- Warm the drizzle gently. Biscoff spread can seize up if you overheat it. Microwave it in 10-second bursts, stirring between each one. It should be pourable but not hot. If it’s too thick, add a tiny splash of milk or coconut oil to thin it out.
Variations & Adaptations
One of the best things about this recipe is how easy it is to customize. Here are a few variations I’ve tried and loved:
- Chocolate Biscoff Cups: Add 2 tablespoons of unsweetened cocoa powder to the cream cheese mixture along with the sugar. The chocolate and spiced cookie flavors are a match made in heaven. I did this for a friend’s birthday and she said it was “life-changing.”
- Peanut Butter Twist: Swap half of the Biscoff spread in the filling for creamy peanut butter. The combination of peanut butter and cookie butter is ridiculously good. Top with a drizzle of melted chocolate and some chopped peanuts.
- Vegan Version: Use vegan cream cheese, coconut cream (the solid part from a can of full-fat coconut milk), and a plant-based butter. The texture is a bit softer, so chill for at least 4 hours. I’ve made these for a vegan friend and she couldn’t stop eating them.
- Seasonal Spice: In the fall, add 1/2 teaspoon of pumpkin pie spice to the cream cheese mixture. In the winter, a pinch of peppermint extract in the whipped cream is lovely. For summer, top with fresh berries—the tartness cuts through the richness perfectly.
- Gluten-Free Option: Use gluten-free speculoos cookies or gluten-free graham crackers. Most Biscoff cookies are actually made with wheat flour, so check the label. There are several good gluten-free alternatives available now.
Serving & Storage Suggestions
These Cozy No-Bake Biscoff Cheesecake Cups are best served cold, straight from the fridge. The contrast between the chilled, creamy filling and the crunchy cookie layers is what makes every bite so satisfying. I like to serve them in clear glasses or small mason jars so everyone can see the beautiful layers. It makes the dessert feel special, even though it took almost no effort.
What to serve with them: A cup of hot coffee or a glass of cold milk is the perfect companion. The bitterness of the coffee balances the sweetness of the cheesecake. If you’re serving these at a party, they pair beautifully with fresh fruit—raspberries or sliced strawberries add a bright, tart contrast.
Storage: Cover the cups with plastic wrap or a lid and store them in the refrigerator for up to 4 days. The flavor actually improves after a day or two as the Biscoff flavor melds with the cream cheese. I’ve made these on a Sunday and enjoyed them all week.
Freezing: You can freeze these cups for up to 2 months. Wrap each cup tightly in plastic wrap and then in foil. Thaw them in the refrigerator overnight before serving. The texture will be slightly softer, but still delicious. Add the drizzle and toppings after thawing, not before.
Reheating: There’s no need to reheat these—they’re meant to be enjoyed cold. If the Biscoff drizzle has hardened in the fridge, just microwave the cups for 5-10 seconds to soften it slightly before serving.
Nutritional Information & Benefits
While these are definitely a treat, they do have a few redeeming qualities. Here’s a rough estimate per serving (based on 6 servings):
- Calories: ~380-420
- Fat: 28g
- Carbohydrates: 32g
- Protein: 5g
- Sugar: 22g
Health highlights: Cream cheese provides a small amount of protein and calcium. The heavy cream adds healthy fats that help keep you full. Biscoff cookies and spread are made with simple ingredients like wheat flour, sugar, and vegetable oils—nothing too artificial. If you’re looking to lighten things up, you can use a reduced-fat cream cheese and swap the heavy cream for a combination of Greek yogurt and milk. The texture won’t be as rich, but it’ll still be tasty.
Dietary considerations: This recipe contains dairy, wheat, and gluten. For a dairy-free version, use the substitutions listed above. For a gluten-free version, use certified gluten-free speculoos cookies. It’s not suitable for a low-carb or keto diet unless you use a sugar substitute and low-carb cookies.
Conclusion
Look, I know there are a million dessert recipes out there. But these Cozy No-Bake Biscoff Cheesecake Cups are different. They’re the recipe you’ll turn to when you need something impressive but have no time. They’re the dessert that makes people think you spent hours in the kitchen, when really you just threw a few ingredients together and let the fridge do the work. They’re comfort in a cup—creamy, crunchy, and full of that warm, spiced flavor that feels like a hug.
I love this recipe because it reminds me that you don’t need to be a professional baker to create something memorable. You just need a good idea and a little bit of confidence. And honestly, this is one of the best ideas I’ve ever stumbled into. Whether you make it for a party, a cozy night in, or just because you deserve something sweet, I promise you won’t regret it.
So go ahead—give it a try. Customize it, make it your own, and don’t forget to share your results. I’d love to hear how yours turn out! Drop a comment below, tag me in your photos, or tell me what variation you tried. Happy no-baking, friend!
Frequently Asked Questions
Can I use low-fat cream cheese for this recipe?
I don’t recommend it. Low-fat cream cheese has a higher water content, which can make the filling runny and prevent it from setting properly. Full-fat cream cheese gives the best texture and flavor. If you’re looking to cut calories, you can use a little less cream cheese and add more whipped cream, but the results won’t be as stable.
How long do these cheesecake cups need to chill?
At least 2 hours, but 4 hours is better. Overnight chilling is ideal if you have the time. The filling needs time to firm up and develop that classic cheesecake texture. If you try to eat them too soon, they’ll be more like a mousse—still delicious, but not as sliceable.
Can I make these in advance for a party?
Absolutely! These are perfect for make-ahead desserts. You can prepare them up to 2 days in advance and keep them covered in the refrigerator. Just add the Biscoff drizzle and any toppings right before serving to keep everything looking fresh and beautiful.
What can I use instead of Biscoff cookies?
You can use any spiced cookie, like speculoos, ginger snaps, or even graham crackers with a pinch of cinnamon and nutmeg. The flavor will be slightly different, but still delicious. If you’re using graham crackers, add a teaspoon of cinnamon and a pinch of cloves to the crumb mixture for a similar warm spice profile.
Can I freeze these cheesecake cups?
Yes! They freeze beautifully for up to 2 months. Wrap each cup tightly in plastic wrap and then in aluminum foil to prevent freezer burn. Thaw them in the refrigerator overnight before serving. Add the drizzle and any toppings after thawing for the best presentation. The texture will be slightly softer than fresh, but still wonderful.
Pin This Recipe!
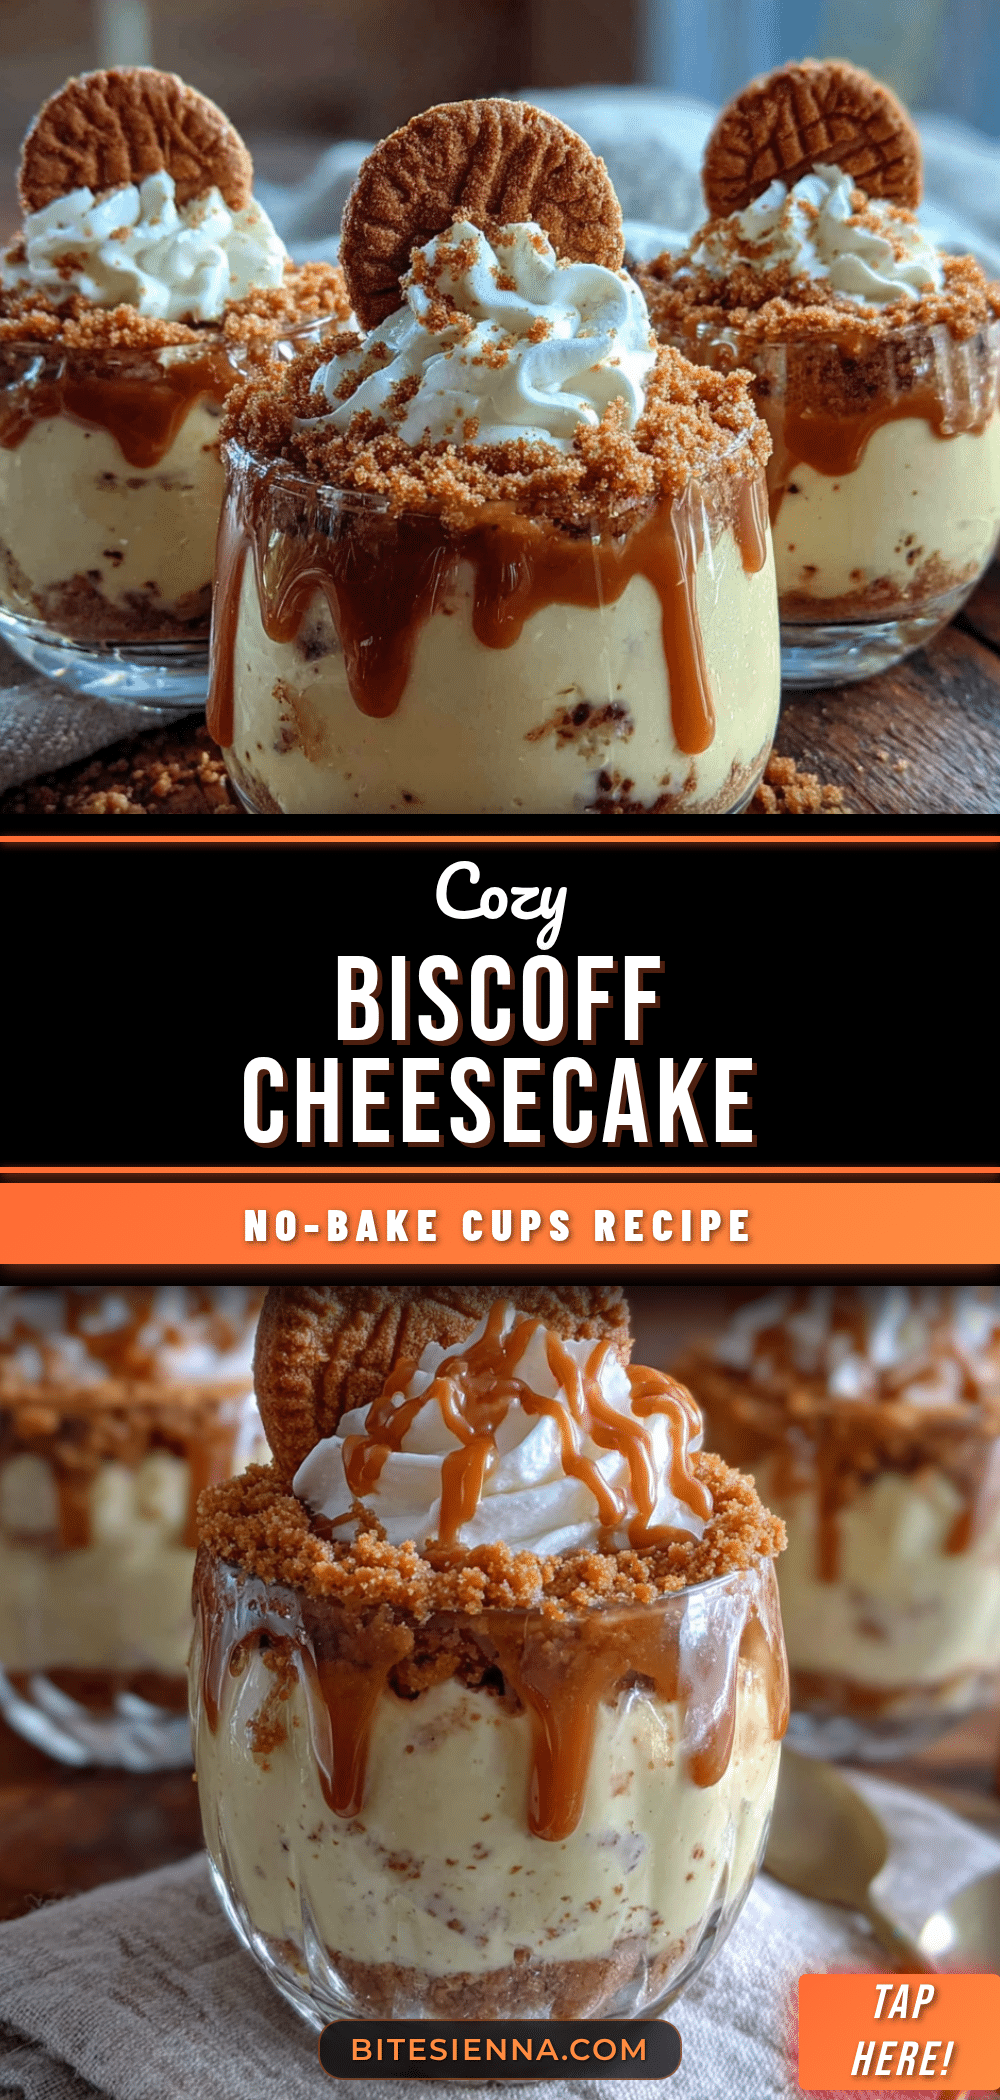
Cozy No-Bake Biscoff Cheesecake Cups – Easy 15-Minute Dessert

These no-bake Biscoff cheesecake cups come together in just 15 minutes with simple pantry ingredients. Creamy, spiced, and layered with crunchy cookie crumbs, they’re the perfect last-minute dessert for any gathering.
- Prep Time: 15 minutes
- Cook Time: 0 minutes
- Total Time: 2 hours 15 minutes (includes chilling)
- Yield: 4-6 servings 1x
- Category: Dessert
- Cuisine: American
Ingredients
- 8 oz (226g) full-fat cream cheese, softened
- 1/2 cup (120ml) heavy cream, cold
- 1/4 cup (50g) granulated sugar
- 1 tsp vanilla extract
- 1/4 cup (60g) Biscoff spread (cookie butter), melted
- 1 1/2 cups (about 15 cookies) Biscoff cookies, crushed into crumbs
- 2 tbsp (28g) unsalted butter, melted
- 1/4 cup (60g) Biscoff spread, warmed (for topping)
- Whipped cream (optional, for topping)
- Crushed Biscoff cookies (optional, for topping)
Instructions
- Make the cookie crust: Place the Biscoff cookies in a food processor and pulse until fine crumbs. Transfer to a small bowl, add melted butter, and stir until every crumb is coated. The mixture should look like wet sand.
- Divide the crust among 4-6 cups (about 2 tablespoons each). Press firmly into the bottom using the back of a spoon or a small glass. Place cups in the fridge to set.
- Whip the cream: In a medium bowl, beat cold heavy cream with an electric mixer on medium-high until stiff peaks form (about 2-3 minutes). Set aside.
- Make the cream cheese base: In a separate large bowl, beat softened cream cheese, sugar, and vanilla until smooth and creamy. Add melted Biscoff spread and beat until uniform and fluffy.
- Fold the whipped cream into the cream cheese mixture: Add one-third of the whipped cream and fold gently with a spatula. Add the remaining whipped cream and fold until no white streaks remain. Be careful not to overmix.
- Layer the cups: Remove cups from fridge. Spoon or pipe a layer of cheesecake filling over the crust (halfway). Sprinkle a thin layer of crushed cookies. Add another layer of filling almost to the top.
- Chill: Refrigerate cups uncovered for at least 2 hours (4 hours or overnight is best) until the filling is firm.
- Add topping: Just before serving, warm the remaining Biscoff spread in a microwave for 10-15 seconds until pourable. Drizzle over each cup. Add whipped cream and crushed cookies if desired. Serve immediately.
Notes
Soft cream cheese is crucial for a smooth filling. Let it sit at room temperature for 30 minutes before starting. Chill time is non-negotiable for proper texture. Warm the Biscoff drizzle gently in 10-second bursts to avoid seizing.
Nutrition
- Serving Size: 1 cheesecake cup
- Calories: 400
- Sugar: 22
- Sodium: 280
- Fat: 28
- Saturated Fat: 16
- Carbohydrates: 32
- Fiber: 1
- Protein: 5
Keywords: no-bake cheesecake, Biscoff dessert, easy dessert, 15-minute dessert, cheesecake cups, cookie butter dessert


