My friend Jen asked why I couldn’t just roast the squash with the skin on. I started to explain why that wouldn’t work — something about texture, something about presentation, the whole spiel I’d been giving for years. Then I stopped. Honestly, I had no good reason. I’d just never tried it. So I said, “You know what? Let’s find out.”
That was a Tuesday night, and I was already running late for dinner. The honeynut squashes sat on my counter, tiny and perfect, and I was about to go through my usual ritual of wrestling with a peeler. Jen watched me from the kitchen stool, dubious. “It’s just faster,” I mumbled, grabbing the peeler anyway. But then I put it down. I halved the squashes, scooped out the seeds, and tossed them with oil and brown sugar — skin and all. I slid them into the oven feeling like I was breaking some unspoken chef rule.
Twenty-five minutes later, I pulled out the tray and just stared. The skin had caramelized into something almost candied, thin and edible, clinging to the tender flesh beneath. I took a bite, and let me tell you — I actually laughed out loud. It was better. The skin gave this slight chew, this rustic edge that made the whole thing feel more honest. Jen just raised her eyebrows and said, “Told you.” I’ve been making them this way ever since. Maybe you’ve been there — so sure of a method you never question it. This is the recipe that taught me to question everything.
Why You’ll Love This Recipe
This isn’t just another roasted squash recipe. I’ve tested this more times than I can count, tweaking the temperature, the spice ratio, the timing. What I landed on is, without question, the best version. Here is why this one stands out:
- Quick & Easy: From counter to oven in under 10 minutes. No peeling, no complicated prep. Just halve, scoop, toss, and roast.
- Simple Ingredients: You probably have everything right now. Brown sugar, cinnamon, butter, salt. That’s it. No special trips required.
- Perfect for Cozy Nights: This is the side dish for cold weather, for slow evenings, for those days when you need something warm and sweet to make everything feel better.
- Crowd-Pleaser: I’ve served this at Thanksgiving, at casual weeknight dinners, even at a brunch. Kids love the sweetness. Adults love the depth. Everyone goes back for seconds.
- Unbelievably Delicious: The skin becomes this thin, caramelized layer that’s slightly chewy and completely edible. You won’t want to peel squash ever again.
What makes this different from every other roasted squash recipe is the technique. Leaving the skin on isn’t just a shortcut — it’s a deliberate choice that changes the texture. The high heat caramelizes the natural sugars in the squash and the brown sugar into something almost like a thin candy shell. And the cinnamon isn’t just sprinkled on top; it’s mixed into the melted butter so every bite gets a warm, even coating. This is comfort food at its simplest and best.
What Ingredients You Will Need
This recipe uses a short list of ingredients, each one playing a specific role in building flavor and texture. Most are pantry staples, so you can make this anytime the craving hits.
- Honeynut squash (4-6 small squashes, halved lengthwise and seeded) — These are smaller and sweeter than butternut squash, with a thinner skin that roasts beautifully. Look for ones that feel heavy for their size with firm, unblemished skin. I prefer getting them from farmers’ markets when they’re in season, but most grocery stores carry them from fall through early winter.
- Unsalted butter (3 tablespoons, melted) — Butter adds richness and helps the brown sugar and cinnamon adhere to the squash. I use unsalted so I can control the salt level. If you only have salted butter, just reduce the added salt slightly.
- Light brown sugar (2 tablespoons, packed) — This brings deep, molasses-like sweetness that pairs perfectly with the squash’s natural flavor. Dark brown sugar works too and will give a more intense caramel taste. For a less sweet version, you can reduce to 1½ tablespoons.
- Ground cinnamon (1 teaspoon) — The warm, cozy spice that makes this recipe feel like fall in a bite. I recommend using a fresh jar — cinnamon loses its punch after about six months. I’m partial to Saigon cinnamon for its stronger, slightly sweeter flavor.
- Kosher salt (½ teaspoon) — Salt balances the sweetness and brings out the squash’s savory side. Don’t skip it. I use Diamond Crystal; if you’re using Morton’s, reduce to about ¼ teaspoon.
- Black pepper (¼ teaspoon, freshly ground) — This is optional but I never leave it out. A tiny bit of heat cuts through the sweetness and adds complexity. It’s subtle — you won’t taste pepper, just a little more depth.
Equipment Needed
You don’t need much for this recipe, which is part of why I love it. Here is what you’ll want to have on hand:
- Sharp chef’s knife (8-inch is ideal) — Honeynut squashes are small but dense. A sharp knife makes halving them safe and easy. Dull knives slip, and that’s how you end up with a bandage on your finger. Trust me on this one.
- Cutting board — A sturdy wooden or plastic board. Place a damp paper towel underneath to keep it from sliding.
- Metal spoon or scoop — For scraping out the seeds and stringy bits. A grapefruit spoon with a serrated edge works surprisingly well here.
- Large rimmed baking sheet — Half-sheet size (18×13 inches) is perfect. The rim is important — the butter and sugar mixture will bubble up, and you don’t want it dripping onto your oven floor. I’ve learned this the hard way. Twice.
- Parchment paper or aluminum foil — Lining the pan makes cleanup almost effortless. I prefer parchment for non-stick results.
- Small bowl — For mixing the butter, brown sugar, cinnamon, salt, and pepper together.
- Pastry brush or spoon — To spread the butter mixture evenly over each squash half. A brush gives you more control, but a spoon works fine.
Preparation Method
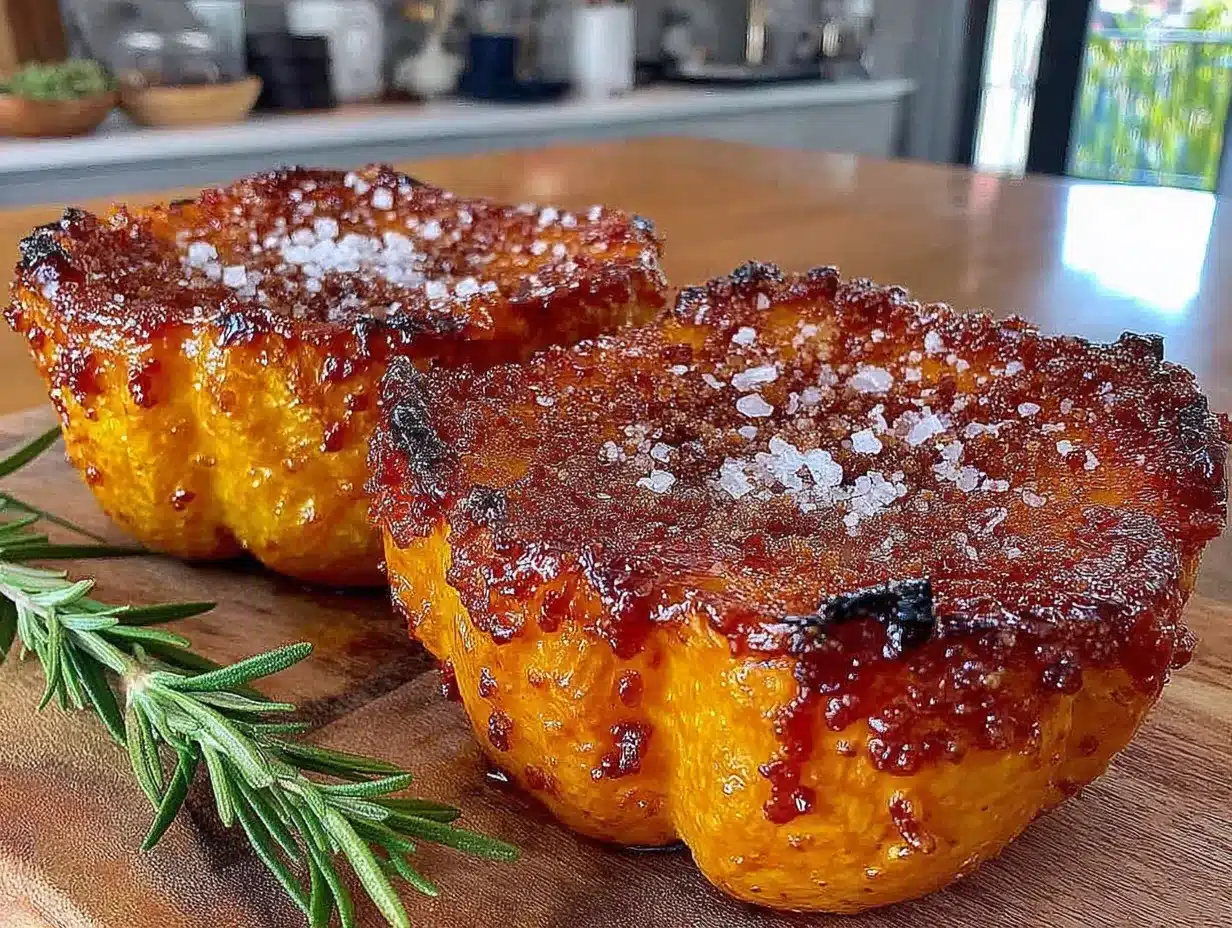
Let me walk you through this step by step. I’ve included all the little details I wish someone had told me the first time.
- Preheat your oven to 400°F (200°C). Position the rack in the middle. Getting the oven fully hot before the squash goes in is crucial — it starts the caramelization process immediately. Give it a full 15 minutes to preheat if your oven runs cool.
- Prepare the baking sheet. Line it with parchment paper or foil. If using foil, lightly spray it with cooking spray so the squash doesn’t stick. Set it aside.
- Halve the squashes. Place one honeynut squash on your cutting board. Using your sharp chef’s knife, carefully cut it in half lengthwise from stem to tip. The skin is thin, so this should be easier than cutting a butternut. If the squash wobbles, slice a tiny piece off the bottom to create a flat surface. Repeat with all squashes. Take your time here — rushing is how accidents happen.
- Scoop out the seeds. Use your metal spoon to scrape out the seeds and any stringy pulp from each half. Don’t worry about getting every last thread — a few bits left behind won’t hurt. You can save the seeds and roast them separately if you like, but honestly, I usually toss them.
- Make the butter mixture. In your small bowl, combine the 3 tablespoons melted unsalted butter, 2 tablespoons packed light brown sugar, 1 teaspoon ground cinnamon, ½ teaspoon kosher salt, and ¼ teaspoon black pepper. Whisk with a fork until the sugar is mostly dissolved and everything is well combined. The mixture should smell warm and sweet — if it doesn’t, your cinnamon might be old.
- Brush the squash. Arrange the squash halves cut-side up on your prepared baking sheet. Using your pastry brush or a spoon, divide the butter mixture evenly among all the halves. Make sure you coat the entire cut surface, including the little ridges and crevices. Don’t worry if some pools in the center cavity — that will caramelize beautifully as it roasts.
- Roast the squash. Place the baking sheet in the preheated oven. Roast for 25 to 30 minutes, until the squash is fork-tender and the edges are caramelized and golden brown. The timing depends on the size of your squashes — smaller ones may be done closer to 22 minutes, larger ones might need 32. Start checking at 20 minutes by piercing the thickest part with a fork. It should slide in with little resistance.
- Optional broil for extra caramelization. If you want deeper color and a slightly crispier edge, turn on the broiler for the last 1 to 2 minutes. Watch it closely — sugar burns fast. I’ve ruined a batch by walking away for “just a second.” Don’t be me.
- Rest and serve. Remove the baking sheet from the oven and let the squash rest for 3 to 5 minutes. This allows the caramelized coating to set slightly. Serve warm, spooning any pan juices over the top.
Cooking Tips & Techniques
I’ve made this recipe more times than I can count, and I’ve learned a few things along the way — mostly through mistakes. Here are the tips that actually matter:
Don’t overcrowd the pan. Give each squash half a little breathing room. If they’re touching, they’ll steam instead of roast, and you’ll lose that beautiful caramelization. Use two pans if you need to, and rotate them halfway through.
Cut the squashes evenly. Try to halve them so both sides are roughly the same thickness. Uneven halves will cook at different rates — one side might be perfect while the other is still firm. If you end up with mismatched halves, just keep an eye on the thinner ones and pull them out early if needed.
Use room-temperature butter. Okay, I know the recipe says melted, but here is the thing — if your butter is too hot when you mix it with the brown sugar, the sugar can start dissolving too much and turn syrupy. Let your melted butter cool for a minute or two before mixing. You want it warm, not hot.
One mistake I still make: Forgetting to check the squash early. Every oven runs differently, and “25 minutes” is a guideline, not a rule. I once left a batch in for 30 minutes because I got distracted by a phone call, and the bottoms were almost burnt. Set a timer for 20 minutes, then check every 3 minutes after that.
For the crispiest edges: Flip the squash halves over for the last 5 minutes of roasting so the cut side faces down. This gives the caramelized surface direct contact with the hot pan. Just be careful when flipping — use tongs and work gently so you don’t tear the skin.
Variations & Adaptations
This recipe is flexible, and I’ve tried several variations over the years. Here are a few worth trying:
Maple Pecan Version: Replace the brown sugar with 2 tablespoons of pure maple syrup. After roasting, drizzle with a little extra maple syrup and sprinkle with toasted, chopped pecans. The nuttiness pairs beautifully with the squash’s sweetness. I made this for a Friendsgiving once and it disappeared in minutes.
Savory Herb Twist: Reduce the brown sugar to 1 tablespoon and add ½ teaspoon dried thyme and ¼ teaspoon garlic powder to the butter mixture. Skip the cinnamon. This version is less sweet and works wonderfully alongside roasted chicken or pork. My neighbor swears by this version and makes it every Sunday.
Spicy Brown Sugar: Add ¼ teaspoon cayenne pepper or red pepper flakes to the original butter mixture. The heat sneaks up on you — it’s subtle at first, then builds. I love this for breaking up the sweetness. Start with less if you’re unsure; you can always add more next time.
Vegan Adaptation: Substitute the butter with melted coconut oil or a high-quality vegan butter. Use coconut sugar instead of brown sugar for a more complex sweetness. The texture will be slightly different — coconut oil doesn’t brown quite the same way — but it’s still delicious.
Air Fryer Method: Cook the squash halves at 375°F (190°C) for 15 to 18 minutes, flipping halfway through. You may need to work in batches depending on your air fryer size. The results are similar, with slightly more concentrated caramelization on the edges.
Serving & Storage Suggestions
These roasted honeynut squashes are best served warm, straight from the oven. The caramelized coating is at its peak right after resting — glossy, tender, and intensely flavorful. I like to arrange them on a platter cut-side up and spoon any remaining pan juices over the top. A sprinkle of flaky sea salt right before serving adds a lovely finishing touch.
They pair beautifully with so many dishes. For a cozy dinner, serve alongside roasted chicken, pork chops, or a seared steak. For a vegetarian meal, pile them onto a bed of warm quinoa or farro with a handful of arugula and a drizzle of balsamic glaze. I’ve even chopped them up and tossed them into salads for lunch the next day.
Storage: Leftovers keep well in an airtight container in the refrigerator for up to 4 days. The texture will soften slightly upon reheating, but the flavor remains wonderful. To reheat, place them in a 350°F (175°C) oven for 5 to 7 minutes, or until warmed through. You can also microwave them, but the caramelized coating won’t be as crisp. I don’t recommend freezing these — the texture changes too much after thawing.
One thing I’ve noticed: the flavors actually deepen after a day in the fridge. The cinnamon and brown sugar meld together even more, making leftovers almost better than the original. If you can resist eating them all right away, save a few for tomorrow’s lunch.
Nutritional Information & Benefits
Here is an estimated nutritional breakdown for one serving (one half of a small honeynut squash with the butter mixture):
- Calories: 145
- Fat: 7g
- Carbohydrates: 22g
- Fiber: 3g
- Sugar: 12g
- Protein: 2g
- Vitamin A: 120% of the Daily Value
- Vitamin C: 25% of the Daily Value
Honeynut squash is packed with vitamin A from beta-carotene, which supports eye health and immune function. It’s also a good source of fiber, which aids digestion and keeps you feeling full. The cinnamon in this recipe isn’t just for flavor — it has anti-inflammatory properties and may help regulate blood sugar. Of course, this is a treat, not a health food, but it’s nice to know you’re getting some good stuff with that sweet, buttery coating.
This recipe is naturally gluten-free and can be made vegan with the substitutions mentioned above. If you have a nut allergy, all versions here are nut-free as written.
Conclusion
This cozy cinnamon brown sugar roasted honeynut squash is the kind of recipe that reminds me why I love cooking. It’s simple, forgiving, and deeply satisfying. The sweetness of the squash, the warmth of the cinnamon, the richness of the butter — it all comes together in a way that feels like a hug on a plate. And honestly, the fact that I learned something new from a friend’s simple question makes me love it even more.
I hope you give this recipe a try, whether it’s for a holiday dinner, a quiet weeknight, or just because you need something warm and sweet. Feel free to tweak it — add more cinnamon if you love it, swap in maple syrup, or skip the pepper if that’s not your thing. Cooking should feel like your own.
If you make this, I’d love to hear how it turns out. Leave a comment below and let me know what you changed, what you loved, or even what went wrong — we all have those moments. And if you share it on Pinterest, tag me so I can see your beautiful roasted squash! Until next time, happy cooking, and don’t be afraid to try something you were sure wouldn’t work.
Frequently Asked Questions
Can I use butternut squash instead of honeynut?
Yes, you can. Butternut squash has thicker skin, so you’ll want to peel it first. The roasting time will also be longer — about 35 to 40 minutes at 400°F. Cut the butternut into 1-inch cubes for more even cooking and faster results.
Do I really need to leave the skin on?
You don’t have to, but I highly recommend trying it at least once. Honeynut squash skin is thin and becomes tender and slightly chewy when roasted. It adds texture and saves you the hassle of peeling. If you’re unsure, just try it on one half and compare.
Can I prep this recipe ahead of time?
You can halve and seed the squashes up to a day in advance. Store them cut-side down in an airtight container in the fridge. Wait to add the butter mixture until just before roasting — the sugar can draw out moisture if it sits too long.
Why is my squash not caramelizing?
Several things could be happening. Your oven might not be hot enough — make sure it’s fully preheated to 400°F. The squash halves might be too crowded on the pan, causing them to steam instead of roast. Or you might need a little more sugar in the mixture. Try increasing the brown sugar to 2½ tablespoons.
Can I double this recipe for a crowd?
Absolutely. Just use two baking sheets and rotate them halfway through roasting. You may need to add a few extra minutes to the cooking time since the oven will be more full. I’ve made this for Thanksgiving with eight squashes and it worked perfectly.
Pin This Recipe!
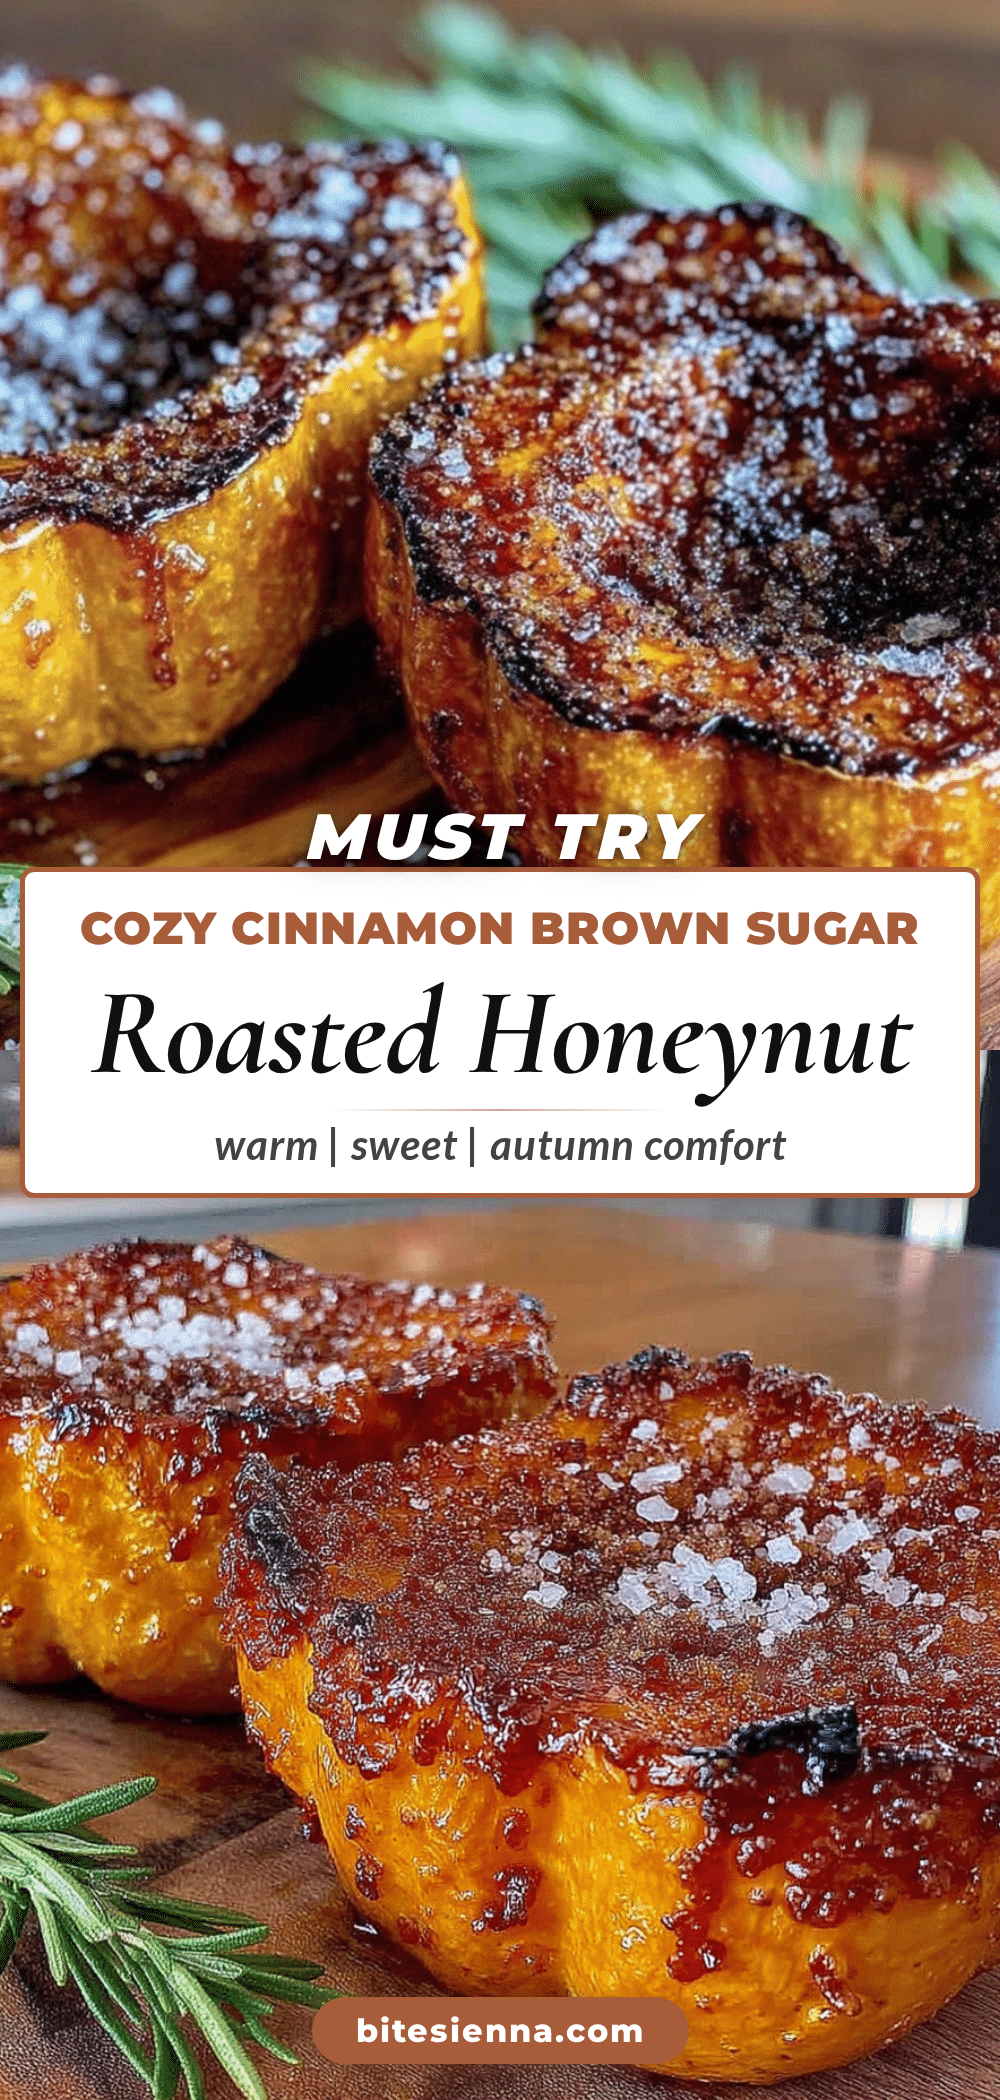
Cozy Cinnamon Brown Sugar Roasted Honeynut Squash
This easy roasted honeynut squash recipe features a caramelized brown sugar and cinnamon coating, with the skin left on for a slightly chewy, candied texture. It’s a quick, crowd-pleasing side dish perfect for cozy nights and holiday dinners.
- Prep Time: 10 minutes
- Cook Time: 25 minutes
- Total Time: 35 minutes
- Yield: 4-6 servings 1x
- Category: Side Dish
- Cuisine: American
Ingredients
- 4–6 small honeynut squashes, halved lengthwise and seeded
- 3 tablespoons unsalted butter, melted
- 2 tablespoons light brown sugar, packed
- 1 teaspoon ground cinnamon
- ½ teaspoon kosher salt
- ¼ teaspoon freshly ground black pepper (optional)
Instructions
- Preheat your oven to 400°F (200°C). Position the rack in the middle. Give it a full 15 minutes to preheat.
- Line a large rimmed baking sheet with parchment paper or foil. If using foil, lightly spray with cooking spray.
- Place one honeynut squash on a cutting board. Using a sharp chef’s knife, carefully cut it in half lengthwise from stem to tip. Repeat with all squashes.
- Use a metal spoon to scoop out the seeds and any stringy pulp from each half.
- In a small bowl, combine the melted butter, packed brown sugar, cinnamon, salt, and black pepper. Whisk with a fork until the sugar is mostly dissolved.
- Arrange the squash halves cut-side up on the prepared baking sheet. Using a pastry brush or spoon, divide the butter mixture evenly among all the halves, coating the entire cut surface.
- Roast for 25 to 30 minutes, until the squash is fork-tender and the edges are caramelized and golden brown. Start checking at 20 minutes.
- Optional: For deeper color, turn on the broiler for the last 1 to 2 minutes, watching closely to prevent burning.
- Remove from the oven and let the squash rest for 3 to 5 minutes. Serve warm, spooning any pan juices over the top.
Notes
Don’t overcrowd the pan; give each squash half breathing room to ensure caramelization. Cut squashes evenly for uniform cooking. Let melted butter cool slightly before mixing with sugar to prevent it from becoming too syrupy. Check squash early (at 20 minutes) as ovens vary. For crispiest edges, flip squash halves cut-side down for the last 5 minutes of roasting. Leftovers keep in an airtight container in the refrigerator for up to 4 days; reheat in a 350°F oven for 5-7 minutes.
Nutrition
- Serving Size: 1 half of a small ho
- Calories: 145
- Sugar: 12
- Fat: 7
- Carbohydrates: 22
- Fiber: 3
- Protein: 2
Keywords: roasted honeynut squash, cinnamon brown sugar squash, easy squash side dish, caramelized squash, fall side dish, Thanksgiving side dish, gluten-free squash


