Hand me that bowl of crushed gingersnaps, my neighbor Rachel said through my screen door last October. I was mid-eye-roll, about to explain that I had a perfectly good graham cracker crust recipe memorized and didn’t need her suggestion. But something made me stop. Maybe it was the way the late afternoon light hit her messy bun, or maybe I was just tired of being right all the time. I handed her the bowl and watched her press those spicy crumbs into my springform pan with a confidence I definitely didn’t have at her age.
I started to explain why gingersnaps might overpower the pumpkin filling — then stopped. Honestly, I had no good reason. I just assumed a classic cheesecake needed a classic crust. Rachel shrugged and said, “It’s fall. Let it taste like fall.” And let me tell you, she was absolutely right. The first slice I pulled out of the fridge the next morning had this gorgeous dark amber crust that smelled like Christmas baking. I took a bite and actually laughed out loud. All those years of perfecting my graham cracker crust, and a twenty-something with a bag of store-bought cookies taught me something new.
You know that feeling when you realize you’ve been doing something the hard way for no reason? That was this moment. The spicy warmth of the gingersnaps doesn’t overpower the creamy pumpkin filling — it wraps around it like a cozy sweater. The molasses notes in the cookies play against the tangy cream cheese and the earthy pumpkin in a way that just makes sense. Maybe you’ve been there too, stubbornly sticking to a recipe because that’s how you’ve always made it. This cozy pumpkin cheesecake with gingersnap crust became my new fall tradition, and I keep making it because it reminds me that sometimes the best lessons come from letting someone else take the lead.
Why You’ll Love This Recipe
This isn’t just another pumpkin cheesecake. After testing this recipe seven times (yes, seven — my coworkers were very patient), I landed on a version that hits every single note perfectly. Here’s why this one is different:
- No Water Bath Required: I know, I know — that alone is worth celebrating. This cheesecake bakes low and slow without the fuss of wrapping your pan in foil and hoping no water seeps through.
- Gingersnap Crust That Actually Stays Crunchy: Most cookie crusts turn into soggy mush by day two. Not this one. The combination of melted butter and a quick pre-bake keeps it crisp even after refrigeration.
- Perfectly Spiced, Not Overpowering: The pumpkin flavor shines without tasting like a pumpkin spice candle. Real pumpkin puree and a careful blend of warm spices create a balanced, sophisticated filling.
- Make-Ahead Friendly: This cheesecake actually tastes better after 24 hours in the fridge. Perfect for Thanksgiving prep or stress-free entertaining.
- Crowd-Pleaser Guaranteed: I brought this to a Friendsgiving dinner and three people asked for the recipe before I even finished my first glass of wine. It’s that good.
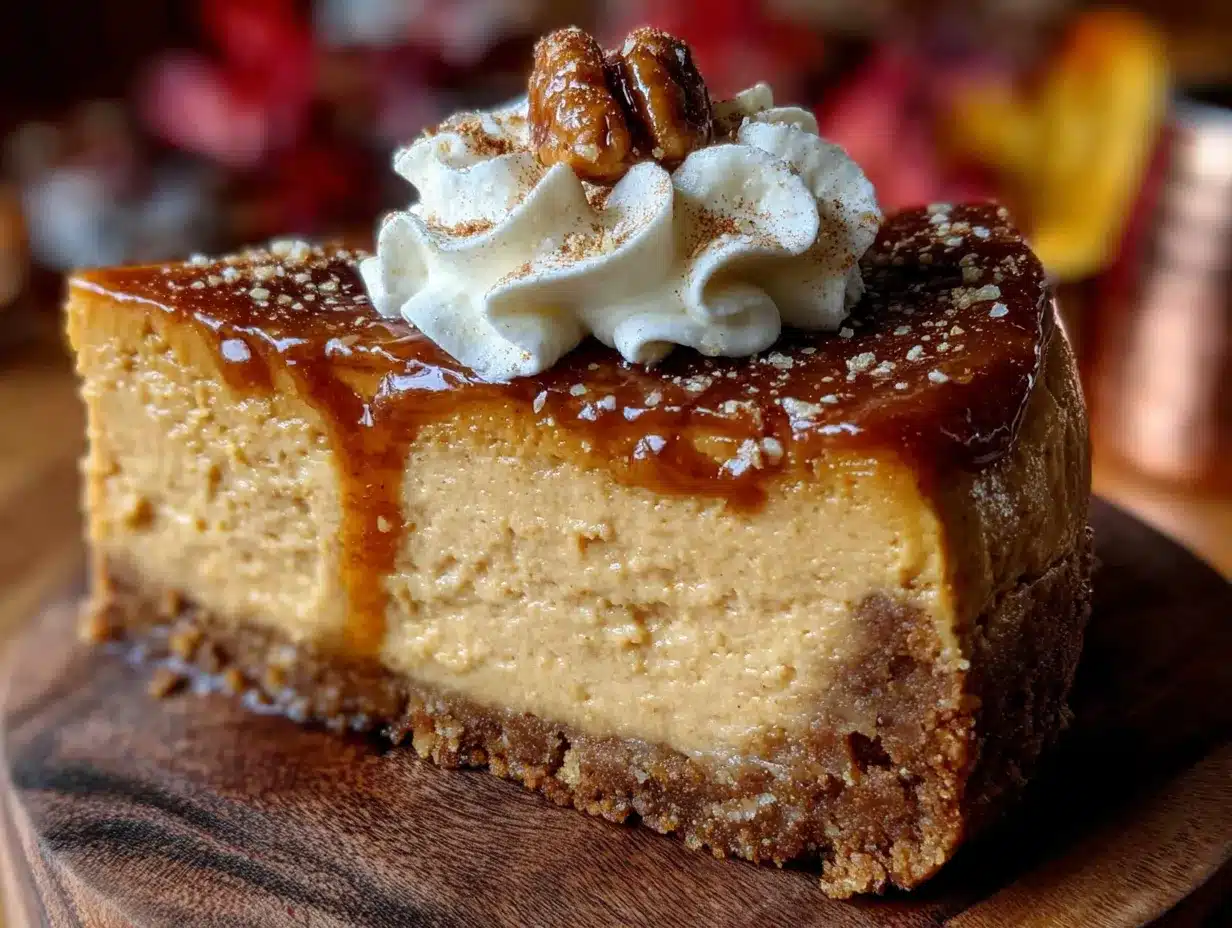
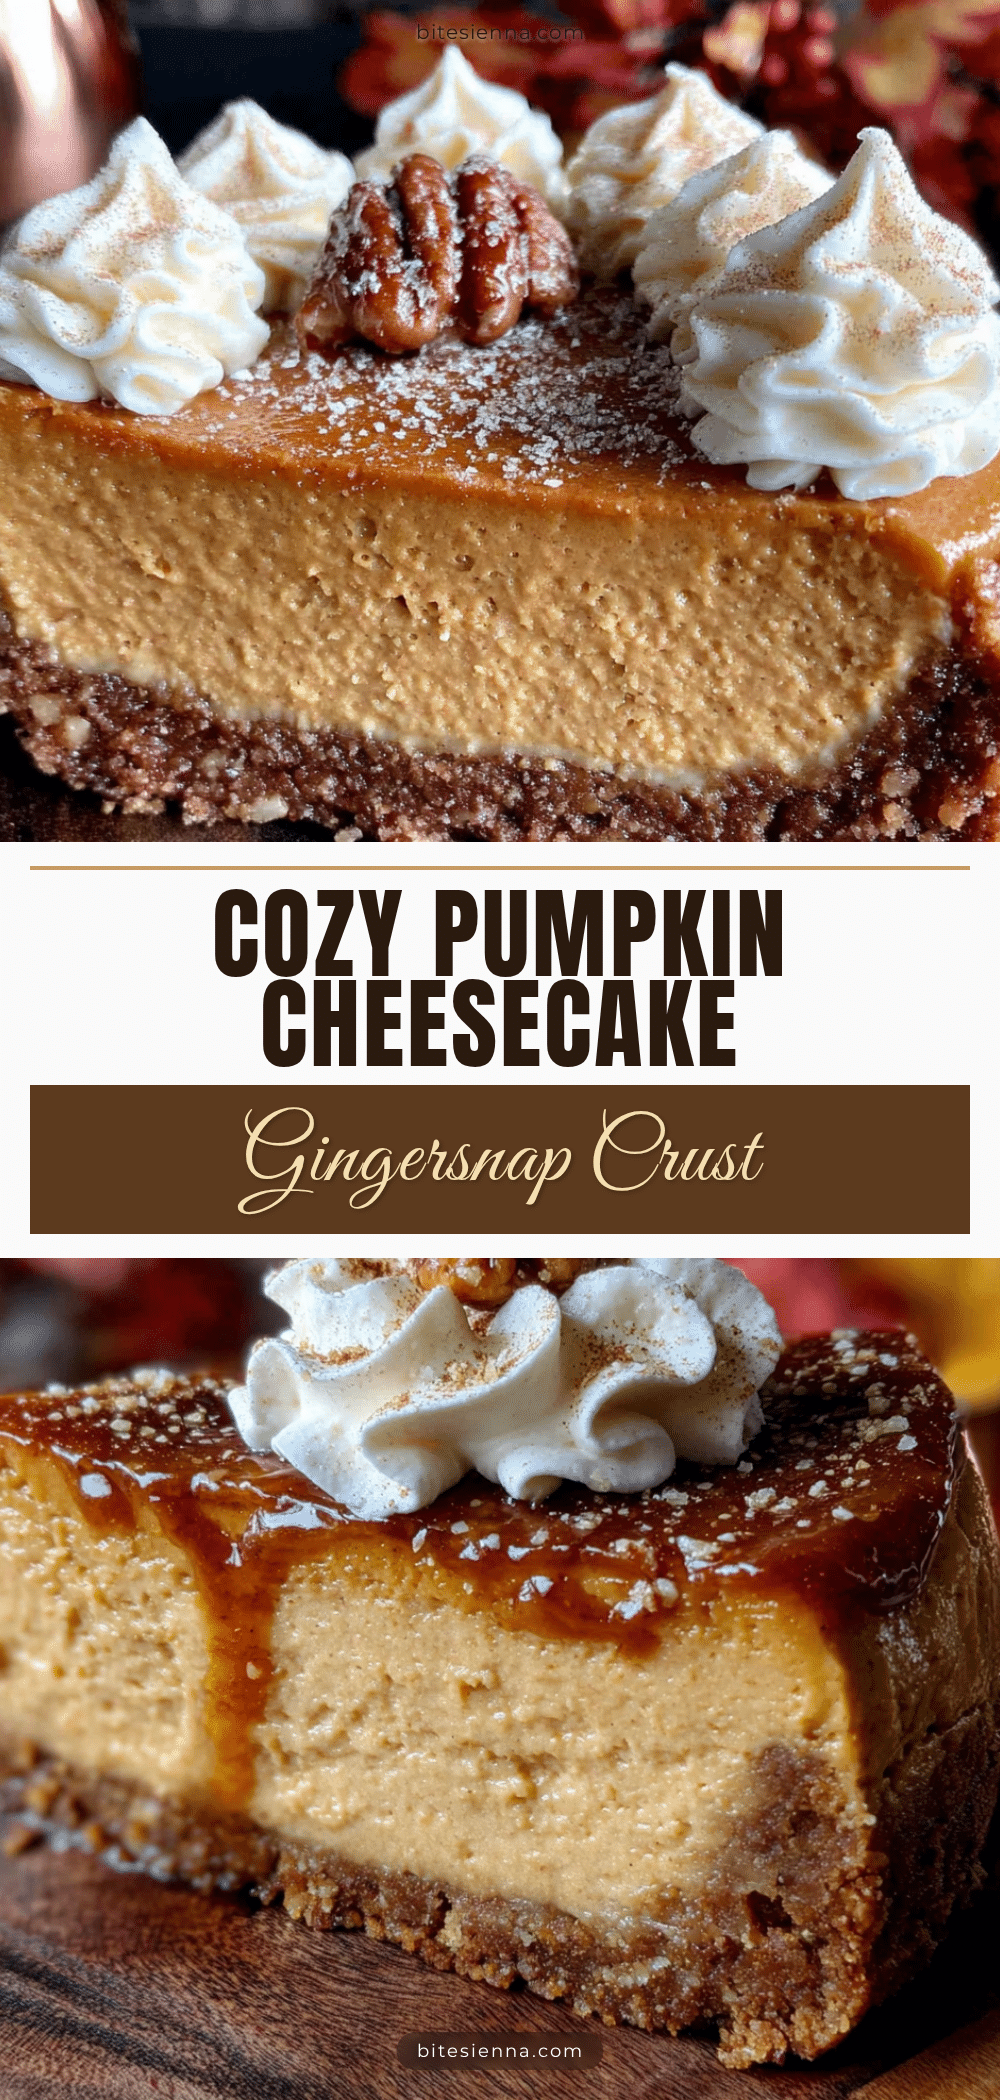
The texture is what really sets this apart. The filling is dense but silky, with no cracks on top thanks to the gentle baking method. The gingersnap crust adds this beautiful spiced crunch that makes every bite interesting. It’s the kind of dessert that makes people close their eyes after the first forkful — I’ve seen it happen more times than I can count.
Ingredients You Will Need
This recipe uses simple, wholesome ingredients to deliver bold flavor and satisfying texture without the fuss. Most of these are pantry staples, especially if you’re already in full fall baking mode.
For the Gingersnap Crust
- 2 cups (240g) gingersnap cookie crumbs (about 30 cookies, crushed finely — I recommend Nabisco or Anna’s brand for consistent texture)
- 6 tablespoons (85g) unsalted butter, melted (adds richness and helps the crust hold together)
- 2 tablespoons (25g) granulated sugar (optional — gingersnaps are already sweet, but this adds a little extra structure)
- Pinch of salt (balances the sweetness and enhances the spice notes)
For the Pumpkin Cheesecake Filling
- 24 ounces (680g) cream cheese, softened to room temperature (full-fat is non-negotiable here for that luscious texture — I use Philadelphia)
- 1 cup (200g) granulated sugar (adds sweetness without overwhelming the pumpkin)
- 1/2 cup (110g) packed light brown sugar (adds moisture and a subtle molasses note that pairs beautifully with the crust)
- 1 cup (245g) pure pumpkin puree (not pumpkin pie filling — look for 100% pure pumpkin like Libby’s brand)
- 3 large eggs, room temperature (cold eggs can seize the batter and create lumps)
- 1/4 cup (60g) sour cream, room temperature (adds tanginess and keeps the filling creamy)
- 2 teaspoons vanilla extract (use pure vanilla extract for the best flavor)
- 2 teaspoons pumpkin pie spice (or make your own blend — see note below)
- 1/2 teaspoon ground cinnamon (extra warmth because you can never have too much cinnamon)
- 1/4 teaspoon ground nutmeg (freshly grated if you have it)
- 1/4 teaspoon salt (don’t skip this — it makes all the flavors pop)
- 2 tablespoons all-purpose flour (helps stabilize the filling and prevent cracking)
Pro tip on pumpkin pie spice: If you don’t have a pre-made blend, mix 1 teaspoon cinnamon, 1/2 teaspoon ginger, 1/4 teaspoon nutmeg, 1/4 teaspoon allspice, and a pinch of cloves. Store the extra in a small jar for your next batch of pumpkin muffins.
Equipment Needed
You don’t need a professional bakery setup for this one. Here’s what I used during my testing:
- 9-inch springform pan (the removable sides are essential for clean slices — I use a Wilton brand pan that’s held up for years)
- Electric hand mixer or stand mixer (you need the power to whip the cream cheese until perfectly smooth)
- Food processor or zip-top bag with a rolling pin (for crushing the gingersnaps — I actually prefer the bag method because it’s oddly satisfying)
- Large mixing bowls (one for the crust, one for the filling)
- Rubber spatula (for scraping down the bowl and folding ingredients gently)
- Measuring cups and spoons (accurate measurements matter in cheesecake)
- Baking sheet (place the springform pan on this to catch any potential drips)
- Cooling rack (for cooling the cheesecake gradually)
If you don’t have a springform pan, you can use a deep 9-inch pie dish, but the slices won’t be as clean. And honestly, springform pans are worth the investment — they work for cheesecakes, ice cream cakes, and even deep-dish quiches.
Preparation Method
Take your time with this one. Cheesecake rewards patience, and rushing leads to cracks and lumps. Trust me, I’ve learned this the hard way more than once.
Step 1: Prepare the Crust
Preheat your oven to 350°F (175°C). Crush the gingersnap cookies into fine crumbs — you want them similar to sand, not gravel. I put mine in a zip-top bag and go at them with a rolling pin while watching the news. It’s weirdly therapeutic. Transfer the crumbs to a medium bowl and add the sugar and salt. Pour the melted butter over the top and stir with a fork until every crumb is moistened. The mixture should look like wet sand and hold together when you squeeze it.
Press the mixture firmly into the bottom and about 1 inch up the sides of your springform pan. Use the bottom of a measuring cup to really pack it down — a loose crust will crumble when you slice. Bake for 10 minutes, then set aside to cool while you make the filling. Leave the oven on but reduce the temperature to 325°F (165°C).
Step 2: Make the Filling
In a large mixing bowl, beat the softened cream cheese with an electric mixer on medium speed until completely smooth — about 2 minutes. Scrape down the sides and bottom of the bowl with your spatula. You want zero lumps at this stage because they won’t disappear later.
Add both sugars and beat for another 2 minutes until light and fluffy. Scrape the bowl again. Add the pumpkin puree, sour cream, and vanilla extract, then beat on low until just combined. Don’t overmix here — you don’t want to incorporate too much air, which can cause cracks later.
In a small bowl, whisk together the pumpkin pie spice, cinnamon, nutmeg, salt, and flour. Add this dry mixture to the wet ingredients and beat on low until just incorporated. Scrape the bowl one more time.
Add the eggs one at a time, beating on low after each addition just until the yolk disappears into the batter. Overmixing after adding eggs creates air bubbles that rise to the surface and cause cracks. I speak from experience — my first attempt looked like a topographic map.
Step 3: Bake the Cheesecake
Pour the filling into the cooled crust and smooth the top with your spatula. Give the pan a gentle tap on the counter to release any trapped air bubbles. Place the springform pan on a baking sheet and slide it into the oven.
Bake at 325°F (165°C) for 55-65 minutes. The edges should look set and slightly puffed, but the center should still jiggle like Jell-O when you gently shake the pan. This jiggle is crucial — if the center is completely firm, you’ve overbaked it and cracks are coming.
Turn off the oven, crack the door open, and leave the cheesecake inside for 1 hour. This gradual cooling is the secret to a crack-free top. After an hour, remove it from the oven and run a thin knife around the edges to loosen the cheesecake from the pan (this prevents cracking as it shrinks during cooling). Let it cool completely on a wire rack, then refrigerate for at least 6 hours, but overnight is best.
Cooking Tips & Techniques
I’ve made this cozy pumpkin cheesecake with gingersnap crust more times than I care to count, and I’ve made every mistake possible. Here’s what I learned:
Room temperature ingredients are not optional. Cold cream cheese creates lumps that no amount of beating can fix. Cold eggs seize the batter and make it grainy. Set everything out on the counter 2 hours before you start baking. I once tried to speed things up and ended up with a filling that looked like cottage cheese. Not cute.
Don’t overmix the filling. I know it’s tempting to keep beating until everything looks perfectly smooth, but too much air creates bubbles that rise to the surface and burst during baking. Those burst bubbles turn into cracks. Mix just until each ingredient is incorporated, then stop.
The water bath alternative. Traditional cheesecake recipes call for a water bath to prevent cracking, but I found this method works just as well without the hassle. The low oven temperature, gradual cooling in the turned-off oven, and the thin knife run around the edges do the heavy lifting. If you’re nervous about cracks, place a shallow pan of hot water on the oven rack below the cheesecake. The steam will keep the surface moist.
Patience with chilling. I know you want to dig in after 4 hours. I know. But the texture improves dramatically after a full overnight chill. The flavors meld, the crust sets properly, and the slices come out clean. My second test batch was sacrificed to impatience, and the slices were a mess. Learn from my mistakes.
Variations & Adaptations
This recipe is wonderfully flexible. Here are some ways I’ve adapted it:
Gluten-Free Version: Use gluten-free gingersnap cookies for the crust. I’ve tested this with both Pamela’s and Kinnikinnick brands, and both worked beautifully. The filling is naturally gluten-free as long as you use certified gluten-free flour or swap it with cornstarch.
Dairy-Free Adaptation: Substitute the cream cheese with a high-quality dairy-free version like Miyoko’s or Kite Hill. Use vegan butter or coconut oil for the crust, and replace the sour cream with full-fat coconut cream. The texture is slightly less dense but still delicious.
Pumpkin Chocolate Swirl: Melt 4 ounces of dark chocolate and swirl it into the filling before baking. The chocolate pairs surprisingly well with the gingersnap crust and pumpkin spice. I did this for a Halloween party and it disappeared in minutes.
Mini Cheesecakes: Press the crust into a muffin tin lined with paper liners, fill with batter, and bake for 18-22 minutes. Perfect for portion control or party platters. Just reduce the cooling time accordingly.
Maple Pecan Topping: Before serving, drizzle with maple syrup and sprinkle with toasted pecans. The nutty crunch adds another layer of texture and flavor that screams fall.
Serving & Storage Suggestions
Serve this cheesecake cold, straight from the refrigerator. The texture is at its best when it’s thoroughly chilled — creamy, dense, and sliceable. I like to let it sit at room temperature for about 10 minutes before slicing to take the chill off, but that’s personal preference.
For presentation, run a thin knife under hot water and wipe it dry before each cut. This gives you those gorgeous clean slices that look like they came from a bakery. Top each slice with a dollop of whipped cream, a sprinkle of cinnamon, and maybe a whole gingersnap cookie for crunch.
This cheesecake pairs beautifully with a warm cup of spiced chai, a bold dark roast coffee, or even a glass of bourbon if you’re feeling festive. For a full fall dessert spread, serve it alongside a warm apple crisp or a slice of classic pecan pie.
Storage: Cover the cheesecake tightly with plastic wrap or store it in an airtight cake carrier in the refrigerator for up to 5 days. The flavors actually improve after day two as the spices meld with the cream cheese.
Freezing: This cheesecake freezes beautifully. Once fully chilled and set, wrap the entire cheesecake (still in the springform pan) in plastic wrap, then a layer of aluminum foil. Freeze for up to 3 months. To thaw, transfer to the refrigerator overnight. I always keep a frozen cheesecake on hand for unexpected guests or last-minute holiday contributions.
Reheating: Don’t. This is a cold dessert. If you want warm pumpkin dessert, make a pumpkin crisp instead.
Nutritional Information & Benefits
Per slice (based on 12 servings), this cozy pumpkin cheesecake with gingersnap crust contains approximately:
- Calories: 420
- Fat: 28g
- Carbohydrates: 38g
- Protein: 7g
- Fiber: 1g
- Sugar: 26g
While this is definitely a treat, pumpkin puree is packed with vitamin A (over 200% of your daily needs per cup), fiber, and antioxidants like beta-carotene. The cream cheese provides calcium and protein, while the ginger in the crust offers anti-inflammatory benefits. I’m not saying this is health food — but you’re getting more nutritional value than you would from a plain sugar cookie, right?
This recipe contains dairy, gluten, and eggs. For allergen-friendly adaptations, refer to the variations section above.
Frequently Asked Questions
Can I use fresh pumpkin instead of canned?
You can, but you’ll need to roast and puree the pumpkin first, then drain it in cheesecloth overnight to remove excess moisture. Canned pumpkin is more consistent and reliable for cheesecake. I’ve tested both, and canned gives better texture every time.
Why did my cheesecake crack on top?
Cracks usually happen from overbaking, overmixing, or sudden temperature changes. Make sure you pull the cheesecake when the center still jiggles, cool it gradually in the turned-off oven, and run a knife around the edges before chilling.
Can I make this cheesecake a day ahead?
Absolutely. In fact, I recommend it. The texture and flavor improve after 24 hours in the fridge. Just cover it tightly and refrigerate until you’re ready to serve.
How do I get clean slices?
Use a thin, sharp knife and run it under hot water between each cut. Wipe the blade dry before slicing. This prevents the cheesecake from sticking to the knife and gives you those beautiful bakery-style slices.
Can I use a different cookie for the crust?
Sure, but the gingersnaps are what make this recipe special. Speculoos cookies or graham crackers with added ginger and cinnamon would work in a pinch. But honestly, the spicy molasses flavor of real gingersnaps is worth seeking out.
Conclusion
This cozy pumpkin cheesecake with gingersnap crust has become my go-to fall dessert, and I think it will become yours too. The spicy, crunchy crust wrapped around that silky, perfectly spiced pumpkin filling is everything I want in a seasonal treat. It’s impressive enough for Thanksgiving dinner but simple enough for a random Tuesday when you need a little comfort.
What I love most about this recipe is how forgiving it is once you know the tricks. No water bath, no complicated techniques — just good ingredients and a little patience. And that moment when you pull off the springform ring and see those perfect edges? Pure magic.
I’d love to hear how yours turns out. Did you add a swirl? Try a different crust? Serve it with something unexpected? Drop a comment below and let me know — your twist might inspire someone else’s new favorite tradition. Happy fall baking, friends.
Pin This Recipe!
Cozy Pumpkin Cheesecake with Gingersnap Crust – Easy Fall Dessert
A creamy pumpkin cheesecake with a spicy gingersnap crust that stays crunchy. No water bath required, and it tastes even better after 24 hours in the fridge.
- Prep Time: 30 minutes
- Cook Time: 65 minutes
- Total Time: 8 hours (includes chilling)
- Yield: 12 servings 1x
- Category: Dessert
- Cuisine: American
Ingredients
- 2 cups (240g) gingersnap cookie crumbs (about 30 cookies, crushed finely)
- 6 tablespoons (85g) unsalted butter, melted
- 2 tablespoons (25g) granulated sugar
- Pinch of salt
- 24 ounces (680g) cream cheese, softened to room temperature
- 1 cup (200g) granulated sugar
- 1/2 cup (110g) packed light brown sugar
- 1 cup (245g) pure pumpkin puree
- 3 large eggs, room temperature
- 1/4 cup (60g) sour cream, room temperature
- 2 teaspoons vanilla extract
- 2 teaspoons pumpkin pie spice
- 1/2 teaspoon ground cinnamon
- 1/4 teaspoon ground nutmeg
- 1/4 teaspoon salt
- 2 tablespoons all-purpose flour
Instructions
- Preheat oven to 350°F (175°C). Crush gingersnap cookies into fine crumbs. Transfer to a medium bowl and add sugar and salt. Pour melted butter over the top and stir until every crumb is moistened.
- Press the mixture firmly into the bottom and about 1 inch up the sides of a 9-inch springform pan. Use the bottom of a measuring cup to pack it down. Bake for 10 minutes, then set aside to cool. Reduce oven temperature to 325°F (165°C).
- In a large mixing bowl, beat softened cream cheese with an electric mixer on medium speed until completely smooth, about 2 minutes. Scrape down the sides and bottom of the bowl.
- Add both sugars and beat for another 2 minutes until light and fluffy. Scrape the bowl again.
- Add pumpkin puree, sour cream, and vanilla extract. Beat on low until just combined.
- In a small bowl, whisk together pumpkin pie spice, cinnamon, nutmeg, salt, and flour. Add to the wet ingredients and beat on low until just incorporated. Scrape the bowl.
- Add eggs one at a time, beating on low after each addition just until the yolk disappears.
- Pour the filling into the cooled crust and smooth the top. Give the pan a gentle tap on the counter to release air bubbles. Place the springform pan on a baking sheet.
- Bake at 325°F (165°C) for 55-65 minutes. The edges should look set and slightly puffed, but the center should still jiggle when gently shaken.
- Turn off the oven, crack the door open, and leave the cheesecake inside for 1 hour. Remove from oven and run a thin knife around the edges to loosen the cheesecake from the pan. Cool completely on a wire rack, then refrigerate for at least 6 hours, preferably overnight.
Notes
Room temperature ingredients are essential. Do not overmix the filling. For a crack-free top, cool gradually in the turned-off oven and run a knife around the edges before chilling. The cheesecake tastes better after 24 hours in the fridge.
Nutrition
- Serving Size: 1 slice
- Calories: 420
- Sugar: 26
- Sodium: 380
- Fat: 28
- Saturated Fat: 16
- Carbohydrates: 38
- Fiber: 1
- Protein: 7
Keywords: pumpkin cheesecake, gingersnap crust, fall dessert, Thanksgiving dessert, no water bath cheesecake


