I was standing in line at the hardware store, of all places, holding a new showerhead and feeling sorry for myself after a long Tuesday. The man in front of me was holding a single pipe wrench and what looked like a very old, greasy index card. He turned around—probably because I was sighing loudly—and said, “You look like you need a cookie.” I laughed, assuming he was just being friendly. But he wasn’t. He was the plumber who had been fixing the store’s back bathroom, and he insisted that the recipe on that greasy card was the only chocolate chip cookie recipe anyone ever needed. I mean, honestly, I was skeptical. A plumber’s cookie recipe? But he was so earnest about it, and I had a long evening ahead of me. So I took a picture of that card with my phone, bought my showerhead, and went home. That night, standing in my kitchen with flour on my counter, I made the best batch of easy bakery-style chocolate chip cookies I have ever had. The edges were perfectly crisp, the centers were so soft and chewy, and they had that deep, caramelized flavor you usually only get from a professional bakery. Maybe you’ve been there—trying recipe after recipe, getting cookies that spread into flat puddles or turn into dry hockey pucks. Let me tell you, this one is different. It’s the one that made me stop looking.
Why You’ll Love This Recipe
I have tested this recipe more times than I can count, tweaking the chill time and the butter temperature until it was absolutely foolproof. This isn’t just another chocolate chip cookie recipe; it is the one that delivers consistent, bakery-quality results every single time, even on a busy weeknight when you are exhausted. Here is why this recipe will become your new go-to:
- Quick & Easy: From start to finish, these cookies are ready in under 30 minutes of active time. The dough comes together in one bowl with a wooden spoon—no fancy mixer required.
- Simple Ingredients: You likely have everything you need in your pantry right now. No obscure extracts or specialty flours. Just butter, sugar, eggs, flour, and chocolate.
- Perfect for Weeknights: This is the kind of recipe you make on a Tuesday when the kids need a treat or you just want something warm and comforting without a huge production.
- Crowd-Pleaser: I have brought these to potlucks, school bake sales, and family dinners. They disappear in minutes. Adults and kids both go crazy for them.
- Unbelievably Delicious: The texture is next-level. The secret is a simple technique that gives you that signature cracked top and gooey center without any complicated steps.
What makes this recipe different from the rest is the way we handle the butter. Instead of just creaming it, we brown it slightly to unlock a nutty, toffee-like flavor that makes the cookies taste like they came from a high-end bakery. It is a small step that makes a massive difference. This isn’t just another version of a chocolate chip cookie—it is the best version. The kind that makes you close your eyes after the first bite and forget about your long day.
What Ingredients You Will Need
This recipe uses simple, wholesome ingredients to deliver bold flavor and satisfying texture without any fuss. Most of these are pantry staples, so you can whip up a batch whenever the craving hits. Let’s break down what you need and why each ingredient matters.
- Unsalted Butter (1 cup / 226 grams): I always use unsalted butter so I can control the salt level. For this recipe, we will brown the butter, which gives the cookies a deep, nutty flavor. I recommend using a good-quality brand like Kerrygold or Land O’Lakes for the best taste.
- Granulated Sugar (1/2 cup / 100 grams): This helps with spreading and creates those crispy, caramelized edges. It also contributes to the cookie’s structure.
- Light Brown Sugar (3/4 cup / 150 grams), packed: This is the secret to a chewy cookie. The molasses in brown sugar adds moisture and that soft, tender texture we all love. Make sure it is packed firmly into your measuring cup.
- Large Eggs (1 whole egg + 1 egg yolk): The whole egg provides structure, while the extra yolk adds richness and fat, making the cookies even more tender and soft.
- Vanilla Extract (2 teaspoons): Pure vanilla extract is worth the splurge here. It enhances the chocolate flavor and adds warmth. Avoid imitation vanilla if you can.
- All-Purpose Flour (2 cups + 2 tablespoons / 270 grams): This gives the cookies their structure. I use unbleached all-purpose flour. For the best results, spoon the flour into your measuring cup and level it off with a knife—don’t scoop directly from the bag, or you will pack in too much flour.
- Baking Soda (1 teaspoon): This helps the cookies spread just the right amount and gives them a nice golden-brown color.
- Salt (1 teaspoon): Salt balances the sweetness and enhances the chocolate flavor. I use fine sea salt. If you use kosher salt, you might need a bit more.
- Semi-Sweet Chocolate Chips (2 cups / 340 grams): I prefer Ghirardelli or Guittard semi-sweet chips. They hold their shape during baking and have a rich, not-too-sweet flavor. You can also chop up a high-quality chocolate bar for those melty pools of chocolate.
Substitution Guidance: If you are dairy-free, you can use a high-quality vegan butter stick (like Miyoko’s) for browning. For a gluten-free option, use a 1:1 gluten-free baking flour blend that contains xanthan gum. Just know the texture might be slightly more delicate.
Equipment Needed
You don’t need a lot of fancy equipment to make these easy bakery-style chocolate chip cookies. Here is what you will need:
- Large Mixing Bowl: A sturdy glass or stainless steel bowl works perfectly. I use my grandmother’s old Pyrex bowl—it feels right for cookie making.
- Wooden Spoon or Silicone Spatula: You can mix the dough by hand. No stand mixer required, which means less cleanup.
- Small Saucepan: For browning the butter. A light-colored pan helps you see the butter change color.
- Whisk: Useful for mixing the egg and sugar together smoothly.
- Baking Sheets (2): I recommend heavy-duty, light-colored baking sheets. Dark sheets can cause the bottoms to burn before the centers are done.
- Parchment Paper or Silicone Baking Mat: This prevents sticking and ensures even browning. It is worth the small investment.
- Cookie Scoop (about 2 tablespoons): This makes portioning the dough quick and ensures all cookies are the same size for even baking. A spring-loaded scoop is a game-changer.
- Cooling Rack: Essential for letting the cookies cool properly so they don’t continue cooking on the hot pan.
If you don’t have a cookie scoop, just use two spoons. It will work fine, though the cookies might be slightly less uniform. A standard kitchen scale is also helpful for measuring flour accurately, but it is not required.
Preparation Method
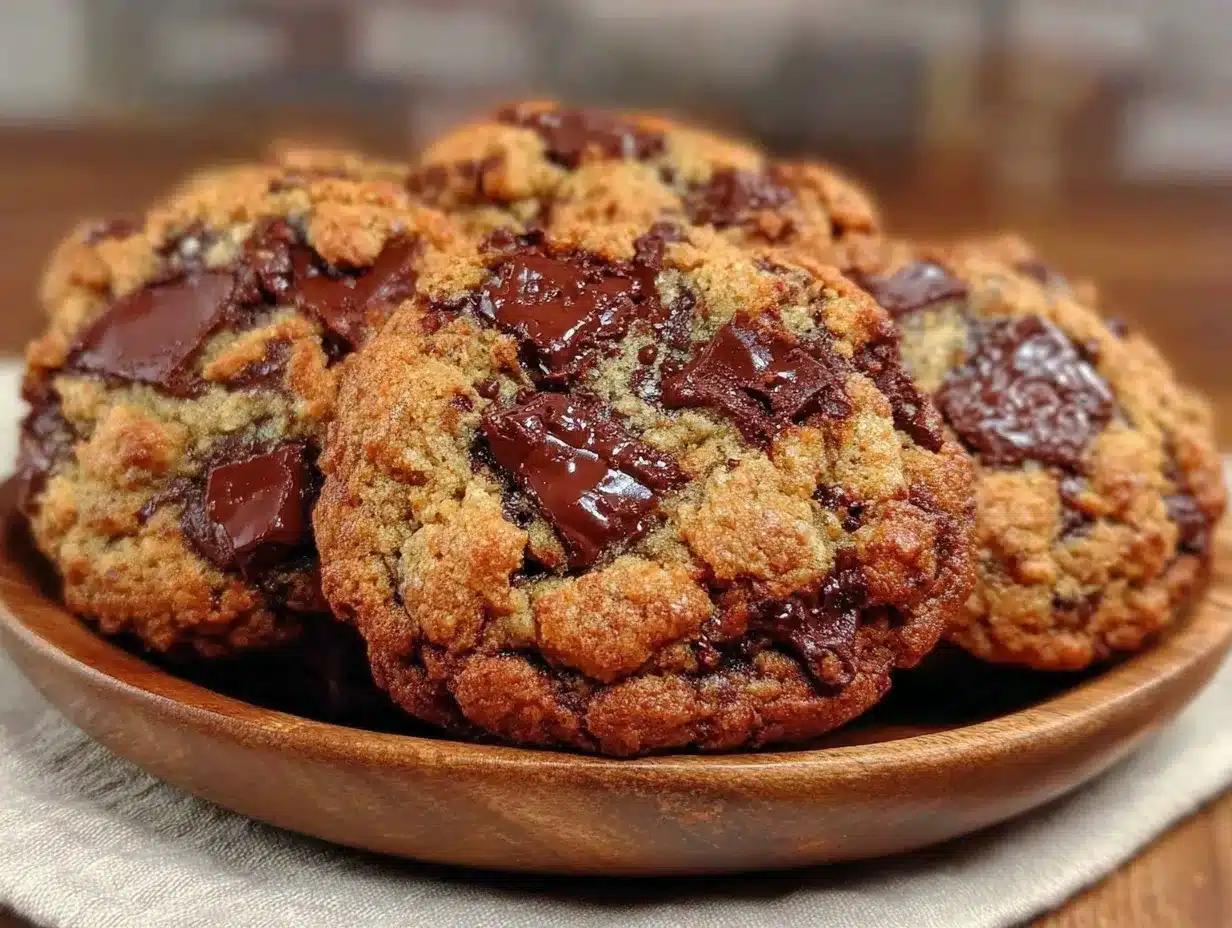
Let’s get baking! Follow these steps carefully, and you will have perfect cookies every time. I have included time estimates and sensory cues so you know exactly what to look for.
- Brown the Butter (5 minutes): Place the 1 cup of unsalted butter in a small saucepan over medium heat. Let it melt completely, then continue cooking, swirling the pan occasionally. The butter will start to foam and then turn from yellow to a golden-amber color. You will smell a nutty, toasty aroma. Once you see brown specks forming at the bottom of the pan and the butter is a warm caramel color, immediately remove it from the heat. Pour it into a large mixing bowl to stop the cooking process. Let it cool for 10 minutes—it should be warm but not hot.
- Mix Sugars and Butter (2 minutes): Add the 1/2 cup granulated sugar and 3/4 cup packed light brown sugar to the bowl with the browned butter. Whisk vigorously for about 1 minute until the mixture looks like wet sand and is well combined. It will be thick and grainy.
- Add Eggs and Vanilla (1 minute): Crack in the 1 whole egg and 1 egg yolk. Add the 2 teaspoons of vanilla extract. Whisk everything together until the mixture is smooth, shiny, and slightly thickened. This should take about 30 seconds. The batter will look like a thick caramel sauce.
- Combine Dry Ingredients (2 minutes): In a separate small bowl, whisk together the 2 cups plus 2 tablespoons of all-purpose flour, 1 teaspoon of baking soda, and 1 teaspoon of salt. Make sure there are no lumps.
- Mix the Dough (1 minute): Add the dry ingredients to the wet ingredients. Use a wooden spoon or silicone spatula to fold everything together. Stir just until you no longer see streaks of flour. Do not overmix, or the cookies will be tough. The dough will be thick and slightly sticky.
- Add Chocolate Chips (1 minute): Fold in the 2 cups of semi-sweet chocolate chips until they are evenly distributed throughout the dough. If the dough feels too soft to handle, you can chill it for 15 minutes at this point, but it is usually fine to proceed.
- Portion the Dough (5 minutes): Using a 2-tablespoon cookie scoop, scoop the dough into balls. Place them on a parchment-lined baking sheet, spacing them about 2 inches apart. For that bakery-style look, you can press a few extra chocolate chips onto the tops of the dough balls.
- Chill the Dough (30 minutes minimum): This step is crucial. Place the baking sheet with the portioned dough balls in the refrigerator for at least 30 minutes. Chilling prevents the cookies from spreading too much and develops deeper flavor. You can chill them for up to 72 hours for even better results.
- Preheat Oven (15 minutes before baking): When you are ready to bake, preheat your oven to 375°F (190°C). Make sure the rack is in the center position.
- Bake (10-12 minutes): Bake the chilled dough balls one sheet at a time. Bake for 10 to 12 minutes. The edges should be golden brown and set, but the centers will still look soft, puffy, and slightly underdone. They will continue to set on the hot pan. For a chewier cookie, bake on the shorter side. For a crisper cookie, add a minute.
- Cool (5 minutes on pan, then transfer): Let the cookies cool on the baking sheet for 5 minutes. This allows them to finish setting up. Then, carefully transfer them to a wire cooling rack to cool completely. If you try to move them too soon, they will fall apart.
Cooking Tips & Techniques
Over the years, I have made every mistake in the book with chocolate chip cookies. I have had them spread into one giant cookie, turn out hard as rocks, and even burn on the bottom while being raw in the middle. Here are the lessons I learned so you don’t have to repeat them.
- Don’t Skip the Chill: I know it is tempting to bake the dough right away, especially when you are craving cookies. But chilling the dough for at least 30 minutes is non-negotiable. It solidifies the butter, which means the cookies spread slower and bake up thicker and chewier. It also gives the flour time to hydrate, which improves the texture.
- Measure Flour Correctly: This is the most common mistake. Scooping your measuring cup directly into the flour bag packs in up to 25% more flour. Always spoon the flour into the cup and level it off with a knife. Or, even better, use a kitchen scale for precision.
- Use Room Temperature Eggs: Cold eggs can seize the browned butter and make the dough lumpy. If you forgot to take your eggs out of the fridge, place them in a bowl of warm water for 5 minutes before using.
- Bake One Sheet at a Time: Putting two sheets in the oven at once causes uneven baking. The top sheet will brown too fast, and the bottom sheet won’t cook through properly. It takes a little longer, but it is worth it.
- The “Pancake” Fix: If your cookies consistently spread into flat pancakes, your butter was too warm, or you didn’t chill the dough long enough. Next time, chill the dough for a full hour.
Variations & Adaptations
One of the best things about this easy bakery-style chocolate chip cookie recipe is how adaptable it is. Here are a few ways I have changed it up depending on my mood or what I have in the pantry.
- Double Chocolate Chip: Replace 1/4 cup of the all-purpose flour with 1/4 cup of unsweetened cocoa powder. Use white chocolate chips or dark chocolate chunks for a rich, fudgy twist.
- Nutty Delight: Add 1 cup of toasted, chopped walnuts or pecans along with the chocolate chips. Toast the nuts in a dry pan for 3-4 minutes first to bring out their flavor. It adds a wonderful crunch.
- Sea Salt Finish: Just before baking, sprinkle a tiny pinch of flaky sea salt (like Maldon) on top of each dough ball. The salt cuts through the sweetness and makes the chocolate flavor pop. This is my personal favorite variation.
- Gluten-Free Version: Substitute the all-purpose flour with a 1:1 gluten-free baking blend. Add an extra tablespoon of milk to the dough if it seems too dry. The texture will be slightly more tender, but still delicious.
- M&M Cookies: Swap out half the chocolate chips for M&Ms. This is a great option for kids’ parties or holidays. Press a few extra M&Ms on top before baking for a colorful look.
Serving & Storage Suggestions
These cookies are best enjoyed warm, when the chocolate is still melty and the edges are perfectly crisp. I like to serve them with a cold glass of milk or a hot cup of coffee for the ultimate comfort experience. They also make a fantastic dessert for a weeknight dinner, especially if you pair them with a scoop of vanilla bean ice cream.
Storage: Store leftover cookies in an airtight container at room temperature for up to 5 days. To keep them soft, add a slice of bread to the container—the cookies will absorb the moisture from the bread and stay chewy.
Freezing: You can freeze the baked cookies for up to 3 months. Place them in a single layer in a freezer-safe bag. To reheat, pop a frozen cookie in the microwave for 15 seconds or in a 300°F oven for 5 minutes.
Freezing the Dough: This is my favorite make-ahead trick. Scoop the dough into balls, place them on a baking sheet, and freeze until solid. Then transfer the frozen dough balls to a freezer bag. You can bake them directly from frozen—just add 2-3 extra minutes to the baking time. Fresh cookies in 15 minutes, any night of the week.
Nutritional Information & Benefits
While these are definitely a treat, you can feel good about using real, whole ingredients. Here is the estimated nutritional breakdown per cookie (based on a batch of 24):
- Calories: 210
- Fat: 12g
- Carbohydrates: 27g
- Protein: 3g
- Sugar: 17g
Dark chocolate contains antioxidants and can be a source of magnesium. Using browned butter adds a depth of flavor that allows you to use slightly less sugar than traditional recipes. For a slightly healthier version, you can reduce the chocolate chips to 1 1/2 cups or use dark chocolate with 70% cocoa content. Remember, these are a homemade treat made with love, and that counts for something.
Conclusion
This easy bakery-style chocolate chip cookie recipe has become a staple in my kitchen for a reason. It is simple, reliable, and produces cookies that taste like they came from a professional bakery. The plumber at the hardware store was right—sometimes the best recipes come from the most unexpected places. I hope you give these a try and make them your own. Maybe you will add a sprinkle of sea salt, or swap in white chocolate chips, or just enjoy them exactly as written. Whatever you do, I would love to hear about it. Drop a comment below and let me know how they turned out! Did you make any fun variations? Share your photos and tag me so I can see your beautiful cookies. Happy baking, my friend. You deserve a warm cookie after a long day.
Frequently Asked Questions
Can I use salted butter instead of unsalted?
Yes, you can. Just reduce the added salt in the recipe to 1/2 teaspoon. The cookies will still taste great, but the salt level will be slightly different.
Why did my cookies turn out hard?
Overbaking is the most common cause. Remove the cookies from the oven when the edges are set but the centers still look soft and puffy. They will continue to cook on the hot pan. Also, make sure you are measuring your flour correctly—too much flour can make cookies dry and hard.
Can I make the dough ahead of time?
Absolutely! The dough can be refrigerated for up to 72 hours. In fact, the longer it chills, the better the flavor will be. You can also freeze the dough balls for up to 3 months.
How do I get that crinkly, cracked top?
That beautiful cracked top comes from using an extra egg yolk and making sure the dough is well-chilled before baking. The combination of the egg yolk and cold dough creates that signature crackly surface as the cookie bakes.
Can I use margarine or vegetable shortening?
I do not recommend it. Butter provides the best flavor and texture. Margarine and shortening have different fat contents and water levels, which will result in cookies that spread differently and lack the rich, buttery taste. Stick with real butter for the best results.
Pin This Recipe!

Easy Bakery-Style Chocolate Chip Cookies: Perfectly Chewy Recipe

These easy bakery-style chocolate chip cookies have perfectly crisp edges, soft and chewy centers, and a deep, caramelized flavor. Made with browned butter and simple ingredients, this foolproof recipe delivers consistent, bakery-quality results every time.
- Prep Time: 20 minutes
- Cook Time: 12 minutes
- Total Time: 1 hour 2 minutes (includes 30 minutes chilling)
- Yield: 24 cookies 1x
- Category: Dessert
- Cuisine: American
Ingredients
- 1 cup (226 grams) unsalted butter
- 1/2 cup (100 grams) granulated sugar
- 3/4 cup (150 grams) light brown sugar, packed
- 1 large egg
- 1 large egg yolk
- 2 teaspoons vanilla extract
- 2 cups + 2 tablespoons (270 grams) all-purpose flour
- 1 teaspoon baking soda
- 1 teaspoon salt
- 2 cups (340 grams) semi-sweet chocolate chips
Instructions
- Brown the butter: Place 1 cup unsalted butter in a small saucepan over medium heat. Melt completely, then continue cooking, swirling occasionally, until butter foams and turns golden-amber with brown specks and a nutty aroma. Immediately remove from heat and pour into a large mixing bowl. Let cool for 10 minutes.
- Mix sugars and butter: Add 1/2 cup granulated sugar and 3/4 cup packed light brown sugar to the bowl with browned butter. Whisk vigorously for about 1 minute until mixture looks like wet sand and is well combined.
- Add eggs and vanilla: Crack in 1 whole egg and 1 egg yolk. Add 2 teaspoons vanilla extract. Whisk until smooth, shiny, and slightly thickened, about 30 seconds.
- Combine dry ingredients: In a separate small bowl, whisk together 2 cups + 2 tablespoons all-purpose flour, 1 teaspoon baking soda, and 1 teaspoon salt until no lumps remain.
- Mix the dough: Add dry ingredients to wet ingredients. Fold with a wooden spoon or silicone spatula just until no streaks of flour remain. Do not overmix.
- Add chocolate chips: Fold in 2 cups semi-sweet chocolate chips until evenly distributed. If dough is too soft, chill for 15 minutes.
- Portion the dough: Using a 2-tablespoon cookie scoop, scoop dough into balls and place on a parchment-lined baking sheet, spacing 2 inches apart. Press extra chocolate chips onto tops if desired.
- Chill the dough: Refrigerate the baking sheet with dough balls for at least 30 minutes (up to 72 hours for better flavor).
- Preheat oven: When ready to bake, preheat oven to 375°F (190°C) with rack in center position.
- Bake: Bake chilled dough balls one sheet at a time for 10-12 minutes. Edges should be golden brown and set, centers still soft and puffy.
- Cool: Let cookies cool on baking sheet for 5 minutes, then transfer to a wire cooling rack to cool completely.
Notes
Chilling the dough for at least 30 minutes is crucial to prevent spreading and develop flavor. For best results, chill up to 72 hours. Measure flour correctly by spooning into cup and leveling off. Use room temperature eggs. Bake one sheet at a time for even baking. For a chewier cookie, bake on the shorter side; for crisper, add a minute. Store in airtight container at room temperature for up to 5 days. Add a slice of bread to keep cookies soft. Freeze baked cookies for up to 3 months or freeze dough balls for up to 3 months (bake from frozen, adding 2-3 minutes).
Nutrition
- Serving Size: 1 cookie
- Calories: 210
- Sugar: 17
- Sodium: 150
- Fat: 12
- Saturated Fat: 7
- Carbohydrates: 27
- Fiber: 1
- Protein: 3
Keywords: chocolate chip cookies, bakery-style cookies, chewy cookies, easy cookie recipe, browned butter cookies, homemade cookies