This was supposed to be a batch of pumpkin snickerdoodles. I had the pumpkin puree out, the cinnamon measured, and a vision of those perfectly puffy, spiced cookies that everyone goes crazy for in October. But somewhere between answering a text from my sister and realizing my toddler had hidden the measuring spoons in the toy bin, I grabbed the wrong container from the pantry. By the time I noticed, the butter was already creamed, the sugar was dissolving, and I was staring at a bowl of dough that had absolutely no pumpkin in it. Just butter, sugar, cinnamon, and that sinking feeling that I’d just wasted a perfectly good stick of butter.
I almost scraped the whole thing into the trash, honestly. But the dough looked too good—soft, fragrant, that classic snickerdoodle color that makes you think of your grandma’s kitchen. So I rolled it into balls anyway, tossed them in cinnamon sugar, and slid the pan into the oven with zero expectations. Ten minutes later, I pulled out the most perfect little cookies I’d made all season. They were crisp on the edges, pillowy in the middle, and had that unmistakable snickerdoodle tang that makes you close your eyes after the first bite. No pumpkin needed. Maybe you’ve been there—staring at a kitchen disaster that somehow turns into your new favorite thing. That’s exactly what happened here.
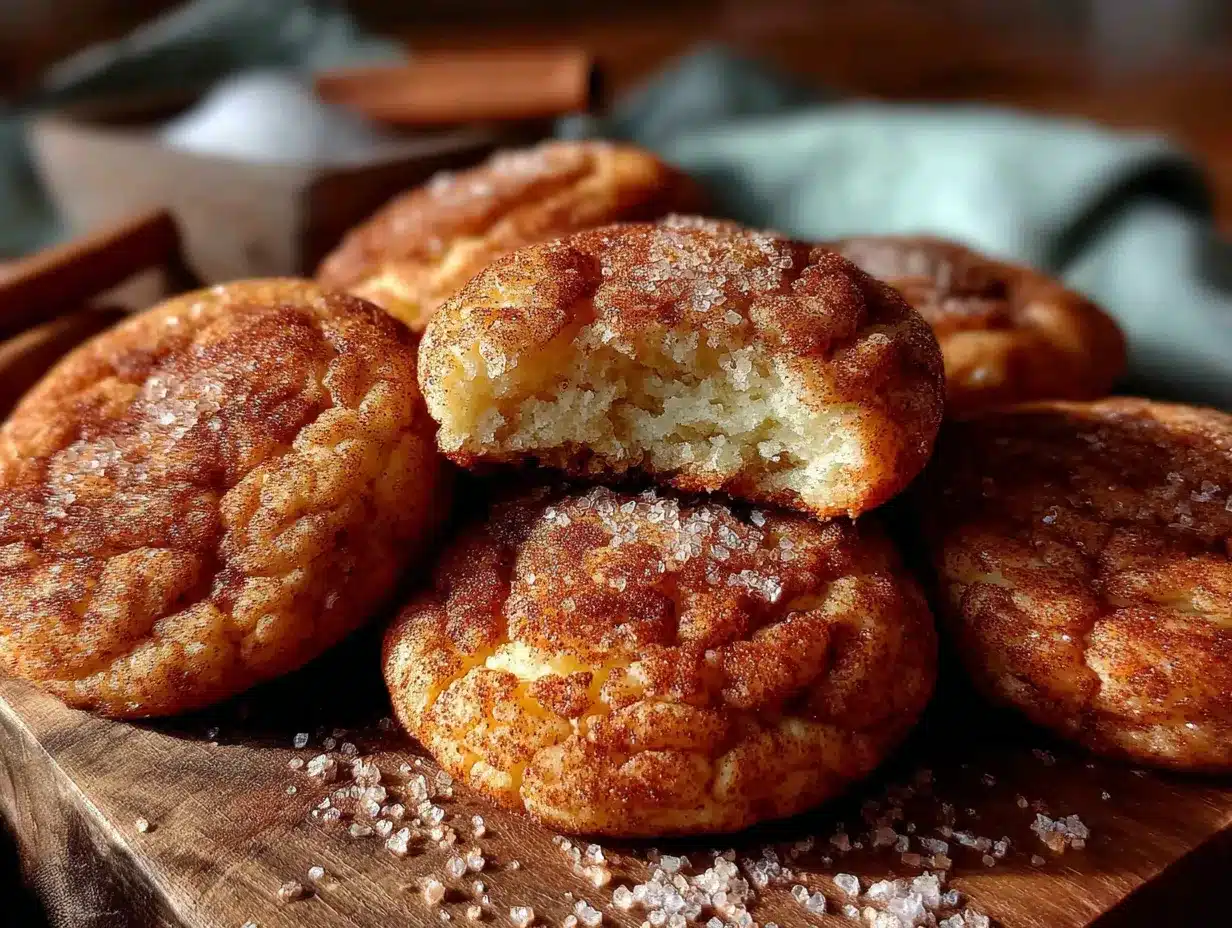
These cozy small-batch snickerdoodle cookies for fall baking became my go-to that very afternoon. I made them three more times that week, tweaking the bake time, testing the sugar ratio, and finally landing on a recipe that feels like a warm hug on a crisp autumn day. They’re the kind of cookies you bake when you want something sweet but don’t want to commit to a full batch that’ll sit on your counter for a week. Just six cookies, perfectly spiced, and gone before you can say “pumpkin spice.”
Why You’ll Love This Recipe
Let me tell you why these little cookies have earned a permanent spot in my fall baking rotation. I’ve tested this recipe at least a dozen times across different ovens, different butter temperatures, and even different altitudes—my sister lives in Colorado and I made her try them too. They work every single time.
- Quick & Easy : From start to finish, you’re looking at about 25 minutes. That’s faster than a trip to the bakery and way more satisfying. Perfect for those random Tuesday cravings when you need something warm and sweet right now.
- Simple Ingredients : Butter, sugar, flour, cream of tartar, baking soda, salt, cinnamon, and an egg. That’s it. No weird extracts, no specialty flours, no hunting down obscure spices at three different stores. Everything is probably in your kitchen already.
- Perfect for Fall Baking : These cookies capture everything we love about autumn—the warmth of cinnamon, the cozy aroma filling your house, the satisfaction of pulling a tray of golden cookies out of the oven when the leaves are turning outside your window.
- Crowd-Pleaser : I brought these to a small dinner party last week and they disappeared before the main course. Kids love them, adults love them, and they pair beautifully with a hot cup of apple cider or coffee.
- Unbelievably Delicious : The texture is what gets me every time. That slight crisp on the outside gives way to a soft, almost cloud-like center. And the tang from the cream of tartar—that’s the secret that makes snickerdoodles different from any other cinnamon cookie.
What makes this recipe different from all the other snickerdoodle recipes out there? It’s the ratio. I spent weeks tweaking the butter-to-flour balance to get that perfect small-batch texture. Most recipes scale down poorly—you end up with flat, greasy cookies or dry, crumbly ones. This one doesn’t. It’s specifically designed for six perfect cookies, and it delivers every time.
This recipe isn’t just good—it’s the kind that makes you reach for another one before you’ve finished the first. It’s comfort food reimagined for real life: quick enough for a weeknight, special enough for a Sunday afternoon, and just the right size for when you want cookies but don’t need a month’s supply.
What Ingredients You Will Need
This recipe uses simple, wholesome ingredients that come together to create something truly special. No fancy stuff here—just pantry staples that transform into pure magic. Here’s what you’ll need and why each one matters.
- Unsalted butter, softened (4 tablespoons, or 57 grams) — I always use unsalted so I can control the salt level. Let it sit out for about 30 minutes before you start. You want it soft enough to leave a dent when you press it, but not melty. Land O’Lakes is my go-to, but any good-quality butter works.
- Granulated sugar (¼ cup, or 50 grams, for the dough; plus 2 tablespoons, or 25 grams, for rolling) — Regular white sugar gives snickerdoodles that classic crisp edge. The extra sugar for rolling gets mixed with cinnamon to create that signature coating. Don’t skip the rolling step—it’s what makes a snickerdoodle a snickerdoodle.
- Large egg yolk (1 yolk, save the white for another use) — Just the yolk gives these cookies richness and tenderness without making the dough too wet. If you’re in a hurry, you can use the whole egg, but the texture won’t be quite as soft. I’ve tested it both ways, and the yolk-only version wins every time.
- Vanilla extract (½ teaspoon) — Pure vanilla extract is worth the splurge here. It rounds out the cinnamon and adds warmth. Imitation vanilla works in a pinch, but you’ll notice the difference. Nielsen-Massey is my favorite brand for baking.
- All-purpose flour (¾ cup, or 96 grams) — Regular AP flour is perfect here. No need for bread flour or cake flour. Spoon it into your measuring cup and level it off with a knife—don’t scoop directly from the bag or you’ll pack in too much flour and end up with dry cookies.
- Cream of tartar (½ teaspoon) — This is the magic ingredient that gives snickerdoodles their signature tangy flavor and soft, chewy texture. Don’t skip it! If you don’t have cream of tartar, you can substitute with 1 teaspoon of lemon juice or white vinegar, but the texture won’t be quite the same. I learned this the hard way.
- Baking soda (¼ teaspoon) — Works with the cream of tartar to help the cookies rise and spread just the right amount. Make sure your baking soda is fresh—test it by dropping a pinch into vinegar; if it fizzes vigorously, you’re good.
- Salt (¼ teaspoon) — A little salt balances the sweetness and makes the cinnamon flavor pop. I use fine sea salt for baking because it dissolves evenly. Table salt works too, just skip the extra pinch.
- Ground cinnamon (1 teaspoon for the dough, plus 1 teaspoon for the cinnamon-sugar coating) — Cinnamon is the star of the show here. Use a fresh jar if yours has been sitting in the back of your spice cabinet for two years. I prefer Saigon cinnamon for its warm, slightly sweet flavor—it’s more aromatic than regular cassia cinnamon.
For the cinnamon-sugar coating, just mix the 2 tablespoons of sugar with 1 teaspoon of cinnamon in a small bowl. That’s it. Simple, but essential.
Equipment Needed
You don’t need a fancy kitchen to make these cookies. Here’s what you’ll need, along with a few tips I’ve picked up along the way.
- Mixing bowls — One medium bowl for the dry ingredients and one larger bowl for creaming the butter and sugar. I use glass bowls because they don’t retain grease, but any bowl works.
- Hand mixer or stand mixer — A hand mixer is perfect for this small batch. I use my trusty KitchenAid hand mixer that I’ve had for over a decade. If you’re mixing by hand, you’ll need some elbow grease to get the butter and sugar properly creamed—about 3 minutes of vigorous whisking.
- Baking sheet — A standard half-sheet pan works great. No need to grease it—the parchment paper handles that. I recommend Nordic Ware baking sheets because they heat evenly and don’t warp.
- Parchment paper — Line your baking sheet for easy cleanup and even baking. Silicone baking mats work too, but I find parchment gives slightly crisper bottoms.
- Measuring cups and spoons — For accuracy, especially with the cream of tartar and baking soda. Invest in a good set of metal measuring spoons—they last forever.
- Cookie scoop or tablespoon — A 1.5-tablespoon cookie scoop gives you perfectly uniform cookies. If you don’t have one, just use a regular tablespoon and shape the dough into balls with your hands.
- Cooling rack — Letting cookies cool on a rack prevents soggy bottoms. If you don’t have one, transfer them to a plate after 5 minutes on the baking sheet.
Budget-friendly tip: You can absolutely make these cookies with just a whisk, a bowl, and a baking sheet. I’ve done it many times when my mixer was in the dishwasher. The cookies turn out just as delicious.
Preparation Method
Let’s get baking! These steps are straightforward, but I’ve included all the little details that make the difference between good cookies and unforgettable ones.
- Preheat your oven to 350°F (175°C). Line a baking sheet with parchment paper. Getting the oven to the right temperature before you start mixing ensures even baking. I always use an oven thermometer—my oven runs 25 degrees hot, and yours might too.
- Cream the butter and sugar. In a large bowl, beat the softened butter and ¼ cup of granulated sugar together until light and fluffy, about 2-3 minutes with a hand mixer on medium speed. You’re looking for a pale, creamy texture that looks almost like frosting. Scrape down the sides of the bowl halfway through. This step is crucial—proper creaming incorporates air that helps the cookies rise.
- Add the egg yolk and vanilla. Beat in the egg yolk and vanilla extract until fully combined, about 30 seconds. The mixture might look slightly curdled at this point—that’s normal, especially if your egg was cold. Don’t panic, it’ll come together when you add the dry ingredients.
- Whisk the dry ingredients together. In a separate medium bowl, whisk together the flour, cream of tartar, baking soda, salt, and 1 teaspoon of cinnamon. Whisking ensures everything is evenly distributed—you don’t want a pocket of baking soda in one cookie. I use a fork if I’m too lazy to get out the whisk, and it works fine.
- Combine wet and dry ingredients. Gradually add the dry ingredients to the wet mixture, mixing on low speed or stirring with a spatula until just combined. Stop as soon as you don’t see any more streaks of flour. Overmixing develops gluten and makes cookies tough. The dough will be soft and slightly sticky—that’s exactly what you want.
- Chill the dough (optional but recommended). Cover the bowl and refrigerate the dough for 15-20 minutes. This step isn’t strictly necessary, but it makes the dough easier to handle and prevents the cookies from spreading too much in the oven. If you’re in a rush, you can skip it—I have plenty of times—but the cookies will be slightly flatter.
- Prepare the cinnamon-sugar coating. In a small bowl, mix the remaining 2 tablespoons of sugar with 1 teaspoon of cinnamon. Stir until well combined. The color should be an even, warm brown.
- Shape the cookies. Using a cookie scoop or your hands, portion the dough into 6 equal balls, about 1.5 tablespoons each. Roll each ball between your palms until smooth. Drop each ball into the cinnamon-sugar mixture and roll to coat thoroughly. Don’t be shy—press the sugar into the dough so it sticks. Place the coated dough balls on the prepared baking sheet, spacing them about 2 inches apart. They’ll spread a little, but not too much.
- Bake. Bake for 9-11 minutes, or until the edges are set and lightly golden. The centers will look slightly puffy and underdone—that’s perfect. They’ll continue to set as they cool. My oven takes exactly 10 minutes, but start checking at 9 minutes. Every oven is different, and overbaked snickerdoodles lose their signature softness.
- Cool. Let the cookies cool on the baking sheet for 5 minutes. This allows them to firm up without overcooking. Then transfer them to a wire rack to cool completely. If you try to move them too soon, they’ll fall apart. Trust me, I’ve learned this the messy way.
And there you have it—six perfect, golden snickerdoodle cookies ready to be devoured. The smell alone will make your kitchen feel like a fall festival.
Cooking Tips & Techniques
After making these cookies more times than I can count, I’ve collected a few tricks that make the process smoother and the results more consistent. Here’s what I wish someone had told me when I first started baking snickerdoodles.
Room temperature ingredients matter. I know, I know—every recipe says this and it feels like a hassle. But cold butter doesn’t cream properly, and cold egg yolk can make your dough seize up. Take the time to let your butter soften and your egg come to room temperature. If you’re in a hurry, cut the butter into small cubes and let it sit for 10 minutes, or place the egg in a bowl of warm water for 5 minutes. It makes a real difference in the texture.
Don’t overbake. This is the most common mistake I see with snickerdoodles. People wait until the cookies look fully done in the oven, and by the time they cool, they’re rock hard. Pull them out when the edges are set but the centers still look soft and slightly puffy. They’ll continue cooking from the residual heat of the baking sheet. I once left a batch in for 12 minutes because I got distracted by a phone call, and they came out more like cinnamon crackers. Still tasty, but not what we’re going for.
Use a light-colored baking sheet. Dark baking sheets absorb more heat and can cause cookies to brown too quickly on the bottom. If you only have dark sheets, reduce your oven temperature by 25 degrees and watch the cookies closely. I learned this after burning the bottoms of three batches in a row before realizing my new baking sheet was the culprit.
Rotate your baking sheet halfway through. Most ovens have hot spots. Halfway through baking, quickly rotate the sheet 180 degrees to ensure even browning. This takes five seconds and can save you from having half your cookies overdone and half underdone.
Let the dough rest if it’s too sticky. If your dough feels overly sticky and hard to shape, pop it in the fridge for 10-15 minutes. The butter firms up, the flour hydrates, and suddenly the dough becomes manageable. This is especially helpful on humid days or if your butter got a little too soft.
Double-check your cream of tartar. Cream of tartar loses its potency over time. If your cookies aren’t developing that signature tangy flavor, your cream of tartar might be old. A fresh jar should be replaced every 6-12 months. I write the date on mine with a permanent marker so I don’t forget.
Variations & Adaptations
One of the best things about this recipe is how easily it adapts to different tastes and dietary needs. Here are some variations I’ve tried and loved.
Gluten-Free Version: Substitute the all-purpose flour with a 1:1 gluten-free baking flour blend. I’ve had great results with King Arthur Measure for Measure and Bob’s Red Mill 1-to-1. The texture is slightly more delicate, but the flavor is spot on. Add an extra tablespoon of flour if the dough seems too sticky.
Vegan Adaptation: Use vegan butter (I recommend Miyoko’s or Earth Balance) and replace the egg yolk with 1 tablespoon of aquafaba (the liquid from a can of chickpeas) mixed with ½ teaspoon of cornstarch. The cookies won’t be quite as tender, but they’re still delicious. I made these for a vegan friend’s birthday and she asked for the recipe three times.
Spiced-Up Version: Add ¼ teaspoon of nutmeg, ¼ teaspoon of ginger, and a pinch of cloves to the dough along with the cinnamon. This creates a chai-spiced snickerdoodle that’s perfect for fall. I make this version when I’m craving something extra warm and cozy.
Brown Sugar Snickerdoodles: Replace half the granulated sugar with packed light brown sugar. This adds a deeper, molasses-like flavor and makes the cookies slightly chewier. The color will be a bit darker, but the taste is incredible.
Lemon Snickerdoodles: Add 1 teaspoon of lemon zest to the dough and replace the cinnamon in the coating with an equal amount of lemon sugar (mix the zest of one lemon into the sugar and let it sit for an hour). This bright, citrusy version is perfect for spring or summer, but I secretly love it in fall too—it cuts through all the heavy flavors of the season.
Smaller or Larger Batch: To double the recipe, simply multiply all ingredients by two. For a single cookie, divide everything by six—use 2 teaspoons of butter, 2 teaspoons of sugar, and so on. It takes some math, but it works.
Serving & Storage Suggestions
These cookies are best enjoyed warm, fresh from the oven, with a tall glass of cold milk or a steaming mug of coffee. But they’re also fantastic at room temperature, and they store surprisingly well.
Serving Temperature: Serve these cookies warm for the ultimate experience. The cinnamon-sugar coating is at its crispiest, and the centers are at their softest. If they’ve cooled completely, pop them in a 300°F oven for 3-4 minutes to re-crisp the outside. Microwaving works too, but it softens the coating.
Presentation Ideas: Arrange the cookies on a rustic wooden board or a simple white plate. Dust with a little extra cinnamon for visual appeal. They look beautiful next to a pile of fall leaves or a small pumpkin for photos. For gifting, stack them in a clear cellophane bag tied with a cinnamon stick and a ribbon.
Complementary Dishes: These cookies pair beautifully with apple cider, hot chocolate, chai tea, or a pumpkin spice latte. For a dessert board, serve them alongside apple slices, caramel dip, and a few dark chocolate squares. I once served them with a side of warm apple compote, and it was a revelation.
Storage Instructions: Store the cookies in an airtight container at room temperature for up to 5 days. Place a slice of bread in the container to keep them soft—the cookies will absorb moisture from the bread. Change the bread slice every other day. Do not refrigerate, as this dries them out.
Freezing Instructions: You can freeze the baked cookies for up to 3 months. Wrap them individually in plastic wrap, then place them in a freezer-safe bag. Thaw at room temperature for about 30 minutes. For longer storage, freeze the unbaked dough balls (coated in cinnamon sugar) on a baking sheet until solid, then transfer to a freezer bag. Bake from frozen, adding 2-3 minutes to the baking time. This is my favorite meal-prep trick—fresh cookies in under 15 minutes anytime a craving strikes.
Flavor Development: Interestingly, these cookies taste even better the next day. The flavors meld together, and the texture becomes perfectly balanced. If you can resist eating them all immediately, you’re in for a treat.
Nutritional Information & Benefits
Let’s be real—these are cookies, not health food. But knowing what’s in them helps you enjoy them mindfully. Here’s the breakdown for one cookie (based on 6 cookies total).
| Nutrient | Amount Per Cookie |
|---|---|
| Calories | 165 |
| Total Fat | 8g |
| Saturated Fat | 5g |
| Cholesterol | 45mg |
| Sodium | 165mg |
| Total Carbohydrates | 22g |
| Sugars | 13g |
| Protein | 2g |
Health Benefits of Key Ingredients: Cinnamon is the star here—it’s packed with antioxidants and has anti-inflammatory properties. Some studies suggest it may help regulate blood sugar levels. Cream of tartar is actually a byproduct of wine-making and provides a small amount of potassium. The butter and egg yolk provide fat-soluble vitamins A, D, E, and K. Of course, these benefits come in small amounts, but every little bit counts.
Dietary Considerations: This recipe contains gluten, dairy, and eggs. For gluten-free and vegan options, see the variations section above. These cookies are nut-free, making them safe for school lunches and parties where nut allergies are a concern. They’re also relatively low in sugar compared to many cookie recipes—each cookie has about 13 grams of sugar, which is reasonable for a treat.
Personal Wellness Perspective: I believe in balance. These cookies are a treat, meant to be enjoyed in moderation. They’re perfect for those moments when you need a little comfort and warmth. I don’t stress about the calories or the sugar—I focus on the joy of baking, the aroma filling my kitchen, and the smile on my face when I take that first bite. That’s good for the soul, and that counts for something.
Conclusion
These cozy small-batch snickerdoodle cookies for fall baking started as a mistake, but they’ve become one of my most-loved recipes. They’re proof that sometimes the best things in life come from happy accidents—a wrong ingredient, a distracted moment, a leap of faith that turns into something wonderful.
What I love most about this recipe is how it captures the essence of fall without trying too hard. No pumpkin, no apples, no complicated spices—just butter, sugar, cinnamon, and a little bit of magic. It’s simple, honest baking that delivers every single time. And the fact that it makes just six cookies means you can enjoy them without feeling overwhelmed by leftovers. They’re the perfect size for a quiet afternoon, a small gathering, or a personal treat when you need a little warmth on a chilly day.
I’d love to hear how these turn out for you. Did you try any of the variations? Did you discover your own happy accident along the way? Drop a comment below and share your snickerdoodle story. And if you loved this recipe, please share it with a friend who needs a little fall comfort in their life. Happy baking, friends—may your cookies be golden, your cinnamon be fresh, and your kitchen be filled with warmth.
Frequently Asked Questions
Can I make these cookies without cream of tartar?
Yes, but the texture and flavor won’t be the same. Cream of tartar gives snickerdoodles their signature tangy flavor and soft, chewy texture. If you don’t have it, you can substitute with 1 teaspoon of lemon juice or white vinegar mixed with the egg yolk. The cookies will still be delicious, but they’ll be more like regular cinnamon sugar cookies.
Why did my cookies turn out flat?
Flat cookies usually mean the butter was too soft or the dough wasn’t chilled enough. Make sure your butter is softened but not melted, and chill the dough for at least 15 minutes before baking. Also check that your baking soda is fresh—old baking soda loses its leavening power and can cause flat cookies.
Can I double this recipe?
Absolutely! Simply multiply all ingredients by two. The baking time may increase by 1-2 minutes since you’ll have more cookies on the sheet. Just keep an eye on them and pull them out when the edges are set and the centers are still soft.
How do I know when the cookies are done baking?
Look for set edges that are lightly golden and centers that look slightly puffy and underdone. They should be soft to the touch but not jiggly. Remember, they’ll continue to cook on the hot baking sheet for 5 minutes after you pull them out of the oven. When in doubt, underbake slightly—you can always bake them longer, but you can’t unbake them.
Can I use salted butter instead of unsalted?
Yes, but reduce the added salt in the recipe to ⅛ teaspoon. Salted butter contains about ¼ teaspoon of salt per stick, so you’ll need to adjust accordingly. I prefer unsalted for baking because it gives me more control over the final flavor, but salted butter works in a pinch.
Pin This Recipe!

Cozy Small-Batch Snickerdoodle Cookies for Easy Fall Baking

These cozy small-batch snickerdoodle cookies are perfect for fall baking. Made with simple ingredients, they yield six perfectly spiced cookies with crisp edges and soft, pillowy centers.
- Prep Time: 15 minutes
- Cook Time: 10 minutes
- Total Time: 25 minutes
- Yield: 6 cookies 1x
- Category: Dessert
- Cuisine: American
Ingredients
- 4 tablespoons (57 g) unsalted butter, softened
- ¼ cup (50 g) granulated sugar (for dough)
- 2 tablespoons (25 g) granulated sugar (for rolling)
- 1 large egg yolk
- ½ teaspoon vanilla extract
- ¾ cup (96 g) all-purpose flour
- ½ teaspoon cream of tartar
- ¼ teaspoon baking soda
- ¼ teaspoon salt
- 1 teaspoon ground cinnamon (for dough)
- 1 teaspoon ground cinnamon (for coating)
Instructions
- Preheat oven to 350°F (175°C). Line a baking sheet with parchment paper.
- In a large bowl, beat softened butter and ¼ cup granulated sugar together until light and fluffy, about 2-3 minutes with a hand mixer on medium speed.
- Beat in egg yolk and vanilla extract until fully combined, about 30 seconds.
- In a separate medium bowl, whisk together flour, cream of tartar, baking soda, salt, and 1 teaspoon cinnamon.
- Gradually add dry ingredients to wet mixture, mixing on low speed or stirring with a spatula until just combined. Do not overmix.
- Cover bowl and refrigerate dough for 15-20 minutes (optional but recommended).
- In a small bowl, mix remaining 2 tablespoons sugar with 1 teaspoon cinnamon for coating.
- Portion dough into 6 equal balls (about 1.5 tablespoons each). Roll each ball in cinnamon-sugar mixture to coat thoroughly.
- Place coated dough balls on prepared baking sheet, spacing 2 inches apart.
- Bake for 9-11 minutes, until edges are set and lightly golden. Centers will look slightly puffy and underdone.
- Let cookies cool on baking sheet for 5 minutes, then transfer to a wire rack to cool completely.
Notes
For best results, use room temperature ingredients. Do not overbake; cookies continue to set as they cool. For a gluten-free version, substitute all-purpose flour with a 1:1 gluten-free baking flour blend. For a vegan adaptation, use vegan butter and replace egg yolk with 1 tablespoon aquafaba mixed with ½ teaspoon cornstarch.
Nutrition
- Serving Size: 1 cookie
- Calories: 165
- Sugar: 13
- Sodium: 165
- Fat: 8
- Saturated Fat: 5
- Carbohydrates: 22
- Protein: 2
Keywords: snickerdoodle cookies, small batch cookies, fall baking, cinnamon cookies, easy cookie recipe