There used to be a tiny bakery on the corner of Maple and 3rd in my hometown, a place called The Cozy Crumble, that made the most incredible Halloween sugar cookies I’ve ever tasted. They weren’t just decorated—they were little works of art, with delicate spider webs painted across them in white royal icing. When they closed their doors three years ago after the owner retired, I honestly felt a little pang of loss. It sounds silly, getting attached to a cookie, but those spider webs were part of my Halloween tradition. After twelve tries—and let me tell you, some of those early attempts looked more like tangled fishing line than spider webs—I finally got it.
The secret wasn’t in some fancy technique I learned from a pastry chef. It was about getting the icing consistency just right and using a simple toothpick to drag those perfect lines. The first time I pulled that toothpick through the wet icing and saw the web form, I actually let out a little gasp. My kitchen looked like a flour bomb had gone off, and there was royal icing on my glasses, but I didn’t care. I had my Cozy Crumble cookie back.
These cozy Halloween spider web sugar cookies are more than just a treat. They are a way to bring a little bit of that bakery magic into your own home, especially on a chilly October evening when all you want is something sweet and a warm drink. Maybe you’ve been there, chasing a taste from your past. Let me show you how to catch it.
Why You’ll Love This Recipe
I’ve tested this recipe more times than I care to admit, and I can tell you with absolute certainty that it delivers. These are not just any sugar cookies. They are soft in the middle, slightly crisp at the edges, and the perfect canvas for that spooky, satisfying spider web design.
- Surprisingly Simple: The spider web design looks incredibly impressive, but it’s one of the easiest cookie decorating techniques you will ever learn. No piping bags or special tips required—just a toothpick and a little patience.
- Perfectly Soft-Baked: This recipe uses a specific ratio of butter to sugar that gives you a cookie that holds its shape during baking but stays tender and delicious. No crunchy, dry hockey pucks here.
- No Fancy Ingredients: You likely have everything you need in your pantry right now. Butter, sugar, flour, eggs, and vanilla. The royal icing uses just powdered sugar and meringue powder or egg whites.
- Family-Friendly Fun: This is the kind of baking project that gets everyone involved. Kids love dragging the toothpick through the icing to watch the web appear. It’s messy, it’s fun, and it creates memories.
- Make-Ahead Magic: The cookie dough freezes beautifully, and the decorated cookies stay fresh for days. You can prep everything ahead of time and decorate when the Halloween mood strikes.
What makes these cookies different from every other sugar cookie recipe out there is the texture. I spent a long time experimenting with chilling times and butter temperatures to get that perfect balance. The cookie holds its shape so the spider web stays intact, but it melts in your mouth. Honestly, it is the kind of cookie that makes you close your eyes after the first bite. Pure comfort.
What Ingredients You Will Need
This recipe uses simple, wholesome ingredients to deliver a cookie that is both beautiful and delicious. The magic is in the technique, not in a long list of exotic items. Most of these are pantry staples you probably already have on hand.
For the Sugar Cookies:
- Unsalted butter, softened: 1 cup (2 sticks, 226 grams). Make sure it is truly at room temperature—soft to the touch but not melting. I prefer using Kerrygold for its rich flavor, but any good quality butter works.
- Granulated sugar: 1 cup (200 grams). This gives the cookies their sweetness and helps them spread just the right amount.
- Large egg: 1, at room temperature. A cold egg can seize the butter, so let it sit out for 30 minutes.
- Vanilla extract: 2 teaspoons. Use pure vanilla extract if you can. I love Nielsen-Massey for its deep, floral flavor.
- All-purpose flour: 2 ½ cups (312 grams). Spoon and level it into your measuring cup—don’t scoop directly, or you will pack in too much flour and get dry cookies.
- Baking powder: ½ teaspoon. This helps the cookies puff up slightly without spreading too much.
- Salt: ½ teaspoon. A crucial ingredient that balances the sweetness and enhances the vanilla.
For the Royal Icing:
- Powdered sugar: 3 cups (340 grams), sifted. Sifting is non-negotiable here. Lumps in your sugar will create lumps in your icing.
- Meringue powder: 2 tablespoons. This gives the icing a nice sheen and helps it dry hard. You can find it at craft stores or online. If you prefer, you can use 2 large pasteurized egg whites instead.
- Warm water: 4 to 5 tablespoons. Add it slowly. You might need a little more or a little less depending on the humidity.
- Black gel food coloring: For the base cookie icing. I recommend Americolor or Wilton brand. Liquid coloring will thin the icing too much.
- White gel food coloring: Optional, but it makes the white spider web really pop against the black.
Equipment Needed
You don’t need a fancy bakery setup to make these cookies. A few basic tools will do the job perfectly.
- Electric mixer: A stand mixer with a paddle attachment is ideal, but a hand-held electric mixer works just as well. You just need to cream the butter and sugar until light and fluffy.
- Large mixing bowls: At least two. One for the dry ingredients and one for the wet.
- Measuring cups and spoons: For accuracy. Baking is a science, especially with cookies.
- Rolling pin: I prefer a French-style rolling pin without handles. It gives you more control over the pressure.
- Parchment paper: Line your baking sheets. It prevents sticking and makes cleanup a breeze.
- Round cookie cutter: A 2 ½ to 3-inch round cutter is perfect. You can also use a fluted one for a fancier edge.
- Baking sheets: Heavy-duty, light-colored aluminum sheets work best. Dark sheets can cause the bottoms of your cookies to burn.
- Toothpicks: The star of the show! You will use these to create the spider web design.
- Piping bags or zip-top bags: For applying the black base icing. A small zip-top bag with a tiny corner snipped off works perfectly.
- Wire cooling rack: Essential for letting the cookies cool completely before decorating.
Preparation Method
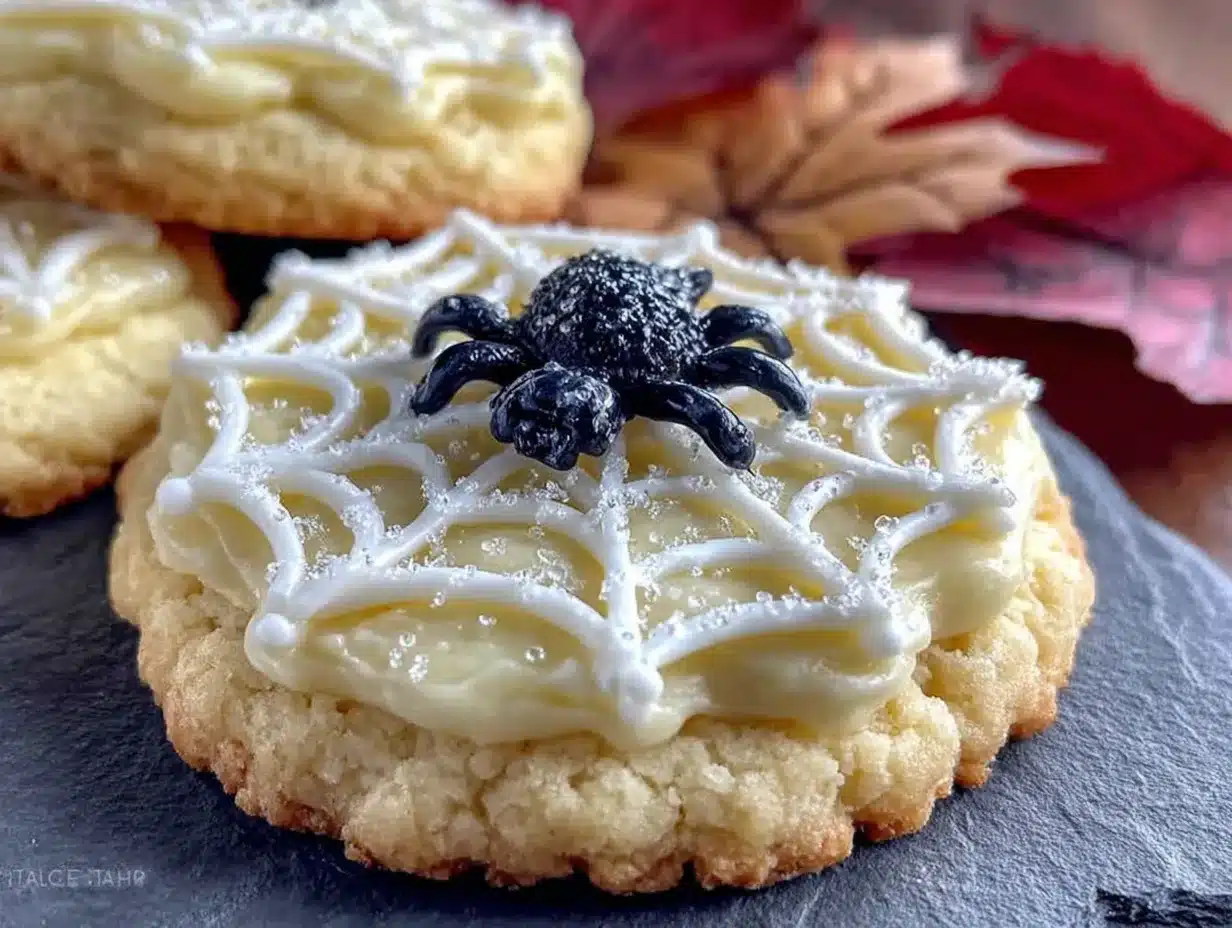
Let’s make some Halloween magic. This process has a few steps, but I promise, each one is straightforward. Take your time, especially with the chilling and the icing.
- Make the Cookie Dough: In your large bowl, cream the softened butter and granulated sugar together on medium speed for about 3 minutes, until it is light, pale, and fluffy. Scrape down the sides of the bowl. Add the egg and vanilla extract and beat until combined. In a separate bowl, whisk together the flour, baking powder, and salt. Gradually add the dry ingredients to the wet ingredients, mixing on low speed until just combined. Do not overmix, or the cookies will be tough.
- Chill the Dough: Divide the dough in half, shape each half into a flat disc, and wrap them tightly in plastic wrap. Refrigerate for at least 2 hours, or up to 3 days. This step is non-negotiable. Chilled dough spreads less and holds its shape better. If you try to roll it out right away, it will be sticky and a mess.
- Preheat and Prep: When you are ready to bake, preheat your oven to 350°F (175°C). Line your baking sheets with parchment paper.
- Roll and Cut: On a lightly floured surface, roll out one disc of dough to about ¼-inch thickness. I like to roll between two sheets of parchment paper—it prevents sticking and makes cleanup so much easier. Use your round cookie cutter to cut out shapes. Re-roll the scraps once, but no more, or the dough will get tough.
- Bake: Place the cookies about 2 inches apart on the prepared baking sheets. Bake for 8 to 10 minutes, or until the edges are just barely golden. The centers should look set but not brown. Let them cool on the baking sheet for 5 minutes, then transfer them to a wire rack to cool completely. They must be 100% cool before you ice them.
- Make the Royal Icing: In a clean bowl, combine the sifted powdered sugar and meringue powder. Add 4 tablespoons of warm water and beat on low speed until combined, then beat on medium-high for about 5 minutes, until the icing is thick, glossy, and forms stiff peaks. It should hold its shape when you lift the beater. If it is too thick, add water a few drops at a time. If it is too thin, add a little more powdered sugar.
- Color the Icing: Divide the icing into two bowls. Color the larger portion black using your gel food coloring. It will look grey at first, but it will deepen as you stir. Color the smaller portion white (or leave it plain white if you prefer). Transfer each color to its own piping bag or zip-top bag.
- Pipe the Base: Snip a tiny tip off the corner of the black icing bag. Pipe an outline around the edge of each cooled cookie, then fill in the center with a squiggly line of icing. Use a toothpick to gently spread the icing to the edges, making sure it is even. Let this base layer dry for at least 2 hours, or until it is completely firm to the touch.
- Create the Spider Web: This is the fun part. Snip a tiny tip off the white icing bag. Pipe a small dot of white icing in the center of the black cookie. Pipe a spiral of white icing from the center out to the edge, like a snail shell. While the white icing is still wet, take a toothpick and drag it from the center outwards through the white spiral to the edge of the cookie. Wipe the toothpick clean, then drag it from the edge back towards the center. Repeat this around the cookie, spacing the lines evenly. You will see the web pattern appear instantly.
- Let the Web Set: Allow the decorated cookies to dry completely, ideally overnight. The royal icing needs time to harden so the design doesn’t smudge.
Cooking Tips & Techniques
I learned these lessons the hard way, so you don’t have to. My first batch of spider web cookies looked like a confused spider had a seizure on them.
The Icing Consistency is Everything. For the spider web technique to work, the white icing needs to be a “flood” consistency—thin enough to spread, but thick enough to hold a line. If it is too thick, the toothpick won’t drag through it properly. If it is too thin, it will just pool into the black base. The perfect consistency is like warm honey. When you lift your spatula, the ribbon of icing should sink back into the bowl within 10 seconds.
Don’t Rush the Chilling. I once tried to rush this step and rolled the dough out after only 30 minutes in the fridge. The cookies spread into weird, misshapen blobs in the oven. The dough needs a full 2 hours to firm up the butter. This is not optional—it is the key to a cookie that holds its shape.
Work in Batches. Only take one disc of dough out of the fridge at a time. Keep the other one cold. If the dough gets too warm and sticky while you are rolling, just pop it back in the fridge for 15 minutes.
The Toothpick Angle. When dragging the toothpick through the white icing, hold it at a 45-degree angle. If you hold it straight up and down, it can dig into the black base layer and ruin the surface. A gentle, angled drag creates those beautiful, delicate webbed lines.
Clean Your Toothpick. After each drag from the center to the edge, wipe the excess icing off the toothpick onto a paper towel. If you don’t, the toothpick will drag a thick glob of white icing through the web and ruin the pattern.
Variations & Adaptations
These cookies are a perfect base for experimentation. Here are a few ways I have played around with the recipe.
- Gluten-Free Version: I swapped the all-purpose flour for a 1:1 gluten-free baking flour blend (like King Arthur Measure for Measure). The texture is slightly more tender and crumbly, but the taste is still fantastic. Make sure your blend contains xanthan gum for structure.
- Different Flavors: Add ½ teaspoon of almond extract along with the vanilla for a subtle, nutty flavor that pairs beautifully with the sweet icing. You could also add a teaspoon of orange zest to the dough for a citrusy Halloween twist.
- Spooky Color Swaps: Instead of black and white, try a deep purple base with a bright green spider web. Or an orange base with a black web. The technique is exactly the same, but the color combinations can be endless.
- Chocolate Spider Webs: Swap out ¼ cup of the all-purpose flour for ¼ cup of unsweetened cocoa powder to make a chocolate sugar cookie. Use a white or orange icing for the web on top. The chocolate flavor is a wonderful, rich contrast to the sweet royal icing.
- Gluten-Free & Vegan Adaptation: I tried this for a friend with multiple allergies. Use a vegan butter stick (like Miyoko’s), a flax egg (1 tablespoon ground flaxseed + 3 tablespoons water), and a gluten-free flour blend. The dough is a bit more fragile to roll out, but the flavor is surprisingly good.
Serving & Storage Suggestions
These cookies are best enjoyed at room temperature, when the cookie is soft and the icing is perfectly hard and snappy. They are the star of any Halloween party, but they are just as good on a quiet night with a cup of tea.
Serving: Arrange them on a platter with some candy corn and caramel apples for a full Halloween spread. They also make wonderful, edible gifts. Package them in a clear cellophane bag tied with a black ribbon.
Storage: Once the royal icing is completely dry and hard (after about 12 hours), you can store the cookies in an airtight container at room temperature. Place them in a single layer, or separate layers with parchment paper. They will stay fresh for up to 1 week. Do not refrigerate them, as the moisture in the fridge can make the icing sticky and soften the cookies.
Freezing: You can freeze the undecorated, baked cookies for up to 3 months. Wrap them tightly in plastic wrap and then foil. When you are ready to decorate, let them thaw at room temperature for an hour before icing. You can also freeze the raw cookie dough discs for up to 3 months. Thaw in the fridge overnight before rolling and baking.
Nutritional Information & Benefits
Let’s be honest—these are a treat, not a health food. But knowing what is in them helps you enjoy them mindfully. The nutritional values below are estimates for one cookie (based on a 2 ½-inch cutter) with royal icing.
| Nutrient | Amount per Cookie |
|---|---|
| Calories | 145 |
| Total Fat | 6g |
| Saturated Fat | 4g |
| Carbohydrates | 22g |
| Sugar | 15g |
| Protein | 1g |
The butter provides a small amount of Vitamin A, and the egg adds a bit of protein. If you use meringue powder, it is pasteurized, making the icing safe for everyone. The main benefit here is the joy of creating something beautiful and sharing it with people you care about. That has its own kind of nutritional value, if you ask me.
Conclusion
I still think about The Cozy Crumble every time I make these cookies, but now my kitchen feels like its own little bakery. There is something deeply satisfying about pulling a toothpick through that white icing and watching a perfect spider web appear. It feels like a small magic trick you get to perform every single time.
I hope you give these cozy Halloween spider web sugar cookies a try. Don’t worry if your first web is a little lopsided or if your black icing looks a bit grey before you add more color. That is part of the process. My first batch was a mess, and I loved every single imperfect cookie. They tasted like victory.
If you make these, I would love to hear how they turned out. Leave a comment below and tell me about your decorating adventures! And if you come up with a cool color combination, I want to see that too. Happy Halloween, and happy baking!
Frequently Asked Questions
Can I use a different type of icing for the spider web?
Yes, you can use a simple glaze made from powdered sugar and milk, but it won’t dry as hard as royal icing. The web design can also be made with melted white chocolate or candy melts for a different look and texture.
Why did my cookie dough spread in the oven?
This is almost always because the dough was not chilled enough. If the butter is too warm when the cookies hit the oven, they will spread into thin, flat discs. Make sure you chill the dough for the full 2 hours, and consider chilling the cut-out cookies on the baking sheet for 10 minutes before baking.
How do I get my black icing to be really dark?
Use a gel food coloring, not a liquid one. Start with a small amount and add more until you reach the desired shade. The color will deepen as it sits. For a true black, let the colored icing rest for 30 minutes, and it will darken naturally.
Can I freeze the decorated cookies?
It is not recommended. The royal icing can absorb moisture from the freezer and become sticky or crack. It is better to freeze the undecorated cookies or the raw dough and decorate them fresh.
My spider web lines look blurry. What did I do wrong?
The white icing was likely too thin. It needs to be a flood consistency that holds its shape for a few seconds. If it is too runny, it will bleed into the black base and create a blurry web. Add a little more sifted powdered sugar to thicken it up.
Pin This Recipe!

Easy Spider Web Sugar Cookies for Halloween

These soft-baked sugar cookies feature a stunning spider web design made with simple royal icing and a toothpick. A nostalgic Halloween treat that’s surprisingly easy to create at home.
- Prep Time: 30 minutes
- Cook Time: 10 minutes
- Total Time: 2 hours 40 minutes (includes chilling and decorating time)
- Yield: 24 servings 1x
- Category: Dessert
- Cuisine: American
Ingredients
- 1 cup (2 sticks, 226 grams) unsalted butter, softened
- 1 cup (200 grams) granulated sugar
- 1 large egg, at room temperature
- 2 teaspoons vanilla extract
- 2 ½ cups (312 grams) all-purpose flour
- ½ teaspoon baking powder
- ½ teaspoon salt
- 3 cups (340 grams) powdered sugar, sifted
- 2 tablespoons meringue powder
- 4 to 5 tablespoons warm water
- Black gel food coloring
- White gel food coloring (optional)
Instructions
- Make the Cookie Dough: In a large bowl, cream the softened butter and granulated sugar together on medium speed for about 3 minutes, until light, pale, and fluffy. Scrape down the sides of the bowl. Add the egg and vanilla extract and beat until combined. In a separate bowl, whisk together the flour, baking powder, and salt. Gradually add the dry ingredients to the wet ingredients, mixing on low speed until just combined. Do not overmix.
- Chill the Dough: Divide the dough in half, shape each half into a flat disc, and wrap tightly in plastic wrap. Refrigerate for at least 2 hours, or up to 3 days.
- Preheat and Prep: When ready to bake, preheat oven to 350°F (175°C). Line baking sheets with parchment paper.
- Roll and Cut: On a lightly floured surface, roll out one disc of dough to about ¼-inch thickness. Use a round cookie cutter (2 ½ to 3 inches) to cut out shapes. Re-roll scraps once only.
- Bake: Place cookies about 2 inches apart on prepared baking sheets. Bake for 8 to 10 minutes, until edges are just barely golden. Let cool on baking sheet for 5 minutes, then transfer to a wire rack to cool completely.
- Make the Royal Icing: In a clean bowl, combine sifted powdered sugar and meringue powder. Add 4 tablespoons warm water and beat on low until combined, then beat on medium-high for about 5 minutes until thick, glossy, and forms stiff peaks. Adjust consistency with additional water or powdered sugar as needed.
- Color the Icing: Divide icing into two bowls. Color the larger portion black using gel food coloring. Color the smaller portion white (or leave plain). Transfer each to piping bags or zip-top bags.
- Pipe the Base: Snip a tiny tip off the black icing bag. Pipe an outline around each cooled cookie, then fill the center with squiggly lines. Use a toothpick to spread icing evenly. Let dry for at least 2 hours until firm.
- Create the Spider Web: Snip a tiny tip off the white icing bag. Pipe a small dot of white icing in the center of the black cookie. Pipe a spiral from the center out to the edge. While wet, drag a toothpick from the center outward through the spiral to the edge. Wipe toothpick clean, then drag from edge back toward center. Repeat around the cookie, spacing lines evenly.
- Let the Web Set: Allow decorated cookies to dry completely, ideally overnight, until royal icing is hard.
Notes
For best results, chill dough for full 2 hours to prevent spreading. The white icing should be flood consistency—like warm honey. Clean toothpick after each drag for clean web lines. Cookies stay fresh up to 1 week in an airtight container at room temperature. Do not refrigerate decorated cookies.
Nutrition
- Serving Size: 1 cookie
- Calories: 145
- Sugar: 15
- Sodium: 75
- Fat: 6
- Saturated Fat: 4
- Carbohydrates: 22
- Protein: 1
Keywords: Halloween cookies, spider web cookies, sugar cookies, royal icing, Halloween baking, easy cookie decorating


