The neighborhood Halloween potluck was in six hours and I’d completely forgotten. Everyone else would be bringing those elaborate themed desserts—you know, the ones that look like they belong on a baking competition show. I had a dozen hard-boiled eggs in my fridge, a jar of olives, and honestly, a growing sense of panic. My neighbor Karen always brings those incredible graveyard brownies with the crumbling cookie tombstones, and last year, Mike showed up with a punch bowl that had a dry ice fog machine. I mean, what was I supposed to do with eggs and olives?
Let me tell you, desperation is a heck of a motivator. I stared at those eggs for a good five minutes, willing them to transform into something impressive. Then it hit me—black olives cut just right look exactly like spiders. And deviled eggs? Everyone loves deviled eggs. They’re the first thing to disappear at any gathering. So I grabbed my piping bag, sliced those olives into the creepiest little arachnids I could manage, and threw together what I honestly thought would be a half-decent backup plan.
The potluck started at six. By six-fifteen, my plate was empty. By six-thirty, three people had asked for the recipe. And Karen? She asked me to bring them to her Thanksgiving dinner. The irony isn’t lost on me—the simplest thing on the table stole the show. These spooky Halloween deviled eggs with olive spiders have become my go-to party trick, and I’m pretty sure they’ll become yours too. Maybe you’ve been in that same panic, staring at your fridge wondering what on earth you’re going to bring. Trust me, this is your answer.
Why You’ll Love This Recipe
Let me be straight with you—I’ve tested this recipe about seven times now. The first batch had too much mustard. The second was too runny. But by batch three, I nailed the texture, and I’ve been perfecting it ever since. Here’s why these spider deviled eggs are going to be your new Halloween party MVP:
- Unbelievably Easy: You don’t need any special skills. If you can boil an egg and slice an olive, you’ve got this. Seriously, it’s that simple.
- Made with Pantry Staples: Eggs, mayo, mustard, olives, paprika. That’s it. No weird ingredients, no specialty store runs. You probably have everything right now.
- Perfect for Halloween Parties: These things are creepy-cute in the best way. Kids love them, adults love them, and everyone takes a picture before they eat them. It’s the kind of dish that makes people say, “Wait, how did you do that?”
- Guaranteed Crowd-Pleaser: I’ve brought these to three different Halloween gatherings now, and they vanish every single time. There’s something about deviled eggs that people just can’t resist, and adding the spider element makes them even more fun.
- Make-Ahead Friendly: You can prep these the night before and just add the spiders right before serving. That’s huge when you’re hosting and already stressed about a million other things.
What makes this recipe different from every other deviled egg out there? It’s the texture. I blend the filling until it’s silky smooth—not chunky, not grainy—so it pipes beautifully and feels luxurious on your tongue. And the olive spiders? They’re not just decoration. The briny, salty pop of olive against the creamy, tangy filling is a combination that’ll surprise you. I mean, honestly, I wasn’t expecting it to work that well either, but here we are.
This recipe is the kind that makes you close your eyes after the first bite. It’s comfort food with a spooky twist—familiar enough to be satisfying, creative enough to be memorable. Perfect for impressing guests without breaking a sweat, or turning a simple appetizer into the talk of the party.
What Ingredients You Will Need
This recipe uses simple, everyday ingredients to create something that looks way more complicated than it actually is. I’ve tested a few different combinations, and this version gives you the creamiest, most flavorful filling with the least amount of fuss. Here’s what you’ll need:
For the Deviled Eggs
- 12 large eggs (use older eggs for easier peeling—I learned this the hard way after destroying three eggs in a row)
- 1/3 cup mayonnaise (I prefer Hellmann’s or Duke’s for the right balance of tang and creaminess)
- 1 tablespoon yellow mustard (or Dijon if you want a sharper kick)
- 1 teaspoon white vinegar (this is my secret for that classic deviled egg tang)
- 1/4 teaspoon salt (plus more to taste)
- 1/8 teaspoon black pepper
- 1/4 teaspoon paprika (smoked paprika adds a nice depth, but regular works great too)
- Optional: 1 teaspoon sugar (only if you like a slightly sweeter filling—my grandma always added this, so I do too sometimes)
For the Spider Decorations
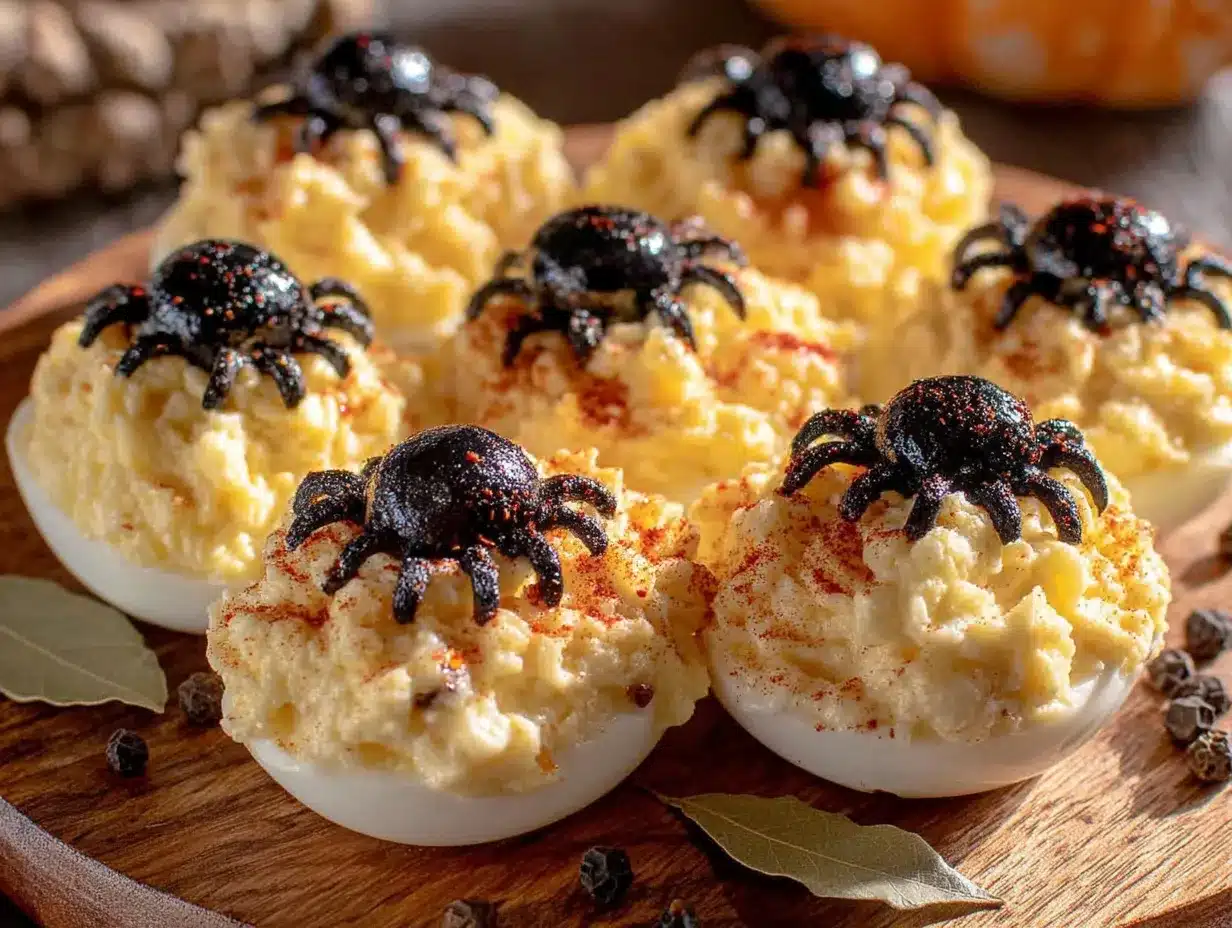
- 1 can (6 ounces) large black olives (look for the jumbo ones—they’re easier to work with and look more spider-like)
- 1/4 cup cream cheese, softened (this helps the spider bodies stick to the eggs)
For Garnish
- Extra paprika for dusting
- Fresh chives or dill (optional, but adds a nice pop of green and freshness)
A few ingredient notes from my kitchen to yours: When it comes to the eggs, I cannot stress this enough—use eggs that have been sitting in your fridge for at least a week. Fresh eggs are a nightmare to peel, and you’ll end up with ugly, pitted whites. I buy my eggs two weeks before Halloween specifically for this recipe. Also, regarding the mayonnaise, please don’t use the Miracle Whip stuff unless you really love that sweet, tangy flavor. It changes the whole character of the filling, and not in a way I personally enjoy.
For the olives, I’ve tried using regular sliced olives, but they just don’t look as convincing. The jumbo whole pitted olives are the way to go because you can cut them into proper spider shapes. If you can find the colossal or super-colossal size, even better. And if someone in your family hates olives? Just make a few without spiders—the deviled eggs themselves are delicious enough to stand alone.
Equipment Needed
You probably have most of this stuff already, but let me walk you through what you’ll need and a few alternatives if you’re missing something:
- Large pot for boiling eggs (I use my 5-quart Dutch oven, but any pot that fits the eggs in a single layer works)
- Mixing bowls (one medium for the filling, one small for the cream cheese)
- Sharp paring knife (this is crucial for cutting the olive spiders—a dull knife will squish them)
- Cutting board
- Piping bag or zip-top bag (I use a disposable piping bag with a star tip for that fancy look, but a zip-top bag with the corner snipped off works perfectly)
- Egg platter or serving dish (something with a bit of a lip so the eggs don’t slide around)
- Slotted spoon for removing eggs from boiling water
- Bowl of ice water for shocking the eggs
If you don’t have a piping bag, don’t sweat it. I’ve used a zip-top bag more times than I can count, and honestly, the results are almost identical. Just fill the bag, squeeze the air out, seal it, and snip about a quarter-inch off the corner. You’ll get a nice, smooth piped filling every time. And if you don’t have a star tip? No problem—just snip the corner straight across for a simple round piped look.
Preparation Method
Alright, let’s get into the nitty-gritty. I’m going to walk you through every step, including all the little tricks I’ve picked up from my many, many attempts at these spooky deviled eggs.
Step 1: Boil the Eggs (20 minutes total)
Place your eggs in a single layer in your pot and cover them with cold water by about an inch. Don’t stack them—they need to cook evenly. Bring the water to a full rolling boil over high heat, then immediately cover the pot, turn off the heat, and let them sit for exactly 12 minutes. While they’re sitting, prepare a bowl of ice water. When the timer goes off, use your slotted spoon to transfer the eggs to the ice bath. Let them chill for at least 5 minutes. This shock stops the cooking and makes peeling way easier.
Step 2: Peel the Eggs (5-10 minutes)
Here’s my foolproof peeling method: Gently tap the egg all over on the counter to crack the shell, then roll it between your palms to loosen it. Start peeling from the wider end—there’s usually an air pocket there that makes it easier to get under the membrane. Run the egg under cold water as you peel to help slide the shell off. If you end up with a few ugly ones, don’t panic. Just save those for your own snack and use the pretty ones for serving.
Step 3: Prepare the Eggs (5 minutes)
Once all your eggs are peeled, slice each one in half lengthwise. Carefully pop out the yolks into your medium mixing bowl. Arrange the white halves on your serving platter, cut side up. I like to put a paper towel under them to catch any moisture, then remove it before serving.
Step 4: Make the Filling (5 minutes)
To the bowl with the yolks, add the mayonnaise, mustard, vinegar, salt, pepper, and paprika. Mash everything together with a fork until it’s relatively smooth, then switch to a whisk or hand mixer for about 30 seconds. You’re looking for a silky, pipeable consistency—no lumps. Taste it and adjust the seasoning. I usually end up adding a pinch more salt and another dash of paprika. If the filling seems too thick, add a tiny splash of vinegar or even pickle juice (trust me on this one).
Step 5: Make the Olive Spiders (10-15 minutes)
This is the fun part. Drain your olives and pat them dry. For each spider, you’ll need one whole olive for the body. Using your sharp paring knife, make two small slits on opposite sides of the olive—these will hold the legs. Then, cut the remaining olives into thin slices for the legs. Each spider needs eight legs, so you’ll need about 2-3 sliced olives per spider. Insert the leg slices into the slits on the body olive. For the eyes, dab two tiny dots of cream cheese onto the front of the body olive. It sounds fiddly, but once you get the hang of it, you can make a spider in about 30 seconds.
Step 6: Fill the Eggs (10 minutes)
Spoon your filling into your piping bag or zip-top bag. Pipe a generous swirl into each egg white half. You want the filling to come up above the edge of the white so it looks nice and full. Don’t skimp here—people eat with their eyes first.
Step 7: Assemble the Spiders (5 minutes)
Gently place one olive spider on top of each filled egg. Press down just slightly so it sticks. The cream cheese eyes should be facing forward. If you want to get extra creative, you can angle the legs so they look like the spider is crawling.
Step 8: Garnish and Serve (2 minutes)
Lightly dust the eggs with paprika using a fine-mesh sieve. If you’re using fresh chives or dill, sprinkle a few over the top for color. Serve immediately, or refrigerate until you’re ready.
Cooking Tips & Techniques
I’ve made these Halloween deviled eggs probably a dozen times now, and let me tell you, I’ve learned a few things the hard way. Here are my best tips to save you from the same mistakes:
Perfect hard-boiled eggs every time: The biggest mistake people make is boiling the eggs too long. That gray-green ring around the yolk? That’s from overcooking. The 12-minute method I shared above gives you perfectly cooked yolks every time—bright yellow, creamy, and no weird sulfur smell. Also, older eggs really do peel better. I know it sounds counterintuitive, but it’s true. The air pocket inside expands as the egg ages, creating a gap between the shell and the white.
Getting the filling texture right: The first time I made these, my filling was way too runny. I’d added too much mayo trying to make it “creamier.” The secret is to mash the yolks thoroughly before adding any wet ingredients. Get them as fine as possible, then add the mayo slowly. You can always add more, but you can’t take it out. If you accidentally make it too thin, mash in another hard-boiled yolk to thicken it up.
Olive spider assembly line: Here’s a time-saving trick I figured out after my third batch: Make all the spider bodies first, then all the legs, then assemble them in an assembly line. It’s way faster than making one complete spider at a time. Also, if the olive legs keep falling out, try cutting the slits a tiny bit deeper and wider. The legs should fit snugly.
Piping without the mess: When you’re filling your piping bag, fold the top half down over your hand like a cuff. This keeps the bag clean and gives you better control. Fill it no more than halfway, then twist the top closed. Practice one swirl on a plate before you start piping onto the eggs—it helps you get the rhythm down.
Timing your prep: If you’re hosting a party, here’s my battle-tested timeline: Boil and peel the eggs the day before. Make the filling and pipe it into the whites the morning of. Store them covered in the fridge. Then, about 30 minutes before guests arrive, add the olive spiders and the paprika dusting. This way, the spiders look fresh and the eggs aren’t sitting out too long.
Variations & Adaptations
One of the best things about this recipe is how easy it is to adapt. Here are a few variations I’ve tried and loved:
Spicy Southwest Version: Add 1/4 teaspoon of cayenne pepper and 1 tablespoon of chopped pickled jalapeños to the filling. Top each spider with a tiny slice of jalapeño for an extra kick. I brought these to a Halloween party last year and they were gone in 10 minutes flat.
Smoky Bacon Version: Crumble three slices of crispy bacon into the filling and swap the regular paprika for smoked paprika. The smoky flavor pairs beautifully with the briny olives. My husband, who claims he doesn’t like deviled eggs, ate six of these in one sitting.
Herb and Lemon Version: Add 1 tablespoon of fresh dill and 1 teaspoon of lemon zest to the filling. Instead of paprika, garnish with fresh dill sprigs. This version feels lighter and brighter—perfect if you’re serving these alongside heavier dishes.
Dairy-Free Adaptation: Use vegan mayonnaise (I like Follow Your Heart’s Vegenaise) and skip the cream cheese for the spider eyes. Instead, use tiny dots of vegan cream cheese or even small pieces of white onion for the eyes. The filling will still be deliciously creamy.
Kid-Friendly Version: If the olive spiders are too creepy for little ones (or if you have picky eaters), make the deviled eggs without the spiders and instead top each one with a small piece of red bell pepper cut into a bat shape. I’ve done this for my niece’s Halloween party and the kids went crazy for them.
Serving & Storage Suggestions
These spooky deviled eggs are best served chilled, straight from the fridge. I like to arrange them on a black platter or a dark-colored serving dish to make the spiders really pop. If you have a Halloween-themed platter, even better. You can also arrange them on a bed of fresh lettuce or kale for a pop of green.
For a Halloween party spread, these pair beautifully with other finger foods like mini sliders, veggie platters, and cheese boards. They also go surprisingly well with a crisp white wine or a light beer—the tangy filling cuts through the richness of other party foods. If you’re serving them as part of a sit-down dinner, place them on the table as guests arrive so they can nibble while you finish cooking.
For storage, place any leftover deviled eggs in an airtight container and refrigerate for up to two days. Fair warning: the olive spiders might get a little soggy after 24 hours, so if you’re planning to have leftovers, store the spiders separately and add them just before serving. I learned this the hard way after a sad batch of limp-legged spiders the morning after a party.
You can also freeze the filling alone for up to a month. Just pipe it into a freezer-safe bag, squeeze out the air, and freeze. When you’re ready to use it, thaw it in the fridge overnight and give it a good stir before piping. The egg whites don’t freeze well, though—they get watery and rubbery—so only freeze the filling.
One more thing: these eggs actually taste better after they’ve sat in the fridge for a few hours. The flavors meld together and the filling sets up nicely. So don’t stress about making them too far in advance—they’ll be even better the next day.
Nutritional Information & Benefits
Here’s the approximate nutritional breakdown for one spider deviled egg (based on the recipe as written):
| Nutrient | Amount Per Serving |
|---|---|
| Calories | 85 |
| Total Fat | 7g |
| Saturated Fat | 2g |
| Cholesterol | 95mg |
| Sodium | 180mg |
| Total Carbohydrates | 1g |
| Protein | 6g |
Eggs are a fantastic source of high-quality protein, and they’re packed with essential nutrients like vitamin B12, riboflavin, and selenium. The yolks contain choline, which is important for brain health. And olives? They’re rich in healthy monounsaturated fats and antioxidants. So while these are definitely a treat, they’re not completely empty calories.
For those with dietary restrictions: This recipe is naturally gluten-free and low-carb. If you’re watching your sodium, you can use low-sodium olives and reduce the added salt in the filling. The eggs themselves are keto-friendly, and with the olive spiders, they make a great appetizer for low-carb diets. Just be mindful of the mayonnaise—some brands have added sugars.
Conclusion
Look, I’m not going to pretend these spooky Halloween deviled eggs with olive spiders are going to win you a Michelin star. But they will win you something way better at a party: the “who brought these?” award. Every single time I’ve made them, someone has asked for the recipe. And the best part? They’re so simple that you can actually enjoy the party instead of stressing in the kitchen.
I love this recipe because it proves that you don’t need fancy ingredients or complicated techniques to impress people. You just need a little creativity and the willingness to try something a little different. These eggs are proof that sometimes the simplest ideas are the most memorable.
So go ahead—give them a try. Make them for your Halloween party, your office potluck, or even just for a spooky movie night at home. And when everyone asks how you made them, just smile and say it was nothing. Because honestly? It kind of is. But they don’t need to know that.
I’d love to hear how yours turn out! Drop a comment below and let me know if your guests screamed (in a good way) or if you came up with your own creepy twist. And if you’re looking for more Halloween party ideas, check out our Halloween appetizer recipes for more spooky inspiration. Happy Halloween, and happy cooking!
Frequently Asked Questions
Can I make these deviled eggs a day ahead?
Absolutely! In fact, I recommend it. Boil, peel, fill, and pipe the eggs up to 24 hours in advance. Store them covered in the fridge. Just add the olive spiders and the paprika dusting about 30 minutes before serving so the spiders stay fresh and the paprika doesn’t get soggy.
How do I keep the olive spider legs from falling off?
Make sure you’re cutting the slits in the body olive deep enough—about halfway through the olive. The legs should fit snugly. If they’re still falling out, try cutting the leg slices a tiny bit thicker so they have more surface area to grip. A little dab of cream cheese inside the slit can also help hold them in place.
Can I use something other than olives for the spiders?
Sure! If olives aren’t your thing, you can use large pitted dates (they look like dark, shiny spiders), or even small meatballs for a heartier version. For a less creepy but still festive option, try using sliced cherry tomatoes with basil leaves as legs. Get creative—that’s half the fun.
How long do these deviled eggs last at a party?
For food safety reasons, deviled eggs shouldn’t sit out at room temperature for more than two hours. If you’re hosting an outdoor party or it’s a warm day, keep them on a tray set over a bowl of ice to keep them chilled. I usually put out a small batch at a time and refresh the platter from the fridge as needed.
Can I make these without a piping bag?
Definitely. A zip-top bag with the corner snipped off works perfectly. Or, if you don’t have either, you can simply spoon the filling into the egg whites and smooth the top with a small spatula. It won’t look as fancy, but it’ll taste just as good. I’ve done it both ways, and honestly, nobody has ever complained about the spooned version.
Pin This Recipe!
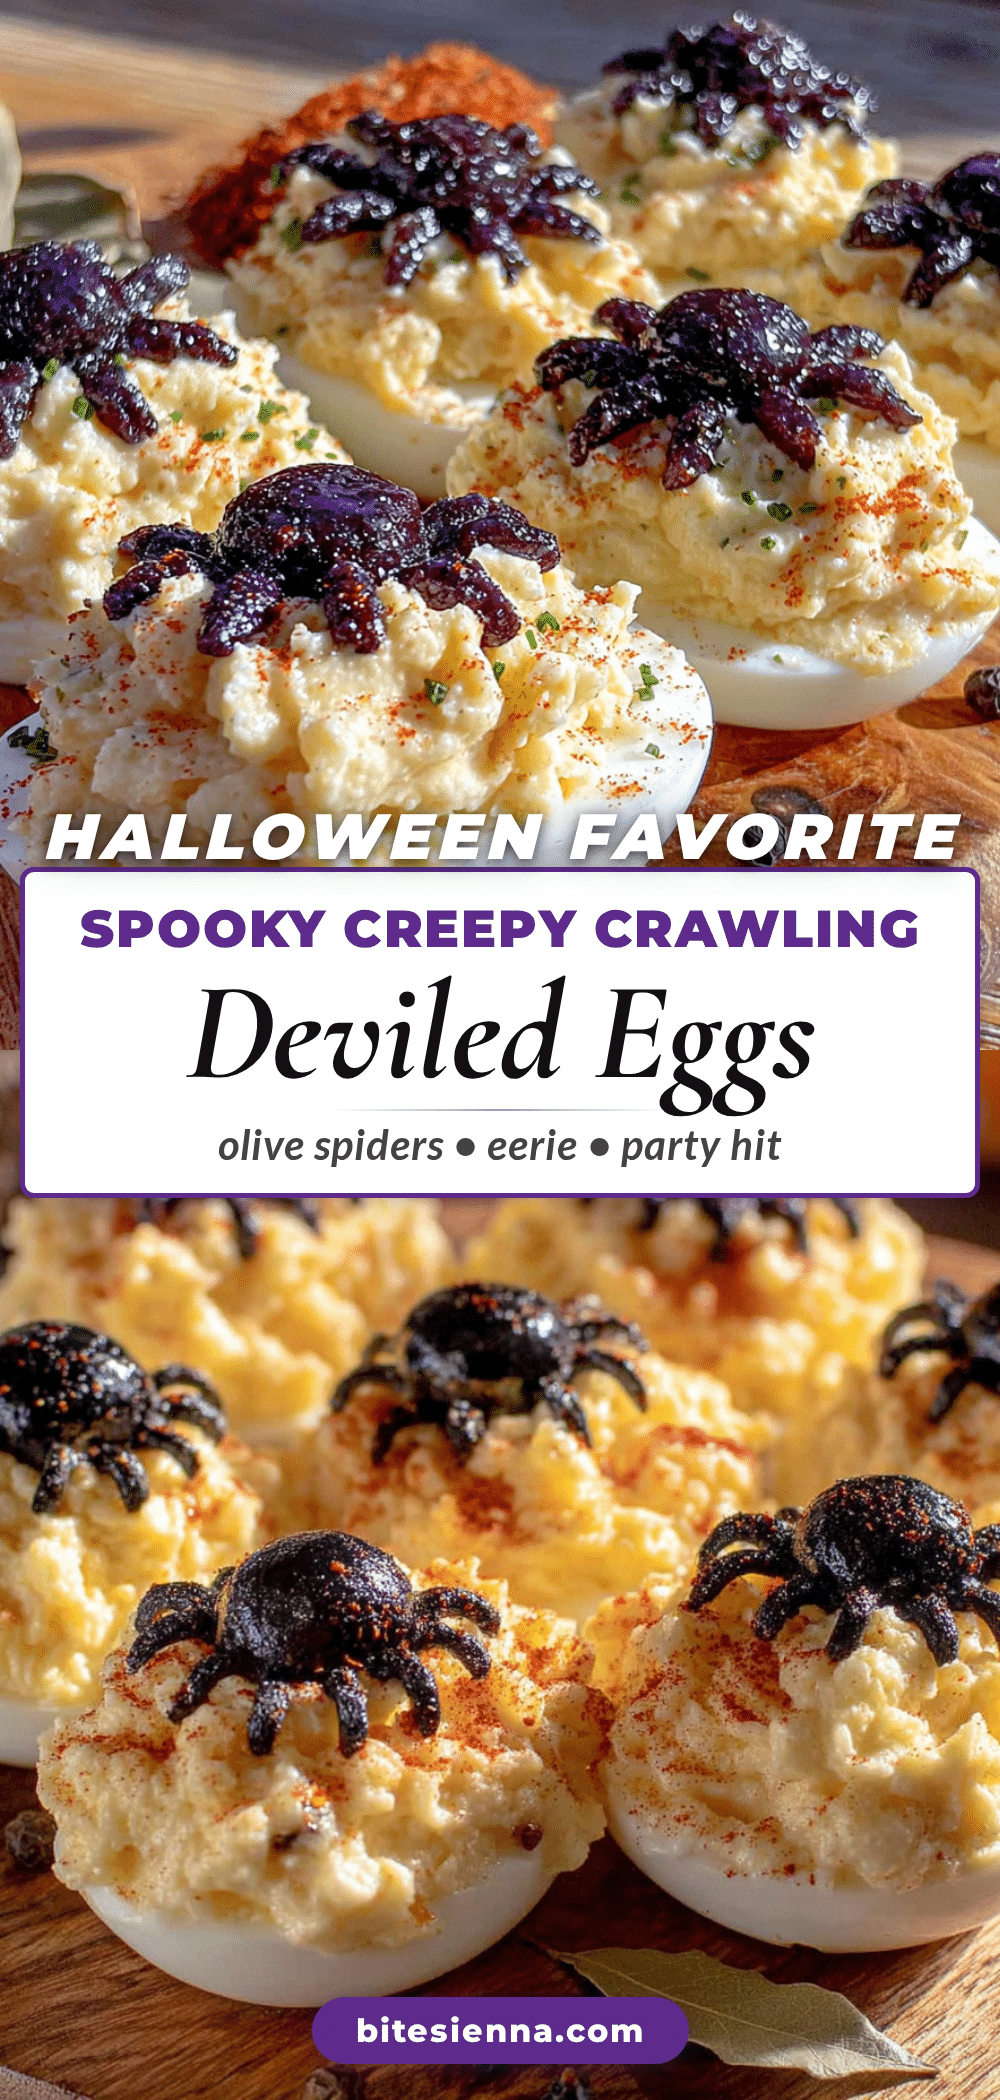
Easy Halloween Deviled Eggs: Spooky Spider Recipe
These spooky Halloween deviled eggs with olive spiders are a simple yet impressive appetizer that will steal the show at any party. Made with pantry staples, they’re creamy, tangy, and topped with creepy-cute olive spiders.
- Prep Time: 30 minutes
- Cook Time: 20 minutes
- Total Time: 50 minutes
- Yield: 24 servings 1x
- Category: Appetizer
- Cuisine: American
Ingredients
- 12 large eggs
- 1/3 cup mayonnaise
- 1 tablespoon yellow mustard
- 1 teaspoon white vinegar
- 1/4 teaspoon salt
- 1/8 teaspoon black pepper
- 1/4 teaspoon paprika
- 1 teaspoon sugar (optional)
- 1 can (6 ounces) large black olives
- 1/4 cup cream cheese, softened
- Extra paprika for dusting
- Fresh chives or dill (optional)
Instructions
- Place eggs in a single layer in a pot and cover with cold water by about an inch. Bring to a full rolling boil over high heat, then cover, turn off heat, and let sit for exactly 12 minutes.
- Prepare a bowl of ice water. Transfer eggs to ice bath and let chill for at least 5 minutes.
- Peel eggs: tap all over to crack shell, roll between palms, and peel starting from the wider end. Rinse under cold water as needed.
- Slice each egg in half lengthwise. Pop out yolks into a medium bowl. Arrange whites on a serving platter, cut side up.
- To the yolks, add mayonnaise, mustard, vinegar, salt, pepper, and paprika. Mash with a fork until smooth, then whisk or use a hand mixer for 30 seconds until silky. Adjust seasoning to taste.
- Drain olives and pat dry. For each spider, use one whole olive for the body. Make two small slits on opposite sides for legs. Cut remaining olives into thin slices for legs (8 per spider). Insert leg slices into slits. Dab two tiny dots of cream cheese on the front for eyes.
- Spoon filling into a piping bag or zip-top bag with corner snipped. Pipe a generous swirl into each egg white half.
- Gently place one olive spider on each filled egg, pressing slightly to stick. Dust with paprika using a fine-mesh sieve. Garnish with chives or dill if desired. Serve immediately or refrigerate.
Notes
Use older eggs for easier peeling. For make-ahead, boil and fill eggs up to 24 hours in advance; add spiders and paprika just before serving. If filling is too runny, mash in an extra hard-boiled yolk. Store leftovers in an airtight container for up to 2 days; spiders may get soggy after 24 hours.
Nutrition
- Serving Size: 1 spider deviled egg
- Calories: 85
- Sodium: 180
- Fat: 7
- Saturated Fat: 2
- Carbohydrates: 1
- Protein: 6
Keywords: Halloween deviled eggs, spider deviled eggs, spooky appetizer, easy Halloween recipe, olive spiders


