Jenny wasn’t trying to impress anyone. I’d stopped by her place to pick up a book I’d lent her months ago—one of those awkward errands where you’re not sure if they even remember you loaned it to them—and the smell of roasted garlic hit me before I even got through the door. It was late October, and her kids were running around in half-assembled costumes, and there she was, standing over a cutting board, completely unfazed by the chaos around her. She was arranging black olives and cherry tomatoes on a big round platter like it was the most normal thing in the world. “Oh, this?” she said when I asked, barely looking up from her work. “It’s just something for the school party tomorrow.” Let me tell you, it was anything but “just something.”
The platter had this incredible pattern—a web made entirely of vegetables, with a little spider in the corner crafted from an olive and some chives. I mean, I’d seen cute veggie platters before, but this one had actual personality. It was creepy in that perfect Halloween way, but also genuinely beautiful. And the best part? She’d thrown it together in maybe fifteen minutes while simultaneously helping her daughter glue a tail onto a cat costume. Honestly, I stood there in her kitchen for way longer than I should have, just watching her work. She’d dip a pita chip into hummus, arrange three more carrot sticks, and somehow the whole thing just came together like magic.
I asked for the recipe, and she laughed. “There’s no recipe,” she said. “It’s just vegetables on a plate.” But you know, that’s exactly why it stuck with me. Because sometimes the best ideas aren’t complicated at all—they’re just clever. And this one was so clever that I’ve been making it every Halloween since. Maybe you’ve been there, scrolling through Pinterest looking for something festive that won’t take all afternoon. Well, this is it. This is the one.
Why You’ll Love This Recipe
Look, I’ve tested a lot of Halloween appetizers over the years. Some are too complicated, some look great but taste like cardboard, and some just don’t hold up at a party. This Spooky Veggie Spider Web Tray is different. It’s the kind of recipe that makes you look like a Pinterest superstar without actually having to try that hard. Here’s why it works:
- Quick & Easy : Comes together in under 20 minutes, perfect for last-minute Halloween parties or school events. No cooking required unless you want to roast some veggies ahead of time.
- Simple Ingredients : Everything you need is probably already in your fridge. We’re talking basic veggies, some dip, and a few olives. No specialty stores required.
- Perfect for Halloween : This is the kind of dish that gets photographed before anyone eats it. The spider web pattern is genuinely spooky, but in a fun, kid-friendly way.
- Crowd-Pleaser : Even picky eaters will grab these veggies because they’re arranged in such a fun way. I’ve watched kids who “don’t eat vegetables” reach for a spider leg without thinking twice.
- Unbelievably Delicious : The combination of crunchy fresh veggies with creamy dip is just perfect. And when you add the roasted garlic hummus I recommend, it’s next-level good.
What makes this recipe different from all the other veggie platters out there? It’s the presentation, honestly. The spider web pattern isn’t just cute—it’s actually functional. The spokes of the web act as little dividers for different veggies, so everything stays organized and looks intentional. Plus, the spider in the center is a conversation starter. I’ve had guests argue over who gets to eat it. And the best part? You’re feeding people actual vegetables at a holiday known for candy. That’s a win in my book.
This recipe isn’t just good—it’s the kind that makes you close your eyes after the first bite. It’s comfort food reimagined: healthier, faster, but with the same soul-soothing satisfaction. Perfect for impressing guests without stress, or turning a simple snack into something memorable.
What Ingredients You Will Need
This recipe uses simple, wholesome ingredients to deliver that perfect Halloween vibe without the fuss. Most of these are pantry staples or standard fridge items, which is exactly what you want when you’re short on time. Let’s break down what you’ll need:
For the Spider Web Base
- 1 large round platter or pizza pan (12-14 inches wide) — This is your canvas. A white platter shows off the pattern best, but any light-colored surface works.
- 2 cups of your favorite dip — I recommend roasted garlic hummus (I’m partial to the Sabra brand for its creaminess) or a classic ranch dip. The dip creates the “web” effect, so choose something with good color contrast.
- Black food coloring (optional) — If you want to get really spooky, you can tint your dip with a drop of black food coloring. Just a tiny bit gives it a grayish-purple hue that looks amazing.
For the Veggie Web Pattern
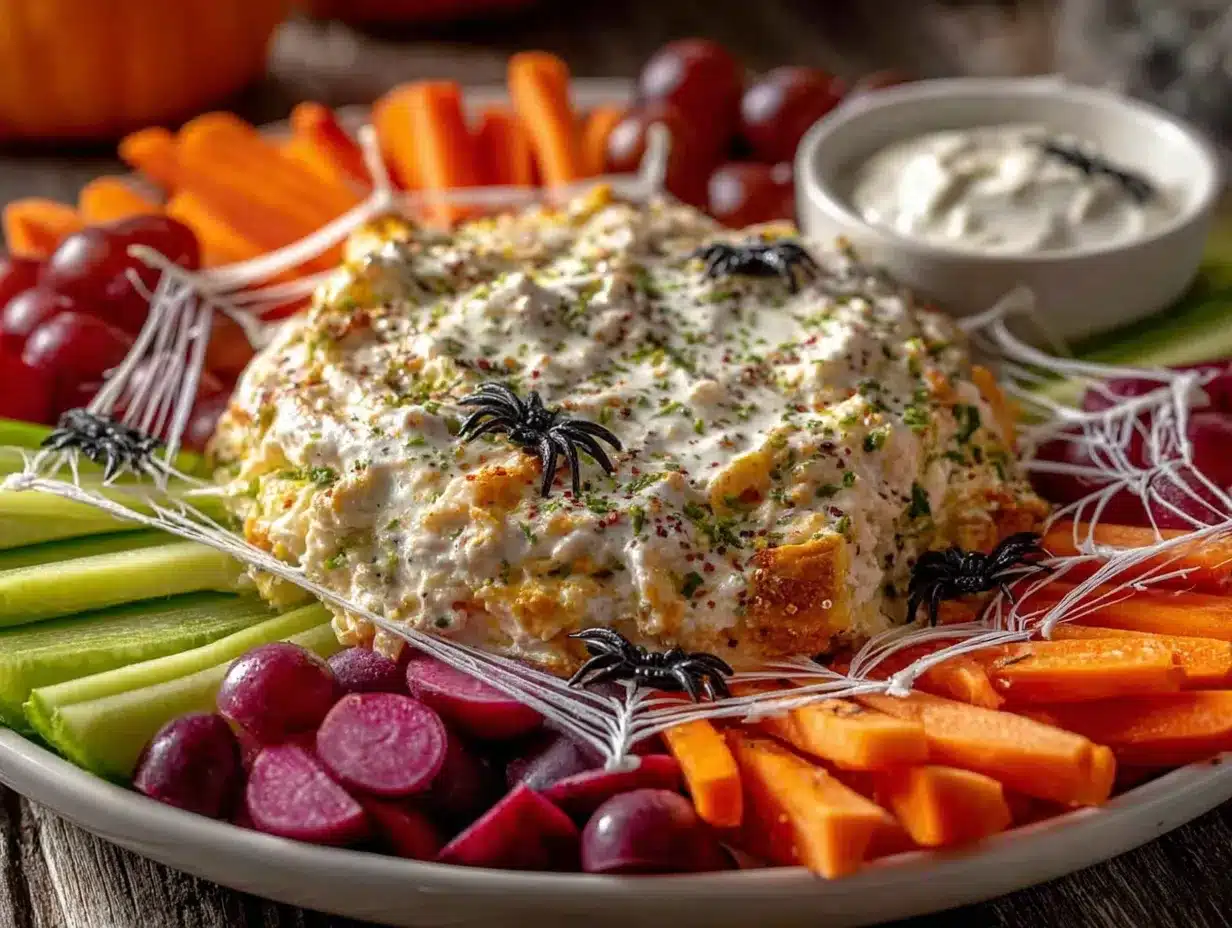
- 1 large cucumber — Cut into thin rounds. These form the outer ring of the web. English cucumbers work best because they’re less watery.
- 1 red bell pepper — Sliced into thin strips. The bright red adds pop against the green veggies and creates the “spokes” of the web.
- 1 yellow bell pepper — Also sliced into thin strips. The yellow adds warmth and variety.
- 2 cups broccoli florets — Small, bite-sized pieces. These fill in the spaces between the web spokes nicely.
- 1 cup cherry tomatoes — Halved or left whole, depending on size. They look like little red jewels scattered around the web.
- 1 cup baby carrots — You can use whole baby carrots or slice regular carrots into thin sticks. I prefer the thin sticks for easier dipping.
- 1 cup snap peas or snow peas — These add a nice crunch and a different shape to the platter.
For the Spider
- 1 large black olive — This becomes the spider’s body. Look for jumbo olives if you can find them.
- 1 small black olive — This is the spider’s head. A smaller olive creates better proportions.
- 8 chives or thin green onion strips — These are the spider legs. You want them long and flexible. If chives aren’t available, use thin strips of bell pepper or even pretzel sticks.
- 2 small dots of cream cheese or hummus — These act as “glue” to attach the legs and head. A tiny dab is all you need.
Substitution Notes
If you’re feeding a crowd with dietary restrictions, here are some easy swaps. Use dairy-free ranch or a white bean dip for a vegan option. Swap broccoli with cauliflower if that’s what you have on hand. For a gluten-free version, just check your dip ingredients—most hummus is naturally gluten-free. In summer, feel free to swap in fresh zucchini rounds or grilled asparagus. The beauty of this recipe is its flexibility. I’ve even made it with leftover crudités from a party platter and it still looked amazing.
Equipment Needed
You don’t need much for this recipe, which is part of its charm. Here’s what you’ll need to pull it off:
- Large round platter or pizza pan — This is non-negotiable. The round shape is what makes the spider web pattern work. I use a white ceramic platter I found at a thrift store for three dollars. If you don’t have a round platter, a large cutting board or even a clean pizza pan works in a pinch.
- Sharp knife and cutting board — You’ll be doing a fair amount of slicing. A sharp knife makes clean cuts that look professional. I learned this the hard way after mangling a bell pepper with a dull blade.
- Small bowl for dip — You’ll spread the dip in the center of the platter, but having a small bowl nearby helps if you want to serve extra dip on the side.
- Toothpicks or small skewers — These are optional but helpful for arranging the spider legs. You can use them to position the chives exactly where you want them.
- Piping bag or zip-top bag — If you want to get fancy with the web pattern in the dip, a piping bag (or a zip-top bag with a tiny corner snipped off) lets you create thin, precise lines. But honestly, a spoon works just fine.
Budget-friendly tip: Don’t go out and buy specialty equipment for this. I’ve made this platter on a paper plate before (not ideal, but it worked in a pinch). The veggies are the star, not the platter.
Preparation Method
Alright, let’s get to the fun part. Here’s how to build your spooky veggie spider web tray, step by step. Take your time with the arrangement—it’s the most important part.
- Prep your veggies (5 minutes) — Wash all your vegetables thoroughly. Slice the cucumber into thin rounds, about ¼ inch thick. Cut the bell peppers into thin strips, about 2 inches long. Break the broccoli into small florets. Halve the cherry tomatoes if they’re large. If you’re using whole baby carrots, leave them as is; if using regular carrots, cut them into thin sticks about 3 inches long. Set everything aside in separate bowls or piles. Having everything prepped before you start arranging makes the process so much smoother.
- Prepare the dip (2 minutes) — If you’re using plain hummus or ranch, give it a good stir. If you want to tint it for a spookier look, add one tiny drop of black food coloring and stir thoroughly. The dip will turn a grayish-purple color that looks fantastic against the bright veggies. Taste it to make sure the coloring hasn’t affected the flavor (it shouldn’t, but better safe than sorry).
- Create the web base (3 minutes) — Spoon the dip into the center of your platter. Using the back of a spoon, spread it into a rough circle about 6 inches in diameter. Don’t worry about making it perfect—the veggies will cover the edges. The dip should be about ¼ inch thick. If you’re using a piping bag, you can pipe concentric circles and then drag a knife through them to create a spider web pattern. But honestly, a simple spread looks just as good once the veggies are in place.
- Build the outer ring (3 minutes) — Arrange the cucumber rounds in a circle around the dip, about 1 inch away from the edge of the dip. Overlap them slightly so they form a solid ring. This ring acts as the outer edge of your spider web. If you want a more dramatic effect, you can use two rows of cucumber rounds, slightly offset.
- Create the web spokes (4 minutes) — This is where the magic happens. Take the red and yellow bell pepper strips and arrange them like spokes of a wheel, radiating outward from the dip to the cucumber ring. Space them evenly—about 8 to 10 spokes total. Alternate colors if you want, or group them for a more dramatic effect. The spokes should touch the dip in the center and extend to the cucumber ring on the outside.
- Fill in the sections (3 minutes) — Now you have a platter that looks like a wheel with spokes. The spaces between the spokes are sections that need filling. In each section, arrange a different veggie. I like to put broccoli in one section, cherry tomatoes in the next, carrots in the next, and snap peas in the next. Repeat this pattern all the way around. The variety of colors and shapes makes the platter look abundant and beautiful.
- Build the spider (3 minutes) — This is the finishing touch. Take the large black olive and place it on the dip in the center of the platter. Take the small black olive and attach it to the front of the large olive using a tiny dab of cream cheese or hummus as glue. This creates the spider’s head and body. Now, take the 8 chives and arrange them as legs—four on each side. Use tiny dabs of cream cheese to hold them in place against the dip. Position the legs so they look like the spider is crawling across the web. If the chives are too long, trim them to size.
- Final touches (1 minute) — Step back and look at your creation. Adjust any veggies that look out of place. Make sure the spider legs are clearly visible. If you have extra veggies, you can scatter a few around the outer edge of the platter for a more abundant look. And that’s it—you’re done!
Sensory cues: At step 5, your platter should look like a colorful sunburst. At step 6, you should see distinct sections of different veggies, like slices of a pie. At step 7, the spider should look like it’s really crawling—the legs should curve slightly, not be straight lines.
Pro tip: If you’re making this ahead of time, don’t assemble the spider until just before serving. The chive legs can wilt if they sit too long. Prep everything else and add the spider at the last minute.
Cooking Tips & Techniques
After making this platter more times than I can count (and messing it up plenty along the way), I’ve picked up a few tricks that make a real difference. Here’s what I’ve learned:
Keep your veggies dry. This is probably the most important tip. Wet veggies make the dip watery and slide around on the platter. After washing your veggies, pat them dry with a clean kitchen towel or paper towels. I once skipped this step and ended up with a sad, soggy platter that looked more like a swamp than a spider web. Learn from my mistake.
Cut uniform pieces. The key to a professional-looking platter is consistency. Try to make your cucumber rounds the same thickness, your pepper strips the same length, and your broccoli florets roughly the same size. It doesn’t have to be perfect—this isn’t a cooking competition—but the more uniform your pieces, the better the pattern will look. I use a mandoline slicer for the cucumbers when I’m feeling fancy, but a sharp knife works just fine.
Use a template if you’re nervous. If the idea of arranging spokes stresses you out, here’s a trick: trace a circle on a piece of parchment paper the same size as your platter, then draw the spokes on the paper. Place the paper under your platter (if it’s clear) or use it as a guide while you arrange. I did this the first few times and it helped a ton.
Don’t overcrowd the platter. It’s tempting to pile on as many veggies as possible, but remember that the pattern is the point. Leave a little space between the veggies so the web design is visible. You can always serve extra veggies in a bowl on the side.
Make the spider the star. The spider is what makes this platter special, so give it some attention. Position it slightly off-center for a more dynamic look. Curve the legs so they look like the spider is mid-crawl. And for goodness’ sake, don’t skimp on the chives—eight legs make a spider, not six.
Timing is everything. This platter looks best within the first hour of assembly. After that, the veggies start to wilt slightly and the dip can get a little crusty around the edges. If you’re serving it at a party, aim to assemble it no more than an hour before guests arrive. The spider can be added right before serving for maximum impact.
Variations & Adaptations
One of the best things about this recipe is how easy it is to adapt. Here are some variations I’ve tried and loved:
Spooky Halloween Twist: For an extra-creepy version, swap the hummus for a black bean dip. The dark color looks amazing against the bright veggies, and the flavor pairs beautifully with the peppers and cucumbers. You can also add edible “eyes” (small mozzarella balls with black olive pupils) scattered around the web for a truly unsettling effect.
Low-Carb/Keto Version: If you’re watching your carbs, this platter is already pretty friendly. Just swap the carrots for more cucumber or bell pepper slices. Use a high-fat dip like a creamy ranch made with full-fat sour cream or a guacamole. The veggies are naturally low-carb, so you’re good to go.
Kid-Friendly Variation: My niece is notoriously picky, but even she couldn’t resist this platter. For kids, use milder veggies like cucumber, bell peppers, and cherry tomatoes. Swap the hummus for a creamy ranch or a yogurt-based dip. And let them help build the spider—they love getting involved. I’ve found that kids are way more likely to eat veggies they helped arrange.
Seasonal Adaptations: In the fall, swap in roasted pumpkin seeds or pomegranate seeds for a festive touch. In summer, use grilled zucchini slices and fresh corn kernels. In spring, add blanched asparagus spears and sugar snap peas. The spider web pattern works with almost any vegetable combination, so feel free to get creative with what’s in season.
Protein-Packed Version: Turn this into a more substantial appetizer by adding rolled-up slices of turkey or ham, cubes of cheese, or even hard-boiled egg halves. The protein additions make it more filling and turn it into a meal-worthy platter. I’ve done this for Super Bowl parties and it was a hit.
Serving & Storage Suggestions
This platter is best served at room temperature, which makes it perfect for parties. The flavors of the veggies and dip really shine when they’re not ice-cold straight from the fridge. If you’ve prepped everything ahead of time, take the assembled platter out of the fridge about 15 minutes before serving to let it come to room temperature.
What to serve alongside: This platter pairs beautifully with other Halloween-themed snacks. I like to serve it alongside a bowl of spicy pumpkin soup for a cozy fall spread. You can also add some crispy garlic chicken wings for a more substantial offering. For drinks, a crisp apple cider or a pumpkin spice latte complements the veggie flavors perfectly.
Storage tips: If you have leftovers (which is rare in my house, but it happens), store the veggies and dip separately. The veggies can be kept in an airtight container in the fridge for up to 3 days. The dip should be covered and refrigerated separately. Don’t try to store the assembled platter—the veggies will get soggy and the dip will dry out.
Reheating: This is a cold appetizer, so there’s no reheating needed. If you’ve used roasted veggies (like roasted red peppers), they’re fine at room temperature. Just let everything come to room temperature before serving for the best flavor.
How flavors develop: Honestly, this platter tastes best the day it’s made. The veggies are at their crispiest and the dip is at its freshest. If you’re prepping ahead, slice the veggies up to a day in advance and store them in separate bags in the fridge. Assemble the platter no more than a few hours before serving for the best results.
Nutritional Information & Benefits
Let’s be real—this is a veggie platter, so it’s pretty healthy. But here’s a rough breakdown per serving (assuming 8 servings):
| Nutrient | Amount per Serving |
|---|---|
| Calories | 120-150 |
| Total Fat | 5-8g |
| Saturated Fat | 1-2g |
| Cholesterol | 0mg |
| Sodium | 200-300mg |
| Total Carbohydrates | 15-20g |
| Dietary Fiber | 4-6g |
| Sugars | 5-8g |
| Protein | 3-5g |
The exact numbers depend on your dip choice and veggie selection. Hummus adds healthy fats and protein, while ranch adds more calories from dairy. Either way, this is a nutrient-dense appetizer that’s packed with vitamins A, C, and K from the colorful veggies.
Health highlights: Bell peppers are loaded with vitamin C (more than oranges, actually). Broccoli is a fiber powerhouse. Cucumbers are hydrating and low in calories. And olives provide healthy monounsaturated fats. This platter is naturally gluten-free, vegetarian, and can easily be made vegan with the right dip choice.
Allergen note: If you’re using hummus, it contains sesame (tahini). If that’s a concern, swap for a bean-free dip or a simple olive oil and herb mixture. The veggies themselves are allergen-friendly.
Conclusion
So there you have it—a spooky veggie spider web tray that’s equal parts fun and delicious. Honestly, this recipe has become a Halloween tradition in my house, and I hope it becomes one in yours too. It’s the kind of dish that makes people smile, that gets kids excited about eating their vegetables, and that makes you look like you put in way more effort than you actually did. And isn’t that the best kind of recipe?
I’d love to hear how yours turns out. Did you add any creative touches? Did your kids help build the spider? Did anyone actually eat the spider? (In my house, it’s always a fight.) Drop a comment below and let me know—I genuinely read every single one. And if you’re looking for more Halloween inspiration, check out our collection of Halloween party recipes for the full spooky spread. Happy Halloween, and happy eating!
Frequently Asked Questions
Can I make this platter ahead of time?
Yes, but with one caveat. You can slice all the veggies and prepare the dip up to 24 hours in advance. Store everything separately in the fridge. Assemble the platter no more than 2 hours before serving, and add the spider right before you bring it out. The chive legs can wilt quickly, so the spider is best added at the last minute.
What if I don’t have a round platter?
No problem! You can use a large cutting board, a pizza pan, or even a clean baking sheet. The round shape is ideal for the spider web pattern, but you can adapt it to any shape. Just arrange the veggies in a circular pattern in the center of whatever surface you’re using. A white or light-colored surface works best to show off the pattern.
Can I use different veggies?
Absolutely! This recipe is incredibly flexible. Swap in any veggies you have on hand—cauliflower, zucchini, radishes, jicama, or even blanched green beans all work great. Just aim for a variety of colors and shapes to keep the platter visually interesting. The key is to cut everything into uniform sizes so the pattern stays clean.
How do I keep the veggies from sliding around?
The dip in the center acts as an anchor for the veggies. For the outer ring, a thin layer of dip or cream cheese underneath the cucumber rounds can help hold them in place. If your platter is slippery, try spreading a very thin layer of dip across the entire surface before arranging the veggies. This creates a “glue” that keeps everything in place.
Is this recipe kid-friendly?
Yes, and that’s one of the best things about it! Kids love helping to arrange the veggies and build the spider. The fun presentation makes vegetables more appealing to picky eaters. If you’re serving it at a kids’ party, consider using milder dips like ranch or a cream cheese-based spread, and include familiar veggies like cucumber and cherry tomatoes that most kids already enjoy.
Pin This Recipe!
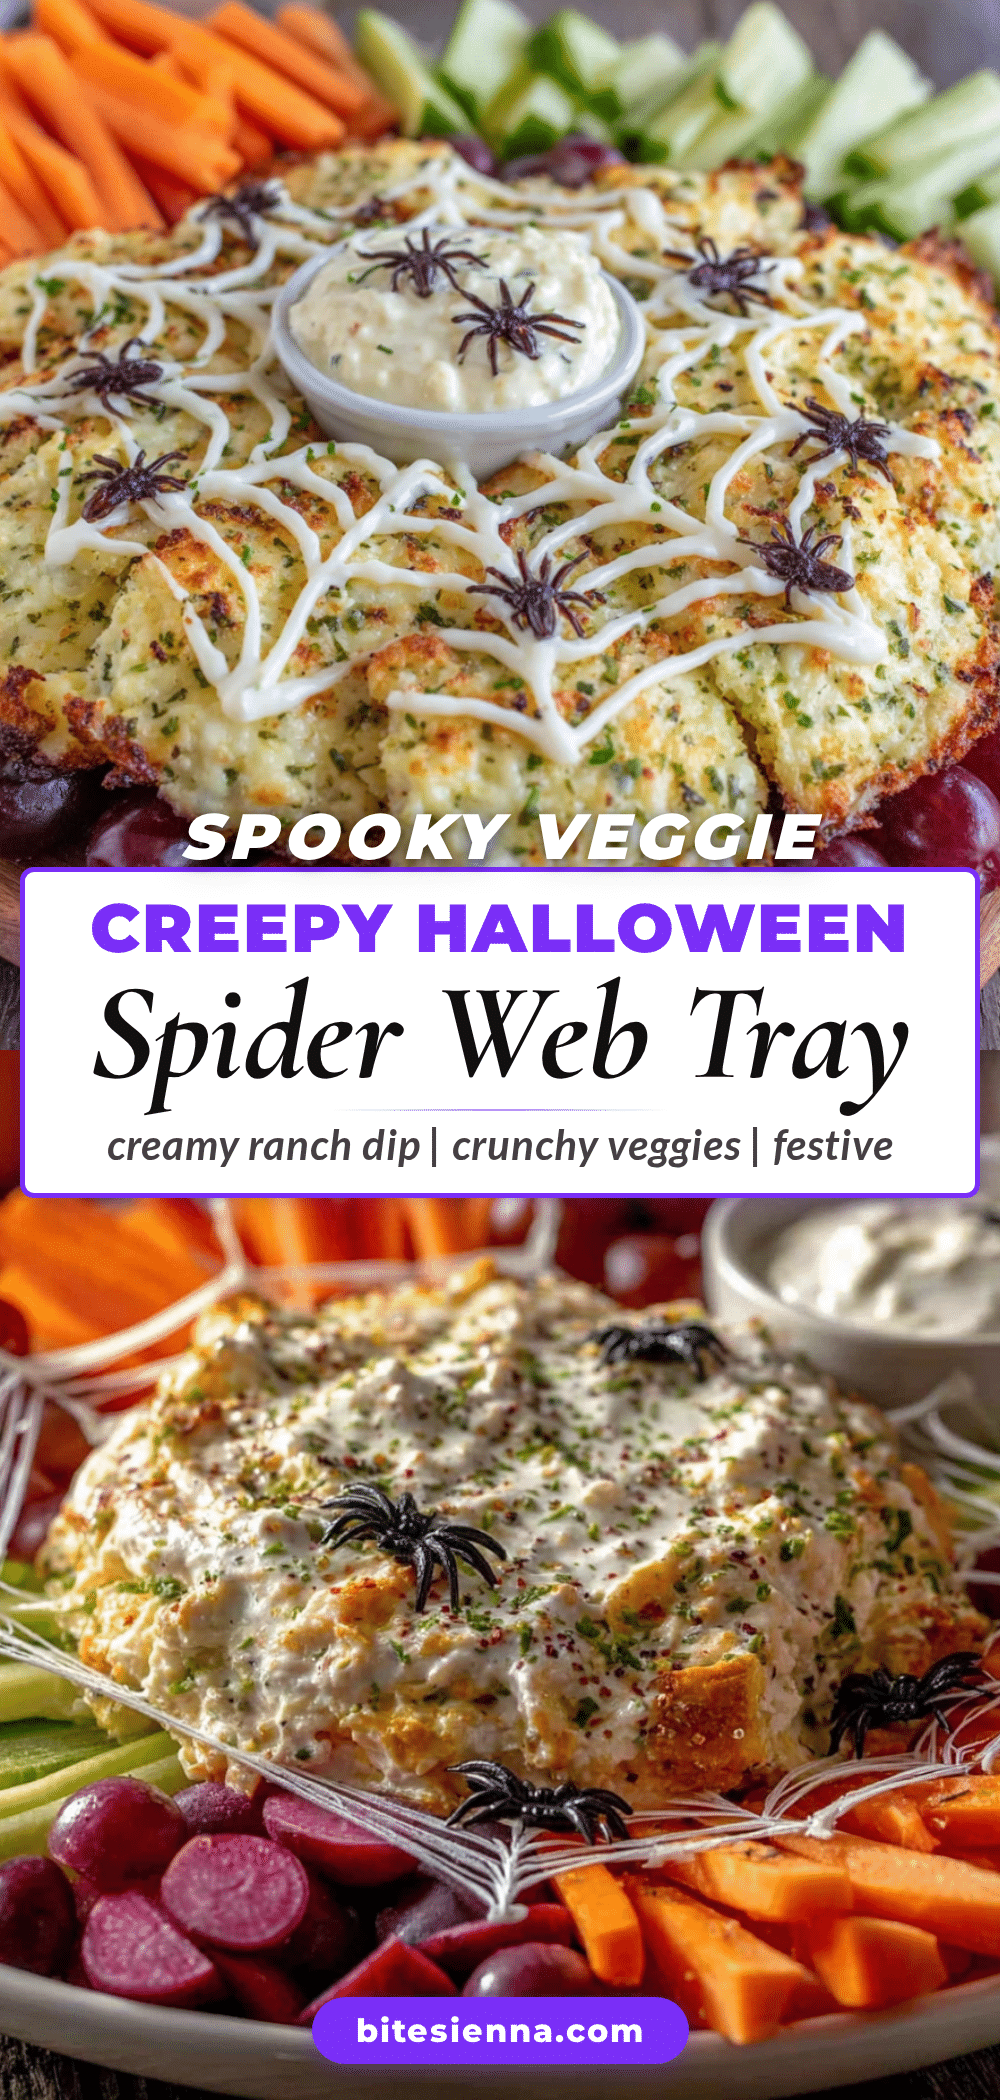
Spooky Veggie Spider Web Tray – Easy Halloween Appetizer
A quick and easy Halloween appetizer that looks like a spider web, made with fresh vegetables and dip. Perfect for parties and school events, this platter comes together in under 20 minutes and is a crowd-pleaser.
- Prep Time: 15 minutes
- Cook Time: 0 minutes
- Total Time: 15 minutes
- Yield: 8 servings 1x
- Category: Appetizer
- Cuisine: American
Ingredients
- 1 large round platter or pizza pan (12–14 inches wide)
- 2 cups roasted garlic hummus (or ranch dip)
- Black food coloring (optional)
- 1 large cucumber, cut into thin rounds
- 1 red bell pepper, sliced into thin strips
- 1 yellow bell pepper, sliced into thin strips
- 2 cups broccoli florets
- 1 cup cherry tomatoes, halved or whole
- 1 cup baby carrots (or regular carrots cut into thin sticks)
- 1 cup snap peas or snow peas
- 1 large black olive
- 1 small black olive
- 8 chives or thin green onion strips
- 2 small dots cream cheese or hummus (for assembly)
Instructions
- Prep your veggies: Wash all vegetables thoroughly. Slice cucumber into thin rounds (about ¼ inch thick). Cut bell peppers into thin strips (about 2 inches long). Break broccoli into small florets. Halve cherry tomatoes if large. If using whole baby carrots, leave as is; if using regular carrots, cut into thin sticks about 3 inches long. Set aside in separate bowls.
- Prepare the dip: Stir the hummus or ranch. If desired, add one tiny drop of black food coloring and stir until the dip turns a grayish-purple color. Taste to ensure flavor is unaffected.
- Create the web base: Spoon the dip into the center of the platter. Using the back of a spoon, spread it into a rough circle about 6 inches in diameter and ¼ inch thick.
- Build the outer ring: Arrange cucumber rounds in a circle around the dip, about 1 inch away from the edge of the dip. Overlap them slightly to form a solid ring.
- Create the web spokes: Take red and yellow bell pepper strips and arrange them like spokes of a wheel, radiating outward from the dip to the cucumber ring. Space them evenly—about 8 to 10 spokes total. Alternate colors if desired.
- Fill in the sections: In each section between the spokes, arrange a different veggie (broccoli, cherry tomatoes, carrots, snap peas). Repeat the pattern all the way around.
- Build the spider: Place the large black olive on the dip in the center of the platter. Attach the small black olive to the front of the large olive using a tiny dab of cream cheese or hummus as glue. Take 8 chives and arrange them as legs—four on each side—using tiny dabs of cream cheese to hold them in place. Position legs so the spider looks like it is crawling.
- Final touches: Step back and adjust any veggies that look out of place. Ensure spider legs are clearly visible. If desired, scatter extra veggies around the outer edge for a more abundant look.
Notes
Keep veggies dry to prevent soggy platter. Cut uniform pieces for a professional look. Use a template if nervous about arranging spokes. Don’t overcrowd the platter; leave space for the web design. Make the spider the star—position it slightly off-center and curve the legs. Assemble no more than 1 hour before serving; add spider at the last minute to prevent wilting chives.
Nutrition
- Serving Size: 1 serving (approxima
- Calories: 135
- Sugar: 6.5
- Sodium: 250
- Fat: 6.5
- Saturated Fat: 1.5
- Carbohydrates: 17.5
- Fiber: 5
- Protein: 4
Keywords: Halloween appetizer, veggie platter, spider web, easy, party snack, healthy, vegetarian


