There used to be this tiny wine bar tucked behind a bookstore in my neighborhood, The Cork & Page, that made the most perfect little snack boards. I’m talking about those beautiful, single-serving wooden plates with a perfectly curated selection of cheese, meat, and little bites that felt like a whole meal and a work of art at the same time. When they closed their doors two summers ago, I was genuinely heartbroken. Honestly, I mourned those little boards for months. After twelve attempts — twelve! — involving some very sad, soggy crackers and one disastrous attempt at pickling my own onions, I finally got it. This recipe for Light & Easy Individual Charcuterie Cups for Friendsgiving is my love letter to that little wine bar. It’s the exact feeling of that cozy, personal snack, but made for sharing with the people you actually like.
You know that feeling when you want to host something special, but the thought of a giant, messy cheese board that everyone picks at gives you anxiety? I mean, we’ve all been there. You want something that feels fancy and thoughtful without spending your whole day in the kitchen. That’s where these individual cups come in. They solve the problem of the dreaded double-dip and the awkward “is that last piece of prosciutto for me?” dance. Each person gets their own perfectly balanced little feast. It’s portion-controlled, it’s gorgeous, and it takes the stress right out of hosting. Let me tell you, the first time I set these out for a casual get-together, the silence that fell over the room (the good kind, the “I’m too busy eating to talk” kind) was all the validation I needed.
This isn’t just another snack idea; it’s a whole experience wrapped up in a cute little cup. These individual charcuterie cups are the perfect way to celebrate Friendsgiving without the fuss. They’re light, they’re easy, and they let everyone build their perfect bite. I keep making them because they turn a simple gathering into something memorable, and honestly, they make me feel like a hostess with the mostest without any of the stress.
Why You’ll Love This Recipe
I’ve tested this concept more times than I care to admit, from fancy dinner parties to lazy Sunday football games, and these cups are the undisputed champion of easy entertaining. They are the perfect marriage of “wow factor” and “minimal effort,” and here’s exactly why they work so well.
- Perfectly Portioned & Stress-Free: Each cup is a self-contained masterpiece. No more worrying about a giant board getting messy or guests hovering. Everyone gets their own perfectly balanced selection, making it ideal for a crowd with different dietary needs. It’s the ultimate grab-and-go appetizer that feels far more personal.
- Simple, Wholesome Ingredients: You don’t need anything fancy. We’re talking about good-quality cheese, your favorite cured meats, fresh fruit, and a few crunchy bits. The beauty is in the combination, not in hunting down obscure ingredients. You can find everything at your regular grocery store, which is a huge win for busy hosts.
- Perfect for Friendsgiving: This is the ultimate dish for a potluck-style gathering. Everyone can assemble their own cup, or you can make a dozen in minutes. It fits the casual, sharing vibe of Friendsgiving perfectly, and it’s a total crowd-pleaser that disappears fast.
- Unbelievably Customizable: This is where your personality shines. Love spicy salami? Add it. Prefer a sharp cheddar over brie? Go for it. Have a guest who’s gluten-free? It’s incredibly easy to swap in gluten-free crackers or skip them altogether. These cups are a choose-your-own-adventure in the best way possible.
- Next-Level Deliciousness: The magic is in the contrast. The creamy cheese against the salty meat, the sweet pop of a grape against the crunch of a nut. It’s a symphony of textures and flavors in every single bite. It’s comfort food that feels sophisticated, and it honestly tastes better than anything you’d get from a restaurant platter.
What makes this recipe different from the rest is the focus on balance and ease. I’ve perfected the ratio of savory to sweet to salty so you get a perfect bite every single time. It’s not just a pile of ingredients in a cup; it’s a thoughtfully composed experience. This is the recipe that makes you close your eyes after the first bite, not because it’s complicated, but because it’s just so perfectly satisfying.
What Ingredients You Will Need
This recipe uses a handful of simple, high-quality ingredients to create a big impact. The key is to choose things you genuinely love eating, because the combination is all about personal preference. Here’s what you’ll need to build the perfect Light & Easy Individual Charcuterie Cups for Friendsgiving.
- For the Cheese (Choose 2-3):
- Soft Cheese (1-2 oz per cup): Think creamy brie, herbed goat cheese (I love the one from Vermont Creamery), or a rich, spreadable blue cheese. These add a luscious, decadent element.
- Hard Cheese (1-2 oz per cup): A sharp aged cheddar, a nutty gouda, or salty manchego. These provide a firm, satisfying bite and a different flavor profile. I always go for a good quality cheddar from a local creamery if I can find one.
- For the Cured Meat (Choose 1-2):
- Salami or Pepperoni (2-3 slices per cup): Classic and always a hit. Look for a dry salami that’s easy to slice or buy pre-sliced for convenience.
- Prosciutto (1-2 slices, torn): Adds a delicate, salty, and buttery texture. It’s a little fancy but totally worth it.
- Soppressata (2-3 slices): For a bit more spice and a coarser texture. It’s a great option if you want a little kick.
- For the Crunch (Choose 1-2):
- Crackers (3-4 per cup): Go for a mix of textures. I like using a buttery water cracker (like Carr’s) and a seedy, whole-grain cracker for variety.
- Breadsticks or Grissini (1-2 per cup): These are perfect for dipping and add a fun, tall element to the cup.
- For the Sweet & Fresh Elements:
- Fresh Fruit (a small handful per cup): Red grapes are my go-to because they’re sweet, juicy, and don’t brown. Sliced apples or pears also work, but toss them in a little lemon juice to prevent browning.
- Dried Fruit (1-2 tablespoons per cup): Dried apricots, figs, or tart cherries add a chewy, concentrated sweetness that pairs beautifully with the cheese.
- For the Briny & Savory Touch:
- Olives (2-3 per cup): Castelvetrano or kalamata olives are great. They add a salty, briny pop that cuts through the richness.
- Pickled Vegetables (1-2 pieces per cup): Cornichons or pickled red onions are a fantastic way to add acidity and crunch. I often use store-bought cornichons for simplicity.
- For the Garnish (Optional but Recommended):
- Fresh Herbs: A sprig of rosemary or a few fresh thyme leaves add a beautiful, aromatic finish.
- Nuts (a tablespoon per cup): Toasted almonds, walnuts, or pecans add a wonderful crunch and healthy fat.
- Honey or Fig Jam (a drizzle or small dollop): A tiny sweet addition that takes the whole thing over the top. I love using a local wildflower honey for a unique flavor.
Equipment Needed
You don’t need any fancy gadgets for this, which is part of the beauty. Here’s what you’ll need to pull these together.
- Small Cups or Ramekins: This is the star of the show. I use 6-8 ounce clear plastic cups for a fun, casual look, or small glass ramekins for a more elegant presentation. You can even use small mason jars. The key is that they are wide enough to easily grab items from.
- Cutting Board & Sharp Knife: For slicing your cheese, fruit, and any large pieces of meat. A good sharp knife makes all the difference for clean cuts.
- Small Bowls (for prep): To hold your olives, nuts, and dried fruit before you assemble the cups. It makes the assembly line process much smoother.
Alternative options: If you don’t have small cups, you can use a mini muffin tin to hold the components, or even just arrange them directly on a small plate for each person. For a budget-friendly option, I’ve even used small paper cups from the party store – they work great and make cleanup a breeze!
Preparation Method
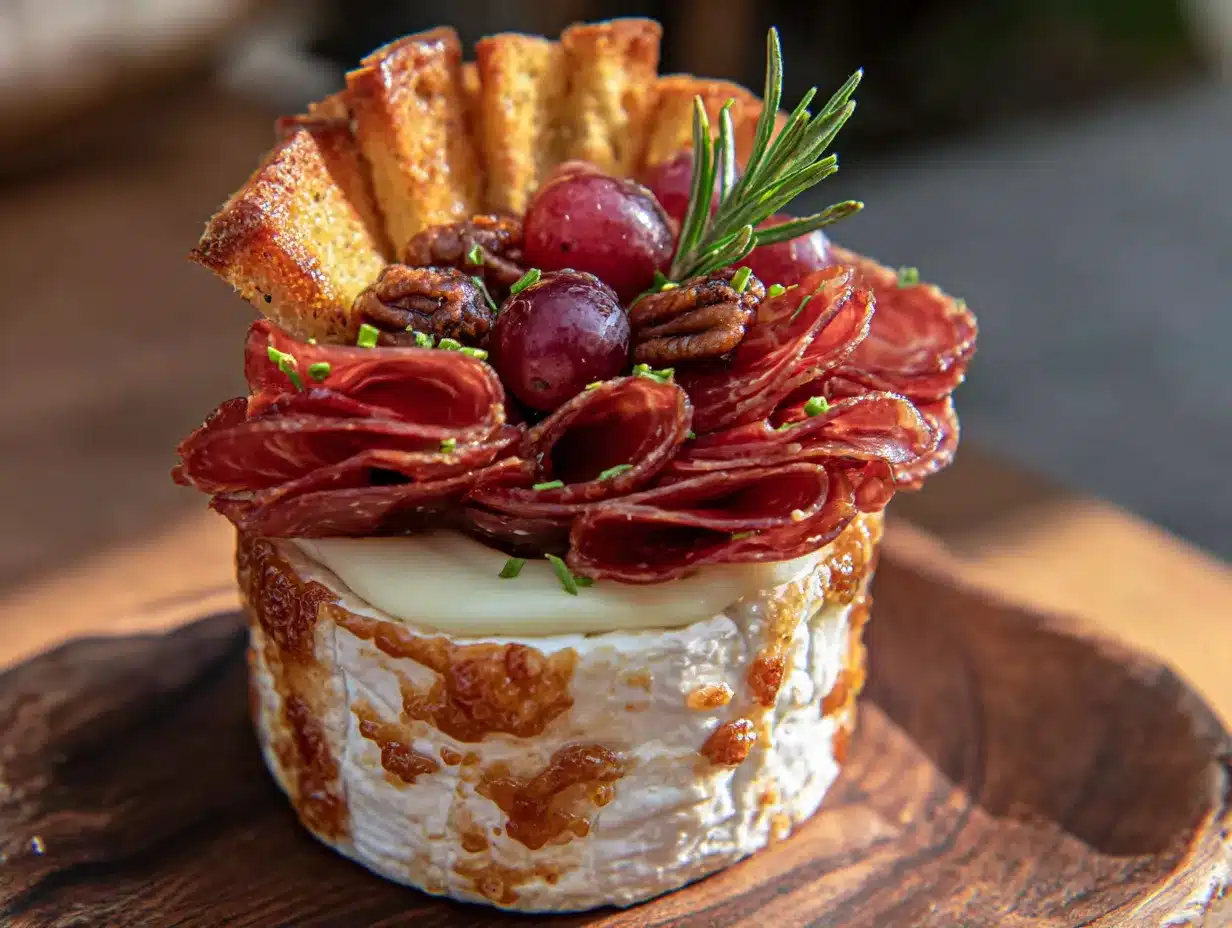
Alright, let’s get to the fun part. This is where you get to be an artist. The process is simple, but the order matters a little for the best visual result. Here’s my tried-and-true method for making these individual charcuterie cups.
- Prep Your Ingredients (5 minutes): First, take your cheese out of the fridge about 15 minutes before you start. This lets it come to room temperature, which makes it taste so much better. Wash and dry your grapes. Slice your hard cheese into small cubes or thin wedges. If you’re using prosciutto, gently tear the slices into smaller, bite-sized ribbons. I find this gives a more rustic, beautiful look than cutting them.
- Create a Base Layer (2 minutes): Start by placing a small handful of your crunch element at the bottom of each cup. This creates a little platform and adds texture throughout. I like to use a mix of 2-3 crackers and maybe a breadstick standing up on the side for height. A little tip: don’t pack them in too tight; you want some air in the cup.
- Add the Cheese (3 minutes): Next, arrange your cheese. Place the soft cheese (like a wedge of brie or a dollop of goat cheese) in one section of the cup. Then, tuck the cubes or slices of hard cheese next to it. Try to keep them separate so guests can see all the different options. I usually put the brie right in the center as a focal point.
- Layer in the Meat (2 minutes): Now, add your cured meat. Fold or roll the salami slices and nestle them in. Drape the torn prosciutto so it looks a bit ruffled and elegant. This adds a lovely visual texture. Don’t just lay it flat; a little height here makes a huge difference.
- Fill with Fresh & Briny Bits (3 minutes): This is where the cup really comes to life. Tuck in your fresh fruit (grapes are perfect here), dried fruit, and olives. Scatter them around the gaps. The goal is to fill in any empty spaces so the cup looks abundant and full. A couple of cornichons tucked in on the side add a fantastic bright green pop of color.
- Add the Final Garnishes (1 minute): To finish, sprinkle a few nuts over the top for crunch. If you’re using honey or fig jam, add a small drizzle or a tiny dollop right on top of the soft cheese. I love finishing with a small sprig of fresh rosemary or a few thyme leaves for that “chef’s kiss” look. It makes the whole thing smell amazing, too.
- Serve Immediately or Chill Briefly: These are best served right away. If you’re making them ahead, you can assemble them (without the fresh herbs and honey) and keep them in the fridge for up to 2 hours. Just add the final garnishes right before serving so they look their best.
Cooking Tips & Techniques
Over my many, many trials (and a few fails), I’ve picked up some tricks that make these cups absolutely foolproof. Here’s what I’ve learned the hard way so you don’t have to.
- The Art of the Tuck: The biggest mistake I made early on was just throwing everything in the cup. It looked like a sad, messy pile. The secret is to “tuck” and “layer.” Place items so they lean against each other. This creates height and visual interest. Think of it like a tiny, edible flower arrangement.
- Don’t Overcrowd the Cup: It’s tempting to fill the cup to the brim, but you want your guests to be able to grab things easily. Leave a little bit of space at the top so it’s not a struggle to pull out a piece of cheese. A cup that is ¾ full looks much more appetizing than one that is overflowing.
- Balance is Everything: Make sure each cup has a good mix of textures and flavors. You want a creamy cheese, a salty meat, a sweet fruit, and a crunchy element in every single cup. If a cup has only hard cheese and salami, it’ll feel one-dimensional. The magic is in the contrast.
- Prep is Your Best Friend: This is a “mise en place” recipe. Have all your ingredients prepped and in small bowls before you start assembling. It turns the process into a 5-minute assembly line instead of a frantic search for the right cracker. I once forgot to slice the cheese before I started, and it completely threw off my flow. Learn from my mistake!
- Temperature Matters: Serve these at room temperature if you can. Cheese, in particular, is so much more flavorful when it’s not straight from the fridge. If you’ve made them ahead, take them out of the fridge 20-30 minutes before your guests arrive. It makes a world of difference.
Variations & Adaptations
This recipe is a fantastic base for your own creativity. Here are a few of my favorite ways to switch it up, depending on the season or who I’m hosting.
- Mediterranean Twist: Swap the cheddar for feta cheese and the salami for marinated grilled chicken or roasted red peppers. Add some cucumber slices, cherry tomatoes, and a drizzle of tzatziki sauce. It’s a lighter, brighter take that’s perfect for a summer gathering.
- Sweet & Spicy Fiesta: Use pepper jack cheese, spicy chorizo (cooked and crumbled), and mango slices. Add a few jalapeño-stuffed olives and a sprinkle of chili-lime seasoning. This is a flavor explosion that’s always a hit with my friends who love a little heat.
- Vegan & Plant-Based Option: This is incredibly easy to adapt. Use your favorite vegan cheeses (a cashew-based brie or a firm vegan cheddar works great). Swap the meat for marinated artichoke hearts, sun-dried tomatoes, or smoky tempeh strips. The rest of the ingredients – fruit, nuts, crackers, olives – are already plant-based!
- Breakfast for Dinner Board: For a fun brinner (breakfast for dinner) option, use small pancakes or waffle squares as the “cracker” base. Add slices of sharp cheddar, crispy bacon, and apple slices. A little drizzle of maple syrup on the side is a must. I tried this on a whim one Sunday night, and it was a game-changer.
Serving & Storage Suggestions
These cups are designed to be a star on their own, but a few simple pairings can turn them into a full meal. Here’s how to serve and store them for the best experience.
Serving: Serve these cups at room temperature for the best flavor. I like to arrange them on a large wooden board or a clean baking sheet so they’re easy to grab. They are the perfect appetizer for a Friendsgiving, but they can also be a light lunch or a fun snack for a movie night. For a more substantial meal, pair them with a simple arugula salad with a lemon vinaigrette or a bowl of tomato soup. A glass of crisp Sauvignon Blanc or a light Pinot Noir is a fantastic beverage pairing.
Storage: These are best enjoyed fresh, but you can prepare them in advance. Assemble the cups (without the fresh herbs and honey) up to 4 hours ahead. Cover them with plastic wrap and store them in the refrigerator. When you’re ready to serve, let them sit at room temperature for 15-20 minutes, then add the final garnishes. If you have leftovers (which is rare!), you can store the components separately. The fruit and crackers will get soggy if left in the cup. I recommend picking out the cheese, meat, and olives and storing them in an airtight container in the fridge for up to 2 days. They make a great snack the next day.
Nutritional Information & Benefits
While these cups feel indulgent, they can absolutely fit into a balanced, health-conscious diet. The beauty is in the portion control and the quality of the ingredients.
- Estimated Values (per cup): Approximately 300-400 calories, 20-25g of fat (mostly healthy fats from cheese and nuts), 15-20g of protein, and 15-20g of carbohydrates (from fruit and crackers). This will vary based on your specific choices.
- Health Benefits: You’re getting a great source of protein and calcium from the cheese. The nuts provide healthy fats and fiber, which help keep you full and satisfied. The fruit adds natural sweetness along with vitamins and antioxidants. It’s a far more nutritious option than a plate of processed snacks.
- Dietary Considerations: This recipe is naturally gluten-free if you choose gluten-free crackers. It’s also very easy to make dairy-free or vegan with simple substitutions. It’s a great option for those watching their carb intake if you skip the crackers and focus on the cheese, meat, and nuts.
I love that this recipe lets me enjoy something delicious and social without feeling like I’ve overdone it. It’s a perfect example of how eating well doesn’t have to mean sacrificing flavor or fun.
Conclusion
So there you have it – my little secret to hosting a stress-free, beautiful, and absolutely delicious Friendsgiving. These Light & Easy Individual Charcuterie Cups are more than just a snack; they’re a way to show your friends you care without spending all day in the kitchen. They are the perfect balance of fancy and fun, and they honestly make everyone feel special.
I want you to make this recipe your own. Swap in your favorite cheese, add a weird cracker you love, or throw in some pickled okra if that’s your thing. The best part is the customization. I’d love to hear what combinations you come up with! Drop a comment below and tell me your favorite cheese and meat pairing, or share a photo of your beautiful cups. Don’t forget to share this post with your Friendsgiving crew – they’ll thank you for it. Happy snacking, friends!
Frequently Asked Questions
Can I make these charcuterie cups a day ahead of time?
You can assemble them up to 4 hours ahead, but I wouldn’t recommend a full day. The crackers can get soft, and the fresh fruit might weep. If you need to prep, I suggest chopping your cheese and fruit and storing them separately, then assembling the cups just before your guests arrive.
What’s the best way to keep the crackers from getting soggy?
The key is to layer your ingredients strategically. Place the crackers at the bottom or on the side, away from any damp ingredients like grapes or olives. You can also put a small piece of parchment paper or a lettuce leaf between the crackers and the fruit to create a barrier.
How many cups should I plan per person for a party?
For a party where these are the main appetizer before a meal, I’d plan on one cup per person. If you’re serving them as a light lunch or the main event, I’d plan on two cups per person. They’re quite filling due to the cheese and nuts, so a little goes a long way.
My guest has a nut allergy. What can I use instead of nuts?
No problem at all! You can simply omit the nuts. To replace that crunchy element, try adding roasted chickpeas, pumpkin seeds, or extra crunchy vegetables like sliced bell peppers or cucumber sticks. They add a great texture without the allergens.
What’s the best way to arrange the items in the cup so it looks pretty?
Think about color and height. Start with a base of crackers, then add your larger items like cheese wedges and rolled salami. Fill in the gaps with smaller items like grapes, olives, and nuts. Tucking items at different angles creates a more dynamic and visually appealing look. Don’t be afraid to let a breadstick or a rosemary sprig stick out the top for drama!
Pin This Recipe!
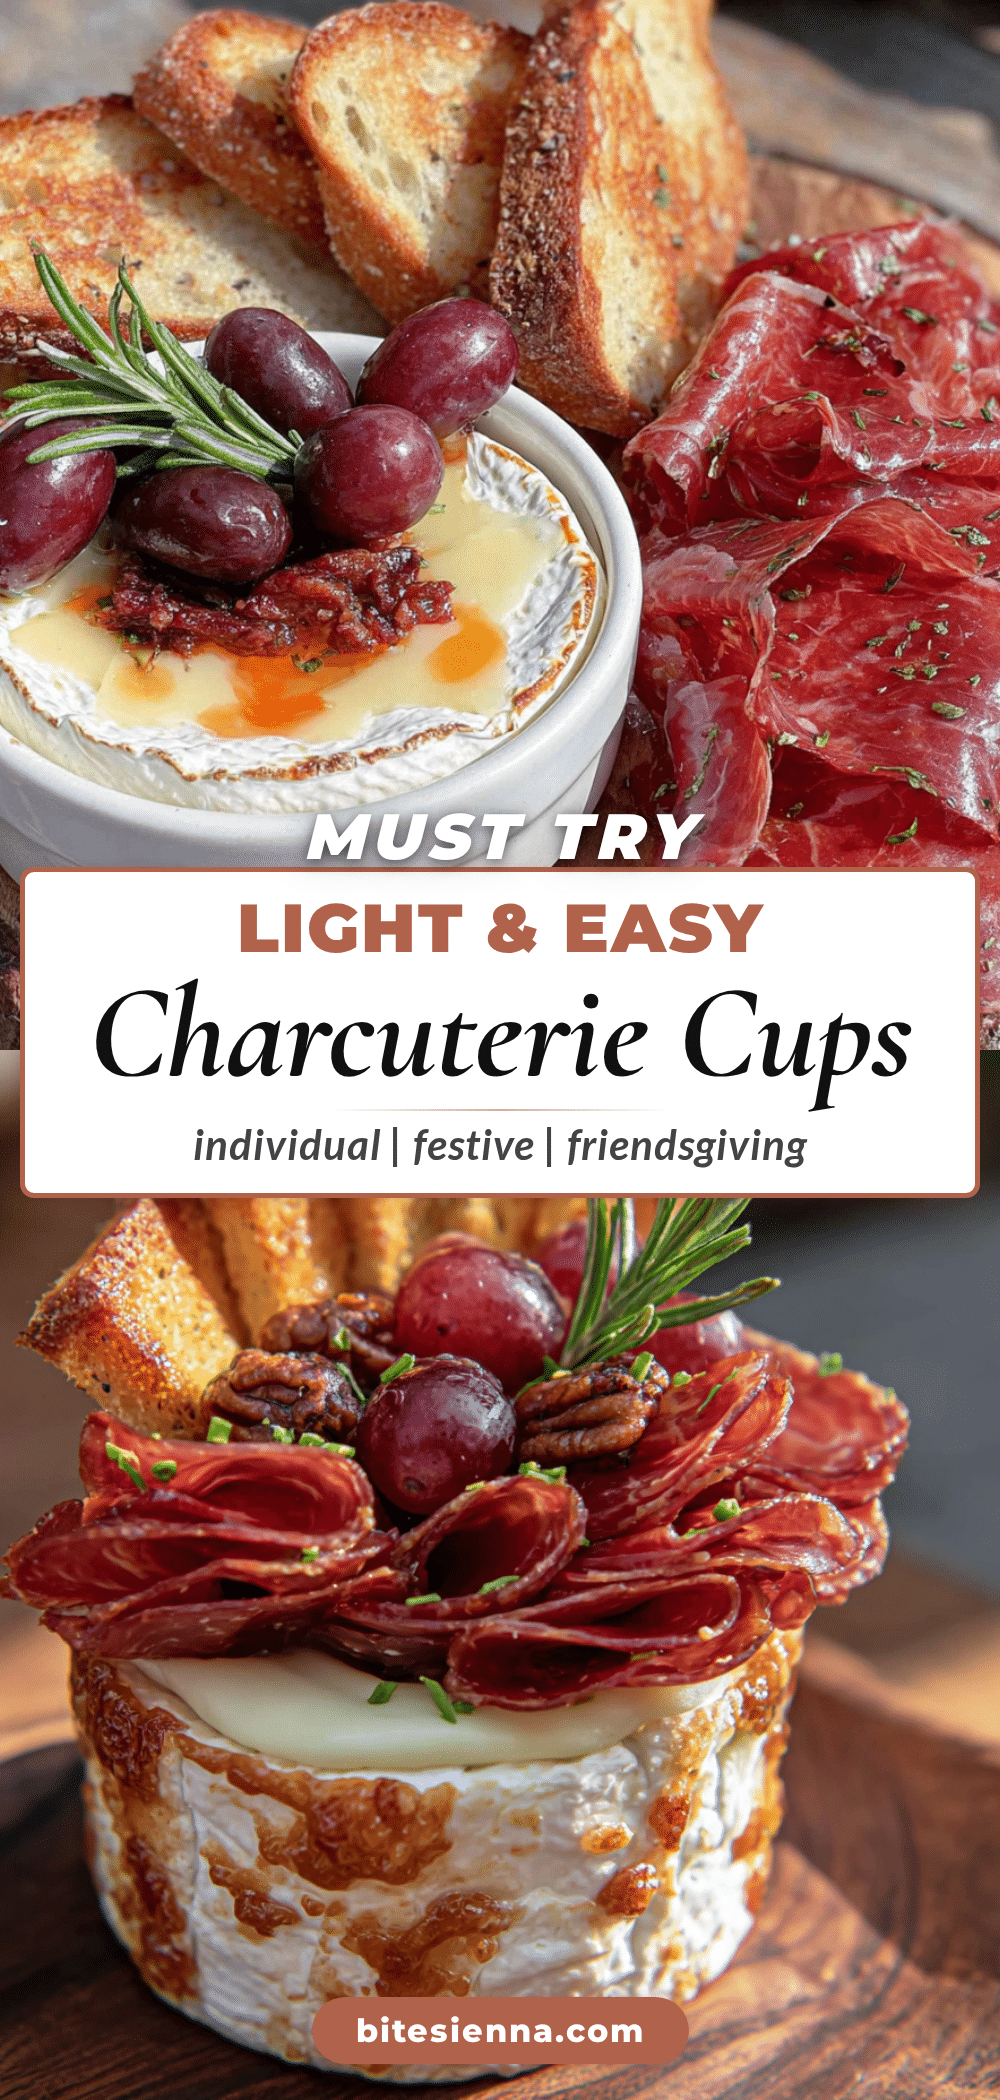
Easy Individual Charcuterie Cups for Friendsgiving
These Light & Easy Individual Charcuterie Cups are the perfect way to celebrate Friendsgiving without the fuss. Each cup is a self-contained masterpiece with a perfectly balanced selection of cheese, meat, fruit, and crunchy bits, making hosting stress-free and delicious.
- Prep Time: 15 minutes
- Cook Time: 0 minutes
- Total Time: 15 minutes
- Yield: 4 servings
- Category: Appetizer
- Cuisine: American
Ingredients
- Soft cheese (1-2 oz per cup): brie, herbed goat cheese, or spreadable blue cheese
- Hard cheese (1-2 oz per cup): sharp aged cheddar, nutty gouda, or manchego
- Salami or pepperoni (2-3 slices per cup)
- Prosciutto (1-2 slices, torn per cup)
- Soppressata (2-3 slices per cup)
- Crackers (3-4 per cup): buttery water crackers and whole-grain crackers
- Breadsticks or grissini (1-2 per cup)
- Fresh fruit (small handful per cup): red grapes, sliced apples or pears (tossed in lemon juice)
- Dried fruit (1-2 tablespoons per cup): dried apricots, figs, or tart cherries
- Olives (2-3 per cup): Castelvetrano or kalamata
- Pickled vegetables (1-2 pieces per cup): cornichons or pickled red onions
- Fresh herbs (optional): rosemary sprig or fresh thyme leaves
- Nuts (1 tablespoon per cup): toasted almonds, walnuts, or pecans
- Honey or fig jam (optional): a drizzle or small dollop
Instructions
- Prep your ingredients: Take cheese out of fridge 15 minutes before starting. Wash and dry grapes. Slice hard cheese into small cubes or thin wedges. Tear prosciutto into bite-sized ribbons.
- Create a base layer: Place a small handful of crackers and/or a breadstick at the bottom of each cup, leaving some air space.
- Add the cheese: Arrange soft cheese (wedge of brie or dollop of goat cheese) in one section, then tuck hard cheese cubes next to it.
- Layer in the meat: Fold or roll salami slices and nestle them in. Drape torn prosciutto for a ruffled look.
- Fill with fresh and briny bits: Tuck in fresh fruit, dried fruit, and olives, filling any empty spaces. Add cornichons for color.
- Add final garnishes: Sprinkle nuts over the top. Drizzle honey or add a dollop of fig jam on soft cheese. Finish with a sprig of rosemary or thyme leaves.
- Serve immediately or chill briefly: Best served right away. If making ahead, assemble without herbs and honey, refrigerate up to 2 hours, then add garnishes before serving.
Notes
For best flavor, serve at room temperature. To prevent crackers from getting soggy, layer them away from damp ingredients or use a small piece of parchment paper as a barrier. If making ahead, assemble without fresh herbs and honey, refrigerate up to 4 hours, then add garnishes before serving.
Nutrition
- Serving Size: 1 cup
- Calories: 350
- Sugar: 10
- Sodium: 600
- Fat: 22
- Saturated Fat: 10
- Carbohydrates: 18
- Fiber: 3
- Protein: 17
Keywords: charcuterie cups, individual charcuterie, Friendsgiving appetizer, easy appetizer, cheese board cups, party snack


