Let me tell you something funny about this homemade pumpkin pie. My niece Lily was over last Thanksgiving, helping me prep, and she asked why I couldn’t just use store-bought crust and canned filling like normal people. I started explaining the whole thing about butter temperature and blind baking and how you really need to taste the spices yourself. She just shrugged and said, “But what if it tastes better because you made it, not because of all that stuff?”
I opened my mouth to explain why she was wrong. Then I closed it. She had a point I wasn’t ready to admit.
So I let her take over the spice blending. She threw in an extra pinch of cinnamon and a tiny bit of nutmeg I would have left out. The crust? She pressed it into the dish with way less fuss than I ever do. And honestly? That was the best pumpkin pie I’d ever made. The crust was flakier than usual, the filling had this warmth I couldn’t quite place, and the whole thing felt less like a science experiment and more like, well, pie should feel.
That moment stuck with me. Here I was, the “experienced cook,” getting schooled by a teenager who just trusted her instincts. Maybe you’ve had that moment too — when you realize the rules you’ve been following aren’t the only way. This flaky all-butter crust recipe is the result of me finally letting go of some of my control. It’s forgiving, it’s buttery, and it pairs with a silky pumpkin filling that tastes like autumn in a slice. I keep making it because it reminds me that sometimes the best thing you can do is stop overthinking and just trust the process.
Why You’ll Love This Recipe
I’ve tested this homemade pumpkin pie more times than I care to count. My kitchen counter has seen butter shatterings, pumpkin spills, and one particularly dramatic crust collapse. But every failure taught me something, and this version is the result of all those lessons. Here’s why I think you’ll fall for it too:
- Quick & Easy: The filling comes together in about 10 minutes. The crust needs some chill time, but the active work is minimal. Perfect for busy holiday mornings or a cozy weekend bake.
- Simple Ingredients: You probably have most of the filling ingredients already. No weird stabilizers or mystery powders. Just real butter, real pumpkin, real cream.
- Perfect for Thanksgiving: This is the pie that disappears first at every holiday table. It’s also wonderful for fall gatherings, Friendsgiving dinners, or just because it’s Tuesday and you want pie.
- Crowd-Pleaser: I’ve served this to pie snobs and kids alike. Both groups go back for seconds. The flaky crust wins over the texture people, and the smooth filling wins over everyone else.
- Unbelievably Delicious: The combination of cold butter creating steam pockets in the crust, plus the velvety pumpkin custard, is next-level comfort food. You’ll close your eyes after the first bite. I promise.
What makes this different from every other pumpkin pie recipe? It’s the balance. The crust isn’t fussy — it’s actually more forgiving than most because we’re using a technique that builds in some insurance against shrinking. The filling isn’t overly sweet, letting the pumpkin and warm spices shine. This isn’t just another version of pumpkin pie. It’s the one you’ll come back to year after year.
There’s something about this pie that feels like a hug. It’s the kind of dessert that makes you slow down and actually taste what you’re eating. And honestly, in a world that moves too fast, that’s worth making time for.
What Ingredients You Will Need
This recipe uses simple, wholesome ingredients to deliver that classic pumpkin pie flavor with a noticeably flakier crust. Most of these are pantry staples, especially during fall baking season. Let me walk you through what you’ll need and why each one matters.
For the Flaky All-Butter Crust
- All-purpose flour, 2 ½ cups (300g) — I prefer King Arthur Flour for consistent results. Spoon and level your flour; don’t scoop directly from the bag or you’ll end up with too much.
- Unsalted butter, 1 cup (226g), very cold — This is non-negotiable. The butter needs to be straight from the fridge, cut into small cubes. I sometimes pop my cubed butter in the freezer for 10 minutes before starting. Kerrygold or any European-style butter works beautifully here because it has less water and more butterfat.
- Ice water, 6-8 tablespoons (90-120ml) — Not just cold water. Actual ice water. Fill a cup with ice, add water, let it sit for a minute, then measure from that.
- Salt, 1 teaspoon (6g) — Fine sea salt or table salt. Don’t skip it — salt makes the butter taste more buttery.
- Sugar, 1 tablespoon (12g) — A tiny bit of sweetness in the crust balances the savory notes.
For the Pumpkin Filling
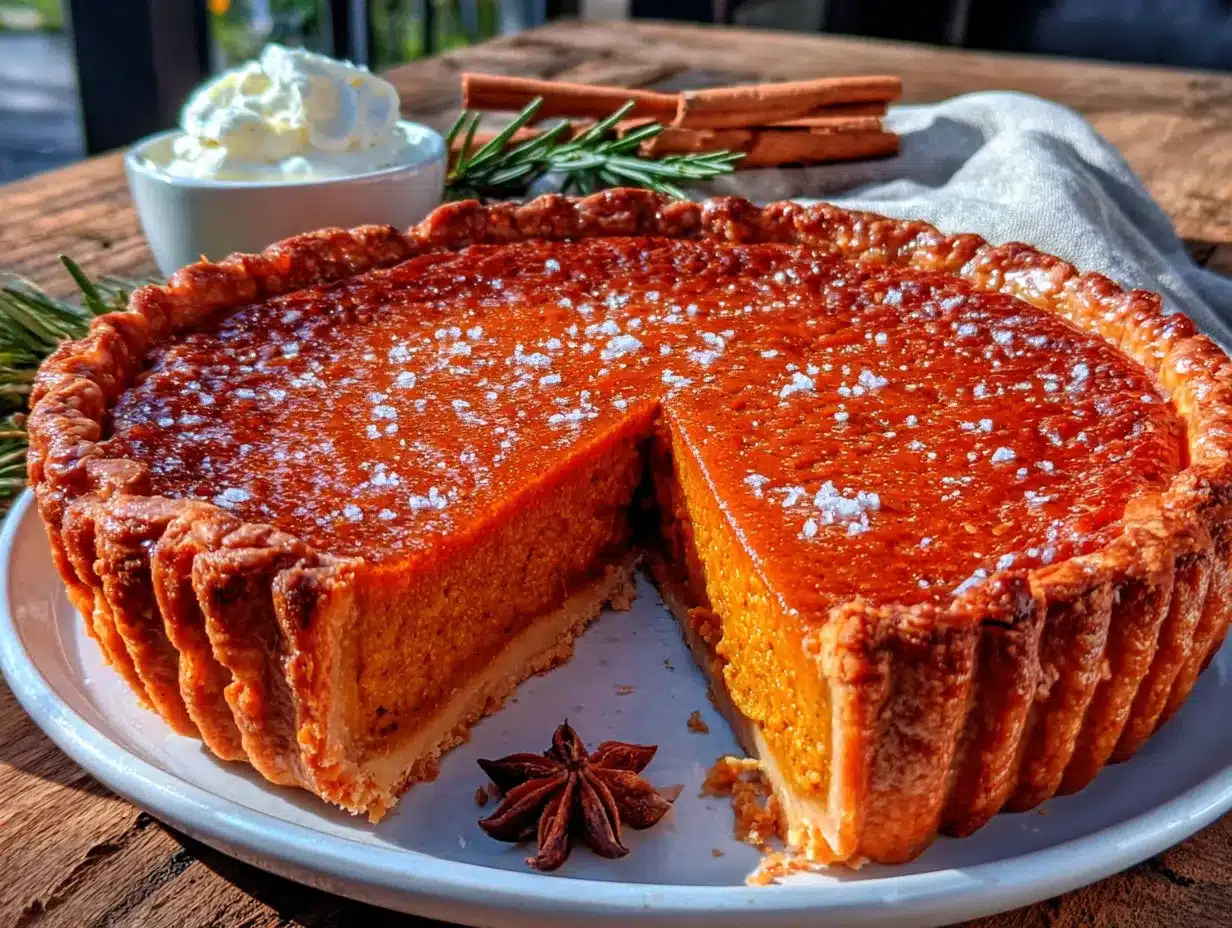
- Pumpkin purée, 1 can (15 oz or 425g) — Not pumpkin pie filling. Look for 100% pure pumpkin. Libby’s is my go-to brand for consistent thickness and flavor. If you roast your own pumpkin, make sure to drain any excess liquid.
- Heavy cream, 1 cup (240ml) — This gives the filling its luxurious texture. You can substitute half-and-half if needed, but the pie won’t be quite as silky.
- Large eggs, 2 — Room temperature eggs blend more smoothly into the filling. If you forgot to take them out early, place them in a bowl of warm water for 5 minutes.
- Brown sugar, ½ cup (100g), packed — Light or dark brown sugar both work. Dark brown sugar adds deeper molasses notes that I personally love with pumpkin.
- Granulated sugar, ¼ cup (50g) — The combination of brown and white sugar gives both depth and clean sweetness.
- Pumpkin pie spice, 2 teaspoons — Use a store-bought blend or make your own: 1 teaspoon cinnamon, ½ teaspoon ginger, ¼ teaspoon nutmeg, ¼ teaspoon cloves, and a pinch of allspice. I make my own because I like extra cinnamon.
- Vanilla extract, 1 teaspoon — Pure vanilla, not imitation. It rounds out the spice flavors.
- Salt, ¼ teaspoon — Just enough to balance the sweetness.
Ingredient Tips from My Kitchen
For the best texture, make sure your pumpkin purée isn’t watery. If you see liquid pooling on top of the canned purée, gently stir it back in or drain it off if there’s a lot. Some brands are runnier than others. I’ve learned this the hard way after a few soggy pies.
If you’re dairy-free, you can substitute cold vegan butter in the crust and full-fat coconut cream in the filling. The texture won’t be identical, but it’s still delicious. Just know that the crust won’t be quite as flaky because vegan butter has a different fat-to-water ratio.
For the spice blend, feel free to adjust based on your preference. My sister-in-law adds a pinch of cardamom to hers, and it’s surprisingly good. The beauty of homemade pumpkin pie is that you’re in control.
Equipment Needed
You don’t need a fancy kitchen to make this homemade pumpkin pie, but a few specific tools make the process smoother. Here’s what I use and what you can substitute if needed.
- 9-inch pie dish — Glass or ceramic works best. I use a Pyrex glass dish because I can see how the bottom crust is browning. Metal pie pans work too, but they conduct heat differently, so keep an eye on the baking time.
- Pastry cutter or food processor — For cutting butter into flour. If you don’t have either, two forks or your fingertips work fine. Just work quickly so the butter stays cold.
- Rolling pin — A standard rolling pin is ideal. No rolling pin? A wine bottle works in a pinch. I’ve done it. It’s not elegant, but it gets the job done.
- Plastic wrap — For chilling the dough. Reusable beeswax wrap also works.
- Pie weights or dried beans — For blind baking the crust. I keep a bag of dried chickpeas in my pantry just for this purpose. They’re cheaper than ceramic pie weights and work exactly the same.
- Parchment paper or aluminum foil — To line the crust before adding weights.
- Mixing bowls — One large for the crust, one medium for the filling.
- Whisk — For blending the filling ingredients smoothly.
- Measuring cups and spoons — For accuracy, especially with the flour and spices.
- Kitchen scale (optional but helpful) — Weighing your flour and butter gives the most consistent results. I use mine all the time now, but I managed without one for years.
One tip: If your pie dish is dark metal, reduce the oven temperature by 25°F. Dark pans absorb more heat and can over-brown your crust. I learned this after a few too-dark-bottomed pies.
Preparation Method
Let’s make this homemade pumpkin pie step by step. I’ve included time estimates and sensory cues so you know exactly what to look for. Take your time — pie making is supposed to be relaxing, not stressful.
Step 1: Make the Crust Dough (15 minutes active + 1 hour chilling)
In a large bowl, whisk together the flour, salt, and sugar. Add your cold butter cubes and toss to coat them in the flour mixture. Using a pastry cutter or your fingertips, cut the butter into the flour until the mixture looks like coarse meal with some pea-sized butter pieces remaining. You want visible butter bits — those create the flaky layers.
Sprinkle 6 tablespoons of ice water over the mixture and stir with a fork until the dough starts coming together. It should look shaggy and slightly clumpy. If it seems dry, add the remaining water one tablespoon at a time. Squeeze a handful — if it holds together without crumbling, you’re good.
Turn the dough onto a lightly floured surface and bring it together into a disc. Don’t knead it — just press it gently into a 6-inch round. Wrap tightly in plastic wrap and refrigerate for at least 1 hour. Overnight is even better. The rest helps the gluten relax and the butter firm up.
Step 2: Roll Out the Crust (10 minutes)
On a well-floured surface, roll the chilled dough from the center outward, rotating it occasionally to prevent sticking. Aim for a 12-inch circle, about ⅛-inch thick. If the edges crack, just press them back together — this dough is forgiving. Carefully transfer the dough to your pie dish by rolling it around your rolling pin and unrolling it over the dish. Gently press it into the corners and trim the overhang to about ½ inch. Fold the edges under and crimp with your fingers or a fork. Pop the crust in the fridge for 15 minutes while you preheat the oven.
Step 3: Blind Bake the Crust (30 minutes)
Preheat your oven to 375°F (190°C). Line the chilled crust with parchment paper or foil, leaving some overhang. Fill with pie weights or dried beans, spreading them evenly up the sides. This prevents the crust from puffing up or shrinking. Bake for 15 minutes, then carefully remove the paper and weights. Prick the bottom of the crust all over with a fork — this is called docking and it prevents air bubbles. Return to the oven and bake for another 10-12 minutes until the bottom looks dry and lightly golden.
Step 4: Make the Pumpkin Filling (10 minutes)
While the crust bakes, make the filling. In a medium bowl, whisk together the pumpkin purée, heavy cream, eggs, both sugars, pumpkin pie spice, vanilla, and salt. Whisk until completely smooth and uniform. The mixture should be thick but pourable, like a milkshake. Taste it — yes, raw egg and all. If it doesn’t taste amazing now, adjust the spices. I always add an extra pinch of cinnamon at this stage.
Step 5: Assemble and Bake (50-60 minutes)
Reduce the oven temperature to 350°F (175°C). Pour the filling into the warm pre-baked crust. The filling should come almost to the top of the crust. Carefully transfer the pie to the oven — I place it on the middle rack. Bake for 50-60 minutes. The edges should be set and slightly puffed, while the center should still have a slight jiggle when you gently shake the pan. It will continue to set as it cools.
If the crust edges are browning too quickly, loosely tent them with foil or a pie shield ring about 30 minutes in. I use a strip of foil folded over the edges.
Step 6: Cool Completely (2-3 hours)
Place the pie on a wire rack and let it cool completely at room temperature. This is crucial — a warm pie will be runny and the crust will be soggy. Patience here pays off. Once fully cool, you can serve it at room temperature or refrigerate it for later. The filling firms up beautifully as it rests.
Cooking Tips & Techniques
Over the years, I’ve made every mistake you can imagine with pumpkin pie. Here’s what I’ve learned so you don’t have to repeat my errors.
Keep everything cold for the crust. This is the single most important tip. Warm butter melts into the flour instead of creating those steam pockets that make the crust flaky. If your kitchen is warm, chill your bowl and flour for 10 minutes before starting. I once made a crust in July without air conditioning — it was a disaster. The butter melted before I even got it in the oven.
Don’t overwork the dough. Overmixing develops gluten, which makes the crust tough. You want barely combined. It’s okay if the dough looks a little scraggly — that’s actually a good sign. My first few pies had tough crusts because I kept trying to make them look perfect.
Blind bake thoroughly. A soggy bottom is the enemy of good pie. Make sure the crust is fully baked before adding the filling. The fork pricks help steam escape, and the weights prevent bubbles. I learned this after one particularly sad pie where the bottom crust was basically raw dough.
Watch the jiggle. The filling should be set around the edges but still wobble slightly in the center when you shake the pan. It will continue cooking from residual heat after you pull it out. Overbaked pumpkin pie cracks and becomes rubbery. Underbaked pie is runny. The jiggle test is your best friend.
Let it cool completely. I know it’s tempting to cut into a warm pie, but resist. The filling needs time to set properly. I usually make my pie the day before serving. Overnight in the fridge actually improves the flavor — the spices meld together beautifully.
Use a pie shield. If the edges of your crust are browning too fast, cover them with foil or a silicone pie shield. I’ve burned many a crust edge while waiting for the center to set. Now I just put the shield on from the start and remove it for the last 10 minutes.
Variations & Adaptations
One of the best things about this homemade pumpkin pie is how adaptable it is. Here are some variations I’ve tried and loved.
Dairy-Free Version: Substitute the butter in the crust with cold vegan butter. Use full-fat coconut cream instead of heavy cream in the filling. The texture will be slightly different — the crust won’t be quite as flaky — but the flavor is still fantastic. I made this for a friend with a dairy allergy and she said it was the best pumpkin pie she’d ever had.
Gluten-Free Crust: Use a 1:1 gluten-free flour blend that contains xanthan gum. Cup4Cup and King Arthur’s measure-for-measure blends work well. The dough will be more fragile, so press it into the dish rather than rolling it. Blind bake it for an extra 5 minutes since gluten-free crusts need more time to set.
Spice It Up: Add a pinch of cayenne pepper or black pepper to the filling for a subtle warmth that complements the sweetness. My neighbor swears by adding a teaspoon of bourbon or dark rum to the filling. I tried it last year and honestly, she’s right. The alcohol burns off during baking, leaving behind a lovely complexity.
Maple Pumpkin Pie: Replace the brown sugar with an equal amount of maple syrup. Reduce the heavy cream by 2 tablespoons to account for the extra liquid. The maple flavor pairs beautifully with pumpkin and gives the pie a deeper, more autumnal taste.
Mini Pies: Use a muffin tin to make individual pies. Roll the crust, cut circles that fit your muffin cups, and blind bake them for 8 minutes instead of 15. Fill and bake for 20-25 minutes. These are perfect for parties or portion control.
Serving & Storage Suggestions
This pumpkin pie is wonderful served at room temperature or slightly chilled. I prefer room temperature because the flavors seem more pronounced. A dollop of lightly sweetened whipped cream on top is traditional and delicious. For a twist, try a spoonful of crème fraîche — the tanginess cuts through the sweetness beautifully.
If you’re feeling fancy, drizzle caramel sauce over each slice and sprinkle with flaky sea salt. The salty-sweet combination is irresistible. A dusting of cinnamon or nutmeg on top of the whipped cream adds a nice visual touch.
For drinks, coffee or spiced chai pair perfectly. A glass of cold milk is a classic choice, especially for kids. If you’re serving adults, a bourbon or rye whiskey on the rocks complements the warm spices.
Storage: Cover the pie loosely with foil or plastic wrap and store in the refrigerator for up to 4 days. The flavor actually improves after a day or two as the spices meld. I don’t recommend leaving it at room temperature for more than 2 hours because of the eggs and cream.
Freezing: You can freeze the fully baked and cooled pie for up to 3 months. Wrap it tightly in plastic wrap, then foil. Thaw in the refrigerator overnight before serving. The crust might lose a tiny bit of its flakiness, but it’s still delicious. I usually make two pies at Thanksgiving and freeze one for later.
Reheating: If you prefer warm pie, place individual slices in a 300°F oven for 10 minutes. The microwave works in a pinch but can make the crust soggy. I’d rather eat it cold than microwaved, honestly.
Nutritional Information & Benefits
Here’s the honest truth about this homemade pumpkin pie — it’s dessert, not health food. But it does have some redeeming qualities. Pumpkin is packed with vitamin A, fiber, and antioxidants. The eggs add protein, and the cream provides calcium. Compared to many holiday desserts, this pie is relatively balanced.
One slice (1/8 of the pie) contains approximately:
- Calories: 380
- Fat: 22g
- Saturated Fat: 13g
- Carbohydrates: 42g
- Sugar: 24g
- Protein: 6g
- Fiber: 3g
- Vitamin A: 250% of the Daily Value
These values are estimates and will vary based on exact ingredients and portion sizes. If you’re watching your sugar intake, you can reduce the granulated sugar to 2 tablespoons without significantly affecting the texture. The brown sugar adds most of the flavor, so I’d keep that.
For a lighter version, use half-and-half instead of heavy cream and reduce the butter in the crust by 2 tablespoons. The pie won’t be as rich, but it will still satisfy that pumpkin pie craving.
This pie contains gluten, dairy, and eggs. For allergen-friendly versions, check the variations section above.
Conclusion
This homemade pumpkin pie with its flaky all-butter crust is more than just a dessert — it’s a tradition waiting to happen. The buttery, tender crust cradles a silky pumpkin filling that’s perfectly spiced and not overly sweet. Every slice is a reminder that the best things in life are worth taking time over.
I love this recipe because it’s forgiving enough for beginners but impressive enough for experienced bakers. It’s the pie I bring to every holiday gathering, the one people ask me to make year after year. And every time I pull a golden slice from the pan, I think of Lily and her simple question that changed how I approach cooking.
Try this recipe and make it your own. Add a little extra cinnamon if that’s your thing. Swap in maple syrup for a twist. Serve it with whipped cream or eat it straight from the pan at midnight — no judgment here. The important thing is that you’re making something with your hands and sharing it with people you love. That’s what pie is really about.
I’d love to hear how yours turns out. Drop a comment below and let me know what variations you tried, or share a photo of your pie on Pinterest. Happy baking, friend.
Frequently Asked Questions
Can I use a store-bought crust instead of making my own?
Absolutely. This filling works beautifully with a store-bought crust. Just blind bake the store-bought crust according to the package directions before adding the filling. The pie won’t be quite as special, but it will still taste great. Sometimes convenience wins, and that’s okay.
Why did my pumpkin pie crack on top?
Cracks usually mean the pie was overbaked or the oven temperature was too high. The filling expands as it bakes and contracts as it cools. If it’s overbaked, the contraction can cause cracks. Try baking at 350°F and pulling the pie out when the center still has a slight jiggle. Cooling gradually in a turned-off oven with the door cracked can also help prevent cracks.
Can I make this pie ahead of time?
Yes, and I actually recommend it. You can make the crust dough up to 3 days ahead and keep it refrigerated. The fully baked pie can be made 1-2 days in advance and stored in the refrigerator. The flavors meld and improve over time. Just don’t add whipped cream until right before serving.
How do I know when the pie is done baking?
The edges should be set and slightly puffed, while the center should jiggle like Jell-O when you gently shake the pan. A knife inserted near the center should come out clean or with just a few moist crumbs. The internal temperature should reach 175°F if you want to use a thermometer. I rely on the jiggle test — it’s never let me down.
Can I freeze leftover pumpkin pie?
Yes, you can freeze fully baked and cooled pumpkin pie for up to 3 months. Wrap it tightly in plastic wrap, then a layer of foil. Thaw in the refrigerator overnight. The texture of the crust might soften slightly, but the flavor will still be wonderful. I wouldn’t freeze an unbaked pie — the filling can separate during thawing.
Pin This Recipe!
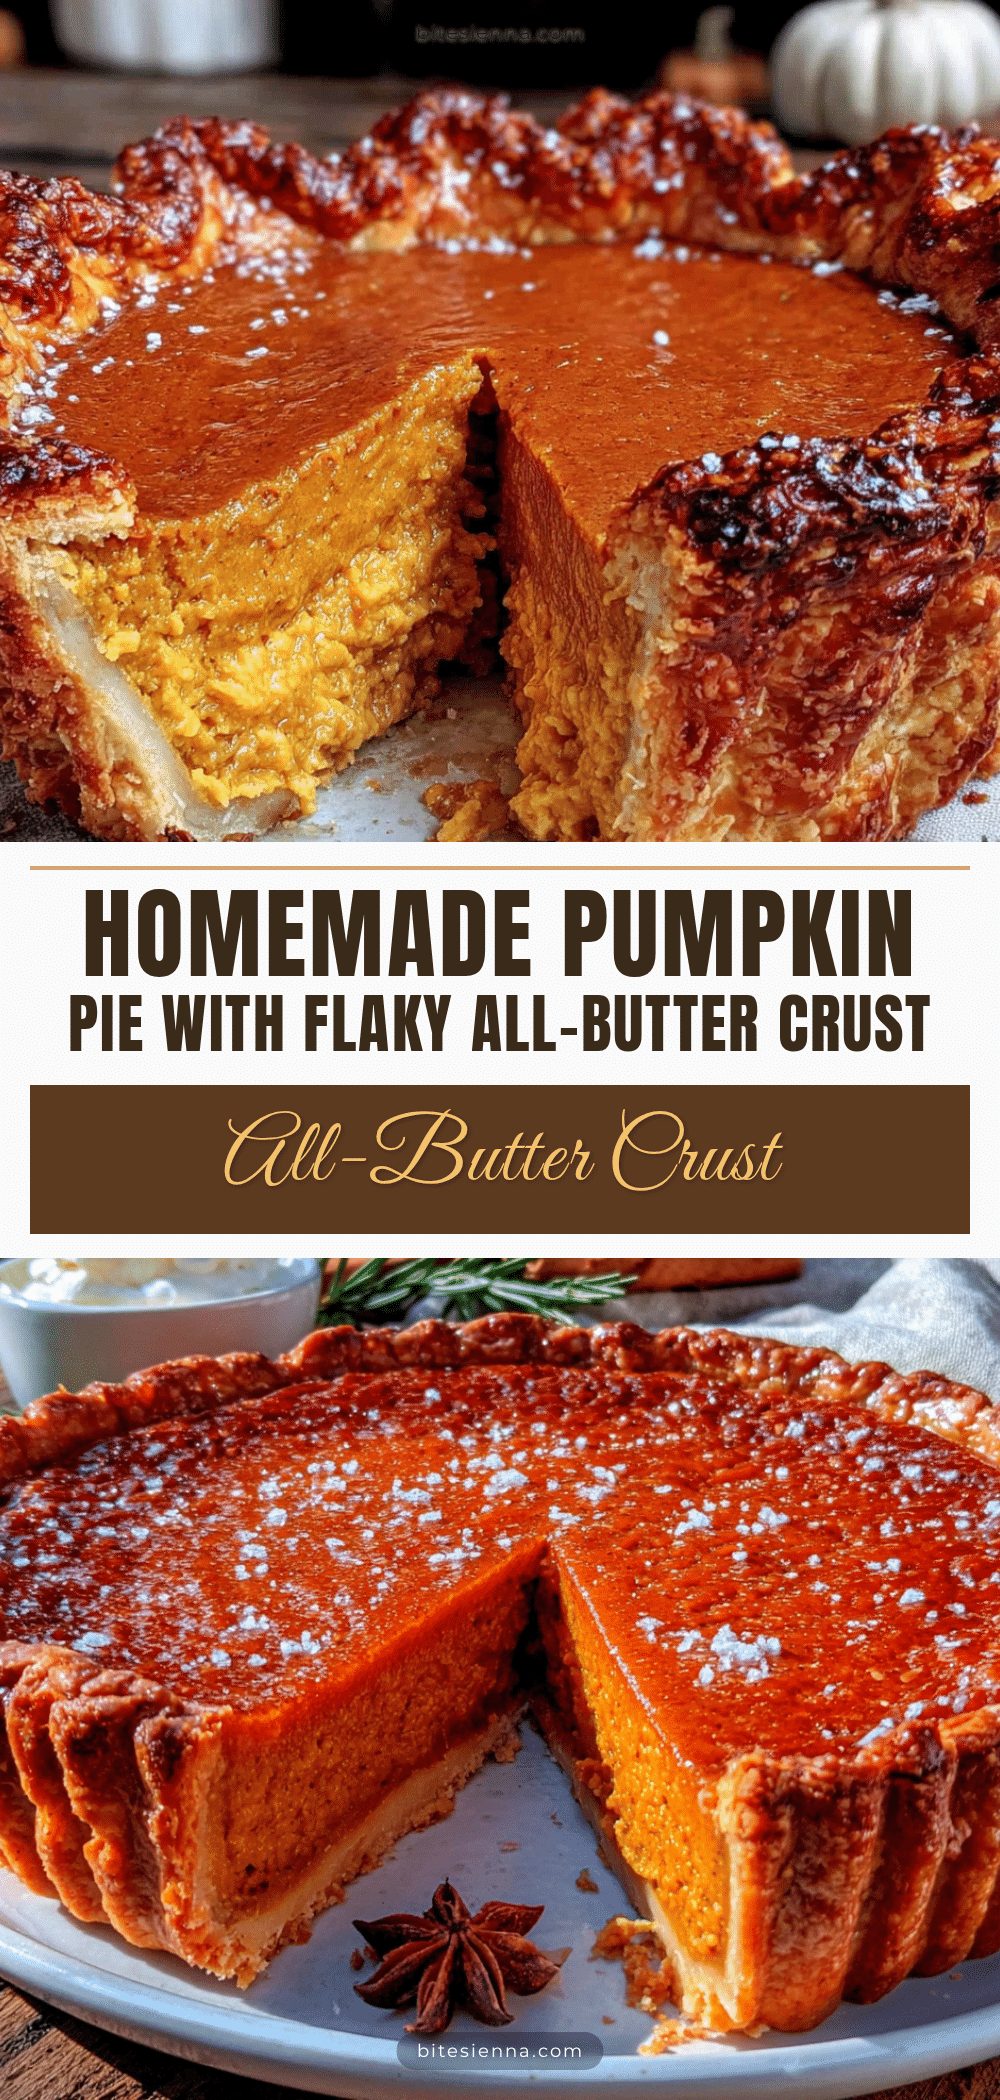
Homemade Pumpkin Pie with Perfect Flaky Butter Crust
A flaky all-butter crust cradles a silky, perfectly spiced pumpkin filling in this homemade pumpkin pie. It’s forgiving for beginners yet impressive enough for experienced bakers, making it the perfect Thanksgiving dessert.
- Prep Time: 15 minutes
- Cook Time: 50-60 minutes
- Total Time: 1 hour 5 minutes to 1 hour 15 minutes (plus chilling and cooling time)
- Yield: 8 servings 1x
- Category: Dessert
- Cuisine: American
Ingredients
- 2 ½ cups (300g) all-purpose flour
- 1 cup (226g) unsalted butter, very cold and cubed
- 6–8 tablespoons (90-120ml) ice water
- 1 teaspoon (6g) salt
- 1 tablespoon (12g) sugar
- 1 can (15 oz or 425g) pumpkin purée (100% pure pumpkin)
- 1 cup (240ml) heavy cream
- 2 large eggs, room temperature
- ½ cup (100g) packed brown sugar
- ¼ cup (50g) granulated sugar
- 2 teaspoons pumpkin pie spice
- 1 teaspoon vanilla extract
- ¼ teaspoon salt
Instructions
- Make the crust dough: In a large bowl, whisk together flour, salt, and sugar. Add cold butter cubes and toss to coat. Using a pastry cutter or fingertips, cut butter into flour until mixture resembles coarse meal with some pea-sized butter pieces. Sprinkle 6 tablespoons ice water over mixture and stir with a fork until dough starts coming together. If dry, add remaining water one tablespoon at a time. Turn dough onto a lightly floured surface and bring together into a disc. Wrap in plastic wrap …
- Roll out the crust: On a well-floured surface, roll chilled dough from center outward to a 12-inch circle, about ⅛-inch thick. Transfer to a 9-inch pie dish, press into corners, trim overhang to ½ inch, fold edges under, and crimp. Refrigerate for 15 minutes.
- Blind bake the crust: Preheat oven to 375°F (190°C). Line chilled crust with parchment paper or foil, fill with pie weights or dried beans. Bake for 15 minutes. Remove paper and weights, prick bottom with a fork, and bake for another 10-12 minutes until bottom is dry and lightly golden.
- Make the pumpkin filling: In a medium bowl, whisk together pumpkin purée, heavy cream, eggs, both sugars, pumpkin pie spice, vanilla, and salt until smooth and uniform.
- Assemble and bake: Reduce oven temperature to 350°F (175°C). Pour filling into warm pre-baked crust. Bake for 50-60 minutes until edges are set and center has a slight jiggle. If crust edges brown too quickly, tent with foil after 30 minutes.
- Cool completely: Place pie on a wire rack and cool completely at room temperature (2-3 hours). Serve at room temperature or refrigerate.
Notes
Keep all ingredients cold for the crust. Don’t overwork the dough. Blind bake thoroughly to avoid a soggy bottom. Use the jiggle test to check doneness. Cool completely before slicing. Make ahead for best flavor.
Nutrition
- Serving Size: 1 slice (1/8 of pie)
- Calories: 380
- Sugar: 24
- Fat: 22
- Saturated Fat: 13
- Carbohydrates: 42
- Fiber: 3
- Protein: 6
Keywords: pumpkin pie, homemade pumpkin pie, flaky butter crust, Thanksgiving dessert, fall baking, pumpkin dessert


