I was standing in the grocery store aisle last December, staring at a box of crackers that cost more than my entire week’s coffee budget, when the smell hit me. It wasn’t from the store at all—it was the sharp, waxy scent of a fresh-cut pine tree mixed with the faint sweetness of someone’s peppermint gum, and suddenly I was six years old at my aunt Linda’s kitchen table. She had this way of making everything feel like a celebration, even on a random Tuesday. Her hands were always moving, arranging things on a big wooden board—cheese cubes, salami roses, little pretzel sticks that looked like they were doing jumping jacks. She’d call it a “snack supper,” which honestly sounded way more fun than anything my mom ever made. I can still see the way she’d sneak a piece of cheddar while pretending to fix the arrangement, and I’d catch her eye and we’d both grin like we were getting away with something. She passed a few years ago, and every December I find myself trying to recreate that feeling—the one where food isn’t just food, it’s a little piece of magic you can eat with your fingers. This Kid-Friendly Christmas Tree Charcuterie Board is my best attempt yet. It’s the kind of thing that makes kids’ eyes go wide and adults feel like they’re in on a secret. Maybe you’ve been there too, standing in your kitchen wondering how to make the holidays feel special without losing your mind or your wallet. This board is your answer.
Why You’ll Love This Recipe
Let me be real with you for a second. I’ve made a lot of charcuterie boards in my time, and most of them end up looking like a fancy Pinterest fail—everything sliding off, cheese sweating, kids grabbing fistfuls of olives. Not this one. This Christmas tree charcuterie board is different. It’s designed for real families with real messes and real budgets.
Kid-Friendly & Fun
This board is literally shaped like a Christmas tree, so kids can’t help but get excited. My nephew, who usually eats only pasta and air, actually reached for a piece of turkey rolled up like a little log. That’s a win in my book.
Simple Ingredients
No weird fancy cheeses or imported meats that cost a small fortune. Everything here is stuff you can find at your regular grocery store. I’m talking cheddar cubes, salami, grapes, pretzels, and a few fun extras. Your wallet will thank you.
Perfect for Family Gatherings
Whether it’s Christmas Eve, a school party, or just a cozy movie night, this board steals the show. It’s the kind of thing that makes people stand around the table, picking and chatting, and honestly, that’s what the holidays are all about.
Crowd-Pleaser
I’ve brought this to three different gatherings now, and every single time, someone asks for the recipe. Kids love the fun shape, adults love the variety, and everyone loves that they can just grab and go. No plates needed, no fuss.
Unbelievably Delicious
Here’s the thing—this isn’t just a pretty board. The combo of salty pretzels, creamy cheese, sweet grapes, and savory meat is the kind of snack that keeps you coming back for “just one more bite.” I’ve lost count of how many times I’ve stood over this board, telling myself I’m done, only to grab another piece of that cheddar.
This recipe is the one that makes you close your eyes after the first bite. It’s comfort food, party food, and holiday magic all rolled into one tree-shaped masterpiece. And the best part? It’s so easy, you could make it with your eyes closed—though I don’t recommend that, for safety reasons.
What Ingredients You Will Need
This recipe uses simple, everyday ingredients that come together to create something that looks way more impressive than it actually is. Most of these are pantry staples or easy to find at any grocery store. Here’s what you’ll need to build your Christmas tree charcuterie board.
- Block of cream cheese (8 oz), softened—this acts as the “base” for your tree, helping everything stick together. I like Philadelphia brand for its creaminess.
- Sharp cheddar cheese (8 oz), cut into small cubes—adds a rich, tangy flavor that kids and adults both love. You can also use mild cheddar if your family prefers it.
- Colby Jack cheese (8 oz), cut into cubes—the orange and white stripes look really pretty against the green tree shape. Plus, it melts in your mouth.
- Salami (about 6 oz), thinly sliced—roll a few slices into little logs for a fun texture. I usually go with hard salami because it holds its shape well.
- Turkey slices (about 4 oz), rolled up—a great option for kids who might not love salami. It’s milder and still feels fancy.
- Green grapes (1 cup)—they add a pop of color and a sweet burst that balances the salty cheese. Seedless is best, obviously.
- Red grapes (1/2 cup)—these are your “ornaments” for the tree. They look like little Christmas lights when placed right.
- Pretzel sticks (about 20)—these become the tree trunk and some branch accents. They add a nice salty crunch.
- Cherry tomatoes (1/2 cup)—another red pop for decoration. If your kids aren’t into tomatoes, you can skip them or use red bell pepper strips instead.
- Broccoli florets (1 cup), lightly steamed—hear me out. These fill in the green spaces and add a veggie option that doesn’t feel like a chore. Steam them just until bright green, then let them cool completely.
- Cucumber slices (1/2 cup)—cut into small triangles or stars if you’re feeling fancy. They add freshness and crunch.
- Small star-shaped cookie or star fruit slice (1)—this goes on top of the tree. I’ve used both, and a star-shaped cheese slice works great too. Just make sure it’s something edible.
- Ranch dressing (for dipping)—optional, but kids love it. Serve it in a small bowl at the base of the tree.
- Fresh rosemary sprigs (a few)—these are technically for decoration, but they smell amazing and add that “tree” vibe. Don’t eat them, though.
Substitution tips: If you’re feeding a crowd with allergies, swap the cream cheese for a dairy-free version, and use gluten-free pretzels. For a nut-free option, skip any nuts you might be tempted to add (I know, I know, but it’s better safe than sorry). You can also swap the salami for ham or roast beef if that’s what your family likes. The beauty of this board is that it’s totally flexible.
Equipment Needed
You don’t need any fancy gadgets to pull this off. Here’s what I use every time I make this board.
- Large wooden cutting board or serving platter—at least 12×18 inches. A baking sheet lined with parchment works in a pinch, and honestly, I’ve done that more times than I’d like to admit.
- Small mixing bowl—for softening the cream cheese if you need to stir it a bit.
- Cheese knife—for cutting cubes. A regular kitchen knife works fine, but a cheese knife makes cleaner cuts.
- Small cookie cutter (star shape)—optional, but fun if you want to cut cheese or cucumber into stars. I found a set at the dollar store last year.
- Piping bag or zip-top bag—for spreading the cream cheese in a tree shape. If you don’t have a piping bag, just snip the corner off a zip-top bag. Works like a charm.
- Toothpicks—for securing any rolled meats or holding the star on top. Kids love pulling these out, just be careful with little ones.
- Small bowl—for the ranch dressing or any other dip you want to include.
Budget-friendly tip: Don’t stress about having the perfect board. I’ve used a clean pizza pan, a cookie sheet, and even a large plastic cutting board. It all looks the same once you pile on the food. And that star cookie cutter? I’ve used a butter knife to cut a star shape freehand before. Imperfect stars have character, I say.
Preparation Method
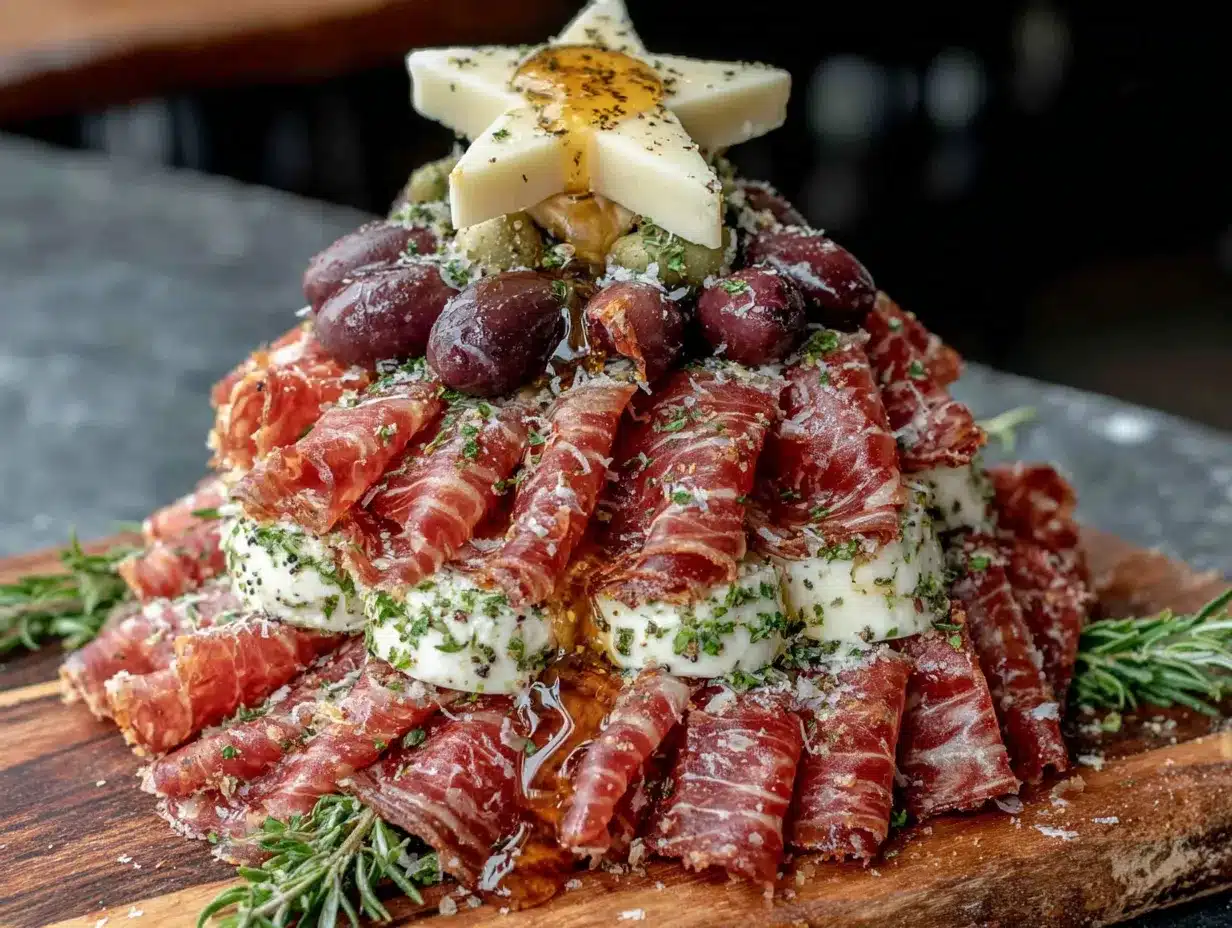
Alright, let’s get to the fun part. Here’s how I build this Christmas tree charcuterie board, step by step. It’s easier than you think, and I promise you’ll feel like a culinary artist by the time you’re done.
Step 1: Prepare the cream cheese base (5 minutes)
Take your block of cream cheese out of the fridge about 20 minutes before you start, so it softens a bit. If you forgot (I do this all the time), just microwave it for about 10 seconds—no more, or it gets too runny. Spoon the cream cheese into a zip-top bag, snip off a corner, and pipe it onto your board in the shape of a Christmas tree. Don’t worry if it’s not perfect—you’re going to cover most of it with other ingredients anyway. Just aim for a triangle shape with a little trunk at the bottom. Use a spatula or the back of a spoon to spread it out evenly, about 1/4 inch thick.
Step 2: Cut the cheeses and meats (10 minutes)
While the cream cheese is setting, cut your cheddar and Colby Jack into small cubes, about 1/2 inch each. Kids love helping with this part, but watch those fingers. Roll up your salami slices into little logs—just roll them tightly and secure with a toothpick if needed. Do the same with the turkey slices. If you have leftover meat, just pile it near the base of the tree. No one’s judging.
Step 3: Prep the fruits and veggies (10 minutes)
Wash your grapes and cherry tomatoes, and let them dry on a paper towel. Wet grapes make the cheese slide around, so pat them dry. Steam your broccoli florets for about 2 minutes in the microwave with a splash of water—just until bright green. Let them cool completely, or they’ll wilt the cream cheese. Cut your cucumber into thin slices, and if you have that star cookie cutter, press out a few stars for decoration.
Step 4: Assemble the tree trunk and base (2 minutes)
At the bottom of your cream cheese triangle, place a row of pretzel sticks vertically to form the tree trunk. I usually use about 6-8 sticks, laid side by side. Then, around the base of the tree, arrange a few extra pretzels and some cheese cubes to anchor everything. This is also where I put the small bowl of ranch dressing—tuck it right at the bottom corner so it looks intentional.
Step 5: Build the tree layers (15 minutes)
Now for the fun part. Start at the bottom of the cream cheese triangle and work your way up. Place rows of ingredients that mimic the branches of a tree. I like to start with a row of broccoli florets along the bottom edge—they create a nice green base. Then add a row of cheddar cubes, then a row of salami rolls, then a row of green grapes, and so on. Alternate colors and textures as you go. Don’t be afraid to overlap things a little—it looks more natural that way. The key is to cover most of the cream cheese so it’s not too visible, but leaving a few spots showing is totally fine.
Step 6: Add the ornaments (5 minutes)
Once the main tree shape is built, it’s time to decorate. Place red grapes and cherry tomatoes in clusters around the tree to look like ornaments. Tuck a few cucumber stars in between. If you have rosemary sprigs, tuck them in along the edges to look like pine needles—just make sure people know not to eat them. I usually tell the kids they’re “magic tree branches” and they leave them alone.
Step 7: Top it off (2 minutes)
Place your star-shaped cookie, star fruit slice, or cheese star right at the very top of the tree. If it’s not staying put, use a toothpick to secure it. This is the crowning moment, and honestly, it’s what makes the whole thing look like a Christmas tree. I’ve used a star-shaped bell pepper slice before, and it looked adorable.
Step 8: Fill in the gaps (5 minutes)
Take a step back and look at your board. Are there any big empty spots? Fill them with extra grapes, pretzels, or cheese cubes. I like to scatter a few loose ingredients around the base of the tree to make it look abundant. Add a few more salami rolls or turkey rolls on the sides. The goal is to make it look full and festive, not sparse.
Sensory cues: When you’re done, the board should look like a vibrant, edible Christmas tree—green from the broccoli and cucumbers, red from the grapes and tomatoes, yellow and orange from the cheeses. The smell is a mix of creamy cheese, savory meat, and fresh herbs. It’s the kind of thing that makes you want to grab a toothpick and start snacking immediately.
Troubleshooting tip: If your cream cheese base is too soft and things are sliding around, pop the whole board in the fridge for 10 minutes to firm up. I’ve had to do this more times than I can count, especially if my kitchen is warm from all the holiday cooking.
Cooking Tips & Techniques
I’ve made this board about a dozen times now, and I’ve learned a few things the hard way. Let me save you some trouble.
Don’t overthink the shape. I spent my first attempt trying to make a perfect geometric triangle with the cream cheese, and it looked terrible. Now I just pipe it freehand and adjust as I go. Trees aren’t perfect in nature, so yours doesn’t have to be either. The food covers most of the mistakes anyway.
Layer strategically. Heavier items like cheese cubes should go closer to the base of the tree, while lighter items like grapes and cucumber stars can go higher up. This keeps the structure stable and prevents everything from sliding off. I learned this after a particularly ambitious attempt where the top of my tree collapsed into a sad pile of cheese. Not my finest moment.
Keep it cold. Charcuterie boards are best served cold, especially if you have kids who might leave it out for a while. I assemble the board about 30 minutes before serving and keep it in the fridge until the last minute. If you’re serving it at a party, put out small plates and remind people to grab what they want before it gets too warm. Cream cheese doesn’t love sitting out for hours.
Let the kids help. This is a kid-friendly recipe, so let them get involved. My niece loves placing the “ornaments” (red grapes and tomatoes) on the tree. My nephew is in charge of the pretzel trunk. It keeps them busy and makes them more likely to actually eat what’s on the board. Plus, it’s a great photo op for the holiday scrapbook.
Prep ahead of time. You can cut all the cheeses and meats the night before and store them in separate containers in the fridge. Same with the washed grapes and tomatoes. Then assembly takes about 15 minutes right before you’re ready to serve. This is a lifesaver on Christmas Eve when you’re juggling a million things at once.
Variations & Adaptations
This board is endlessly customizable, which is one of the reasons I love it. Here are a few variations I’ve tried and loved.
Dairy-Free Version: Swap the cream cheese for a dairy-free alternative (Kite Hill makes a good one), and use dairy-free cheese cubes. There are some surprisingly good options out there now. My friend’s daughter has a dairy allergy, and she devoured this version without even noticing the difference.
Gluten-Free Version: Use gluten-free pretzels or skip them altogether and use cucumber sticks for the trunk. Rice crackers also work well as a crunchy base. Just make sure all your meats and cheeses are gluten-free—most are, but it’s worth double-checking labels.
Meat-Lover’s Version: Add pepperoni slices, prosciutto rolls, and even some cooked bacon crumbles. My husband is a meat fanatic, so I usually double the salami and add a few extra turkey rolls. He calls it “the best thing I’ve ever made,” which is saying a lot.
Veggie-Heavy Version: Load up on the broccoli, add some bell pepper strips (red and green for Christmas colors), and throw in some snap peas. You can even make the entire tree out of vegetables and just use cheese as accents. My sister-in-law is vegetarian, and she goes crazy for this version.
Sweet & Savory Version: Add some chocolate-covered pretzels or a few mini candy canes at the base for a sweet treat. I did this for a kids’ party once, and the board was completely empty within 20 minutes. Just be careful not to mix the sweet stuff with the savory too much—keep them on separate sides of the board.
Breakfast Board: Use the same tree shape but swap the ingredients for breakfast items—pancake bites, sausage links, cheese cubes, and fruit. I made this for a Christmas morning brunch, and it was a huge hit. The kids thought it was hilarious to eat a Christmas tree for breakfast.
Serving & Storage Suggestions
This board is best served cold or at room temperature, so take it out of the fridge about 15 minutes before serving. That gives the cheese time to soften just a bit without getting greasy.
Presentation tips: Place the board on a large table where people can gather around it. I like to put it on a festive holiday towel or a piece of wrapping paper (just make sure it’s food-safe). Add a few sprigs of fresh rosemary around the edges for that pine tree look. If you’re feeling extra fancy, sprinkle a little powdered sugar on the board to look like snow—just don’t get it on the cheese.
Complementary dishes: This board pairs beautifully with a warm bowl of tomato soup or a simple salad. For drinks, hot cocoa is a no-brainer for the kids, and a glass of red wine or a spiced cider works for the adults. I’ve also served it alongside a batch of my easy holiday punch for a complete party spread.
Storage: If you have leftovers (unlikely, but possible), separate the ingredients into airtight containers. The cheese and meats will keep for 3-4 days in the fridge. The grapes and tomatoes should be eaten within a day or two—they get soggy fast. The cream cheese base doesn’t store well once it’s been out, so I usually just scrape it off and toss it. Don’t try to save the broccoli—it gets sad and limp.
Reheating: Honestly, this is a cold dish, so reheating isn’t really a thing. But if you have leftover salami or turkey rolls, they’re great chopped up in a salad or on a sandwich the next day. The cheese cubes make a good snack straight from the fridge.
Flavor development: The flavors actually get better after about an hour at room temperature—the cheese softens, the meats release a little oil, and everything melds together. But don’t leave it out for more than two hours, especially if you have kids around. Food safety first, always.
Nutritional Information & Benefits
I’m not a nutritionist, but I’ve done enough label-reading to give you a rough idea. This board is packed with protein from the cheese and meats, plus vitamins from the fruits and veggies. It’s a balanced snack that won’t leave you crashing an hour later.
Estimated per serving (based on 8 servings):
| Nutrient | Amount |
|---|---|
| Calories | ~350 |
| Protein | 18g |
| Fat | 22g |
| Carbohydrates | 15g |
| Fiber | 3g |
| Sugar | 8g |
| Sodium | 800mg |
Health benefits: Cheese is a great source of calcium for growing kids (and adults). Grapes are packed with antioxidants, and broccoli is full of vitamin C and fiber. Even the salami has some protein to keep little tummies full. It’s not exactly health food, but it’s a heck of a lot better than a bag of chips.
Dietary considerations: This recipe is naturally low-carb if you skip the pretzels. It’s also vegetarian-friendly if you leave out the meats. For a nut-free option, just don’t add any nuts (I know some charcuterie boards call for almonds or walnuts, but I skip them for safety). Potential allergens include dairy (from the cheese) and gluten (from the pretzels), so adjust accordingly for your crowd.
My personal take: I love that this board lets me feed my family something that feels indulgent but actually has some nutritional value. The kids are getting protein, calcium, and veggies without even realizing it. That’s a win in my book.
Conclusion
This Kid-Friendly Christmas Tree Charcuterie Board is more than just a snack—it’s a memory in the making. It’s the kind of thing that makes the holidays feel special without requiring a culinary degree or a second mortgage. I’ve made it for family gatherings, school parties, and quiet nights at home, and every single time, it brings smiles. The best part? You can customize it to fit your family’s tastes, your budget, and whatever you have in the fridge. Don’t be afraid to experiment—swap out the grapes for apple slices, use pepperoni instead of salami, or add a handful of chocolate chips for a sweet surprise. This recipe is yours now, so make it your own.
I’d love to hear how yours turns out. Drop a comment below and tell me what your family thought, or share a photo on social media and tag me. Did your kids help build the tree? Did you try a fun variation? Let’s keep the conversation going—I read every comment, and I always answer questions. And if you’re looking for more holiday inspiration, check out my easy Christmas punch recipe that pairs perfectly with this board.
Now go build that tree. Your family is waiting.
Frequently Asked Questions
Can I make this board ahead of time?
Yes! You can prep all the ingredients the night before—cut the cheese, roll the meats, wash the grapes—and store them in separate containers in the fridge. Assemble the board about 30 minutes before serving. The cream cheese base is best done fresh, but you can pipe it onto parchment paper and transfer it to the board later if you’re really in a pinch.
How do I keep the board from getting soggy?
Pat all your fruits and veggies dry before placing them on the board. Wet ingredients can make the cream cheese slide around and turn everything into a mushy mess. Also, don’t add the broccoli until right before serving—steamed veggies release moisture over time.
What if I don’t have a star-shaped cookie cutter?
No problem! You can cut a star shape freehand from a slice of cheese or cucumber. Or use a star-shaped cracker, a bell pepper slice cut into a star, or even a small cookie. I’ve used a star-shaped fruit snack before in a pinch, and the kids loved it.
How many people does this board serve?
This recipe serves about 6-8 people as a snack or appetizer. If you’re serving it as a main dish for a light meal, figure on 4-6 people. For a big party, I’d double the ingredients and make two boards—or one giant one on a baking sheet.
Can I use other dips besides ranch?
Absolutely! Honey mustard, French onion dip, or even a simple vinaigrette work great. For a sweet option, try a chocolate dip or caramel sauce on the side. Just make sure whatever you use is in a small bowl that won’t tip over. I learned that one the hard way at a New Year’s Eve party.
Pin This Recipe!
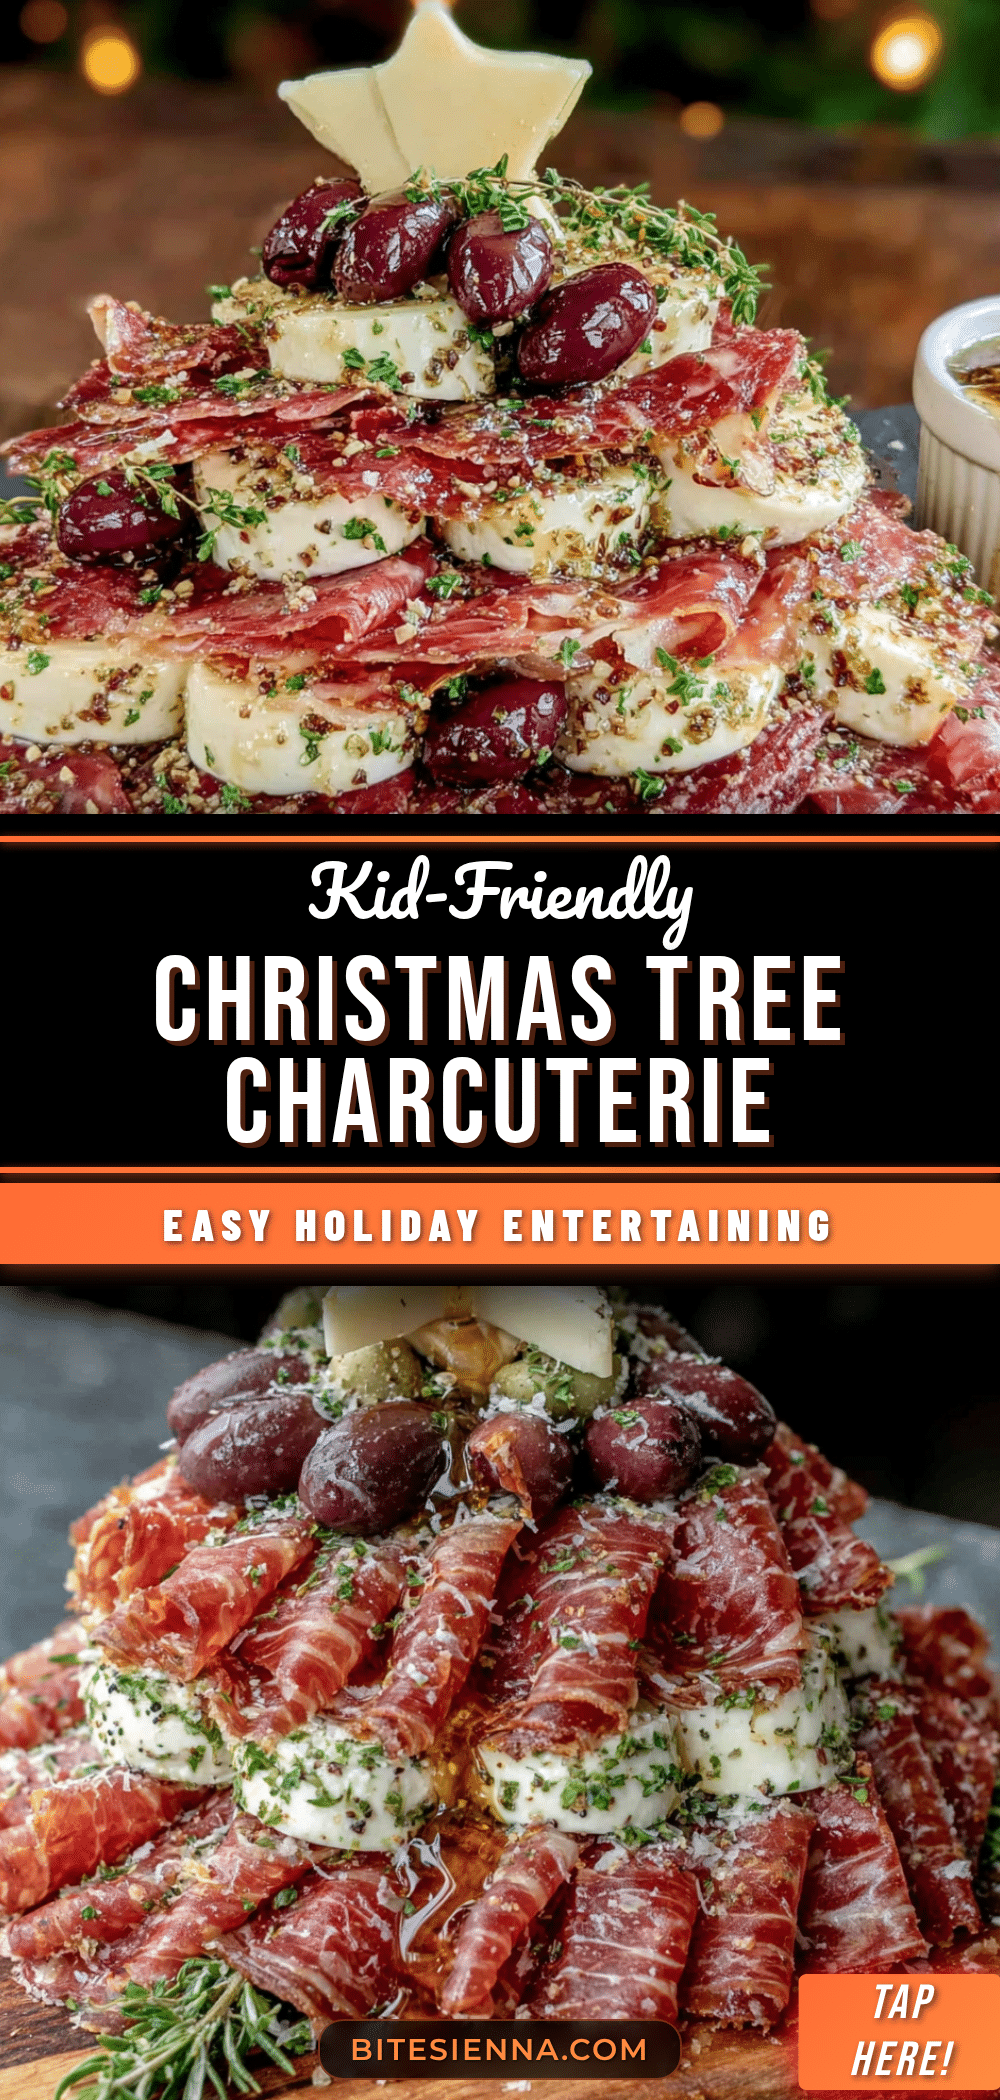
Easy Kid-Friendly Christmas Tree Charcuterie Board
A fun, festive, and easy-to-make Christmas tree-shaped charcuterie board that kids and adults will love. Made with simple, budget-friendly ingredients like cheese, salami, grapes, and pretzels, it’s perfect for holiday gatherings.
- Prep Time: 30 minutes
- Cook Time: 2 minutes
- Total Time: 32 minutes
- Yield: 6-8 servings 1x
- Category: Appetizer
- Cuisine: American
Ingredients
- 8 oz cream cheese, softened
- 8 oz sharp cheddar cheese, cut into small cubes
- 8 oz Colby Jack cheese, cut into cubes
- 6 oz salami, thinly sliced
- 4 oz turkey slices, rolled up
- 1 cup green grapes
- 1/2 cup red grapes
- 20 pretzel sticks
- 1/2 cup cherry tomatoes
- 1 cup broccoli florets, lightly steamed
- 1/2 cup cucumber slices
- 1 small star-shaped cookie or star fruit slice
- Ranch dressing (for dipping)
- Fresh rosemary sprigs (for decoration)
Instructions
- Prepare the cream cheese base: Take the cream cheese out of the fridge about 20 minutes before starting to soften. If forgotten, microwave for about 10 seconds. Spoon cream cheese into a zip-top bag, snip off a corner, and pipe onto the board in the shape of a Christmas tree (triangle with a small trunk). Use a spatula or spoon to spread evenly, about 1/4 inch thick.
- Cut the cheeses and meats: Cut cheddar and Colby Jack into small cubes, about 1/2 inch each. Roll salami slices into tight logs, securing with a toothpick if needed. Do the same with turkey slices.
- Prep the fruits and veggies: Wash grapes and cherry tomatoes, pat dry. Steam broccoli florets for about 2 minutes in the microwave with a splash of water until bright green, then let cool completely. Cut cucumber into thin slices; use a star cookie cutter for stars if desired.
- Assemble the tree trunk and base: At the bottom of the cream cheese triangle, place a row of pretzel sticks vertically (about 6-8 sticks) to form the trunk. Arrange extra pretzels and cheese cubes around the base. Place a small bowl of ranch dressing at the bottom corner.
- Build the tree layers: Starting at the bottom of the cream cheese triangle, place rows of ingredients to mimic branches. Alternate colors and textures: a row of broccoli florets, then cheddar cubes, then salami rolls, then green grapes, etc. Overlap slightly for a natural look, covering most of the cream cheese.
- Add the ornaments: Place red grapes and cherry tomatoes in clusters around the tree to look like ornaments. Tuck cucumber stars in between. Add rosemary sprigs along the edges for pine needles (not for eating).
- Top it off: Place the star-shaped cookie, star fruit slice, or cheese star at the very top of the tree. Secure with a toothpick if needed.
- Fill in the gaps: Look at the board and fill any empty spots with extra grapes, pretzels, or cheese cubes. Scatter loose ingredients around the base for an abundant look.
Notes
Pat all fruits and veggies dry to prevent sogginess. If cream cheese base is too soft, refrigerate the board for 10 minutes to firm up. Prep ingredients the night before for quicker assembly. Keep board cold until serving, and don’t leave out for more than 2 hours.
Nutrition
- Serving Size: 1 serving (based on
- Calories: 350
- Sugar: 8
- Sodium: 800
- Fat: 22
- Saturated Fat: 12
- Carbohydrates: 15
- Fiber: 3
- Protein: 18
Keywords: Christmas tree charcuterie board, kid-friendly charcuterie, holiday appetizer, easy charcuterie board, Christmas snack


