There used to be a tiny bakery on the corner of Elm and 4th in our old neighborhood called The Wicked Whisk. They made these deviled eggs every October that were the stuff of legend—creamy, tangy, and topped with a single black olive sliced to look like a spider. When they closed their doors two years ago, I honestly felt a little piece of my Halloween spirit disappear with them. I mean, who knew a simple appetizer could hold so much seasonal magic?
After about seven tries—some were too salty, a couple looked more like sad blobs than spiders—I finally cracked the code. The secret? A touch of pickle brine in the yolk mixture and patience when slicing those olives. Let me tell you, the first time I bit into my recreation and got that exact creamy, tangy, smoky flavor I remembered, I almost teared up right there in my kitchen. The power had flickered during a storm, and I was standing there eating a deviled egg by candlelight. It felt right.
These Cozy Spooky Spider Deviled Eggs aren’t just about looking cute on a platter (though they absolutely do). They’re about bringing that warm, nostalgic feeling back—the kind where you’re wrapped in a blanket with a hot cider, watching Hocus Pocus, and snacking on something that feels both playful and comforting. Maybe you’ve been there, searching for that one dish that makes a cold October evening feel complete. This is it. Honestly, I think I love them even more than the original now. And that’s saying something.
Why You’ll Love This Recipe
Let me be real with you—I’ve tested this recipe more times than I care to admit. I’ve made them for Halloween parties, for quiet movie nights, and even for a “spooky brunch” that my neighbor Sarah insisted we host last fall. Each time, they disappeared within minutes. Here’s why these eggs are different from every other deviled egg recipe you’ve tried:
- Quick & Easy: You can have these ready in about 30 minutes, with only 15 minutes of active prep. Perfect for busy Halloween weeknights or last-minute party invites.
- Simple Ingredients: Eggs, mayo, mustard, pickle brine, and olives. That’s it. No fancy grocery trips or specialty stores required.
- Perfect for Halloween: Whether you’re hosting a costume party, attending a potluck, or just want something fun for the kids, these eggs fit every spooky occasion.
- Crowd-Pleaser: I’ve served these to kids, adults, and even my picky uncle who “doesn’t do themed food.” They all went back for seconds.
- Unbelievably Delicious: The creamy yolk filling with that subtle tang from the brine, paired with the salty olive “spider”—it’s a flavor combo that just works.
What makes this version stand out is the texture. I use a potato ricer to get the yolks perfectly smooth—no lumps, no graininess, just silky, velvety goodness. Plus, the ratio of mayo to mustard is spot-on. Not too heavy, not too sharp. It’s the kind of appetizer that makes you close your eyes after the first bite, even if you’re surrounded by a dozen screaming kids in costumes. Trust me, I’ve been there.
What Ingredients You Will Need
This recipe uses simple, humble ingredients to deliver big flavor and that cozy Halloween vibe. Most of these are probably already in your kitchen, which makes this recipe even better for those spontaneous spooky gatherings.
For the Deviled Eggs
- 12 large eggs (room temperature works best for even cooking)
- 1/3 cup mayonnaise (I prefer Duke’s or Hellmann’s for that perfect creamy tang)
- 1 tablespoon yellow mustard (adds that classic deviled egg zing)
- 1 tablespoon pickle brine (from your favorite dill pickles—this is the secret ingredient)
- 1/2 teaspoon salt (adjust to taste)
- 1/4 teaspoon black pepper (freshly ground if you have it)
- 1/4 teaspoon paprika (plus extra for garnish)
For the Spider Toppers
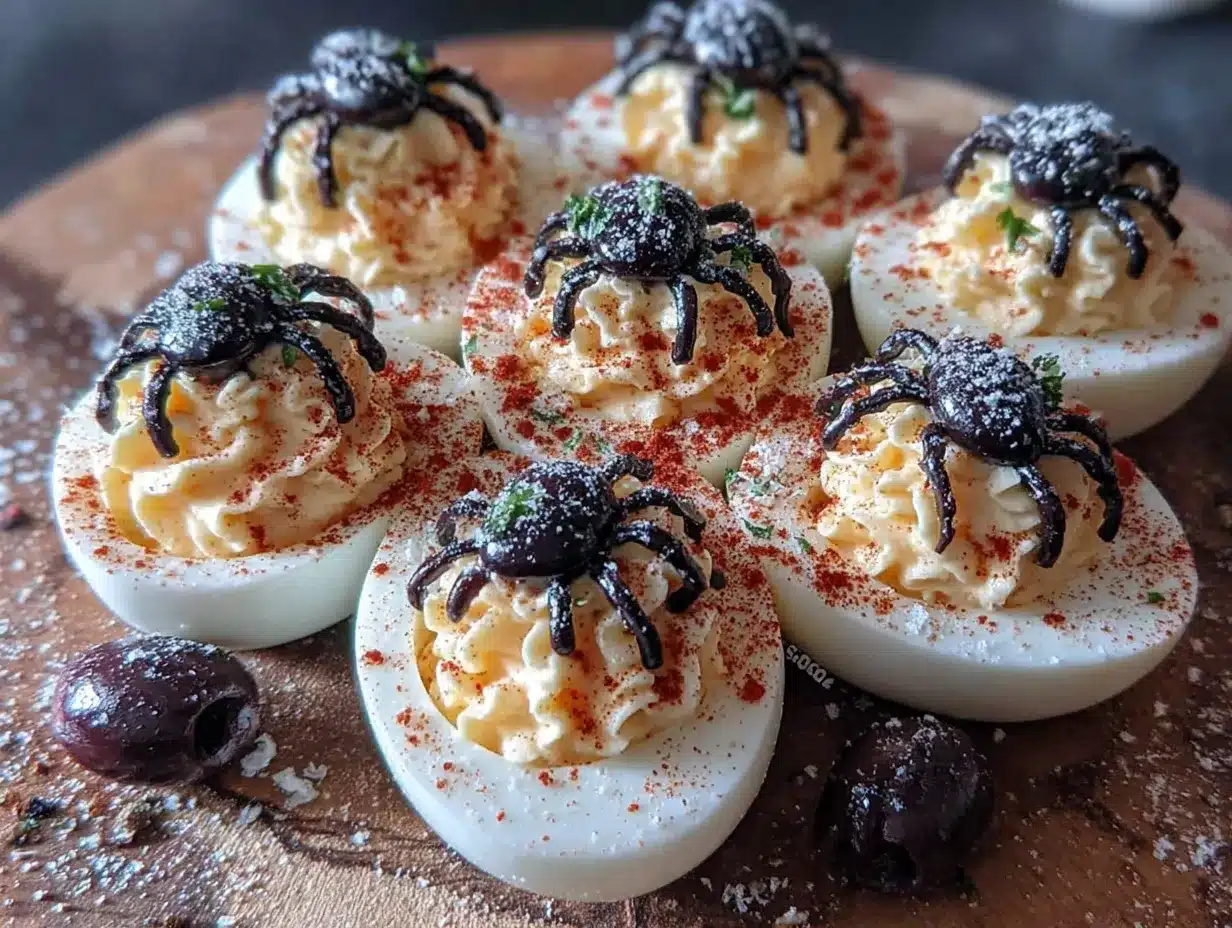
- 12 large black olives (pitted, whole—look for the firmest ones you can find)
- 24 small black olive slices (for the spider legs—you’ll slice these from extra olives)
Ingredient Tips: I’ve found that older eggs actually peel better than fresh ones, so if your eggs have been sitting in the fridge for a week, that’s perfect. For the olives, I recommend Lindsay or Mezzetta brands—they’re consistently firm and easy to slice without falling apart. If you’re dairy-free, this recipe is naturally safe, but always check your mayo label to be sure. And honestly, don’t skip the pickle brine. I tried making these without it once, and they were just… flat. That little splash makes all the difference.
Equipment Needed
You don’t need a professional kitchen to pull these off. Here’s what you’ll need:
- Large pot (for boiling the eggs—I use my trusty 5-quart one)
- Mixing bowls (one for the yolks, one for the whites)
- Potato ricer or fork (the ricer gives you that ultra-smooth texture, but a fork works in a pinch)
- Piping bag or zip-top bag (for filling the eggs neatly—though I’ve used a spoon in a hurry)
- Sharp paring knife (for slicing olives precisely—this is key for the spider legs)
- Cutting board (preferably a small one for the olive work)
- Slotted spoon (for transferring eggs from the boiling water)
If you don’t have a potato ricer, don’t stress. I spent years just mashing yolks with a fork, and it worked fine. The ricer just makes the filling a little fluffier. And if you’re on a budget, a simple zip-top bag with the corner snipped off works beautifully for piping—I’ve done it dozens of times.
Preparation Method
Step 1: Boil the Eggs
Place your 12 eggs in a single layer in a large pot. Cover them with cold water by about an inch. Bring the water to a rolling boil over high heat—this usually takes about 8-10 minutes depending on your stove. Once boiling, cover the pot, remove it from heat, and let it sit for exactly 12 minutes. I set a timer every single time because I’ve forgotten and ended up with green-ringed yolks more times than I’d like to admit.
Step 2: Ice Bath
While the eggs are resting, fill a large bowl with ice and cold water. Using your slotted spoon, transfer the eggs to the ice bath immediately after the 12 minutes are up. Let them chill for at least 10 minutes. This stops the cooking process and makes peeling a hundred times easier. Honestly, I’ve skipped this step before out of impatience, and I regretted it every single time.
Step 3: Peel and Halve
Gently tap each egg on the counter to crack the shell, then roll it between your hands to loosen it. Peel under running cold water—it helps slide the shell off cleanly. Pat the peeled eggs dry with a paper towel. Slice each egg in half lengthwise with a sharp knife. Carefully pop out the yolks into a mixing bowl. Arrange the white halves on a serving platter, cut-side up.
Step 4: Make the Filling
Add the mayonnaise, yellow mustard, pickle brine, salt, pepper, and paprika to the yolks. Mash everything together with a fork until it’s relatively smooth. Here’s where my trick comes in: if you have a potato ricer, press the yolk mixture through it into a clean bowl. It makes the filling incredibly light and airy. Then stir in the remaining ingredients until fully combined. Taste it—I always do—and adjust the salt or brine if needed.
Step 5: Fill the Eggs
Spoon the yolk mixture into a piping bag fitted with a star tip, or into a zip-top bag with a small corner snipped off. Pipe the filling into each egg white half, mounding it slightly. You want it to look generous and inviting, not skimpy. If you don’t have a bag, just use a small spoon—it’ll still taste amazing, I promise.
Step 6: Create the Spiders
Now for the fun part! Take your whole black olives and slice them in half lengthwise. Each half will be the spider’s body. For the legs, take additional olives and slice them crosswise into thin rounds—you’ll need about 24 slices total. Place one olive half (cut-side down) on top of each deviled egg. Then, using a toothpick or your fingers, arrange two olive slices on each side of the body to create eight spider legs. Press them gently into the filling so they stay put.
Step 7: Garnish and Serve
Sprinkle a light dusting of paprika over the eggs for that extra pop of color. Serve immediately, or refrigerate until you’re ready. They look best within a few hours of making them, but trust me, they won’t last that long.
Cooking Tips & Techniques
I’ve made enough deviled eggs in my life to fill a swimming pool, so let me share what I’ve learned the hard way:
Perfect Hard-Boiled Eggs Every Time: The 12-minute rest method I mentioned is foolproof. But here’s the thing—if you live at a high altitude, you might need to add a minute or two. I learned this when I visited my sister in Denver and ended up with undercooked yolks. Also, older eggs peel better. If your eggs are super fresh, add a teaspoon of baking soda to the water—it helps loosen the shells.
The Biggest Mistake: Overmixing the yolk filling. I know it’s tempting to keep stirring until it’s perfectly smooth, but you can actually make it too thin. Stop when it’s creamy but still holds its shape. If it gets too runny, add another yolk (if you have one) or a tiny bit more mustard to thicken it up.
Timing Strategy: I like to boil and peel the eggs the night before. Store the whites and yolks separately in the fridge. Then, the next day, I just make the filling and assemble. It cuts the active time in half and makes party prep so much less stressful. I once tried to do everything in one hour before a party, and let’s just say the spiders looked more like sad blobs.
Consistency Tip: For the smoothest filling, make sure your mayonnaise is at room temperature. Cold mayo doesn’t blend as well and can leave little lumps. I learned this after staring at a lumpy batch wondering what went wrong.
Variations & Adaptations
One of the best things about this recipe is how easy it is to tweak. Here are some variations I’ve tried and loved:
Spicy Spider Eggs
Add 1/2 teaspoon of sriracha or a pinch of cayenne pepper to the yolk mixture. The heat pairs beautifully with the cool, creamy filling. I made these for a Halloween party last year, and they were the first to go.
Smoky Bacon Spiders
Crumble a slice of crispy bacon over each egg before adding the olive spider. The smoky, salty crunch takes these to a whole new level. Just be careful—the bacon can overwhelm the delicate flavor if you use too much.
Avocado Deviled Spiders
Replace half the mayonnaise with mashed ripe avocado. It gives the filling a beautiful green hue and a subtle, buttery flavor. This is my go-to when I’m trying to be a little healthier, and honestly, it’s just as delicious.
Dietary Adaptations: For a dairy-free version, use a vegan mayonnaise like Follow Your Heart or Just Mayo. For a lower-fat option, swap half the mayo with plain Greek yogurt—it adds protein and tang. And if you’re avoiding nightshades, skip the paprika and use a pinch of turmeric for color instead.
Serving & Storage Suggestions
These spider deviled eggs are best served chilled or at room temperature—never hot, obviously. I like to arrange them on a black or dark-colored platter to make the spiders really pop. A sprinkle of fresh chives or dill around the edges adds a nice touch of green.
What to Serve With Them: These eggs are perfect alongside other Halloween snacks like crispy baked chicken wings, a warm bowl of creamy pumpkin soup, or even a spooky charcuterie board with cheese and crackers. For drinks, a crisp apple cider or a dark stout beer complements the creamy, tangy flavors beautifully.
Storage: Store any leftovers in an airtight container in the refrigerator for up to 2 days. The eggs will keep, but the olive spiders might start to slide around a bit. To prevent this, you can store the filling and whites separately and assemble just before serving. I don’t recommend freezing these—the texture gets watery and weird.
Reheating: Don’t. These are served cold. If you’ve refrigerated them, just let them sit at room temperature for about 10 minutes before serving to take the chill off.
Flavor Development: Honestly, these eggs taste even better after a few hours in the fridge. The flavors meld together, and the filling becomes even more cohesive. I once made them a day ahead for a party, and they were the best batch I’d ever made.
Nutritional Information & Benefits
Here’s the breakdown for one spider deviled egg (based on 24 servings):
| Nutrient | Amount |
|---|---|
| Calories | 65 |
| Protein | 5g |
| Fat | 4.5g |
| Saturated Fat | 1g |
| Cholesterol | 95mg |
| Sodium | 180mg |
| Carbohydrates | 1g |
| Fiber | 0g |
| Sugar | 0.5g |
Eggs are a fantastic source of high-quality protein and contain important nutrients like vitamin D, B12, and choline, which supports brain health. The olive toppers provide healthy monounsaturated fats and a touch of iron. This recipe is naturally gluten-free and low-carb, making it suitable for keto and paleo diets. Just be mindful if you’re watching your sodium intake—the olives and brine add a fair amount.
Conclusion
These Cozy Spooky Spider Deviled Eggs are more than just a Halloween appetizer—they’re a little piece of nostalgia that brings warmth and joy to any spooky gathering. Whether you’re recreating a memory from a beloved bakery or starting a new tradition with your family, this recipe delivers on flavor, fun, and comfort. The creamy filling, the playful spider toppers, and that tangy kick from the pickle brine all come together in a way that feels both familiar and exciting.
I’d love to hear how yours turn out! Did you try any variations? Did your kids love making the spiders? Drop a comment below and let me know—I read every single one, and your stories honestly make my day. And if you’re looking for more cozy Halloween recipes, be sure to check out my easy pumpkin bread or candy corn popcorn mix for a full spooky spread.
Happy Halloween, my friend. Now go make some spiders!
Frequently Asked Questions
Can I make these spider deviled eggs a day ahead?
Absolutely! In fact, I recommend it. Prepare the filling and egg whites separately, then assemble them the day of your event. The flavors actually deepen and get better after a night in the fridge.
How do I keep the olive spiders from falling off?
Press the olive body gently but firmly into the yolk filling. The filling acts like glue. If you’re transporting them, place them in a single layer in a container with a tight-fitting lid, and try not to jostle them too much.
Can I use a different type of olive?
You can, but black olives look the most like spiders. Green olives work in a pinch, but they’re usually smaller and have a different texture. Kalamata olives are too soft and tend to fall apart when sliced.
My yolk filling turned out too runny. What did I do wrong?
This usually happens if you added too much mayonnaise or brine, or if you overmixed it. To fix it, add another hard-boiled yolk (if you have one) or a teaspoon of breadcrumbs to absorb the excess moisture. Next time, add the liquid ingredients slowly and stop when it reaches the right consistency.
Are these spider deviled eggs kid-friendly?
Absolutely! Kids love the spider design, and the flavor is mild and familiar. Just be careful with the olive legs—they can be a choking hazard for very young children. You can always omit the legs and just use the olive body for a simpler design.
Pin This Recipe!
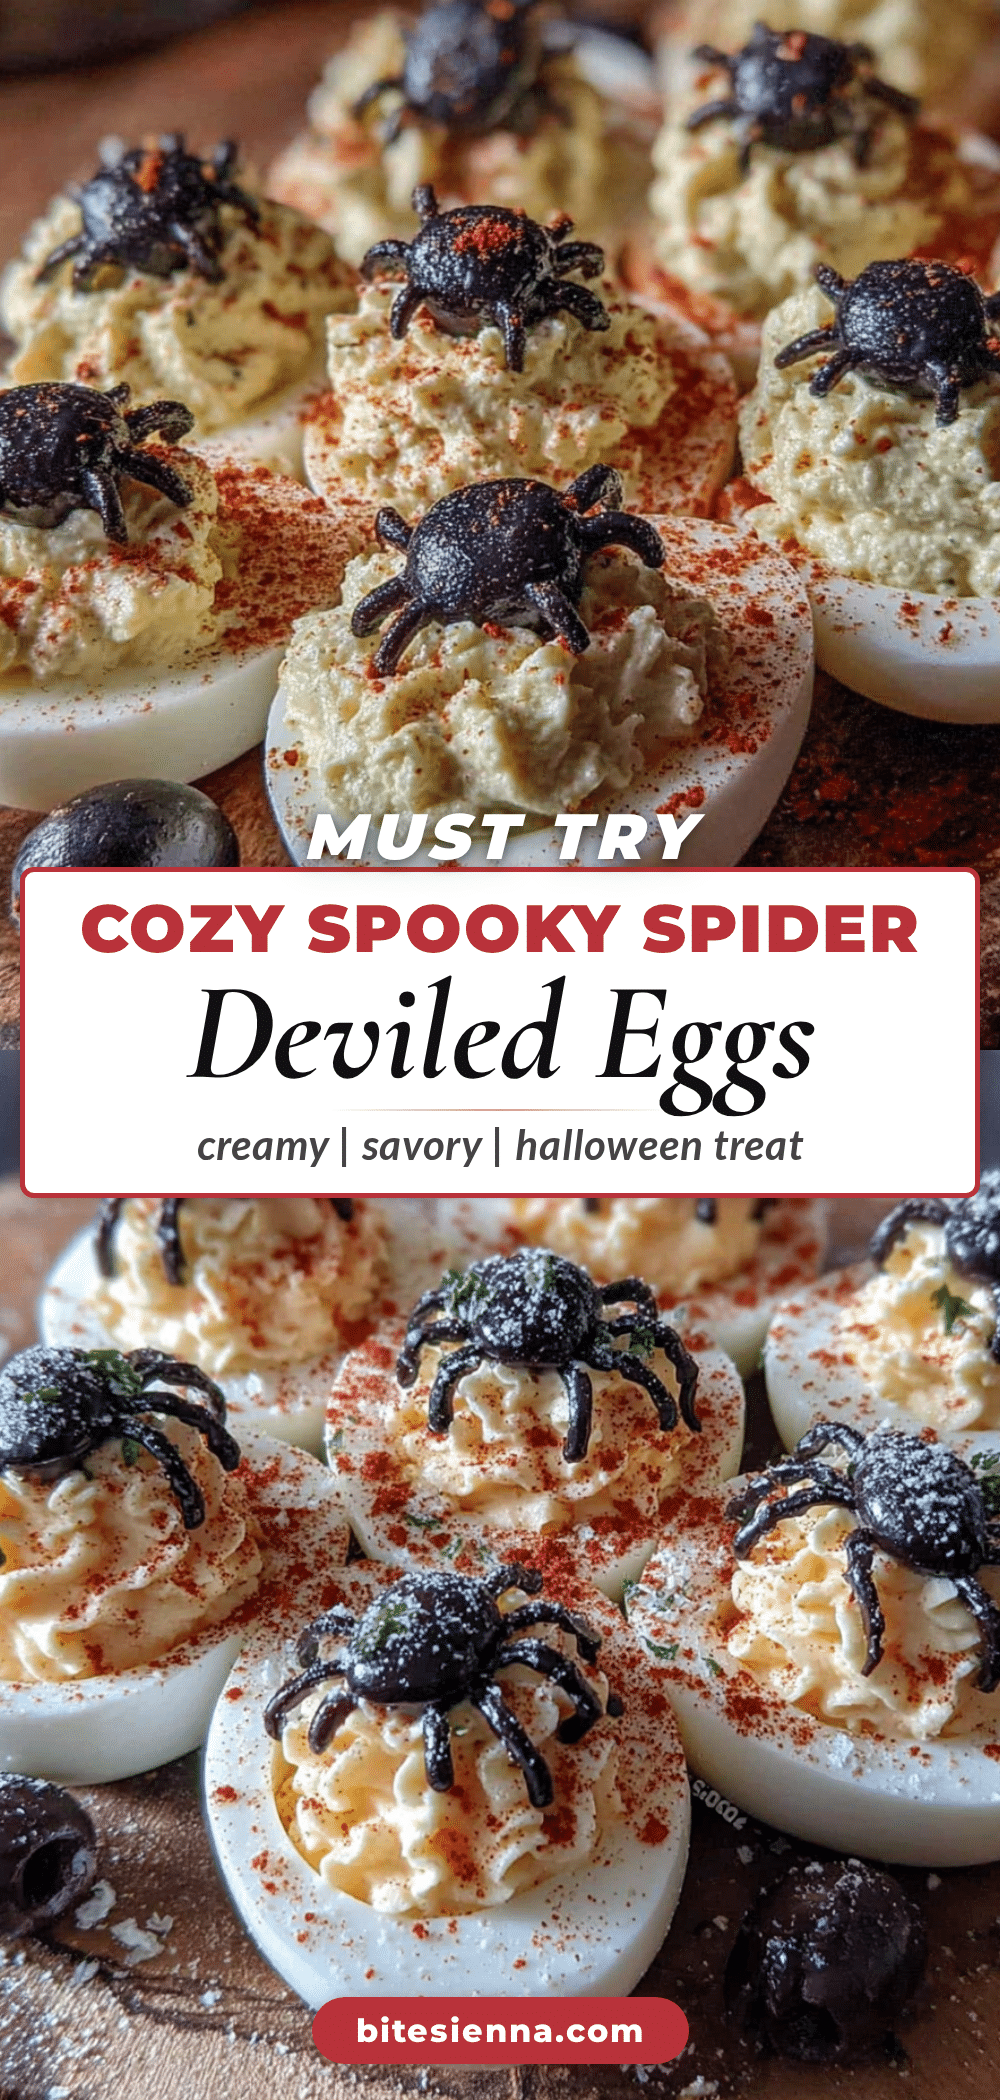
Cozy Spooky Spider Deviled Eggs: Easy Halloween Appetizer
These creamy, tangy deviled eggs topped with olive spiders are a nostalgic Halloween treat that brings warmth and joy to any spooky gathering. Perfect for parties, movie nights, or a fun family activity.
- Prep Time: 15 minutes
- Cook Time: 12 minutes
- Total Time: 27 minutes
- Yield: 24 servings 1x
- Category: Appetizer
- Cuisine: American
Ingredients
- 12 large eggs (room temperature)
- 1/3 cup mayonnaise (preferably Duke’s or Hellmann’s)
- 1 tablespoon yellow mustard
- 1 tablespoon pickle brine
- 1/2 teaspoon salt
- 1/4 teaspoon black pepper (freshly ground)
- 1/4 teaspoon paprika (plus extra for garnish)
- 12 large black olives (pitted, whole)
- 24 small black olive slices (for spider legs)
Instructions
- Place eggs in a single layer in a large pot. Cover with cold water by about an inch. Bring to a rolling boil over high heat (8-10 minutes). Once boiling, cover, remove from heat, and let sit for exactly 12 minutes.
- While eggs rest, fill a large bowl with ice and cold water. Transfer eggs to ice bath using a slotted spoon. Let chill for at least 10 minutes.
- Gently tap each egg on the counter to crack the shell, then roll between hands to loosen. Peel under running cold water. Pat dry. Slice each egg in half lengthwise. Pop out yolks into a mixing bowl. Arrange white halves on a serving platter, cut-side up.
- Add mayonnaise, yellow mustard, pickle brine, salt, pepper, and paprika to the yolks. Mash with a fork until relatively smooth. For extra smoothness, press yolk mixture through a potato ricer into a clean bowl. Stir until fully combined. Taste and adjust seasoning if needed.
- Spoon yolk mixture into a piping bag fitted with a star tip, or into a zip-top bag with a small corner snipped off. Pipe filling into each egg white half, mounding slightly.
- Slice whole black olives in half lengthwise. Each half will be the spider’s body. Slice additional olives crosswise into thin rounds (about 24 slices total) for legs. Place one olive half (cut-side down) on top of each deviled egg. Arrange two olive slices on each side of the body to create eight spider legs. Press gently into filling.
- Sprinkle a light dusting of paprika over the eggs. Serve immediately or refrigerate until ready.
Notes
Older eggs peel better. For high altitude, add 1-2 minutes to the resting time. If eggs are very fresh, add 1 teaspoon baking soda to the water to help loosen shells. Do not overmix the yolk filling; stop when creamy but still holds its shape. For best results, boil and peel eggs the night before, store whites and yolks separately, then assemble the next day. These taste even better after a few hours in the fridge.
Nutrition
- Serving Size: 1 spider deviled egg
- Calories: 65
- Sugar: 0.5
- Sodium: 180
- Fat: 4.5
- Saturated Fat: 1
- Carbohydrates: 1
- Protein: 5
Keywords: Halloween deviled eggs, spider deviled eggs, spooky appetizer, easy Halloween recipe, deviled eggs with olives


