The neighborhood fall potluck was in six hours and I’d completely forgotten. Everyone else would be bringing their signature dishes—the kind that take two days to prepare and require special equipment I don’t own. My neighbor Karen was bringing her famous caramel apple cheesecake that she spends an entire weekend perfecting. Across the street, the Johnsons were showing up with their grandmother’s recipe for spiced pumpkin rolls, rolled and filled with such precision they looked store-bought.
I opened my fridge in a panic. Half a bag of clementines. Some green grapes. A block of cheddar cheese. Not exactly potluck royalty, you know? I mean, I couldn’t show up with a sad bowl of fruit and call it a day. Not when everyone else was pulling out all the stops.
Then I spotted the pumpkin-shaped platter my sister gave me last year—the one I’d shoved in the back of the cabinet because when would I ever use a pumpkin-shaped platter? The answer, apparently, was today. I grabbed the clementines, started peeling, and before I knew it, I had this ridiculous idea to arrange everything to look like a pumpkin patch.
Honestly, I was just trying to make the best of a bad situation. I wasn’t trying to win anything. But when I walked into that potluck carrying this Easy Pumpkin Patch Fruit Tray with Clementines, people actually stopped mid-conversation. Karen put down her cheesecake to take a picture. The Johnsons asked for the “recipe” which, let’s be real, is just arranging fruit on a plate.
That’s the thing about this Guest-Favorite Pumpkin Patch Fruit Tray with Clementines—it looks like you spent hours planning it when really, you threw it together because you forgot about the party. It’s the accidental overachiever of appetizers. And honestly? I’ve been making it every fall since. It’s just too fun not to share.
Why You’ll Love This Recipe
Let me tell you why this pumpkin patch fruit tray has become my go-to for every fall gathering. I’ve tested this at six different events now—potlucks, dinner parties, even my kid’s classroom celebration—and it never fails to get the same reaction. People genuinely light up when they see it.
- Looks Impressive, Takes Minutes: You can put this together in under 15 minutes. Seriously. While everyone else is stressing over complicated recipes, you’re done before they’ve preheated their ovens.
- Simple Ingredients: Clementines, green grapes, and a few extras you probably already have. No fancy grocery trips. No obscure ingredients you’ll never use again.
- Perfect for Hosting: This is the dish that makes you look like a hero at any fall gathering. Dinner parties, potlucks, Thanksgiving appetizers—it fits everywhere.
- Crowd-Pleaser: Kids love the fun presentation. Adults appreciate the fresh, healthy option among all the heavy fall foods. Everybody wins.
- Naturally Beautiful: The colors are stunning without any effort. Bright orange clementines against green grapes and white cheese—it’s like autumn on a plate.
What makes this different from just throwing fruit on a tray? It’s the presentation. The way the clementines mimic little pumpkins in a patch. The way the grapes become the “vines.” It’s not just fruit—it’s a conversation starter. And when you’re hosting, that’s exactly what you want. Something that gets people talking before they even take a bite.
This is the kind of dish that makes you close your eyes after the first bite—not because the fruit is life-changing (it’s fruit, you know?), but because you realize you pulled off something beautiful without breaking a sweat. That feeling never gets old.
What Ingredients You Will Need
This recipe uses the simplest ingredients to create something that looks way more complicated than it actually is. Most of these are probably sitting in your kitchen right now.
- Clementines (5-6 medium): These are the stars of the show. You want ones that are firm and bright orange—they’ll look more like mini pumpkins. I prefer Cuties or Halos brand because they’re consistently sweet and seedless. Look for clementines with the stems still attached if you can; it adds to the pumpkin look.
- Green grapes (2 cups): These become the “vines” connecting your pumpkin patch. You want them seedless and firm. Red grapes work too, but green gives that nice contrast against the orange clementines.
- Cheddar cheese block (4 ounces): Cut into small cubes or use a small cookie cutter for pumpkin shapes. The orange color ties everything together. I like sharp cheddar for the flavor contrast with the sweet fruit.
- Fresh rosemary sprigs (3-4 small): These become the pumpkin stems. Just a tiny piece poked into each clementine half. It’s optional but makes the pumpkin illusion way more convincing.
- Pumpkin-shaped platter or large round board: Not strictly necessary, but it really sells the theme. A white platter works great too—the contrast makes the colors pop.
- Small pretzel sticks (optional): Another option for pumpkin stems if you don’t have rosemary. They look cute and add a salty crunch to the board.
- Apple slices (optional): For extra color and variety. Toss them in a little lemon juice to prevent browning.
A note on ingredient selection: I’ve tried this with regular oranges instead of clementines, and honestly, clementines work better. They’re smaller, cuter, and easier to arrange. Plus, guests can pop them in their mouths in one or two bites—no sticky fingers everywhere.
For the cheese, you can swap cheddar for gouda or even brie if you’re feeling fancy. Just make sure it’s firm enough to cut into shapes. Soft cheeses won’t hold up as well on the tray.
If you’re serving this at a party where kids will be around, consider adding some yogurt-covered raisins or dried cranberries to the mix. Kids love picking out the “little extras” from the pumpkin patch.
Equipment Needed
You don’t need much for this recipe, which is part of why I love it. Here’s what you’ll want to have on hand:
- Pumpkin-shaped platter or large serving board: I found mine at Target for about $12. A white oval platter works just as well if you don’t want to buy something seasonal. The key is having enough surface area to spread everything out nicely.
- Small cookie cutters: Pumpkin-shaped ones are fun for the cheese, but a small round cutter works too. I’ve also just cut the cheese into small squares—it still looks great.
- Sharp knife and cutting board: For halving the clementines and cutting the cheese. Nothing fancy needed.
- Small bowl: For holding extra grapes or pretzel sticks if you’re adding them on the side.
- Kitchen shears: For cutting the rosemary sprigs into tiny stems. Regular scissors work in a pinch.
Honestly, if you have a knife, a cutting board, and a plate, you can make this work. The first time I made this, I used a regular dinner plate and it still looked adorable. Don’t let the equipment list intimidate you—this is the most low-maintenance recipe you’ll make all season.
Preparation Method
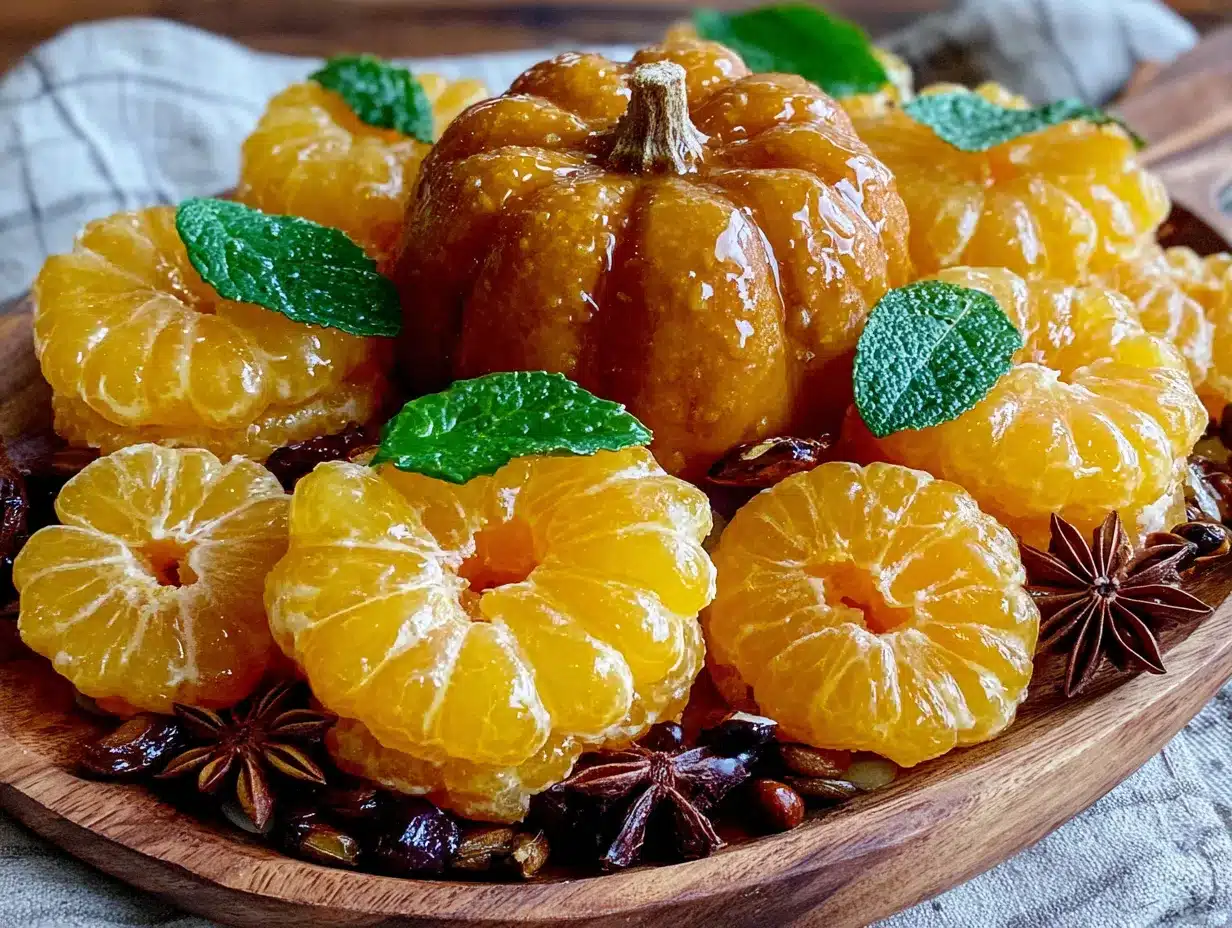
Alright, let me walk you through exactly how to put this together. I’ve made this enough times to know what works and what doesn’t.
- Prep your clementines (5 minutes): Peel all your clementines and separate them into segments. You want to keep the segments intact—don’t break them apart. Leave a few whole if you want some “full pumpkins” on your tray. For the halves, gently press two segments together to form a little pumpkin shape. It doesn’t have to be perfect—imperfect pumpkins look more natural anyway.
- Add the stems (2 minutes): Take your rosemary sprigs and snip off tiny pieces—about half an inch long. Gently poke one into the top of each clementine segment pair. If you’re using pretzel sticks, just break them into small pieces and stick them in. The rosemary gives a more realistic look, but pretzels are fun too.
- Wash and dry your grapes (2 minutes): Rinse your green grapes and pat them completely dry. Wet grapes will make your tray soggy, and nobody wants that. Spread them out on a paper towel while you work on the rest.
- Cut your cheese (3 minutes): If you’re using cookie cutters, press them into the cheese block and pop out your shapes. If you’re cutting by hand, aim for small cubes—about half an inch. I like to make a mix of pumpkins and small squares for variety.
- Arrange the pumpkin patch (5 minutes): Start by placing your clementine “pumpkins” in clusters around the tray. Don’t space them evenly—real pumpkin patches have them grouped naturally. Leave some space between clusters for your grapes and cheese.
- Add the grape “vines” (3 minutes): Arrange the green grapes in curving lines between your pumpkin clusters. Think of them as vines connecting everything. You want them to look organic, not like you placed them with a ruler.
- Fill in with cheese and extras (2 minutes): Tuck your cheese pumpkins or cubes around the edges and in any empty spots. If you’re adding apple slices or dried cranberries, scatter them around for pops of color.
- Final touches (1 minute): Stand back and look at your tray. Fill in any bare spots with extra grapes or cheese. Add a few extra rosemary sprigs around the edges for a “fresh from the garden” feel.
One thing I learned the hard way: don’t overcrowd the tray. You want people to be able to grab pieces without knocking everything over. Leave a little breathing room between the clusters.
The whole process takes about 15-20 minutes, depending on how fancy you get with the cheese cutting. I’ve done it in 10 minutes when I was running late. It still looked great.
Cooking Tips & Techniques
After making this pumpkin patch fruit tray more times than I can count, I’ve picked up a few tricks that make the process smoother and the final result even better.
Keep your clementines cold: Cold clementines are firmer and easier to peel without breaking the segments. I pop mine in the fridge for about 30 minutes before I start. Room temperature clementines tend to fall apart when you’re trying to shape them into pumpkins.
Don’t skip drying the grapes: I know it seems like a small thing, but wet grapes will make your cheese soggy and your clementines slippery. Pat them dry thoroughly. I learned this one the hard way at a party where everything started sliding around halfway through the evening.
Make extra pumpkins: People will eat the clementines first—they’re just so cute and easy to grab. I always make a few extra “pumpkins” to replenish the tray halfway through the party. Just keep them in a bowl in the fridge and add them when the tray starts looking sparse.
Prep ahead of time: You can peel your clementines and cut your cheese the night before. Store them in separate containers in the fridge. Assemble the tray about 30 minutes before guests arrive. This is my favorite hosting hack—it makes me look like I spent way more time than I actually did.
Use a damp paper towel under the tray: If you’re serving on a wooden board or a slippery platter, a damp paper towel underneath will keep everything from sliding around. This is especially helpful if you’re serving outdoors or on a buffet table where people are reaching across.
One mistake I made early on: I arranged everything too perfectly. It looked stiff and unnatural. Now I go for a more organic, scattered look. Real pumpkin patches aren’t perfectly symmetrical, and your tray shouldn’t be either.
Variations & Adaptations
I’ve tried quite a few variations on this pumpkin patch fruit tray, and some of them have become new favorites. Here are a few ways to switch it up:
Savory-Sweet Version: Add small cubes of aged gouda or manchego alongside the cheddar. The nutty flavor pairs beautifully with the sweet clementines. Throw in some salted almonds or pecans for crunch. This version is always a hit at adult gatherings.
Dip It: Add a small bowl of honey-yogurt dip or caramel sauce in the center of the tray. For the honey-yogurt dip, just mix plain Greek yogurt with a tablespoon of honey and a pinch of cinnamon. It takes about 30 seconds and makes the fruit feel like dessert.
Berry Patch Variation: Swap the green grapes for a mix of blackberries and raspberries. The deep red and purple colors look gorgeous against the orange clementines. This version feels a bit more elegant for dinner parties.
Kid-Friendly Version: Add some mini marshmallows, yogurt-covered raisins, and small pretzel sticks scattered around. Kids love finding the “treasures” hidden in the pumpkin patch. I’ve done this for classroom parties and it’s always a hit.
Low-Sugar Option: Skip the cheese and add cucumber slices and bell pepper strips alongside the fruit. The crunch is satisfying without any added sugar. This works great for guests watching their carb intake.
Seasonal Swaps: In winter, use blood oranges instead of clementines for a dramatic red-orange color. In spring, swap in strawberries and kiwi for a different color palette. The pumpkin shape works with any round fruit.
My personal favorite variation? The one with the honey-yogurt dip and salted almonds. Something about the sweet, creamy, and salty combination just works. I’ve brought that version to three parties now and it disappears every time.
Serving & Storage Suggestions
This pumpkin patch fruit tray is best served at room temperature, so take it out of the fridge about 20 minutes before your guests arrive. The flavors are brighter when the fruit isn’t ice-cold.
Presentation tips: Place the tray at eye level on your buffet table—it’s too pretty to hide behind other dishes. I like to put it on a slightly elevated cake stand or a small riser. It draws people in and makes them want to grab a plate.
What to serve alongside: This tray pairs beautifully with other fall appetizers. I often serve it next to a warm brie with cranberry sauce or a bowl of spiced nuts. The contrast between the cold, fresh fruit and warm, savory dishes is lovely.
For drinks: A crisp white wine or sparkling cider complements the citrus flavors. For non-alcoholic options, apple cider or a cranberry spritzer works great.
Storage: If you have leftovers (which honestly, rarely happens), store the components separately. Clementines go in an airtight container in the fridge for up to 3 days. Grapes in a separate container with a paper towel to absorb moisture. Cheese wrapped tightly in plastic wrap.
Reheating: There’s nothing to reheat here, but if you’re serving the cheese, let it come to room temperature before serving for the best flavor and texture.
One thing I love about this tray: the flavors actually get better as the fruit sits at room temperature. The clementines release their oils and the whole tray starts smelling amazing. Don’t worry if it sits out for an hour—it’ll still be delicious.
Nutritional Information & Benefits
This pumpkin patch fruit tray is naturally healthy, which makes it a great option for guests who are watching what they eat during the holiday season.
Estimated per serving (about 1 cup of fruit and cheese):
- Calories: 120-150
- Carbohydrates: 20g
- Fiber: 3g
- Protein: 5g
- Fat: 4g
- Vitamin C: 60% of daily value
Health benefits: Clementines are packed with vitamin C, which supports your immune system—especially helpful during cold and flu season. The green grapes provide antioxidants called polyphenols, which are great for heart health. Cheese adds calcium and protein, making this a more balanced snack than just fruit alone.
Dietary considerations: This recipe is naturally gluten-free and vegetarian. If you’re dairy-free, simply skip the cheese or use a plant-based alternative. For low-carb diets, focus on the cheese and grapes and go easy on the clementines.
Potential allergens: Dairy from the cheese. If you’re serving guests with allergies, label the cheese separately or offer a dairy-free option on the side.
I love that this tray lets guests indulge in something sweet and fun without derailing their health goals. It’s the kind of dish that makes everyone feel good about what they’re eating—and that’s a win in my book.
Conclusion
Look, I’m not going to pretend this pumpkin patch fruit tray is some complicated culinary masterpiece. It’s fruit on a plate. But sometimes the simplest things are the ones that bring the most joy—and this tray brings a lot of joy.
It’s the dish that makes people smile before they even take a bite. It’s the one that sparks conversations and makes kids light up. And honestly? It’s the recipe that saved me from showing up empty-handed to that potluck, which is why it holds a special place in my heart.
I hope you’ll give this a try at your next fall gathering. Make it your own—add your favorite fruits, experiment with different cheeses, or throw in a dip that you love. The beauty of this recipe is that it’s more of a template than a rigid set of rules.
If you make this, I’d love to hear about it. Drop a comment below and tell me how it went—did your guests love it? Did you add any fun twists? I read every comment and I genuinely love hearing how these recipes show up in your kitchens.
Until next time, happy hosting! And remember: sometimes the best dishes are the ones you throw together in a panic. Those are the ones that end up becoming traditions.
Frequently Asked Questions
Can I make this pumpkin patch fruit tray the night before?
You can prep all the components the night before—peel the clementines, wash the grapes, cut the cheese. Store everything separately in the fridge. Assemble the tray about 30 minutes before serving for the freshest look.
What if I can’t find pumpkin-shaped cookie cutters?
No problem at all! You can cut the cheese into small squares or use a round cookie cutter. The clementines are the real stars anyway—the cheese is just a bonus. I’ve made this with plain cheese cubes and it still looks adorable.
How long will this fruit tray stay fresh at a party?
It’ll stay fresh for about 2 hours at room temperature. After that, the grapes might start to get a little soft and the cheese might sweat. If your party runs longer, just refresh the tray with some fresh fruit from the fridge.
Can I use other fruits besides clementines and grapes?
Absolutely! Apple slices, pear slices, and berries all work beautifully. Just keep in mind that apples and pears will brown after a while, so toss them in a little lemon juice first. Kiwi slices add a nice pop of green too.
Is this recipe safe for kids with nut allergies?
Yes, this recipe is naturally nut-free if you skip any optional nut additions. Just be sure to check the labels on your cheese and any dips you add. It’s a great option for school parties and nut-free events.
Pin This Recipe!
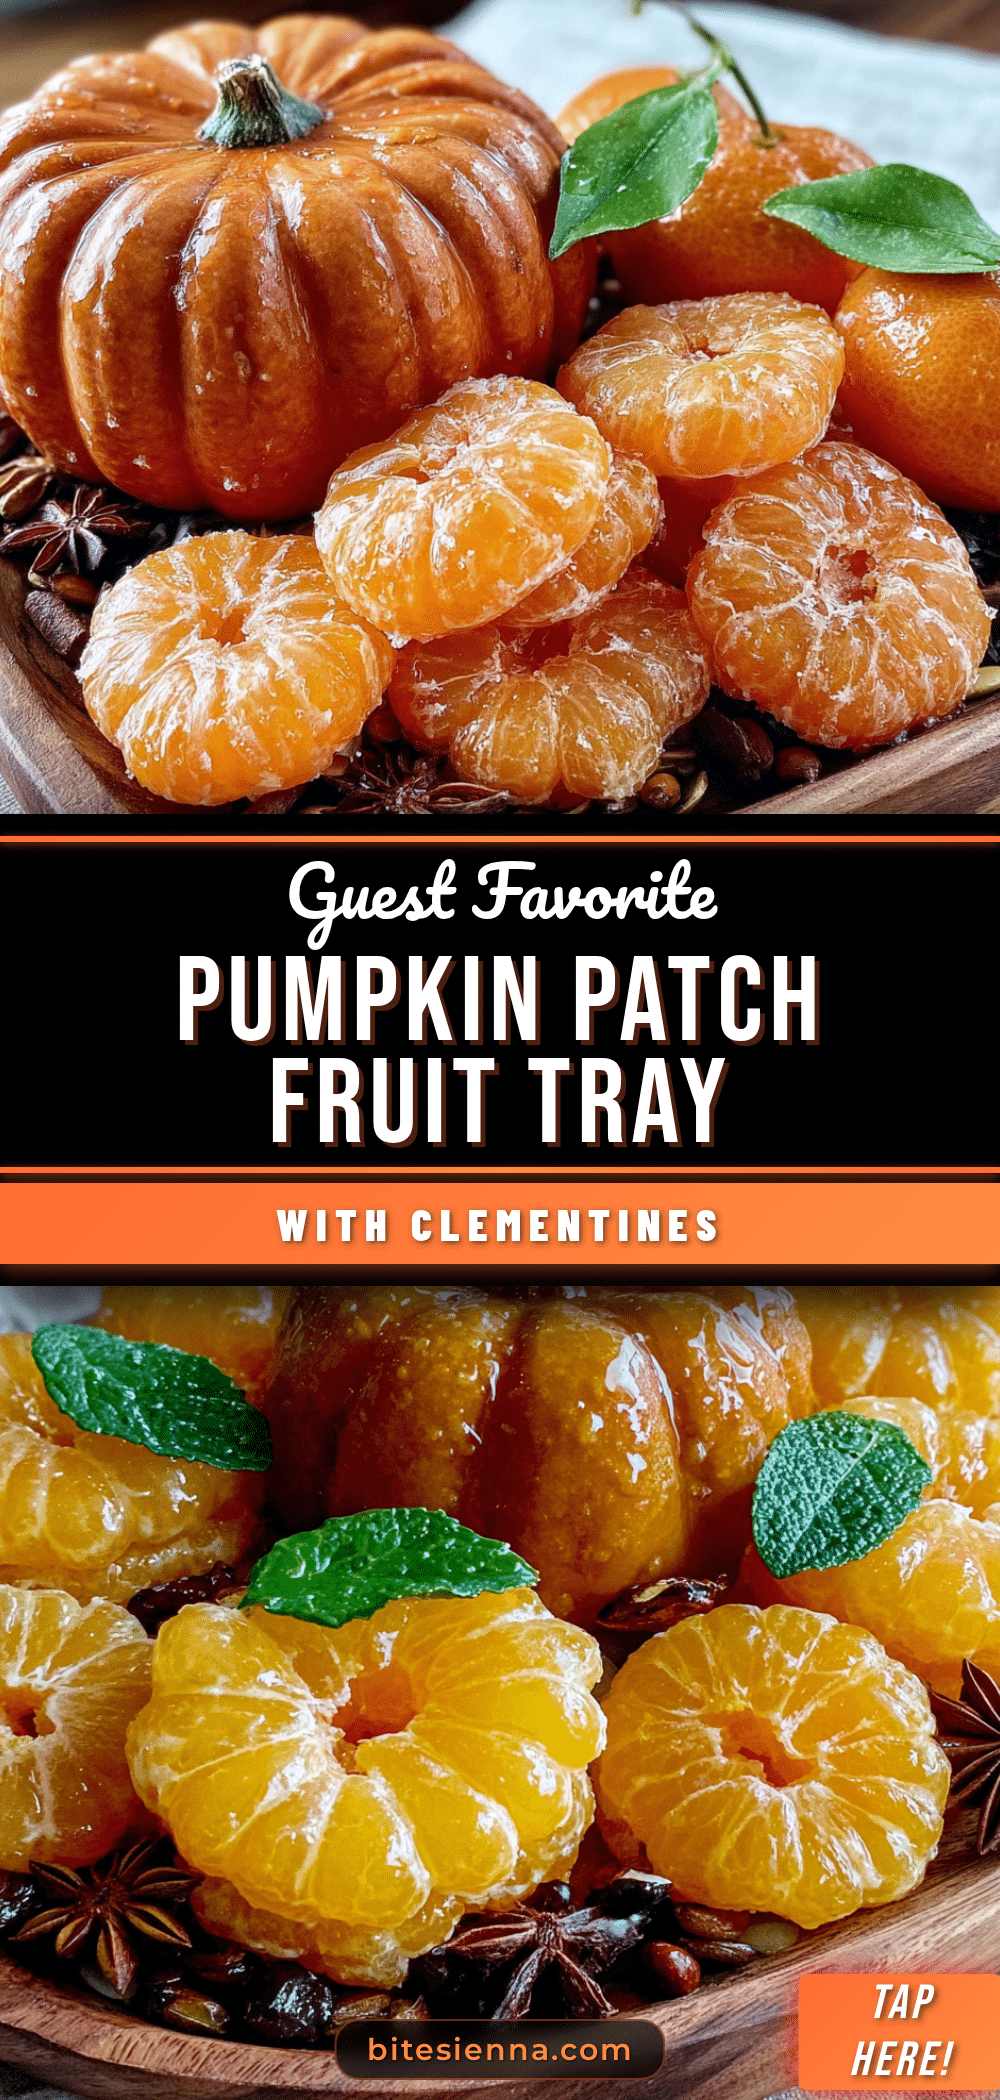
Easy Pumpkin Patch Fruit Tray with Clementines
A fun and festive fall fruit tray that looks like a pumpkin patch, made with clementines, green grapes, and cheese. Perfect for potlucks, parties, and holiday gatherings, this simple appetizer comes together in minutes and always impresses guests.
- Prep Time: 15 minutes
- Cook Time: 0 minutes
- Total Time: 15 minutes
- Yield: 6 servings 1x
- Category: Appetizer
- Cuisine: American
Ingredients
- 5–6 medium clementines
- 2 cups green grapes
- 4 ounces cheddar cheese block
- 3–4 small fresh rosemary sprigs
- Pumpkin-shaped platter or large round board
- Small pretzel sticks (optional)
- Apple slices (optional)
Instructions
- Peel all clementines and separate into segments, keeping them intact. Leave a few whole for full pumpkins. Gently press two segments together to form a pumpkin shape.
- Snip rosemary sprigs into half-inch pieces and gently poke one into the top of each clementine segment pair as a stem. Alternatively, use small pieces of pretzel sticks.
- Rinse green grapes and pat them completely dry.
- Cut cheddar cheese into small cubes or use pumpkin-shaped cookie cutters to create shapes.
- Arrange clementine pumpkins in clusters on the platter, leaving space between clusters.
- Place green grapes in curving lines between pumpkin clusters to resemble vines.
- Fill in empty spots with cheese shapes or cubes. Add optional apple slices or dried cranberries for color.
- Stand back and adjust the arrangement, filling any bare spots. Add extra rosemary sprigs around the edges for a garden-fresh look.
Notes
Prep components the night before and assemble 30 minutes before serving. Keep clementines cold for easier peeling. Dry grapes thoroughly to prevent sogginess. Make extra clementine pumpkins to replenish the tray. Use a damp paper towel under the platter to prevent sliding. For a natural look, arrange fruit in organic clusters rather than perfectly spaced.
Nutrition
- Serving Size: 1 cup of fruit and c
- Calories: 135
- Sugar: 15
- Sodium: 180
- Fat: 4
- Saturated Fat: 2.5
- Carbohydrates: 20
- Fiber: 3
- Protein: 5
Keywords: pumpkin patch fruit tray, clementine appetizer, fall fruit platter, easy party appetizer, healthy fall snack, fruit tray for potluck


