I was elbow-deep in pumpkin guts last October when my neighbor, an older woman named Gladys who grows the most ridiculous zucchinis you’ve ever seen, appeared at my back gate. She didn’t say hello. She just watched me struggling with a particularly stubborn stringy mess, then shook her head and walked away. I thought I’d offended her somehow. But ten minutes later, she came back holding a small jar filled with what looked like tiny golden nuggets. “You’re wasting the best part,” she said, pressing the jar into my sticky hands. “Try these.” They were cinnamon sugar baked pumpkin seeds, and honestly? I almost cried right there on my back porch. They were that good.
I’d always thought of pumpkin seeds as that salty, sometimes burnt snack you pick out of a bowl at a fall party. You know the ones—they’re either too hard to chew or they’ve got that weird bitter taste from being roasted too long. But Gladys’s version was completely different. They were crunchy but not hard, sweet but not cloying, and that warm cinnamon coating made them taste like the coziest thing you could possibly eat while sitting on a chilly October afternoon. I asked her for the recipe, and she just shrugged and said, “There’s no real recipe. You just figure it out.” So I did. And now I’m sharing what I figured out with you.
This cozy cinnamon sugar baked pumpkin seeds recipe has become my absolute favorite way to use up those pumpkin innards after carving. I mean, let’s face it—after you’ve scooped out all that stuff for a jack-o’-lantern, you’re left with a pile of seeds and a lot of potential. This turns that potential into something you’ll actually look forward to eating. Maybe you’ve been there, standing over your sink with a colander full of slippery seeds, wondering why you even bothered. Trust me, this recipe changes everything.
Why You’ll Love This Recipe
I’ve tested this recipe about a dozen times to get it just right. Not because it’s complicated—honestly, it’s one of the simplest things you can make—but because I wanted to nail that perfect balance of crunch, sweetness, and warm spice that made me fall in love with Gladys’s version in the first place. Here’s what makes this one stand out:
- Quick & Easy: From start to finish, you’re looking at about 30 minutes. Most of that is just waiting for them to bake. The actual hands-on time is maybe five minutes. Perfect for when you’re already dealing with pumpkin carving chaos.
- Simple Ingredients: You probably have everything in your pantry right now. No weird specialty items, no trips to some fancy grocery store. Just pumpkin seeds, butter, sugar, cinnamon, and a pinch of salt.
- Perfect for Fall Gatherings: These make an incredible snack for Halloween parties, Thanksgiving appetizers, or just munching while you watch a scary movie. They’re also great for packing in lunchboxes or giving as little homemade gifts.
- Crowd-Pleaser: I’ve served these to kids, adults, picky eaters, and people who swore they didn’t like pumpkin seeds. Every single person has asked for the recipe. Every. Single. One.
- Unbelievably Delicious: The combination of melted butter, cinnamon sugar, and the nutty flavor of roasted pumpkin seeds is honestly next-level. It’s like eating a warm snickerdoodle cookie, but in seed form. And somehow healthier.
What makes this recipe different from all those other pumpkin seed recipes out there? It’s the method. Most recipes tell you to just toss everything together and bake. But I figured out that boiling the seeds first in salted water makes them crispy all the way through instead of chewy in the middle. And using melted butter instead of oil gives you that rich, almost caramelized coating that makes these absolutely irresistible. This isn’t just another version—it’s the best version. The kind that makes you close your eyes after the first bite. Comfort food reimagined, but with the same soul-soothing satisfaction.
What Ingredients You Will Need
This recipe uses simple, wholesome ingredients to deliver that cozy, warm flavor without any fuss. Most of these are pantry staples, so you can whip up a batch anytime you’ve got pumpkin seeds on hand. Here’s what you’ll need:
- Fresh pumpkin seeds, 1 cup (about 120g) – These should be raw and freshly scooped from a pumpkin. You can use seeds from any type of pumpkin or winter squash. I personally love using seeds from sugar pumpkins because they’re smaller and more tender, but any variety works great. Make sure to rinse them well to remove all the stringy pulp.
- Unsalted butter, 2 tablespoons (28g), melted – I use unsalted so I can control the salt level. Land O’Lakes or Kerrygold are my go-to brands. If you only have salted butter, just reduce the added salt later. The butter gives these seeds that rich, almost toasty flavor that oil just can’t replicate.
- Granulated sugar, 2 tablespoons (25g) – Regular white sugar works perfectly here. It melts into the butter and creates that sweet, crunchy coating. You could also use coconut sugar for a deeper flavor, but the texture won’t be quite as crisp.
- Ground cinnamon, 1 teaspoon – This is the star of the show. Use a good-quality cinnamon for the best flavor. I really like McCormick or Simply Organic. Fresh cinnamon makes a noticeable difference, so don’t use that dusty jar you’ve had since 2019.
- Salt, ½ teaspoon – This balances the sweetness and brings out the nutty flavor of the seeds. I use fine sea salt. If you’re using kosher salt, you might need a bit more.
- Water, 2 cups (for boiling) – Just tap water is fine. You’ll boil the seeds in salted water before baking, which is the secret to getting them perfectly crispy.
- Optional: Vanilla extract, ½ teaspoon – This adds a lovely warmth that complements the cinnamon. I add it to the melted butter mixture. It’s not essential, but it makes them taste even more like a cozy fall treat.
- Optional: Pinch of nutmeg or pumpkin pie spice – If you want to amp up the autumn vibes, add a tiny pinch of nutmeg or a quarter teaspoon of pumpkin pie spice along with the cinnamon. Don’t overdo it, though—cinnamon should still be the main flavor.
For the best results, use seeds that are fresh. If your pumpkin has been sitting on the porch for a week, the seeds might be a bit dried out and won’t be as tender after baking. Also, if you’re using seeds from a store-bought pumpkin that’s been carved for a few days, give them a good rinse and check for any that feel mushy or smell off. Fresh is best.
One more thing—if you don’t have fresh pumpkin seeds, you can absolutely use raw, shelled pumpkin seeds from the store. Just skip the boiling step and reduce the baking time by about 5 minutes. They’ll still be delicious, just a bit different in texture.
Equipment Needed
You don’t need any fancy equipment for this recipe, which is one of the reasons I love it. Here’s what you’ll need:
- Colander or strainer – For rinsing the seeds. A fine-mesh strainer works best so the tiny seeds don’t fall through.
- Medium saucepan – For boiling the seeds. Any size works, as long as it can hold the seeds and water comfortably.
- Baking sheet – A standard half-sheet pan works perfectly. I use a rimmed baking sheet to keep the seeds from rolling off. If you only have a cookie sheet without sides, that’s fine too—just be careful when stirring.
- Parchment paper or silicone baking mat – This makes cleanup so much easier and prevents the seeds from sticking. I prefer parchment paper because it’s disposable, but a silicone mat works great too.
- Mixing bowl – For tossing the seeds with the butter mixture. Any medium bowl will do.
- Measuring cups and spoons – For accurate measurements. I know some people eyeball it, but for this recipe, precision matters if you want that perfect coating.
- Spatula or wooden spoon – For stirring the seeds. A silicone spatula is great for scraping every bit of that butter mixture onto the seeds.
- Paper towels or clean kitchen towel – For drying the seeds after rinsing. Don’t skip this step—wet seeds won’t get crispy.
If you don’t have parchment paper, you can grease the baking sheet with a little butter or non-stick spray. Just keep an eye on the seeds because they might stick a bit more. And if you don’t have a saucepan, you can boil the seeds in a microwave-safe bowl with water in the microwave. It’s not ideal, but it works in a pinch. Honestly, I’ve made these in a tiny apartment kitchen with the bare minimum of tools, and they still turned out amazing. Don’t let a lack of fancy equipment stop you.
Preparation Method
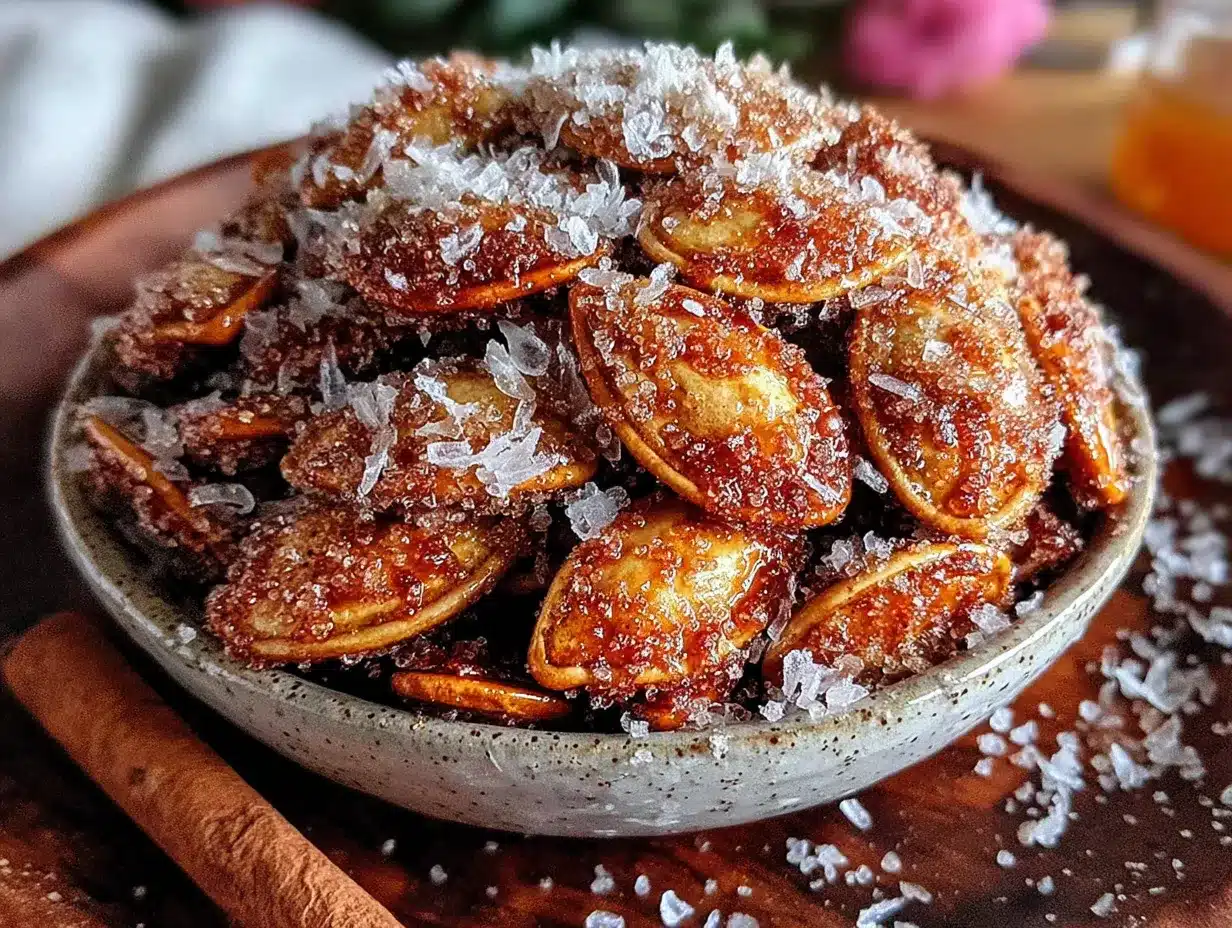
Alright, let’s get to the fun part. Here’s how to make these cozy cinnamon sugar baked pumpkin seeds. Follow these steps, and you’ll have a bowl of crunchy, sweet, absolutely addictive seeds in no time.
- Preheat your oven to 350°F (175°C). Line a baking sheet with parchment paper or a silicone mat. Getting the oven hot before you start is important—you want the seeds to start cooking immediately when they go in.
- Separate the seeds from the pumpkin guts. This is the messy part, but it’s also kind of satisfying. Scoop out the seeds and stringy pulp into a large bowl. Fill the bowl with cold water and use your hands to gently separate the seeds from the pulp. The seeds will float to the top, and the pulp will sink. Scoop the seeds out with your hands or a slotted spoon and transfer them to a colander. Don’t worry if there’s a little pulp still attached—it’ll come off during rinsing.
- Rinse the seeds thoroughly. Run cold water over the seeds in the colander, using your fingers to rub off any remaining pulp. Pick out any broken or discolored seeds—they can taste bitter. You should end up with about 1 cup of clean seeds.
- Dry the seeds. Spread the rinsed seeds on a clean kitchen towel or several layers of paper towels. Pat them dry as much as possible. This step is crucial—wet seeds will steam instead of roast, and you’ll end up with chewy, not crispy, seeds. Let them sit for about 5 minutes to air dry a bit more.
- Boil the seeds in salted water. In a medium saucepan, bring 2 cups of water and ½ teaspoon of salt to a boil. Add the pumpkin seeds and let them boil for exactly 10 minutes. This is the secret step that makes all the difference. Boiling softens the outer shell just enough so the seeds become crispy all the way through instead of having a tough, chewy texture. Drain the seeds in a colander and pat them dry again with paper towels.
- Mix the coating. In a small bowl, combine the melted butter, granulated sugar, ground cinnamon, and vanilla extract if you’re using it. Stir until the sugar is mostly dissolved. The mixture will look a bit grainy—that’s fine.
- Coat the seeds. Place the boiled and dried seeds in a medium mixing bowl. Pour the butter mixture over them and toss well with a spatula or your hands until every seed is evenly coated. I like to use my hands for this because I can feel if any seeds are still dry. Just make sure the butter isn’t too hot.
- Spread the seeds on the baking sheet. Pour the coated seeds onto the prepared baking sheet and spread them out in a single, even layer. Try not to overlap them too much, or they’ll steam instead of roast. If you have a lot of seeds, use two baking sheets.
- Bake for 20-25 minutes, stirring halfway through. Place the baking sheet in the preheated oven and bake for 10 minutes. Then, remove the sheet and give the seeds a good stir with a spatula. This ensures even browning. Return to the oven and bake for another 10-15 minutes, or until the seeds are golden brown and fragrant. Keep a close eye on them during the last 5 minutes—they can go from perfectly golden to burnt very quickly. Your kitchen will smell like a cinnamon-scented dream at this point.
- Cool completely before serving. Remove the baking sheet from the oven and let the seeds cool right on the sheet. They’ll continue to crisp up as they cool. Don’t be tempted to taste them right away—they’re extremely hot and the sugar coating is like lava. I learned this the hard way. Let them cool for at least 15-20 minutes. Once they’re completely cool, they should be crunchy and delicious.
One thing I want to mention—the seeds will still feel slightly soft when they come out of the oven. That’s normal. They firm up as they cool. If you bake them until they’re crunchy straight out of the oven, they’ll be overdone and hard once cooled. Trust the process.
Cooking Tips & Techniques
I’ve made this recipe enough times to have a few tricks up my sleeve. Here are some things I’ve learned the hard way so you don’t have to:
Don’t skip the boiling step. I know it seems like an extra hassle, but trust me on this. The first time I made these, I skipped the boiling because I was in a hurry. The seeds came out chewy and tough, with that weird papery texture you sometimes get. Boiling them for 10 minutes softens the outer shell and allows the inside to cook evenly. It’s the difference between good pumpkin seeds and amazing pumpkin seeds.
Watch your oven temperature. All ovens run a little differently. My oven runs hot, so I usually check the seeds at the 18-minute mark. If your oven runs cool, you might need the full 25 minutes. The key is to look for a golden brown color and listen for that crackling sound—when they start crackling, they’re almost done.
Stirring is non-negotiable. I forgot to stir halfway through once, and the seeds on the edges burned while the ones in the middle were still pale. Set a timer for 10 minutes so you don’t forget. It makes a huge difference in evenness.
Let them cool completely. I know it’s hard to resist, but if you eat them warm, they’ll seem soft and you might think you messed up. Give them that full 20 minutes to cool, and you’ll be rewarded with perfectly crunchy seeds. I usually make these while I’m cleaning up the pumpkin carving mess, so by the time I’m done, they’re ready to eat.
Double the batch if you can. These disappear fast. I’ve learned to make at least two cups of seeds at a time because a single batch is gone in about 10 minutes. They’re great for snacking, but they also make an amazing topping for fall salads or yogurt bowls.
One mistake I made: I once used too much butter because I thought more fat would make them crispier. It didn’t. It made them greasy and the sugar coating slid right off. Stick to the measurements—2 tablespoons of butter is plenty for 1 cup of seeds.
Variations & Adaptations
One of the best things about this recipe is how easy it is to customize. Here are some variations I’ve tried and loved:
- Spicy Sweet: Add ¼ teaspoon of cayenne pepper or chili powder along with the cinnamon. The heat balances the sweetness beautifully. I made this version for a Halloween party and people couldn’t stop eating them. The sweet and spicy combo is addictive.
- Maple Cinnamon: Replace the granulated sugar with 2 tablespoons of pure maple syrup. Reduce the butter to 1½ tablespoons since the syrup adds moisture. The flavor is deeper and more complex, with that unmistakable maple taste. These are my favorite for Thanksgiving snacking.
- Pumpkin Pie Spice: Swap the cinnamon for 1 teaspoon of pumpkin pie spice. You get all those warm fall flavors—cinnamon, nutmeg, ginger, and cloves—in every bite. It’s like eating pumpkin pie in seed form.
- Vegan Version: Use coconut oil or a vegan butter substitute instead of regular butter. The texture will be slightly different, but still delicious. I’ve tried this with melted coconut oil and it works perfectly—just make sure it’s refined coconut oil if you don’t want a coconut flavor.
- Gluten-Free: This recipe is naturally gluten-free, so no changes needed. Just make sure your cinnamon and other spices are certified gluten-free if you’re serving someone with celiac disease.
- Savory-Sweet: Reduce the sugar to 1 tablespoon and add ½ teaspoon of smoked paprika and a pinch of garlic powder. The smoky flavor with the cinnamon is surprisingly good. I made this on a whim and it’s become my second-favorite version.
If you want to make these in an air fryer, you absolutely can. Just reduce the temperature to 300°F (150°C) and cook for about 10-12 minutes, shaking the basket halfway through. Keep a close eye on them because air fryers cook faster. I’ve done this a few times when I didn’t want to heat up the whole oven, and it works great.
For a chocolate version, drizzle melted dark chocolate over the cooled seeds and let it set. It’s decadent and perfect for holiday gifting. I did this for Christmas one year and put them in little jars as presents. Everyone loved them.
Serving & Storage Suggestions
These cozy cinnamon sugar baked pumpkin seeds are incredibly versatile. Here’s how to serve and store them:
Serving: Serve them at room temperature in a bowl for snacking. They’re perfect on their own, but they also make a fantastic topping for:
- Fall salads (try them on a spinach salad with apple slices and goat cheese)
- Yogurt bowls or oatmeal for a crunchy breakfast
- Pumpkin soup for a sweet and savory garnish
- Ice cream sundaes (the warm cinnamon flavor pairs beautifully with vanilla)
- Roasted vegetables like butternut squash or sweet potatoes
For a party, I like to serve them in a small wooden bowl with a few cinnamon sticks for decoration. They look beautiful and festive. You can also package them in little cellophane bags tied with ribbon for Halloween party favors or Thanksgiving place settings.
Storage: Store the cooled seeds in an airtight container at room temperature. They’ll stay fresh and crunchy for up to 2 weeks. I use a mason jar or a glass container with a tight-fitting lid. Don’t store them in the refrigerator—the moisture will make them soft.
If they do get a bit soft, you can re-crisp them in a 300°F (150°C) oven for about 5 minutes. Let them cool completely before storing again. I’ve done this a few times and it works like a charm.
Freezing: You can freeze these seeds for up to 3 months. Place them in a freezer-safe bag or container, squeeze out as much air as possible, and freeze. Thaw at room temperature for about 15 minutes before serving. They might lose a tiny bit of crunch, but they’re still delicious. I usually freeze a batch around Halloween so I have some for Thanksgiving snacking.
The flavors actually develop a bit over time. The cinnamon and sugar meld together, and the seeds get even more flavorful after a day or two. That is, if they last that long. In my house, they’re usually gone within 24 hours.
Nutritional Information & Benefits
These cozy cinnamon sugar baked pumpkin seeds are not just delicious—they also offer some surprising nutritional benefits. Here’s a rough breakdown per ¼-cup serving (about 30g):
- Calories: Approximately 180
- Fat: 14g (mostly healthy unsaturated fats from the seeds and butter)
- Protein: 7g
- Carbohydrates: 8g
- Fiber: 2g
- Sugar: 5g (from added sugar and natural sweetness)
- Iron: 2mg (about 11% of daily value)
- Magnesium: 70mg (about 17% of daily value)
- Zinc: 1.5mg (about 14% of daily value)
Pumpkin seeds are packed with nutrients. They’re an excellent source of magnesium, which supports muscle function and sleep quality. They also contain zinc, which is great for immune health—perfect for fall when cold season is ramping up. The healthy fats and protein make these a satisfying snack that keeps you full between meals.
This recipe is naturally gluten-free and vegetarian. If you use a vegan butter substitute, it’s also vegan-friendly. The main allergen to be aware of is dairy from the butter, but that’s easily swapped.
While these are a treat and have added sugar, they’re still a better choice than most packaged snacks. You’re getting real, whole ingredients with actual nutritional value. Plus, making them yourself means you control exactly what goes in. I feel good about giving these to my family—they’re a treat that doesn’t feel totally indulgent.
Conclusion
So there you have it—my take on the cozy cinnamon sugar baked pumpkin seeds that Gladys introduced me to that day in my backyard. These little nuggets of fall goodness have become a staple in my kitchen every autumn, and I honestly can’t imagine pumpkin carving season without them now.
What I love most about this recipe is how it transforms something you’d normally throw away into something you genuinely look forward to eating. It’s not just about using up leftovers—it’s about finding joy in the simple, unexpected parts of cooking. That’s what good food is all about, isn’t it?
I hope you give these a try, whether you’re carving pumpkins with your kids, preparing for a Halloween party, or just craving something warm and cozy on a crisp fall day. Don’t be afraid to make them your own—play with the spices, try different sweeteners, or go crazy with toppings. The best recipes are the ones that feel like yours.
If you make these, I’d love to hear how they turn out. Drop a comment below and let me know if you tried any fun variations. And if you share them on social media, tag me—I want to see your cozy creations! Happy fall baking, friends. May your kitchen smell like cinnamon and your pumpkin seeds be perfectly crunchy.
Frequently Asked Questions
Can I use store-bought pumpkin seeds instead of fresh ones?
Absolutely. If you’re using raw, shelled pumpkin seeds (also called pepitas) from the store, you can skip the boiling step. Just toss them with the butter mixture and bake for about 15-18 minutes at 350°F. They’ll be a bit smaller and more tender than fresh seeds, but just as delicious.
Why are my pumpkin seeds chewy instead of crunchy?
This usually happens for one of two reasons: either you skipped the boiling step, or you didn’t dry the seeds thoroughly before baking. Boiling softens the outer shell so the inside can crisp up, and drying ensures they roast instead of steam. Also, make sure you let them cool completely on the baking sheet—they continue to crisp as they cool.
Can I make these without butter?
Yes! You can substitute the butter with coconut oil, avocado oil, or a vegan butter alternative. Coconut oil will add a slight coconut flavor, which actually pairs nicely with the cinnamon. Just use the same amount—2 tablespoons—and follow the recipe as written.
How do I prevent the sugar coating from burning?
The sugar can burn if your oven is too hot or if you bake the seeds too long. Stick to 350°F and keep a close eye on them during the last 5 minutes. Also, stirring halfway through helps distribute the heat evenly. If your oven runs hot, you can reduce the temperature to 325°F and bake for a few extra minutes.
Can I double or triple this recipe?
Definitely. Just make sure you spread the seeds in a single layer on your baking sheets—don’t overcrowd them or they’ll steam instead of roast. You might need to use two or three baking sheets, and the baking time might be slightly longer. I recommend rotating the sheets halfway through for even browning.
Pin This Recipe!
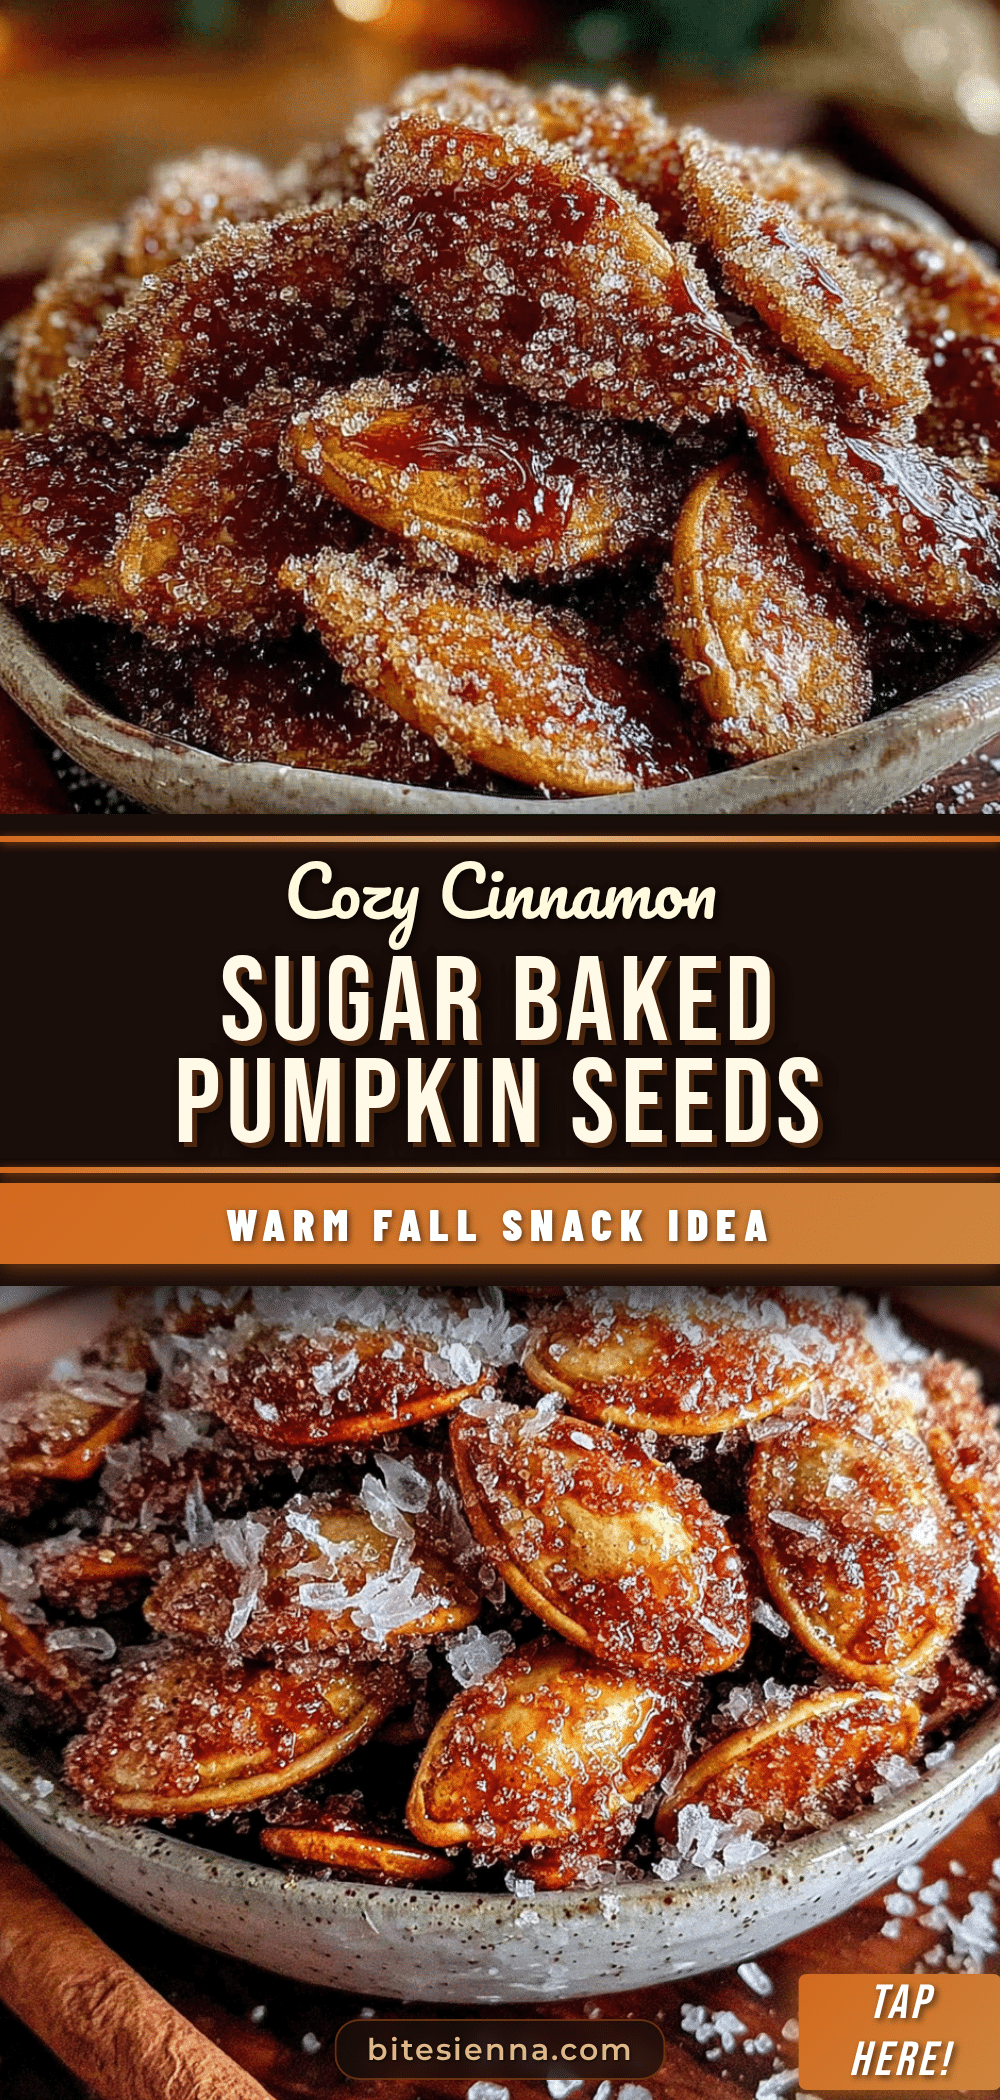
Cozy Cinnamon Sugar Baked Pumpkin Seeds: Easy Fall Treat
These crunchy, sweet, and warmly spiced pumpkin seeds are the perfect fall snack. Boiled for crispness and coated in a buttery cinnamon sugar mixture, they transform pumpkin carving leftovers into an irresistible treat.
- Prep Time: 15 minutes
- Cook Time: 25 minutes
- Total Time: 40 minutes
- Yield: 4 servings 1x
- Category: Snack
- Cuisine: American
Ingredients
- 1 cup fresh pumpkin seeds (about 120g)
- 2 tablespoons unsalted butter, melted
- 2 tablespoons granulated sugar (25g)
- 1 teaspoon ground cinnamon
- ½ teaspoon salt
- 2 cups water (for boiling)
- ½ teaspoon vanilla extract (optional)
- Pinch of nutmeg or pumpkin pie spice (optional)
Instructions
- Preheat your oven to 350°F (175°C). Line a baking sheet with parchment paper or a silicone mat.
- Separate the seeds from the pumpkin guts. Scoop out the seeds and stringy pulp into a large bowl. Fill the bowl with cold water and use your hands to gently separate the seeds from the pulp. The seeds will float to the top; scoop them out and transfer to a colander.
- Rinse the seeds thoroughly under cold water, rubbing off any remaining pulp. Pick out any broken or discolored seeds.
- Dry the seeds by spreading them on a clean kitchen towel or paper towels. Pat dry as much as possible and let air dry for about 5 minutes.
- In a medium saucepan, bring 2 cups of water and ½ teaspoon of salt to a boil. Add the pumpkin seeds and boil for exactly 10 minutes. Drain and pat dry again.
- In a small bowl, combine the melted butter, granulated sugar, ground cinnamon, and vanilla extract (if using). Stir until the sugar is mostly dissolved.
- Place the boiled and dried seeds in a medium mixing bowl. Pour the butter mixture over them and toss well until every seed is evenly coated.
- Spread the coated seeds in a single, even layer on the prepared baking sheet. Avoid overlapping.
- Bake for 20-25 minutes, stirring halfway through, until the seeds are golden brown and fragrant. Keep a close eye during the last 5 minutes.
- Cool completely on the baking sheet for at least 15-20 minutes before serving. They will crisp up as they cool.
Notes
Boiling the seeds in salted water is the secret to crispy seeds. Do not skip this step. Let seeds cool completely before serving; they will continue to crisp as they cool. Store in an airtight container at room temperature for up to 2 weeks. For a vegan version, substitute butter with coconut oil or vegan butter.
Nutrition
- Serving Size: 1/4 cup (about 30g)
- Calories: 180
- Sugar: 5
- Sodium: 150
- Fat: 14
- Saturated Fat: 4
- Carbohydrates: 8
- Fiber: 2
- Protein: 7
Keywords: pumpkin seeds, cinnamon sugar, fall snack, Halloween, Thanksgiving, easy recipe, baked pumpkin seeds


