It was 10:47 PM on a random Wednesday in October, and I had that familiar, slightly pathetic craving for something warm, cheesy, and deeply comforting. The kind of craving that hits when you’ve already brushed your teeth and told yourself you’re done eating for the night. I wanted pizza, obviously. But I didn’t have pizza dough, and honestly, I wasn’t about to start kneading anything at that hour. What I did have was a pack of crescent rolls sitting in the back of the fridge, some string cheese that was dangerously close to its expiration date, and a jar of marinara that had seen better days. That’s when the idea arrived—a weird, slightly unhinged idea that felt absolutely genius at that exact moment. What if I wrapped these little cheese sticks in strips of crescent dough, like bandages, and made tiny mummy pizzas?
I mean, let me tell you, the late night kitchen experiments are always the best ones. There’s no one watching, no pressure to impress, just you and your hunger and whatever random ingredients are staring back at you from the fridge. So I preheated the oven, pulled out a baking sheet, and started cutting that dough into thin little strips. My fingers were a little sticky, and I definitely dropped one on the floor (five-second rule, obviously), but by the time those little mummies came out of the oven, golden and bubbly and absolutely ridiculous-looking, I knew I had stumbled onto something special.
These Easy Cheesy Mummy Pizza Bites are everything a late-night snack should be. They’re fast, they’re fun, and they require almost zero effort for a payoff that feels way bigger than it should. The crescent dough gets perfectly flaky, the cheese inside gets all melty and stretchy, and those little peppercorn eyes make them look almost too cute to eat—almost. Maybe you’ve been there, staring into your fridge at 11 PM, wondering what culinary masterpiece you can cobble together with what’s left. This is that recipe. And honestly, I haven’t stopped making them since that night, because they work for Halloween parties, weeknight dinners when you need a smile, and honestly, any random Tuesday when you just want something fun to eat.
Why You’ll Love This Recipe
Let’s be real for a second. There are a million Halloween snacks out there that look impressive but take three hours and a trip to three different stores. These Easy Cheesy Mummy Pizza Bites are not that. They are the kind of recipe that makes you feel like a kitchen genius without actually having to do much work. And honestly, in the middle of a busy week, that’s exactly what we all need.
- Quick & Easy: From start to finish, these come together in about 20 minutes. That’s faster than ordering delivery, and way more fun.
- Simple Ingredients: Crescent rolls, string cheese, pizza sauce, and some pepperoni or olives for eyes. That’s it. You probably already have most of this in your kitchen.
- Perfect for Halloween: Whether you’re throwing a party, sending treats to school, or just want something spooky for dinner, these little mummies deliver on cuteness and flavor.
- Crowd-Pleaser: Kids absolutely lose their minds over these. Adults do too, they just pretend to be more dignified about it.
- Unbelievably Delicious: The combo of flaky, buttery crescent dough wrapped around warm, melty cheese with a little hit of pizza sauce is honestly next-level comfort food.
What makes these different from every other Halloween snack out there is the texture. The crescent dough gets this beautiful golden crispiness on the outside while staying soft and tender inside. And because we’re using string cheese instead of shredded mozzarella, you get that perfect, pull-apart cheese pull that makes everything better. This isn’t just another version of a mummy snack—it’s the best version, born from a late-night craving and perfected through many, many test batches (someone had to do it).
There’s something about food that looks like little characters that just makes eating more fun. Maybe it’s the childlike joy of it, or maybe it’s just that everything tastes better when it has a face. Either way, these Easy Cheesy Mummy Pizza Bites are the kind of recipe that makes you close your eyes after the first bite, not just because the cheese is hot, but because it’s genuinely that satisfying.
What Ingredients You Will Need
This recipe uses simple, everyday ingredients to deliver maximum flavor and fun without any fuss. Most of these are pantry staples or things you can grab in the regular grocery run, which makes these perfect for last-minute Halloween plans or spontaneous snack attacks.
- 1 can (8 oz) refrigerated crescent roll dough — I personally recommend Pillsbury for consistent results, but any brand works. The key is getting the kind that comes in a tube, not the pre-formed sheets, because you’ll be cutting it into strips.
- 6 string cheese sticks — Pull-apart mozzarella sticks work best here. They hold their shape during baking and give you that perfect stretchy cheese pull. Look for ones that are firm and not too soft.
- 1/4 cup pizza sauce — Any brand works, but I like using a thicker sauce so it doesn’t make the dough soggy. Rao’s or Classico are my go-tos. You can also use marinara if that’s what you have.
- 24 black peppercorns or 12 small black olive slices — For the mummy eyes. Peppercorns give a cute, slightly cartoonish look, but olives are easier to eat. Both work great.
- Optional: 12 small pepperoni slices — These go under the cheese if you want a little meat in your mummies. Totally optional but highly recommended if you’re a pepperoni fan.
- Optional: 1 tablespoon melted butter — Brushing this on top before baking gives the mummies a beautiful golden color and adds a little extra richness.
- Optional: Garlic powder, dried oregano, or everything bagel seasoning — A sprinkle on top before baking adds flavor and makes them look even more finished.
Here’s a quick tip about the crescent dough: don’t unroll it completely before cutting. Keep it in the rectangle shape it comes in from the tube, and cut it crosswise into thin strips. This makes wrapping so much easier and keeps the dough from getting too stretched out. If the dough gets too warm and sticky, just pop it in the fridge for five minutes to firm up.
For the string cheese, you can absolutely use low-fat or part-skim versions if you’re watching calories. They melt slightly differently (a little less gooey), but they still work perfectly. And if you’re dairy-free, there are some really good plant-based mozzarella sticks available now—just check the melting instructions on the package because they might need a slightly different bake time.
Equipment Needed
You don’t need any fancy equipment for these Easy Cheesy Mummy Pizza Bites, which is honestly one of the best things about them. Here’s what you’ll need:
- Baking sheet — A standard half-sheet pan works perfectly. Line it with parchment paper or a silicone baking mat for easy cleanup.
- Sharp knife or pizza cutter — For cutting the crescent dough into strips. A pizza cutter actually works better here because it glides through the dough without dragging.
- Small bowl — For the melted butter if you’re using it.
- Pastry brush — Optional, but helpful for brushing on butter or egg wash. A silicone one is easy to clean.
- Cutting board — For prepping the string cheese and cutting the dough.
- Measuring spoons — For the butter and any seasonings.
If you don’t have a pastry brush, you can just use a paper towel to dab on the melted butter. It’s not as elegant, but it gets the job done. And if you’re using a silicone baking mat, make sure it’s oven-safe up to at least 400°F. Most are, but it’s always worth checking.
Preparation Method
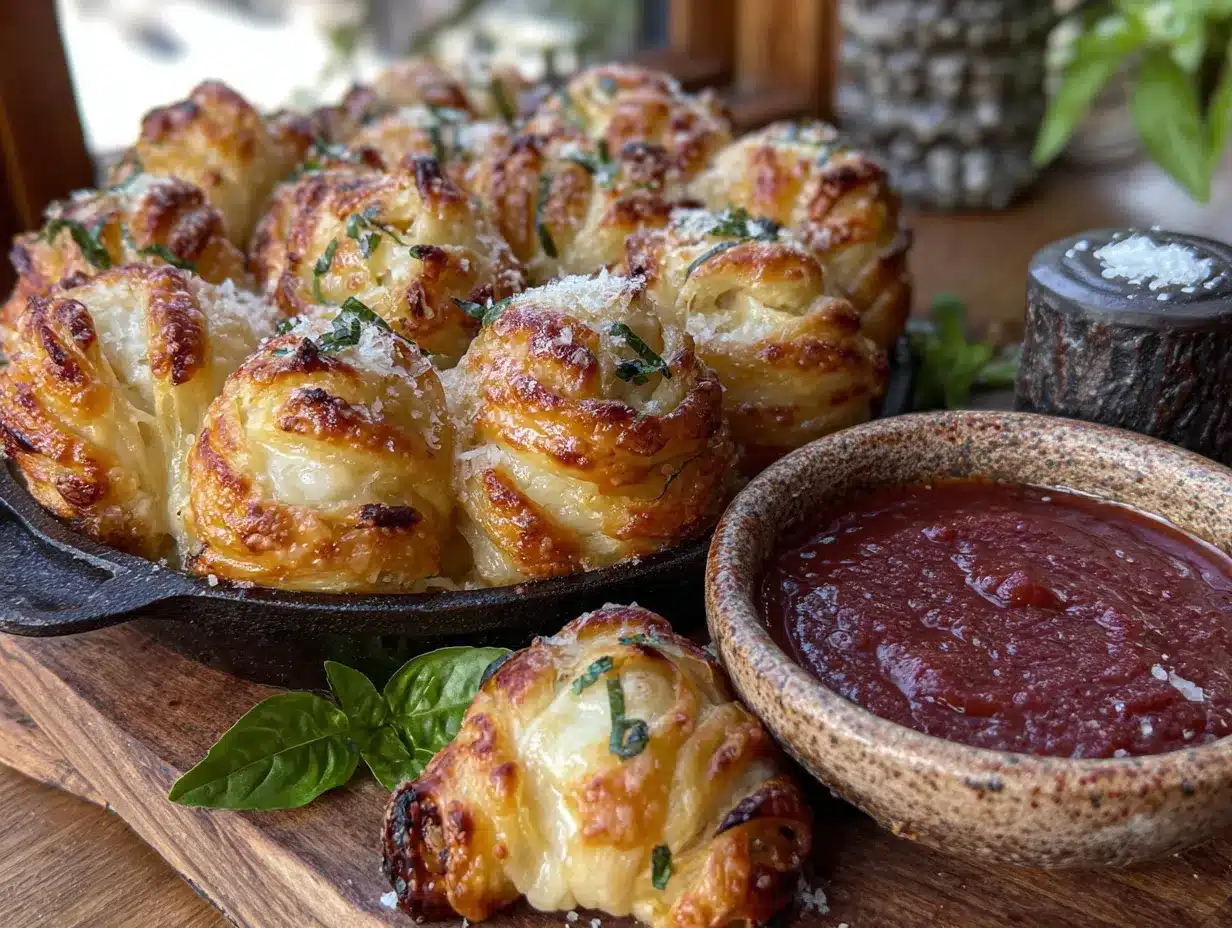
Alright, let’s get these little guys made. This is honestly one of the easiest recipes I’ve ever developed, and the whole process takes maybe 10 minutes of active work. The oven does the rest.
- Preheat your oven to 375°F (190°C). Line a baking sheet with parchment paper or a silicone mat. This step is important because the cheese can leak a little, and parchment makes cleanup a breeze.
- Prepare the crescent dough. Open the tube of crescent rolls (that satisfying pop never gets old) and unroll the dough. Keep it in one large rectangle—don’t separate it into triangles. Pinch the perforated seams together gently so you have a solid sheet of dough.
- Cut the dough into strips. Using a sharp knife or pizza cutter, cut the dough crosswise into thin strips, about 1/4 to 1/2 inch wide. You should get around 12 to 15 strips depending on how thin you cut them. Don’t worry if they’re not perfectly even—the mummies look cuter when they’re a little irregular.
- Prep the string cheese. Cut each string cheese stick in half crosswise so you have 12 shorter pieces. If you’re using pepperoni, place one slice on top of each cheese piece now.
- Wrap the mummies. Take one strip of dough and wrap it around a cheese piece, starting at one end and working your way down. Leave a small gap near the top for the mummy’s face. The dough should overlap slightly as you wrap, like bandages. Don’t wrap too tightly—the cheese needs a little room to expand as it melts.
- Place on baking sheet. Arrange the wrapped mummies on the prepared baking sheet, leaving about an inch of space between each one. They don’t spread much, so you can fit all 12 on one sheet.
- Add the eyes. Before baking, press two black peppercorns or small olive slices into the exposed cheese at the top of each mummy. Press them in gently so they stay put during baking.
- Brush with butter (optional). If you’re using melted butter, brush it lightly over the dough strips. This gives them a beautiful golden color and adds a little extra richness. Sprinkle with garlic powder or oregano if desired.
- Bake. Place the baking sheet in the preheated oven and bake for 10-12 minutes, or until the dough is golden brown and the cheese is melted and bubbly. Keep an eye on them after 10 minutes—ovens vary, and you don’t want the cheese to explode out.
- Cool slightly. Let the mummies cool on the baking sheet for 2-3 minutes before transferring them to a plate. The cheese inside is extremely hot, so give them a minute to settle down before serving.
- Serve with warm pizza sauce. Heat up some pizza sauce in a small bowl and serve it alongside the mummies for dipping. The contrast between the warm, flaky dough and the cool dip is perfection.
Here’s a little sensory cue for you: when these are done, the kitchen will smell like buttery, garlicky pizza heaven. The dough should be golden brown with slightly darker spots where the cheese has bubbled up. If you see little puffs of steam escaping from the dough, that’s a good sign—it means the cheese inside is perfectly melted and ready to go.
Cooking Tips & Techniques
I’ve made these Easy Cheesy Mummy Pizza Bites about fifteen times now (don’t judge me, it was research), and I’ve learned a few things along the way that will save you time and frustration.
Don’t overwork the dough. Crescent roll dough is delicate, and if you handle it too much, it gets tough. When you’re cutting the strips and wrapping the mummies, work quickly and gently. If the dough starts feeling sticky or too soft, just pop it in the fridge for five minutes to firm up.
Watch the cheese. String cheese does this interesting thing where it can hold its shape while the inside gets completely molten. But if you bake it too long, it will burst through the dough and make a mess. I learned this the hard way when I got distracted by a phone call and came back to a baking sheet full of sad, cheese-less dough wrappers. Set a timer, and check them at the 10-minute mark.
Leave room for the face. When you’re wrapping the mummies, make sure you leave a clear gap at the top for the eyes. I made the mistake of wrapping too high on my first batch, and the eyes just disappeared into the dough. They still tasted fine, but they looked like blobs instead of mummies.
Multitasking tip: While the mummies are baking, heat up your dipping sauce in a small saucepan or in the microwave. This way everything is ready at the same time, and you’re not scrambling at the end.
Consistency trick: If you’re making these for a party and want them to look uniform, use a ruler to measure your dough strips. I know that sounds extra, but it actually makes a difference if presentation matters to you. For everyday snacking, though, embrace the imperfection—it’s part of the charm.
Variations & Adaptations
One of the best things about this recipe is how easy it is to customize. Here are some variations I’ve tried and loved:
- Gluten-Free Version: Use gluten-free crescent roll dough. It’s a little more delicate to work with, but it bakes up just as flaky and delicious. You might need to add a minute or two to the bake time.
- Veggie Mummies: Instead of pepperoni, tuck a small piece of roasted red pepper, a basil leaf, or a slice of mushroom under the cheese. The smoky flavor from roasted peppers is especially good.
- Spicy Mummies: Add a thin slice of jalapeño or a drizzle of hot honey before wrapping. The sweet-heat combo with the cheese is addictive.
- Breakfast Mummies: Use scrambled egg and a slice of cheese instead of pizza sauce and pepperoni. Serve with ketchup or salsa for dipping. These are surprisingly good for a fun breakfast.
- Air Fryer Method: Cook at 350°F for 6-8 minutes, flipping halfway through. The air fryer makes the dough extra crispy. Just make sure not to overcrowd the basket.
I tried the spicy version last week with some leftover pickled jalapeños I had in the fridge, and honestly, it might be my new favorite. The vinegar from the peppers cuts through the richness of the cheese perfectly. Give it a try if you like a little heat.
Serving & Storage Suggestions
These Easy Cheesy Mummy Pizza Bites are best served warm, right out of the oven, when the cheese is still stretchy and the dough is at its flakiest. I like to arrange them on a platter with a small bowl of warm pizza sauce in the center for dipping. They look adorable on a Halloween-themed plate or even just a simple white platter that lets the mummies stand out.
For drinks, these pair beautifully with a crisp apple cider, a cold beer (if you’re an adult), or even a glass of milk if you’re feeling nostalgic. They also go great with a simple side salad if you’re serving them as a meal instead of a snack.
If you have leftovers (which is rare, but it happens), store them in an airtight container in the refrigerator for up to 3 days. To reheat, pop them in a 350°F oven for 5-7 minutes, or in the air fryer at 325°F for 3-4 minutes. The microwave works in a pinch, but the dough will be soft instead of crispy. I honestly think they taste even better the next day—the flavors seem to meld together somehow.
You can also freeze these before baking. Assemble the mummies, place them on a baking sheet, and freeze until solid. Then transfer them to a freezer bag. When you’re ready to bake, add 2-3 minutes to the bake time. No need to thaw first. This is a lifesaver for last-minute Halloween parties or unexpected cravings.
Nutritional Information & Benefits
Let’s be honest—these are a treat, not a health food. But here’s the nutritional breakdown for one mummy (based on 12 servings, using standard ingredients):
| Nutrient | Amount per Serving |
|---|---|
| Calories | 145 |
| Total Fat | 9g |
| Saturated Fat | 4.5g |
| Carbohydrates | 11g |
| Protein | 7g |
| Sodium | 380mg |
The good news is that these do have some protein from the cheese, which helps keep you full. And because they’re portion-controlled (each mummy is pretty small), it’s easy to enjoy a few without overdoing it. If you’re watching your sodium, use low-sodium string cheese and skip the added salt in the butter.
These are not gluten-free or dairy-free in their standard form, but with the substitutions I mentioned earlier, you can easily adapt them. They’re also nut-free, egg-free, and soy-free, which makes them a good option for school parties or gatherings where allergies are a concern.
Conclusion
These Easy Cheesy Mummy Pizza Bites are exactly what a weeknight snack should be—fast, fun, and so satisfying that you’ll forget you made them in under 20 minutes. Whether you’re making them for a Halloween party, a movie night, or just because you need a little joy in your Tuesday, they deliver every single time.
I love that this recipe came from a late-night, slightly desperate kitchen experiment. It reminds me that some of the best food comes from just playing around with what you have, without overthinking it. These mummies are proof that you don’t need fancy ingredients or hours of prep to create something that feels special.
So go ahead—raid your fridge, grab that can of crescent rolls, and make some mummies. And when you do, I’d love to hear about it. Leave a comment below and tell me how yours turned out, or share a photo on social media and tag me. Did you add pepperoni? Go vegetarian? Make them extra spicy? I want to know every detail. Happy Halloween, happy snacking, and remember—sometimes the best recipes are the ones you make at 11 PM on a Wednesday.
Frequently Asked Questions
Can I use pizza dough instead of crescent rolls?
Yes, you can! Pre-made pizza dough works, but it’s thicker and chewier than crescent dough. You’ll need to roll it out very thin (about 1/8 inch) before cutting into strips. The bake time might also increase by a few minutes. Crescent rolls give a lighter, flakier texture that I personally prefer for these.
How do I keep the cheese from leaking out during baking?
Make sure your dough strips overlap slightly as you wrap, and don’t wrap too tightly—the cheese needs a little room. Also, make sure the ends of the dough are tucked under the mummy so they stay sealed. If you’re really worried, you can pinch the dough gently at the bottom to seal it.
Can I make these ahead of time for a party?
Absolutely! Assemble them up to 24 hours in advance and keep them covered in the refrigerator. Bake them right before serving for the best texture. You can also freeze them unbaked for up to 3 months—just add a few minutes to the bake time.
What can I use instead of string cheese?
Mozzarella sticks are the best substitute, but you can also use cubes of fresh mozzarella or even cut blocks of mozzarella into sticks. Just make sure they’re about the same size as string cheese so the bake time stays consistent. Avoid shredded cheese—it will melt too quickly and leak out.
How do I make the eyes stay on after baking?
Press the peppercorns or olive pieces gently into the cheese before baking. The cheese will melt slightly and hold them in place. If they shift during baking, just adjust them while the mummies are still warm. Using small olive slices instead of whole peppercorns can also help them stay put.
Pin This Recipe!

Easy Cheesy Mummy Pizza Bites: Perfect Halloween Snack
These Easy Cheesy Mummy Pizza Bites are fast, fun, and require almost zero effort for a payoff that feels way bigger than it should. The crescent dough gets perfectly flaky, the cheese inside gets all melty and stretchy, and those little peppercorn eyes make them look almost too cute to eat.
- Prep Time: 10 minutes
- Cook Time: 12 minutes
- Total Time: 22 minutes
- Yield: 12 servings 1x
- Category: Appetizer
- Cuisine: American
Ingredients
- 1 can (8 oz) refrigerated crescent roll dough
- 6 string cheese sticks
- 1/4 cup pizza sauce
- 24 black peppercorns or 12 small black olive slices
- Optional: 12 small pepperoni slices
- Optional: 1 tablespoon melted butter
- Optional: Garlic powder, dried oregano, or everything bagel seasoning
Instructions
- Preheat your oven to 375°F (190°C). Line a baking sheet with parchment paper or a silicone mat.
- Open the tube of crescent rolls and unroll the dough. Keep it in one large rectangle—don’t separate it into triangles. Pinch the perforated seams together gently so you have a solid sheet of dough.
- Using a sharp knife or pizza cutter, cut the dough crosswise into thin strips, about 1/4 to 1/2 inch wide. You should get around 12 to 15 strips.
- Cut each string cheese stick in half crosswise so you have 12 shorter pieces. If you’re using pepperoni, place one slice on top of each cheese piece now.
- Take one strip of dough and wrap it around a cheese piece, starting at one end and working your way down. Leave a small gap near the top for the mummy’s face. The dough should overlap slightly as you wrap, like bandages. Don’t wrap too tightly.
- Arrange the wrapped mummies on the prepared baking sheet, leaving about an inch of space between each one.
- Before baking, press two black peppercorns or small olive slices into the exposed cheese at the top of each mummy. Press them in gently so they stay put during baking.
- If you’re using melted butter, brush it lightly over the dough strips. Sprinkle with garlic powder or oregano if desired.
- Place the baking sheet in the preheated oven and bake for 10-12 minutes, or until the dough is golden brown and the cheese is melted and bubbly.
- Let the mummies cool on the baking sheet for 2-3 minutes before transferring them to a plate.
- Heat up some pizza sauce in a small bowl and serve it alongside the mummies for dipping.
Notes
Don’t overwork the dough. If the dough gets too warm and sticky, pop it in the fridge for five minutes to firm up. Watch the cheese—if you bake it too long, it will burst through the dough. Leave room for the face when wrapping. For uniform mummies, use a ruler to measure dough strips. These are best served warm, right out of the oven.
Nutrition
- Serving Size: 1 mummy
- Calories: 145
- Sugar: 2
- Sodium: 380
- Fat: 9
- Saturated Fat: 4.5
- Carbohydrates: 11
- Protein: 7
Keywords: Halloween, mummy, pizza bites, crescent rolls, string cheese, easy snack, party food


