Introduction
The Halloween party was in six hours and I’d completely forgotten. My son came bouncing into the kitchen after school, eyes wide, asking when we could start making “the creepy treats” for his class party. I stood there, staring into the open fridge like it might magically produce something impressive. Everyone else would be bringing elaborate cupcakes with fondant ghosts or those Pinterest-perfect rice krispie treats shaped like pumpkins. I had a pack of hot dogs, a can of crescent rolls, and maybe twenty minutes before we needed to leave for soccer practice. Honestly, I almost just grabbed a bag of chips and called it a day.
But then I remembered seeing something online about mummy hot dogs. You know, the ones where you wrap strips of dough around hot dogs to look like bandages? It seemed almost too simple to work. I mean, could something that came together in the time it took to preheat the oven really impress a room full of sugar-crazed seven-year-olds? I figured it was worth a shot—what did I have to lose besides a few hot dogs and my dignity?
So I grabbed the crescent roll dough, unrolled it, and started cutting it into thin strips. My son sat on the counter (against my better judgment, let me tell you), “helping” by handing me strips of dough and telling me which hot dog needed more bandages. We used mustard dots for eyes—the only piping bag I had was a sandwich bag with the corner snipped off. It was messy, a little ridiculous, and honestly, I was pretty sure these were going to be a flop.
Fast forward to the class party. I walked in with a platter of these silly little mummy hot dogs, fully expecting them to be ignored next to the fancy desserts. But guess what? They were the first thing to disappear. Kids were grabbing two and three at a time. One mom asked me for the recipe, looking genuinely surprised when I told her it was just crescent rolls and hot dogs. And my son? He walked around telling everyone he made them. That moment—seeing how something so simple could bring that much joy—is why I keep making these every single Halloween. Maybe you’ve been there too, scrambling for a last-minute contribution that actually turns out to be the hit of the party.
Why You’ll Love This Recipe
Let me tell you why these mummy hot dogs have become my go-to for every Halloween gathering, classroom party, and even just a fun weeknight dinner when we need a little excitement. I’ve tested this recipe more times than I can count—through burnt edges, undercooked dough, and one memorable incident where the “bandages” completely unraveled in the oven. So trust me when I say I’ve worked out all the kinks for you.
- Quick & Easy: From start to finish, these come together in under 30 minutes. The actual prep time is maybe 10 minutes—the rest is just oven time. Perfect for those nights when you realize at 5:30 PM that you need something for the school party tomorrow morning.
- Simple Ingredients: Two main ingredients. That’s it. Hot dogs and crescent roll dough. You probably already have both in your kitchen right now. No special trips to the store for obscure ingredients you’ll never use again.
- Perfect for Halloween Parties: These are the ultimate crowd-pleaser for any spooky gathering. Kids love the mummy theme, and adults appreciate how clever and easy they are. Plus, they’re finger food—no plates or forks needed.
- Crowd-Pleaser: I’ve yet to meet a kid who doesn’t go crazy for these. And honestly, most adults sneak a few too. There’s something about the combination of salty hot dog and flaky, buttery crescent roll that just works.
- Unbelievably Delicious: The texture is what gets me every time. The crescent roll gets golden and crispy on the outside while staying soft and fluffy around the hot dog. It’s like a pig in a blanket, but way more fun.
What makes this recipe different from all the other mummy hot dog recipes out there? It’s the little details I’ve figured out through trial and error. Like how to cut the dough so the strips don’t break. Or the perfect oven temperature that gets the dough golden without burning the hot dogs. Or the trick to making the mustard eyes actually stay put. This isn’t just another version—it’s the version I’d make for my own family, and I do, every single Halloween.
These mummy hot dogs are the kind of recipe that makes you feel like a superhero parent without actually having to do much work. And honestly, isn’t that what we all need sometimes?
What Ingredients You Will Need
This recipe uses the simplest ingredients to create something that looks way more impressive than it actually is. Here’s what you’ll need to grab from your kitchen:
- 1 package (8 count) hot dogs – I recommend using regular-sized hot dogs, not the jumbo ones, because they cook through at the same rate as the crescent roll dough. My personal favorite is Hebrew National for their snap and flavor, but any brand works fine. For a fun twist, try turkey or chicken hot dogs—they’re a bit leaner but still delicious.
- 1 can (8 oz) refrigerated crescent roll dough – This is the magic ingredient. I’ve tried a few brands, and Pillsbury is consistently the easiest to work with. The dough separates nicely into triangles, which makes cutting strips a breeze. If you can find the “sheets” version (without the perforations), even better—you’ll get longer, unbroken strips.
- Yellow mustard – For the eyes. You could use ketchup or even sriracha if you want, but yellow mustard gives that classic mummy look with the perfect pop of color. Plus, it doesn’t run or smear when you pipe it on.
- Cooking spray or butter – For greasing the baking sheet. I prefer butter for extra flavor, but cooking spray works perfectly and saves time on cleanup.
- Optional: Everything bagel seasoning – This is my secret weapon. A light sprinkle over the wrapped hot dogs before baking adds this amazing savory crunch that takes them to another level. Not traditional for mummy hot dogs, but trust me on this one.
- Optional: Cheese slices – If you want to get fancy, you can cut small triangles of cheese to tuck under the “bandages” for an extra gooey surprise. I’ve done this for my son’s birthday parties, and it’s always a hit.
When selecting your hot dogs, look for ones that are uniform in size—this helps them cook evenly. If you’re using frozen hot dogs, make sure they’re fully thawed before wrapping, otherwise the dough will get soggy. For the crescent roll dough, check the expiration date and make sure the can isn’t bulging or damaged.
One thing I learned the hard way: don’t try to use low-fat crescent roll dough. It doesn’t brown as nicely and tends to tear more easily when you’re cutting the strips. Stick with the regular version for the best results.
For a gluten-free option, you can use gluten-free crescent roll dough (I’ve had good luck with the Annie’s brand) and gluten-free hot dogs. Just note that the cooking time might need to be adjusted by a minute or two.
Equipment Needed
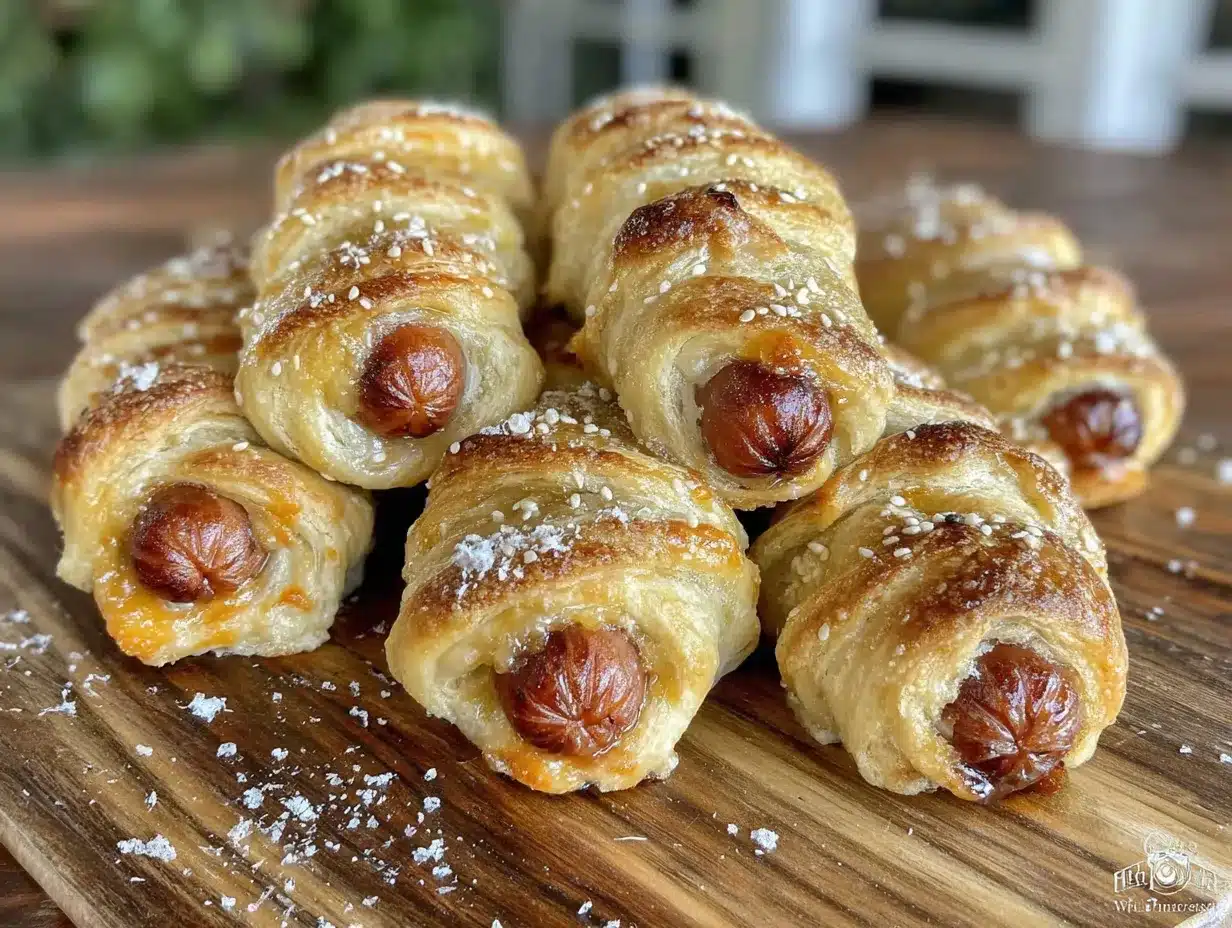
You don’t need much for this recipe, which is part of the beauty. Here’s what you’ll want to have on hand:
- Baking sheet – A standard half-sheet pan works perfectly. I prefer one with a slight rim to catch any butter or grease that might drip off during baking.
- Parchment paper or silicone baking mat – This makes cleanup so much easier and prevents the bottoms from sticking. I’ve used both, and honestly, parchment paper is my go-to because it’s disposable and I don’t have to wash anything.
- Sharp knife or pizza cutter – For cutting the crescent roll dough into strips. A pizza cutter is actually easier because it glides through the dough without pulling or stretching it. I learned this after struggling with a dull knife and ending up with jagged edges.
- Pastry brush (optional) – If you’re brushing the wrapped hot dogs with butter or egg wash for extra browning. I don’t always bother, but when I do, it does make them look prettier.
- Small piping bag or sandwich bag – For piping the mustard eyes. A sandwich bag with the corner snipped off works just as well as a fancy piping bag, and you don’t have to clean it—just toss it when you’re done.
- Toothpicks – These come in handy if you need to secure any loose dough ends before baking. Just remember to remove them before serving!
If you don’t have a pizza cutter, a sharp chef’s knife works fine. And if you don’t have parchment paper, you can lightly grease the baking sheet with cooking spray or butter—just keep an eye on the bottoms so they don’t burn.
Preparation Method
Alright, let’s get to the fun part. Here’s how to make these mummy hot dogs step by step. I’ve included all the little details I wish someone had told me the first time I made them.
Step 1: Preheat and Prep
Preheat your oven to 375°F (190°C). Line a baking sheet with parchment paper or a silicone baking mat. If you don’t have either, lightly grease the sheet with cooking spray. Trust me on the parchment paper—it makes cleanup a breeze, and you don’t want to be scrubbing baked-on mustard off a pan later.
Step 2: Prepare the Crescent Roll Dough
Open the can of crescent roll dough carefully—I always jump when it pops, even after making these dozens of times. Unroll the dough and separate it along the perforated lines into 8 triangles. If you’re using the sheet version, just unroll it into one large rectangle.
Here’s the trick: use a pizza cutter or sharp knife to cut each triangle lengthwise into 3-4 thin strips. The strips should be about 1/4 to 1/2 inch wide. Don’t worry if they’re not perfectly uniform—mummies aren’t supposed to look perfect anyway. If the dough feels too soft or sticky, pop it in the fridge for 5 minutes to firm up. I learned this after my first batch where the strips kept tearing because the dough was too warm.
Step 3: Wrap the Hot Dogs
Take one hot dog and start wrapping a strip of dough around it, starting at one end and working your way to the other. Leave a small gap at the top for the “face” where you’ll add the eyes. The dough should overlap slightly as you wrap, creating that bandaged mummy look. Don’t wrap too tightly—the dough needs a little room to expand as it bakes. I made this mistake once and ended up with dough that burst open in the oven.
If you’re using cheese, tuck a small triangle of cheese under one of the middle strips before wrapping. This creates a gooey surprise when you bite into it.
Press the end of the dough strip gently against the hot dog to seal it. If it doesn’t stick, use a tiny dab of water or egg wash to help it adhere. Place the wrapped hot dog on the prepared baking sheet, seam side down. Repeat with the remaining hot dogs and dough strips.
You should have enough dough strips for all 8 hot dogs. If you run short, you can cut the strips a little thinner next time—or just use fewer strips per hot dog. Some mummies look better with fewer bandages anyway!
Step 4: Add the Eyes
Before baking, add the mustard eyes. Fill a small piping bag or sandwich bag with yellow mustard and snip off the tiniest corner. Pipe two small dots of mustard on the exposed part of each hot dog for the eyes. Don’t make them too big—they’ll spread slightly as the hot dog heats up. I always aim for dots about the size of a pea.
If you’re making these ahead of time, wait to add the eyes until after baking. The mustard can get a little runny in the oven and lose its shape. I’ve done both ways, and adding them after baking gives you cleaner, more defined eyes.
Step 5: Bake
Bake the mummy hot dogs for 12-15 minutes, or until the crescent roll dough is golden brown and puffed. The hot dogs should be heated through and slightly plump. If you’re using the everything bagel seasoning, sprinkle it on right before they go in the oven.
Keep an eye on them during the last few minutes of baking. Every oven is different, and you want the dough to be golden but not burnt. If the edges are browning too quickly, you can tent the baking sheet loosely with foil.
Step 6: Cool and Serve
Let the mummy hot dogs cool on the baking sheet for 2-3 minutes before transferring them to a serving platter. This gives the dough time to set and prevents it from falling apart when you move them.
If you waited to add the eyes, pipe the mustard dots on now while the hot dogs are still warm. The warmth helps the mustard stick better.
Serve warm or at room temperature. They’re best within an hour of baking, but honestly, I’ve eaten them cold the next day and they’re still pretty good. The dough gets a little softer, but the flavor is still there.
Cooking Tips & Techniques
After making these mummy hot dogs more times than I can count (and messing up plenty along the way), I’ve picked up some tips that make the process smoother and the results better. Here’s what I wish I’d known from the start:
Don’t Overwork the Dough
Crescent roll dough is delicate, and the more you handle it, the tougher it gets. When you’re cutting the strips and wrapping the hot dogs, work quickly and gently. If the dough starts to feel sticky or elastic, it’s getting too warm. Just pop it in the fridge for a few minutes to firm up again. I learned this the hard way after a batch of tough, chewy mummies that nobody wanted to eat.
Leave Room for the Eyes
This seems obvious, but I’ve definitely wrapped a few hot dogs so thoroughly that there was no room left for the face. Leave about an inch of exposed hot dog at one end for the eyes. You can also leave both ends exposed if you want a more “unwrapped” mummy look—it’s totally up to you.
Use a Pizza Cutter for Clean Strips
A pizza cutter glides through the dough without pulling or stretching it, giving you clean, even strips. A knife works too, but it’s easier to accidentally drag the dough and end up with jagged edges. Trust me on this one—it’s worth the extra second to grab the pizza cutter.
Space Them Out on the Baking Sheet
These mummies puff up as they bake, so give them some room. I usually fit 6-8 on a standard half-sheet pan without overcrowding. If they’re too close together, the dough won’t crisp up properly and you’ll end up with soft spots.
Check for Doneness Early
Start checking your mummy hot dogs at the 10-minute mark. Ovens vary, and you want the dough to be golden brown but not burnt. If the tops are browning faster than the bottoms, move the baking sheet to a lower rack for the last few minutes.
Make Ahead and Reheat
You can assemble these mummy hot dogs up to a day in advance and keep them covered in the fridge. Just add the mustard eyes after baking. When you’re ready to serve, bake them straight from the fridge—you might need to add an extra minute or two to the cooking time. I’ve done this for parties, and it saves so much stress on the day of.
Variations & Adaptations
One of the best things about this recipe is how easy it is to customize. Here are some variations I’ve tried and loved:
Spicy Mummy Hot Dogs
Use spicy Italian sausages or chorizo instead of regular hot dogs. The extra kick pairs beautifully with the buttery crescent roll dough. I made these for a Halloween party for adults, and they were gone before the regular ones. Just make sure the sausages are fully cooked before wrapping, or adjust the baking time accordingly.
Cheesy Mummy Hot Dogs
Cut small strips of cheddar, mozzarella, or pepper jack cheese and tuck them under the dough strips before baking. The cheese melts and oozes out slightly, creating a delicious surprise when you bite into it. I’ve also used cheese sticks cut into thin strips—they’re the perfect size and melt evenly.
Vegetarian Mummy “Hot Dogs”
Use vegetarian or vegan hot dogs instead. I’ve tried several brands, and Field Roast and Beyond Meat work best because they hold their shape and don’t get too soft. The baking time might be slightly shorter, so keep an eye on them. You can also use carrot sticks or zucchini spears for a healthier twist—just blanch them first so they’re tender.
Breakfast Mummy Sausages
Swap the hot dogs for breakfast sausage links. These are perfect for a Halloween morning breakfast or brunch. The smaller size means you’ll need to cut the dough strips even thinner, but the result is adorable bite-sized mummies. Serve with a side of mustard or maple syrup for dipping.
Pizza Mummy Hot Dogs
Before wrapping, brush the hot dogs with a little pizza sauce and sprinkle with shredded mozzarella. Then wrap with the dough strips as usual. Bake, and you’ve got pizza-flavored mummies. I made these for my son’s pizza-themed birthday party, and they were a huge hit.
Gluten-Free Mummy Hot Dogs
Use gluten-free crescent roll dough and gluten-free hot dogs. The dough can be a bit trickier to work with—it’s more delicate and prone to tearing—so handle it gently. You might need to cut the strips a little wider to prevent breakage. The baking time might also need to be adjusted by a minute or two.
Serving & Storage Suggestions
These mummy hot dogs are best served warm, right out of the oven, when the dough is at its flakiest and the hot dog is perfectly heated through. But they’re also delicious at room temperature, which makes them perfect for parties and potlucks where you can’t control the timing perfectly.
How to Serve
Arrange the mummy hot dogs on a platter with a small bowl of extra mustard for dipping. You can also serve them with ketchup, ranch dressing, or even honey mustard for a sweeter twist. For a Halloween-themed presentation, arrange them on a black platter or a tray lined with orange and black napkins. Add some fake spider webs or plastic spiders around the platter for extra spooky vibes.
What to Serve With Them
These mummy hot dogs are hearty enough to be a meal on their own, but they pair well with simple sides. Try serving them with a crisp green salad, some roasted vegetables, or a bowl of tomato soup for dipping. For a party, put out a spread of other Halloween-themed snacks like spider web dip, pumpkin-shaped cheese ball, or ghost-shaped cookies.
How to Store Leftovers
If you have leftovers (which honestly, rarely happens in my house), store them in an airtight container in the refrigerator for up to 3 days. The dough will soften slightly as it sits, but the flavor is still great.
How to Reheat
To reheat, place the mummy hot dogs on a baking sheet and warm them in a 350°F (175°C) oven for 5-7 minutes, or until heated through. You can also microwave them for 20-30 seconds, but the dough won’t be as crispy. I prefer the oven method—it takes a little longer, but the texture is so much better.
Can You Freeze Them?
Yes! You can freeze the assembled (unbaked) mummy hot dogs for up to 2 months. Place them on a baking sheet and freeze until solid, then transfer to a freezer bag. When you’re ready to bake, add a few extra minutes to the cooking time—no need to thaw first. I’ve done this for Halloween parties, and it’s a lifesaver. Just don’t add the mustard eyes until after baking.
Nutritional Information & Benefits
Let’s be real—these mummy hot dogs aren’t health food. But they’re a fun treat for special occasions, and there are a few ways to make them a little better for you if that’s a concern.
Estimated Nutritional Values (per serving, based on 1 mummy hot dog)
| Nutrient | Amount |
|---|---|
| Calories | 220-250 |
| Total Fat | 14-16g |
| Saturated Fat | 5-7g |
| Cholesterol | 25-35mg |
| Sodium | 600-700mg |
| Total Carbohydrates | 18-22g |
| Protein | 7-9g |
These values will vary depending on the brand of hot dogs and crescent roll dough you use. Turkey or chicken hot dogs will be lower in fat and calories, while beef hot dogs will be higher.
Health Benefits of Key Ingredients
Hot dogs are a source of protein, which helps keep you full and satisfied. They also provide some B vitamins, including B12, which is important for energy metabolism. Crescent roll dough provides carbohydrates for quick energy—perfect for fueling a busy Halloween night of trick-or-treating.
Dietary Considerations
This recipe is not gluten-free unless you use gluten-free dough and hot dogs. It’s also not suitable for vegetarians or vegans unless you use plant-based alternatives. For a lower-sodium option, look for reduced-sodium hot dogs and check the crescent roll dough label—some brands have less salt than others.
Potential Allergens
This recipe contains wheat (gluten), dairy (in the crescent roll dough), and soy (often in hot dogs). Check your ingredient labels carefully if you’re cooking for someone with allergies. The mustard is generally safe, but some brands may contain additives.
From a wellness perspective, I see these mummy hot dogs as a fun, occasional treat. They’re not something you’d eat every day, but for Halloween parties, classroom celebrations, or a silly weeknight dinner, they’re perfect. And honestly, the joy they bring is worth the extra calories.
Conclusion
These mummy hot dogs with crescent roll wraps are proof that you don’t need fancy ingredients or hours in the kitchen to create something memorable. They’re quick, easy, and endlessly customizable—everything a busy parent needs when Halloween sneaks up on them. I’ve made these for parties, school events, and even just a random Tuesday when we needed a little fun in our dinner routine. And every single time, they disappear.
What I love most about this recipe is how it brings people together. There’s something about the silly mummy faces and the flaky, buttery dough that makes everyone smile. My son still talks about the first time we made them together, and now it’s become our Halloween tradition. We make a batch for his class party, a batch for our neighborhood potluck, and a batch just for us to snack on while we hand out candy.
I encourage you to make this recipe your own. Try different hot dogs, add cheese, experiment with the seasonings—there’s no wrong way to do it. And when you do, I’d love to hear about it. Drop a comment below and tell me how your mummy hot dogs turned out. What variations did you try? Did your kids help you make them? Did they disappear as fast as mine always do?
Thanks for stopping by, and happy Halloween cooking! Remember, even if things don’t go perfectly—if the dough tears or the mustard eyes come out lopsided—it’s all part of the fun. These mummies aren’t supposed to be perfect. They’re supposed to be delicious. And honestly, they always are.
Frequently Asked Questions
Can I make these mummy hot dogs ahead of time?
Absolutely! You can assemble them up to a day in advance and keep them covered in the fridge. Just add the mustard eyes after baking. When you’re ready to serve, bake them straight from the fridge—you might need to add an extra minute or two to the cooking time.
Can I use puff pastry instead of crescent roll dough?
Yes, you can! Puff pastry will give you a flakier, more buttery texture. Just thaw the puff pastry according to the package directions, roll it out slightly, and cut it into strips. The baking time might be slightly different, so keep an eye on them.
How do I keep the dough from unraveling during baking?
Make sure the end of the dough strip is pressed firmly against the hot dog, and place the mummy seam-side down on the baking sheet. If you’re still having trouble, you can use a tiny dab of water or egg wash to help the dough stick. A toothpick can also help secure loose ends—just remember to remove it before serving.
Can I use something other than mustard for the eyes?
Of course! Ketchup works well, though it’s a bit runnier. You can also use sriracha for a spicy kick, or even small dots of melted cheese for a gooey alternative. For a non-food option, you can use edible googly eyes from a baking supply store.
How do I get the dough to brown nicely?
Brush the wrapped hot dogs with a little melted butter or an egg wash (one egg beaten with a tablespoon of water) before baking. This helps the dough develop a beautiful golden color. You can also sprinkle a little salt or everything bagel seasoning on top for extra flavor and visual appeal.
Pin This Recipe!
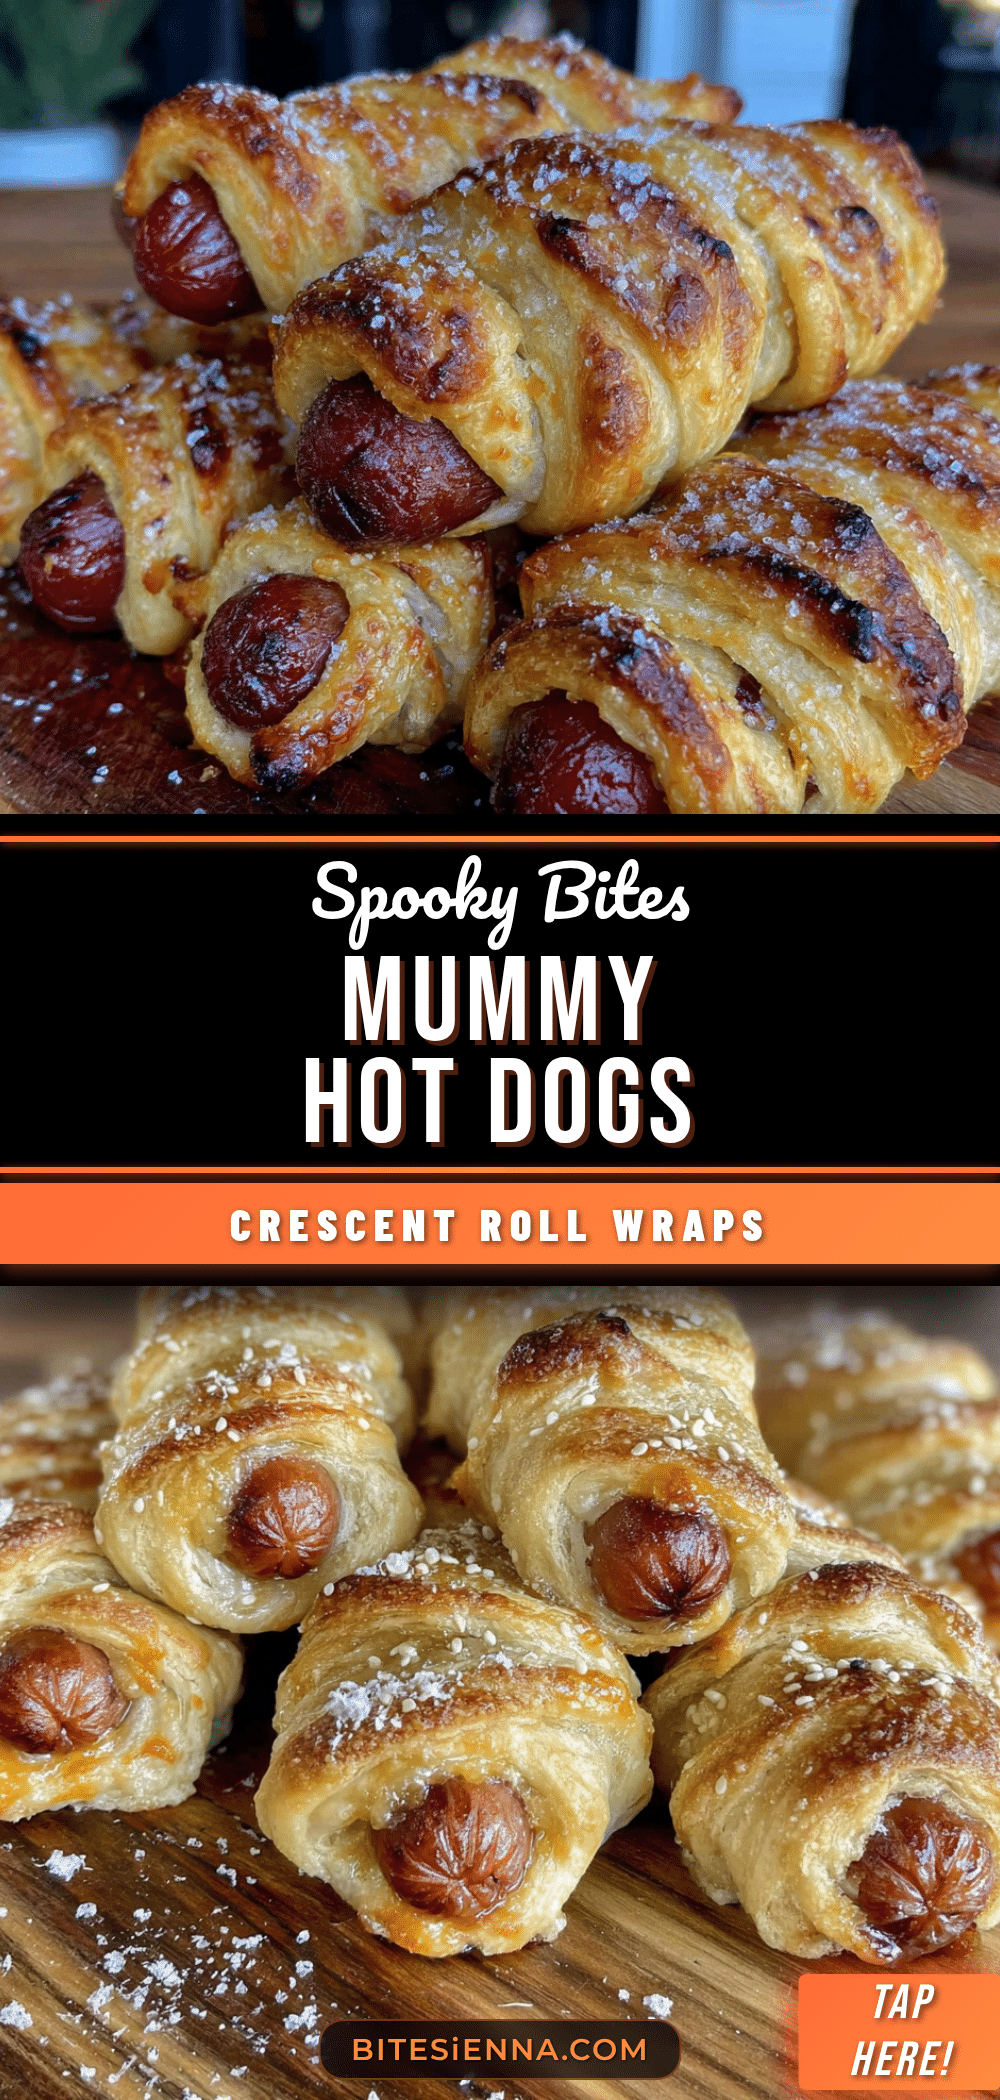
30-Minute Mummy Hot Dogs with Crescent Roll Wraps
Quick and easy mummy hot dogs made with crescent roll dough, perfect for Halloween parties or a fun weeknight dinner. Ready in under 30 minutes with simple ingredients.
- Prep Time: 10 minutes
- Cook Time: 15 minutes
- Total Time: 25 minutes
- Yield: 8 servings 1x
- Category: Appetizer
- Cuisine: American
Ingredients
- 1 package (8 count) hot dogs
- 1 can (8 oz) refrigerated crescent roll dough
- Yellow mustard (for eyes)
- Cooking spray or butter (for greasing)
- Optional: Everything bagel seasoning
- Optional: Cheese slices
Instructions
- Preheat oven to 375°F (190°C). Line a baking sheet with parchment paper or lightly grease with cooking spray.
- Open the can of crescent roll dough and separate into 8 triangles. Cut each triangle lengthwise into 3-4 thin strips (about 1/4 to 1/2 inch wide).
- Wrap a strip of dough around each hot dog, starting at one end and leaving a small gap at the top for the face. Overlap slightly and press the end to seal. Place seam-side down on the baking sheet.
- Pipe two small dots of yellow mustard on the exposed part of each hot dog for eyes (or add after baking for cleaner eyes).
- Bake for 12-15 minutes, until dough is golden brown and puffed. If using everything bagel seasoning, sprinkle on before baking.
- Let cool on the baking sheet for 2-3 minutes before serving. Serve warm or at room temperature.
Notes
For best results, use regular-sized hot dogs and regular crescent roll dough. If dough becomes too soft, refrigerate for 5 minutes before cutting. Add mustard eyes after baking for cleaner look. Can be assembled up to a day in advance and baked straight from the fridge. Freeze unbaked mummies for up to 2 months.
Nutrition
- Serving Size: 1 mummy hot dog
- Calories: 235
- Sugar: 4
- Sodium: 650
- Fat: 15
- Saturated Fat: 6
- Carbohydrates: 20
- Protein: 8
Keywords: mummy hot dogs, Halloween appetizer, crescent roll wraps, easy Halloween recipe, kid-friendly, party food


