I wasn’t expecting cooking advice from the guy fixing my garbage disposal, but there I was, leaning against my own kitchen counter, covered in flour, listening to Marco explain exactly how to make the best tailgate wings I’d ever tasted. Marco, who showed up unannounced on a Thursday afternoon, took one look at my sad attempts at meal prep and shook his head. “You’re overthinking it,” he said, wiping his hands on his coveralls. “Wings aren’t about fancy techniques. They’re about patience and a good glaze.” He scribbled something on the back of his work order, handed it to me, and that crumpled piece of paper became the origin story of my now-famous Sticky Honey Garlic Chicken Wings.
Honestly, I almost threw that note away. It looked like a grocery list written by a five-year-old. But something made me shove it in my recipe box, and three weeks later, during a particularly desperate game day, I gave it a shot. The result? Wings so sticky, so glossy, so perfectly balanced between sweet and savory that my friends literally licked their fingers clean. I mean, I’ve seen people go through a lot for good food, but watching a grown man fight over the last wing is a special kind of validation.
Maybe you’ve been there—staring down a pack of chicken wings, wondering how to turn them into something memorable without spending all day in the kitchen. These Sticky Honey Garlic Chicken Wings are the answer. They’re the kind of recipe that makes you look like a hero with minimal effort. The secret is in the glaze, which caramelizes into this incredible, sticky coating that clings to every bite. Let me tell you, once you make these, you’ll never go back to plain hot wings again. This recipe stayed with me because it proved that the best things often come from the most unexpected places—and from the people you’d least expect to teach you something.
Why You’ll Love This Recipe
These aren’t just any wings. These are the wings that disappear before the first commercial break. I’ve tested this recipe at countless gatherings, from Super Bowl parties to casual backyard barbecues, and the feedback is always the same: “These are the best wings I’ve ever had.” Here’s why they work so well:
- Quick & Easy: These wings come together in under 45 minutes, with only about 15 minutes of active prep. Perfect for those last-minute tailgate decisions when you realize you need something impressive.
- Simple Ingredients: You probably have most of these items in your pantry right now. Honey, soy sauce, garlic, and a few pantry staples—no exotic grocery store runs required.
- Perfect for Tailgates: These wings are designed to be eaten with your hands, which is exactly what you want at a tailgate party. They hold up well in a cooler and taste amazing at room temperature.
- Crowd-Pleaser: I’ve served these to picky eaters, wing snobs, and people who claim they “don’t like chicken wings.” Every single person has gone back for seconds. It’s almost embarrassing how fast they disappear.
- Unbelievably Delicious: The sticky glaze creates this incredible texture that’s both crispy and gooey. The honey caramelizes beautifully, while the garlic adds a savory depth that keeps you coming back for more.
What makes this recipe different from all the other honey garlic wing recipes out there? It’s the technique. Instead of just tossing baked wings in a sauce, we’re building layers of flavor. The wings get a dry rub first, then a quick bake to render the fat, and finally a glorious toss in a reduced honey garlic glaze that gets sticky and caramelized under the broiler. It’s not just another version—it’s my best version, perfected after dozens of batches and countless taste tests.
This recipe isn’t just good—it’s the kind that makes you close your eyes after the first bite. The sweet honey hits your tongue first, followed by the sharp bite of garlic, and then this subtle warmth from the ginger and soy. It’s comfort food reimagined for game day—faster than traditional wings, but with the same soul-soothing satisfaction. Perfect for impressing your tailgate crew without stress, or turning a simple game day into something memorable.
What Ingredients You Will Need
This recipe uses simple, wholesome ingredients to deliver bold flavor and satisfying texture without the fuss. Most of these items are pantry staples, which makes these wings perfect for spontaneous cooking. Here’s everything you’ll need:
For the Wings
- 3 pounds chicken wings (about 15-18 wings), split into drumettes and flats (I recommend buying pre-separated wings to save time)
- 1 tablespoon baking powder (not baking soda—this is crucial for crispy skin)
- 1 teaspoon salt (I use kosher salt for better flavor distribution)
- 1/2 teaspoon black pepper
- 1/2 teaspoon garlic powder
- 1/2 teaspoon smoked paprika (adds a subtle smoky depth)
For the Sticky Honey Garlic Glaze
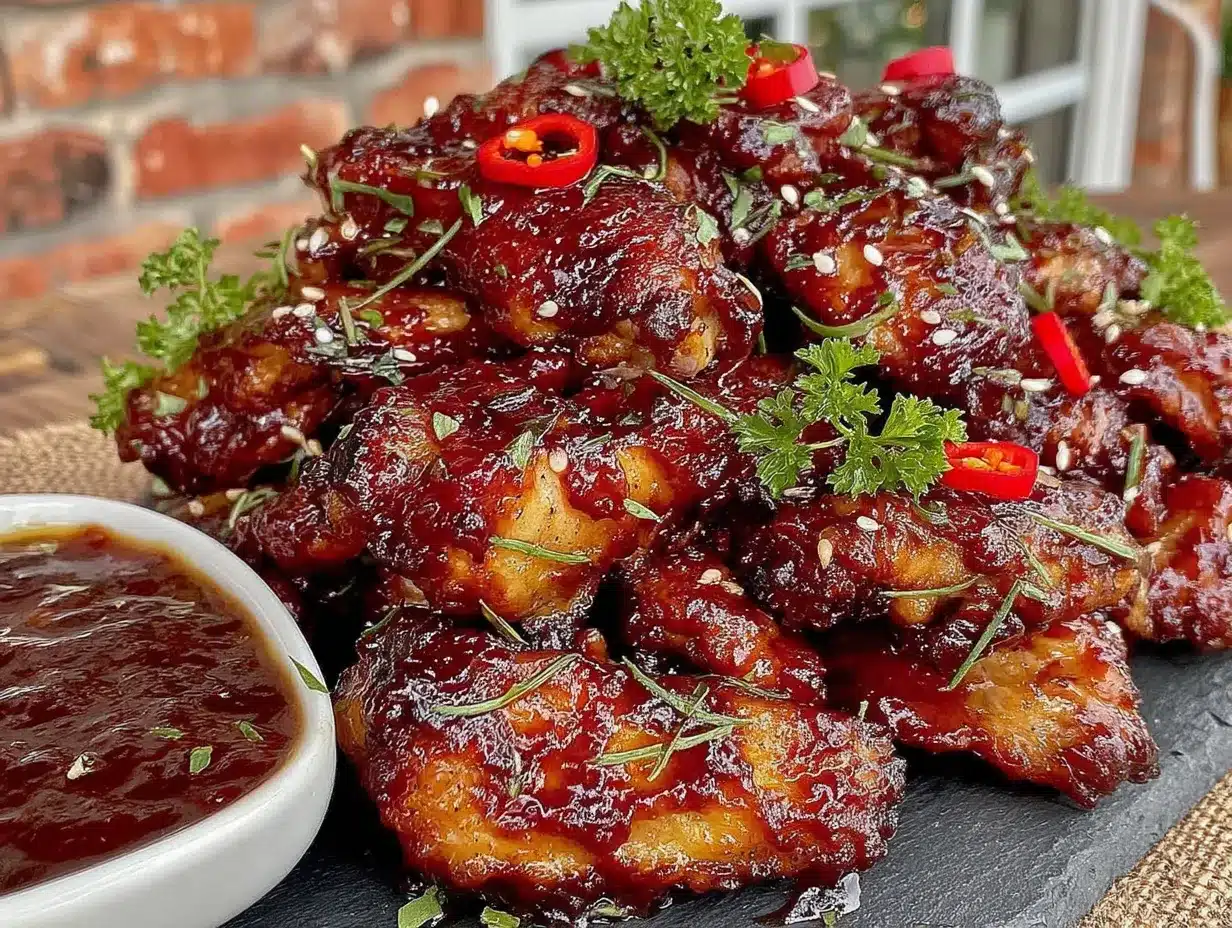
- 1/2 cup honey (use a good quality honey—I prefer a mild wildflower honey for balanced sweetness)
- 1/4 cup soy sauce (low-sodium works best to control saltiness)
- 6 cloves garlic, minced (fresh garlic is non-negotiable here—don’t use jarred)
- 2 tablespoons rice vinegar (adds acidity to balance the sweetness)
- 1 tablespoon grated fresh ginger (optional but highly recommended for warmth)
- 1 tablespoon sesame oil (adds a nutty aroma that complements the honey)
- 1/2 teaspoon red pepper flakes (adjust to your heat preference)
- 1 tablespoon cornstarch mixed with 2 tablespoons water (for thickening the glaze)
For Garnish
- 2 tablespoons sesame seeds, toasted
- 3 green onions, thinly sliced
- Fresh cilantro sprigs (optional, for color)
When selecting your chicken wings, look for ones that are plump and have a good amount of meat on them. I personally prefer Bell & Evans or Mary’s Free Range wings for their superior texture and flavor. If you’re using frozen wings, make sure to thaw them completely in the refrigerator overnight and pat them very dry before cooking—excess moisture is the enemy of crispy skin.
For the honey, avoid the cheap stuff that’s often cut with corn syrup. A good-quality honey will have a more complex flavor and will caramelize better in the glaze. If you’re looking for a substitution, you can use maple syrup, but the flavor profile will change significantly—still delicious, just different.
Equipment Needed
You don’t need a professional kitchen to make these wings, but having the right tools makes the process smoother. Here’s what you’ll need:
- Large baking sheet with a wire rack (the rack is essential for air circulation, which gives you crispy wings all over)
- Parchment paper or aluminum foil (for easy cleanup—trust me on this one)
- Large mixing bowl for tossing wings with the dry rub
- Small saucepan for making the glaze
- Whisk for combining glaze ingredients
- Tongs for turning wings and tossing them in glaze
- Chef’s knife and cutting board for mincing garlic and slicing green onions
- Instant-read thermometer (optional but recommended for perfectly cooked wings)
If you don’t have a wire rack, you can use a broiler pan or simply place the wings directly on a parchment-lined baking sheet. Just know that the bottom won’t get as crispy. I learned this the hard way during my first attempt—the wings were good, but the skin on the bottom was a bit sad. The wire rack is a game-changer, and you can find affordable ones at any kitchen supply store for under $10.
For cleaning the baking sheet after all that sticky glaze, I recommend soaking it in hot, soapy water immediately after cooking. The caramelized honey can be stubborn, but it releases much easier when it’s still warm.
Preparation Method
Let’s get cooking! Follow these steps carefully, and you’ll have the most incredible Sticky Honey Garlic Chicken Wings your tailgate has ever seen.
- Preheat your oven to 425°F (220°C). Position the rack in the upper third of the oven. Line your baking sheet with parchment paper or foil, then place the wire rack on top.
- Prepare the wings: Pat the chicken wings completely dry with paper towels. This step is crucial—wet skin won’t crisp up. In a large bowl, combine the baking powder, salt, pepper, garlic powder, and smoked paprika. Add the wings and toss until every piece is evenly coated. The baking powder might look a bit powdery at first, but trust the process—it’s what creates those incredible crispy bubbles on the skin.
- Arrange the wings: Place the seasoned wings on the wire rack in a single layer, making sure they’re not touching. Crowding the pan will steam the wings instead of roasting them. If you need to use two baking sheets, go for it. I once tried to cram all the wings onto one pan, and they came out soggy—a mistake I only made once.
- Bake the wings: Roast for 25 minutes, then flip each wing using tongs. Continue baking for another 20-25 minutes, until the skin is golden brown and crispy. The internal temperature should reach 165°F (74°C) when measured at the thickest part of the meat. Your kitchen will start smelling incredible about 15 minutes in—that’s the fat rendering and the spices blooming.
- Make the glaze: While the wings are baking, combine honey, soy sauce, minced garlic, rice vinegar, grated ginger, sesame oil, and red pepper flakes in a small saucepan. Bring to a simmer over medium heat, stirring occasionally. Let it bubble gently for 5-7 minutes until it thickens slightly. In a small bowl, whisk together the cornstarch and water to create a slurry. Slowly pour this into the simmering glaze while whisking constantly. The glaze will thicken immediately. Remove from heat and set aside.
- Glaze the wings: Once the wings are crispy and golden, remove them from the oven. Transfer them to a large bowl and pour about two-thirds of the glaze over them. Toss gently until every wing is coated in that beautiful, sticky mixture. Don’t be too rough—you want the glaze to cling, not to tear the skin.
- Broil for the final touch: Return the glazed wings to the wire rack (line a fresh piece of foil under them if the old one is messy). Turn your oven to broil and cook the wings for 2-3 minutes, watching them carefully. The glaze will bubble and caramelize, creating that signature sticky texture. Keep a close eye—honey burns quickly! I learned this lesson when I got distracted by a phone call and ended up with charcoal wings.
- Final toss and garnish: Remove the wings from the oven and transfer them back to the bowl. Pour the remaining glaze over them and toss one more time. Sprinkle with toasted sesame seeds and sliced green onions. For an extra pop of color, add some fresh cilantro sprigs.
Serve immediately while the wings are still warm and the glaze is at its stickiest. The contrast between the crispy skin and the sweet, savory glaze is absolutely magical.
Cooking Tips & Techniques
Over the years, I’ve made these wings more times than I can count, and I’ve picked up a few tricks along the way. Here are my best tips for perfect results every time:
The drying secret: After patting the wings dry, let them sit uncovered in the refrigerator for 30 minutes to an hour. This dries out the skin even further, which means extra crispy results. It’s a small step that makes a huge difference. I do this while I’m prepping the other ingredients, and it’s become non-negotiable in my kitchen.
Don’t skip the baking powder: This is the number one mistake people make. Baking powder (not baking soda!) creates tiny bubbles on the skin that crisp up beautifully in the oven. Without it, your wings will be good, but they won’t have that restaurant-quality crunch. I once ran out of baking powder and thought I could skip it—the wings were a sad, flabby disappointment.
Watch the broiler like a hawk: The broiler step is where magic happens, but it’s also where disaster strikes. Honey burns at a lower temperature than you’d think. Set a timer for 2 minutes and don’t walk away. I’ve lost more batches than I’d like to admit to a distracted moment.
Double-glaze for extra stickiness: If you want that truly over-the-top sticky texture, do the initial toss with the glaze, broil for 2 minutes, then toss again with the remaining glaze and broil for another minute. This creates layers of caramelized goodness that will have people licking their fingers.
Timing is everything: These wings are best served immediately after cooking. If you’re making them for a tailgate, I recommend baking the wings ahead of time (through step 4), then finishing the glaze and broiling step at the tailgate. You can transport the baked wings in a cooler and reheat them in a hot oven or on a grill before glazing.
Variations & Adaptations
One of the best things about this recipe is how adaptable it is. Here are some variations I’ve tried and loved:
Spicy Honey Sriracha Wings: Add 2 tablespoons of sriracha to the glaze along with an extra teaspoon of red pepper flakes. The heat cuts through the sweetness beautifully. I made these for a friend who claims to have “iron taste buds,” and even he was impressed.
Air Fryer Version: Cook the wings in an air fryer at 400°F (200°C) for 12 minutes, shake the basket, then cook for another 10-12 minutes. Toss with the glaze and air fry for an additional 2 minutes. This method is faster and yields incredibly crispy results. I’ve tested this multiple times, and the air fryer version might actually be my favorite for smaller batches.
Gluten-Free Adaptation: Simply replace the soy sauce with tamari or coconut aminos. The rest of the recipe is naturally gluten-free. I’ve made this for friends with celiac disease, and they couldn’t tell the difference.
Smoky Chipotle Honey Wings: Add 1-2 minced chipotle peppers in adobo sauce to the glaze. The smoky heat pairs perfectly with the honey and garlic. This variation is fantastic for summer barbecues and adds a depth of flavor that’s hard to beat.
Garlic Lovers Version: Double the garlic in the glaze and add 2 teaspoons of garlic powder to the dry rub. If you’re like me and believe there’s no such thing as too much garlic, this version is for you. Just be prepared for very garlicky breath—it’s worth it.
Serving & Storage Suggestions
These wings are best served hot and fresh, but they’re still delicious at room temperature—which is perfect for tailgates. Here’s how to make the most of them:
Serving: Arrange the wings on a large platter and garnish with extra sesame seeds, sliced green onions, and a few lime wedges for squeezing. I like to serve them with celery sticks and carrot sticks on the side, along with a cooling ranch or blue cheese dip. The crunch of the vegetables and the creaminess of the dip balance the sticky, sweet wings perfectly.
What to serve alongside: These wings pair beautifully with classic tailgate sides like potato wedges, coleslaw, or a simple green salad. For drinks, a cold beer (something crisp like a lager or pilsner) cuts through the sweetness, while a tangy lemonade or iced tea works well for non-alcoholic options.
Storage: If you have leftovers (which is rare in my house), store them in an airtight container in the refrigerator for up to 3 days. The glaze will continue to soak into the skin, so they won’t be as crispy, but the flavor will still be fantastic.
Reheating: The best way to reheat these wings is in a 400°F (200°C) oven for 5-7 minutes, or in an air fryer at 375°F (190°C) for 3-4 minutes. Avoid the microwave—it will make the wings soggy and the glaze will become a sticky mess. I learned this the hard way when I was too impatient to wait for the oven.
Freezing: You can freeze the baked (but unglazed) wings for up to 2 months. Wrap them tightly in plastic wrap and then foil. When you’re ready to serve, thaw in the refrigerator overnight, then reheat in a 400°F oven for 10 minutes before glazing and broiling. The glaze itself can be frozen separately in a small container.
Nutritional Information & Benefits
While these wings are definitely an indulgence, they do have some redeeming qualities. Here’s a rough nutritional breakdown per serving (about 4-5 wings):
| Nutrient | Amount |
|---|---|
| Calories | 420 |
| Protein | 28g |
| Fat | 22g |
| Carbohydrates | 28g |
| Sugar | 24g |
| Sodium | 680mg |
Chicken wings are a good source of protein and contain essential B vitamins, particularly B6 and B12, which support energy metabolism. The garlic in this recipe isn’t just for flavor—it’s known for its immune-boosting properties and anti-inflammatory benefits. Honey provides natural antioxidants and has antibacterial properties. Of course, these wings are higher in sugar and sodium than some other options, so they’re best enjoyed as an occasional treat rather than a daily staple.
For those watching their intake, you can reduce the honey to 1/3 cup and use low-sodium soy sauce to cut the sugar and salt content. The wings will still be delicious, just slightly less sticky. This recipe contains gluten (from the soy sauce) and sesame, so it’s not suitable for those with allergies to those ingredients without modifications.
From a wellness perspective, I believe in balance. These wings are about celebration and enjoyment—they’re meant to be shared with people you care about. One indulgent meal isn’t going to derail your health goals, but it might just make your tailgate unforgettable.
FAQs
Can I make these wings in advance for a party?
Absolutely! Bake the wings through step 4 up to 24 hours in advance. Store them in the refrigerator, then reheat in a 400°F oven for 10 minutes before glazing and broiling. This actually helps the skin get even crispier.
Why are my wings not crispy?
The most common reasons are wet skin, overcrowding the pan, or skipping the baking powder. Make sure your wings are very dry before seasoning, give them space on the baking sheet, and don’t skip the baking powder—it’s essential for crispy skin.
Can I use chicken thighs or drumsticks instead of wings?
Yes, but you’ll need to adjust the cooking time. Chicken thighs (boneless) need about 20-25 minutes, while drumsticks need 30-35 minutes. Use an instant-read thermometer to check for doneness—165°F for thighs and 175°F for drumsticks.
How do I prevent the glaze from burning?
Watch the broiler carefully and don’t walk away. The honey in the glaze caramelizes quickly and can burn in seconds. If your oven runs hot, reduce the broil time to 1-2 minutes. You can also brush the glaze on in layers rather than tossing all at once.
Can I grill these wings instead of baking?
Definitely! Grill the seasoned wings over medium heat for about 20-25 minutes, turning occasionally, until crispy and cooked through. Brush with the glaze during the last 5 minutes of grilling, turning frequently to prevent burning. The smoky flavor from the grill adds another dimension to these wings.
Conclusion
These Sticky Honey Garlic Chicken Wings have become my go-to recipe for every tailgate party, and I honestly can’t imagine game day without them. They’re everything you want in a wing—crispy, sticky, sweet, savory, and absolutely addictive. The best part? They’re deceptively simple to make, which means you can spend less time in the kitchen and more time enjoying the party.
I love this recipe because it proves that you don’t need fancy techniques or exotic ingredients to create something truly memorable. It’s about understanding a few key principles—dry skin, hot oven, careful glazing—and letting the ingredients shine. Every time I make these wings, I think of Marco and his crumpled work order, and I’m reminded that the best recipes often come from the most unexpected places.
Now it’s your turn. Give these wings a try at your next tailgate, and watch them disappear. And if you come up with your own twist—maybe a different spice blend or a new glaze variation—I’d love to hear about it. Drop a comment below and share your creation. After all, the best recipes are the ones we pass along and make our own. Happy cooking, and see you at the tailgate!
Pin This Recipe!
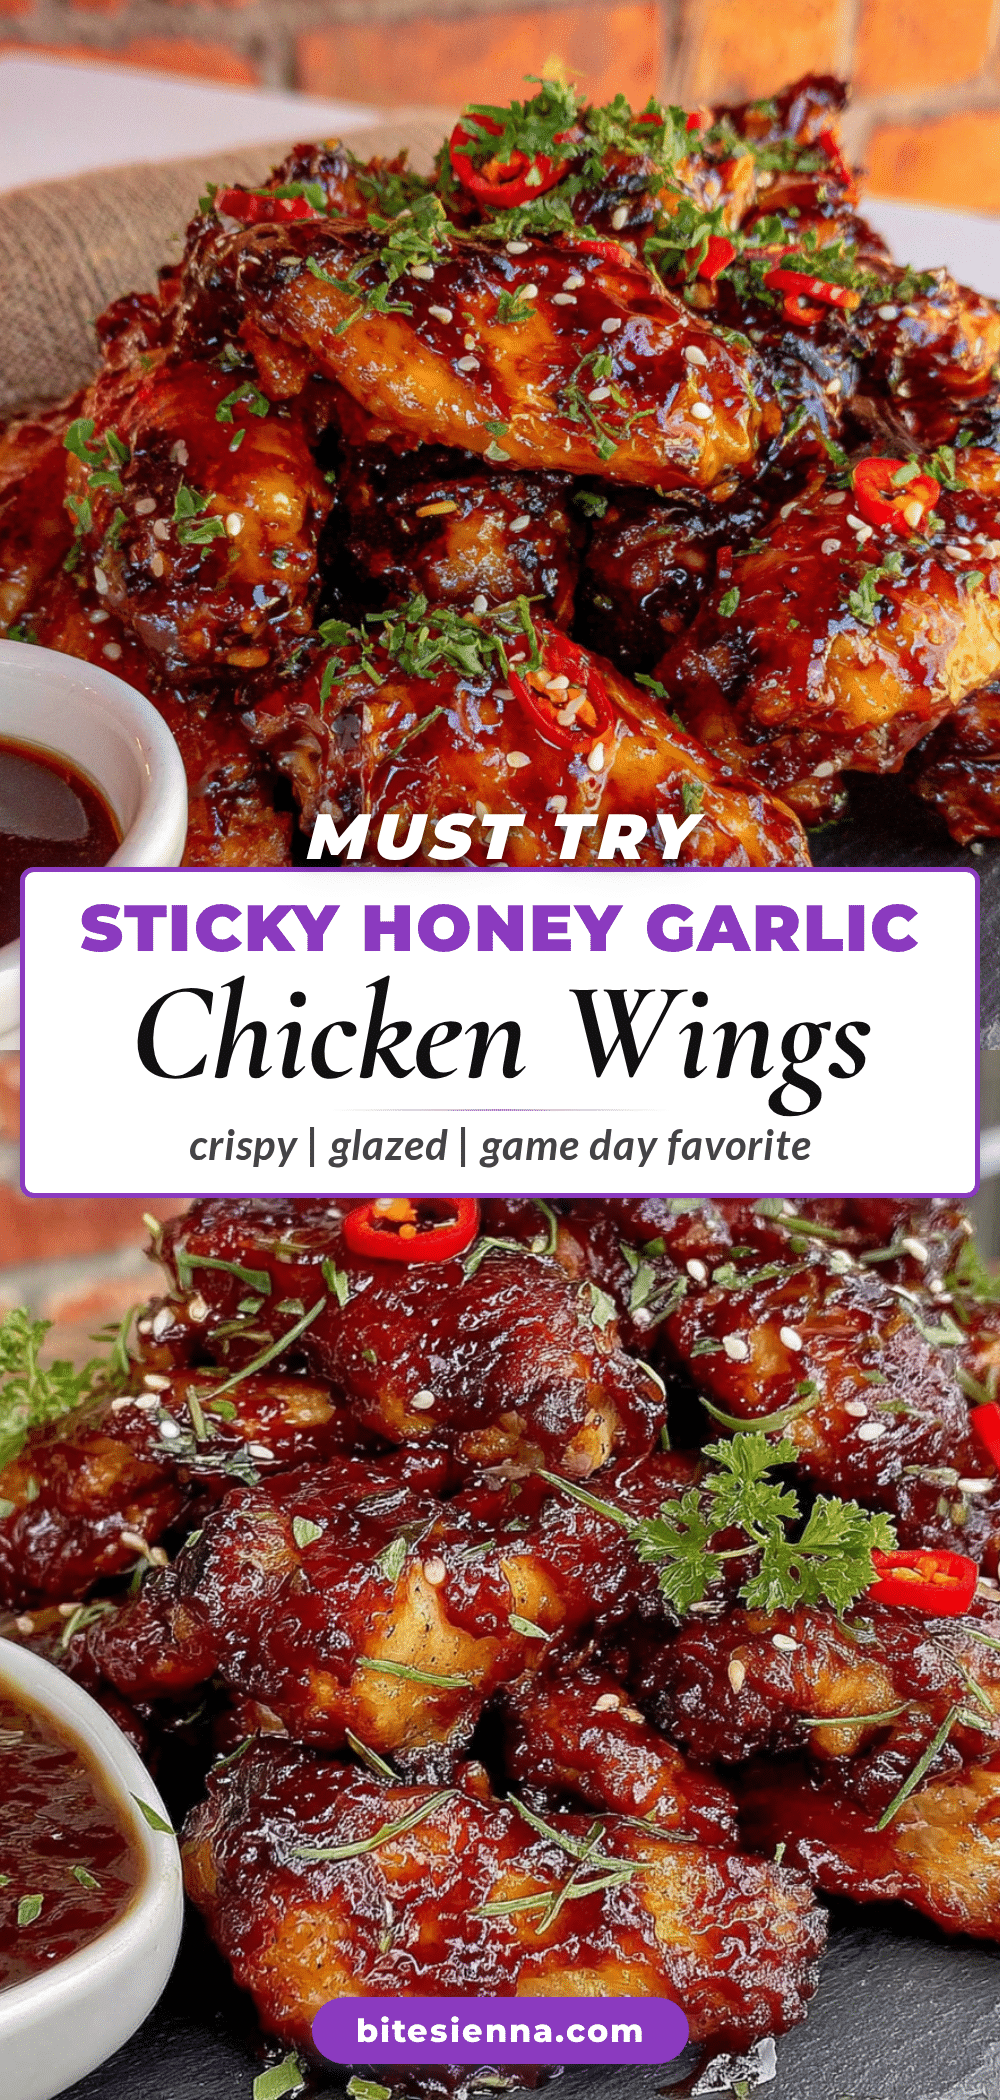
Best Sticky Honey Garlic Chicken Wings for Tailgate

These Sticky Honey Garlic Chicken Wings are the ultimate tailgate party food—crispy, sticky, sweet, and savory, with a caramelized honey garlic glaze that clings to every bite. Perfect for game day, they come together in under 45 minutes with simple pantry ingredients.
- Prep Time: 15 minutes
- Cook Time: 45 minutes
- Total Time: 1 hour
- Yield: 4 servings 1x
- Category: Appetizer
- Cuisine: American
Ingredients
- 3 pounds chicken wings (about 15–18 wings), split into drumettes and flats
- 1 tablespoon baking powder
- 1 teaspoon kosher salt
- 1/2 teaspoon black pepper
- 1/2 teaspoon garlic powder
- 1/2 teaspoon smoked paprika
- 1/2 cup honey
- 1/4 cup low-sodium soy sauce
- 6 cloves garlic, minced
- 2 tablespoons rice vinegar
- 1 tablespoon grated fresh ginger
- 1 tablespoon sesame oil
- 1/2 teaspoon red pepper flakes
- 1 tablespoon cornstarch mixed with 2 tablespoons water
- 2 tablespoons sesame seeds, toasted
- 3 green onions, thinly sliced
- Fresh cilantro sprigs (optional)
Instructions
- Preheat your oven to 425°F (220°C). Position the rack in the upper third of the oven. Line a baking sheet with parchment paper or foil, then place a wire rack on top.
- Pat the chicken wings completely dry with paper towels. In a large bowl, combine the baking powder, salt, pepper, garlic powder, and smoked paprika. Add the wings and toss until evenly coated.
- Arrange the seasoned wings on the wire rack in a single layer, making sure they are not touching.
- Bake for 25 minutes, then flip each wing using tongs. Continue baking for another 20-25 minutes, until the skin is golden brown and crispy and the internal temperature reaches 165°F (74°C).
- While the wings are baking, make the glaze: In a small saucepan, combine honey, soy sauce, minced garlic, rice vinegar, grated ginger, sesame oil, and red pepper flakes. Bring to a simmer over medium heat, stirring occasionally. Let it bubble gently for 5-7 minutes until slightly thickened. Slowly whisk in the cornstarch slurry and cook until thickened. Remove from heat.
- Once the wings are crispy, remove them from the oven. Transfer to a large bowl and pour about two-thirds of the glaze over them. Toss gently until every wing is coated.
- Return the glazed wings to the wire rack. Turn your oven to broil and cook for 2-3 minutes, watching carefully, until the glaze bubbles and caramelizes.
- Remove from the oven and transfer back to the bowl. Pour the remaining glaze over them and toss one more time. Sprinkle with toasted sesame seeds and sliced green onions. Garnish with fresh cilantro if desired. Serve immediately.
Notes
For extra crispy skin, pat wings dry and let them sit uncovered in the refrigerator for 30 minutes to 1 hour before seasoning. Do not skip the baking powder—it creates crispy bubbles on the skin. Watch the broiler carefully as honey burns quickly. For a double-glaze effect, toss with glaze, broil 2 minutes, toss with remaining glaze, and broil another minute. Wings are best served immediately but are still delicious at room temperature.
Nutrition
- Serving Size: 4-5 wings
- Calories: 420
- Sugar: 24
- Sodium: 680
- Fat: 22
- Saturated Fat: 6
- Carbohydrates: 28
- Fiber: 1
- Protein: 28
Keywords: sticky honey garlic chicken wings, tailgate wings, game day wings, crispy chicken wings, honey garlic glaze, party appetizer


