There used to be a tiny, unassuming diner off Highway 99 called The Rusty Spoon that made a turkey dinner every Thursday that was, honestly, legendary. When they closed their doors three years ago after the owner retired, I felt a genuine pang of loss. It wasn’t just the turkey—it was the gravy. This silky, herb-flecked, utterly decadent gravy that made you want to lick the plate clean. After twelve tries—some so lumpy I almost cried—I finally cracked the code. The secret? Herb butter. It’s the little thing that makes all the difference, and let me tell you, this homemade herb butter turkey gravy from scratch is the one you’ll be making for every holiday from now on.
I remember standing in my kitchen, staring at a sad, floury disaster, thinking, “How does The Rusty Spoon get it so right?” The answer was simpler than I thought. They weren’t using plain butter; they were using compound herb butter, the same stuff you’d slather on a dinner roll. That infusion of rosemary, sage, and thyme into the fat before you even start the roux is the game-changer. It turns a simple gravy into something you’d order at a fancy restaurant. Honestly, once you make this, you’ll never go back to the packet stuff again. Maybe you’ve been there, staring at a lumpy gravy boat, feeling the pressure of a perfect holiday meal. This recipe is your rescue.
This isn’t just a recipe; it’s a memory I can finally recreate. The best part? It takes just 15 minutes from start to finish. I mean, who doesn’t love a little kitchen magic that looks like you spent hours on it? You know that feeling when a dish just works, and you can’t help but smile? That’s this gravy. It’s the kind of thing that makes you want to find an excuse to roast another turkey just so you can pour this all over it.
Why You’ll Love This Recipe
Let’s be real—gravy can be the most stressful part of a holiday meal. It’s usually the last thing you make, the turkey is resting, and everyone is hungry. This recipe is designed to take that pressure off. It’s quick, foolproof, and packed with flavor. I’ve tested this through three Thanksgivings, two Christmases, and a random Tuesday when I just needed some comfort food. It works every single time.
- Quick & Easy: This comes together in under 15 minutes. Seriously. You can make it while the turkey rests, and it’ll be ready to pour before anyone even grabs a fork.
- Simple Ingredients: No fancy grocery trips. You likely already have butter, herbs, and flour in your pantry. The only special thing is the pan drippings from your turkey, which you’ll have anyway.
- Perfect for Holidays: Whether it’s Thanksgiving, Christmas, or Easter, this gravy is the star of the show. It pairs perfectly with roasted turkey, mashed potatoes, and even stuffing.
- Crowd-Pleaser: I’ve served this to picky kids and foodie adults, and it gets rave reviews every time. The herb flavor is noticeable but not overpowering—it’s just right.
- Unbelievably Delicious: The texture is silky smooth, and the flavor is rich and savory with a hint of fresh herbs. It’s the kind of gravy that makes you close your eyes after the first bite.
What makes this different from other gravy recipes? It’s the herb butter. Most recipes use plain butter or oil for the roux, but I take an extra step. I soften butter with fresh herbs, let it sit for a bit, and then use that to start the gravy. It infuses the entire dish with flavor from the very beginning. This isn’t just another version of turkey gravy—it’s the best version. It’s comfort food reimagined: faster, more flavorful, but with the same soul-soothing satisfaction. Perfect for impressing guests without the stress.
What Ingredients You Will Need
This recipe uses simple, wholesome ingredients to deliver bold flavor and a silky smooth texture without the fuss. Most of these are pantry staples, but the fresh herbs are non-negotiable for that signature taste. Here’s what you’ll need:
For the Herb Butter
- Unsalted butter, 4 tablespoons (56 grams), softened to room temperature (this is key for easy mixing)
- Fresh rosemary, 1 tablespoon, finely chopped (I love using fresh from my garden, but store-bought works great)
- Fresh sage, 1 tablespoon, finely chopped (adds that classic turkey flavor)
- Fresh thyme leaves, 1 teaspoon (I recommend picking them off the stems—it’s worth the tiny effort)
- Fresh parsley, 1 tablespoon, finely chopped (for a touch of brightness)
- Garlic powder, 1/4 teaspoon (not fresh garlic, which can burn; powder gives a gentle flavor)
- Salt, 1/4 teaspoon, fine sea salt preferred
- Black pepper, 1/4 teaspoon, freshly ground
For the Gravy
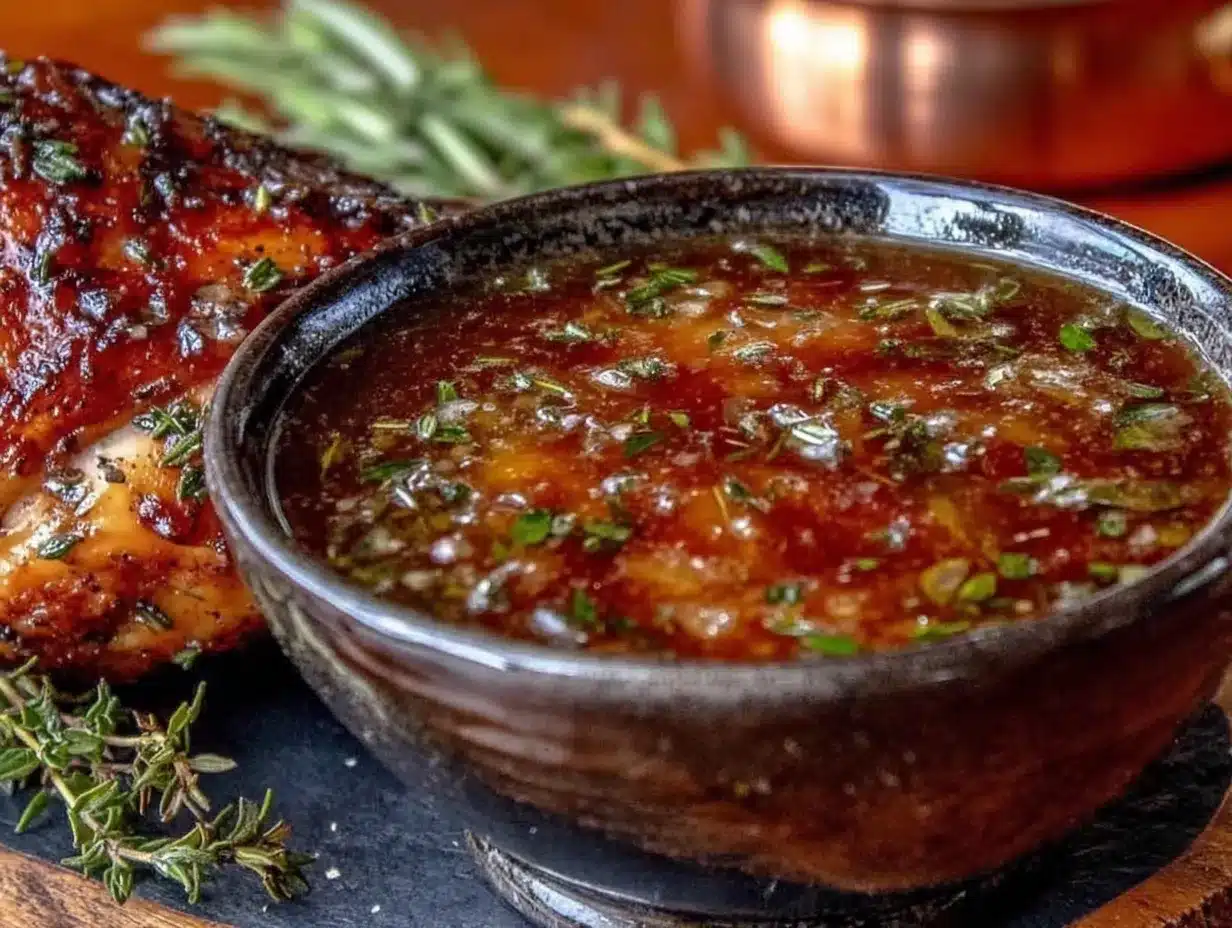
- Pan drippings from roasted turkey, 1/4 cup (the brown bits at the bottom of the pan are liquid gold)
- All-purpose flour, 1/4 cup (32 grams) (use a gluten-free blend if needed, but I prefer all-purpose for best texture)
- Low-sodium chicken or turkey broth, 2 cups (480 ml) (I recommend Swanson or Kitchen Basics for a clean flavor)
- Herb butter, the whole batch you just made (this is the star of the show!)
- Salt and pepper, to taste (go easy on salt since the drippings can be salty)
Ingredient Selection Tips: Look for butter that’s labeled “unsalted” so you can control the salt level. For the herbs, fresh is best—dried herbs won’t give you the same vibrant flavor. If you’re in a pinch, you can use 1 teaspoon of dried herb blend, but honestly, fresh makes a huge difference. For the broth, I always use low-sodium so I can adjust the seasoning later. If you have homemade turkey stock, even better!
Substitution Guidance: If you don’t have all the herbs, just use what you have. Rosemary and sage are the most important. For a dairy-free version, use a high-quality vegan butter like Miyoko’s. It works surprisingly well. And if you don’t have pan drippings? You can substitute 1/4 cup of butter and 1 tablespoon of soy sauce for a similar savory depth, but it won’t be quite the same. Trust me on this one.
Equipment Needed
You don’t need a fancy kitchen to make this gravy. Here’s what you’ll need:
- A small bowl for mixing the herb butter (any bowl will do, but a shallow one makes mixing easier)
- A fork or small spatula to combine the butter and herbs (a fork works great for mashing it all together)
- A medium saucepan (I use a 2-quart one, but any size works as long as it’s not too wide)
- A whisk (this is non-negotiable—a whisk is the only way to get a smooth gravy without lumps)
- A fat separator (optional but helpful if you want to remove excess fat from the drippings)
- A measuring cup for the broth (a 2-cup liquid measuring cup is perfect)
- A gravy boat or serving pitcher for serving (I have a ceramic one I got at a thrift store that I love)
If you don’t have a fat separator, don’t worry. Just let the drippings sit for a minute and spoon off the top layer of fat. It’s not as precise, but it works. I’ve done it many times when mine was in the dishwasher. For the whisk, I prefer a balloon whisk because it gets into the corners of the pan better. Budget-friendly options from IKEA or Target work just as well as expensive ones. I’ve been using the same $3 whisk for years, and it’s never let me down.
Preparation Method
This is where the magic happens. Follow these steps, and you’ll have the best gravy of your life. I promise.
- Make the herb butter (5 minutes): In a small bowl, combine the softened butter, chopped rosemary, sage, thyme, parsley, garlic powder, salt, and pepper. Use a fork to mash everything together until the herbs are evenly distributed. The butter should look speckled and smell amazing. Set it aside. You can do this up to 3 days ahead if you want—just keep it in the fridge and bring it to room temperature before using.
- Prepare the pan drippings (2 minutes): After you’ve roasted your turkey, pour the drippings from the roasting pan into a fat separator or a glass measuring cup. Let it sit for a minute so the fat rises to the top. If you want a leaner gravy, skim off most of the fat. I usually leave about a tablespoon for flavor. Reserve 1/4 cup of the drippings (the brown liquid part, not the fat). If you don’t have 1/4 cup, supplement with broth.
- Make the roux (3 minutes): In a medium saucepan over medium heat, melt 2 tablespoons of the herb butter. Once it’s bubbly, whisk in the flour. Keep whisking constantly for about 2 minutes. The mixture should turn a light golden brown and smell nutty. This is the roux, and it’s what thickens your gravy. Don’t walk away! Burnt roux ruins everything. I learned this the hard way when I answered the phone and came back to a dark, bitter mess.
- Add the drippings (1 minute): Slowly pour in the reserved 1/4 cup of pan drippings while whisking. The mixture will seize up and look like a thick paste—that’s normal. Keep whisking until it’s smooth and bubbly, about 30 seconds.
- Add the broth (4 minutes): Slowly pour in the 2 cups of broth while whisking constantly. Keep whisking until the mixture is smooth and begins to thicken. This usually takes about 3 to 4 minutes. The gravy should coat the back of a spoon. If it’s too thick, add a splash more broth. If it’s too thin, let it simmer a minute longer.
- Finish with the remaining herb butter (1 minute): Remove the pan from the heat. Whisk in the remaining 2 tablespoons of herb butter. This step adds a final burst of flavor and gives the gravy a beautiful, silky sheen. Taste it and adjust the salt and pepper. Be careful with salt—the drippings are often salty enough.
- Strain (optional, 1 minute): If you want a perfectly smooth gravy, pour it through a fine-mesh strainer into your gravy boat. This catches any stray herb bits or lumps. I usually skip this step because I like the little flecks of herbs, but it’s nice if you’re serving company.
- Keep warm until serving: Cover the gravy boat with foil or a lid to keep it warm. If it thickens too much while sitting, stir in a tablespoon of hot broth before serving.
Sensory Cues: When you’re making the roux, it should smell like toasted nuts, not burnt popcorn. The gravy is ready when it coats the back of a spoon and you can draw a line through it with your finger. It should look glossy and smooth, not greasy or separated.
Cooking Tips & Techniques
I’ve messed up a lot of gravy in my day, so let me save you the trouble. Here are my best tips:
Don’t rush the roux. This is the most important step. If you cook the flour for less than a minute, your gravy will taste like raw flour. If you cook it too long, it will be bitter. Aim for a light golden color and a nutty aroma. I once rushed this step because I was hungry, and the gravy had a weird, pasty taste. Never again.
Use warm broth. Cold broth can cause the roux to seize up and get lumpy. I microwave my broth for about 30 seconds before adding it. It’s a small step that makes a big difference. If you forget, just whisk like crazy and it’ll eventually smooth out.
Whisk constantly. I know it’s tempting to step away, but don’t. Gravy can go from smooth to lumpy in seconds. I keep my whisk in my hand the entire time. It’s a good arm workout, honestly.
Taste as you go. Seasoning is personal. I like my gravy on the peppery side, so I add a good crack of black pepper at the end. My sister prefers it milder. Taste it before you serve and adjust accordingly. Remember, you can always add more salt, but you can’t take it out.
If it gets lumpy, don’t panic. Pour the gravy through a fine-mesh strainer. It’ll catch the lumps, and you’ll have perfectly smooth gravy. I’ve done this more times than I care to admit. It works every time.
Multitasking strategy: Make the herb butter while the turkey is roasting. Then, while the turkey rests, you can make the gravy. It’ll be ready at the same time your turkey is ready to carve. Perfect timing.
Variations & Adaptations
This recipe is a great base, but feel free to make it your own. Here are some variations I’ve tried and loved:
- Classic Herb Version: Stick with the rosemary, sage, and thyme. This is my go-to for Thanksgiving. It’s classic for a reason.
- Mushroom Herb Gravy: Sauté 1 cup of finely chopped mushrooms in the herb butter before adding the flour. This adds an earthy, umami flavor that’s incredible with roast chicken. I made this for a friend who doesn’t eat turkey, and she said it was the best gravy she’d ever had.
- Spicy Southwest Gravy: Add 1/2 teaspoon of smoked paprika and a pinch of cayenne to the herb butter. Use chicken broth instead of turkey. This is amazing on tacos or enchiladas. I served it at a taco night, and people were putting it on everything.
- Dairy-Free Version: Use vegan butter for the herb butter. I’ve tested this with Miyoko’s, and it works beautifully. The texture is slightly less rich, but the flavor is still great.
- Gluten-Free Version: Substitute the all-purpose flour with a gluten-free all-purpose blend or cornstarch. If using cornstarch, mix 2 tablespoons with 3 tablespoons of cold broth to make a slurry, then whisk it in at the end. Simmer for 1 minute until thickened. It’s a bit different, but still delicious.
- Make it Ahead: You can make the gravy up to 3 days in advance. Reheat it gently on the stovetop, adding a splash of broth to thin it out. The flavor actually gets better as it sits!
One of my favorite personal variations is adding a splash of white wine to the roux before adding the broth. It adds a lovely acidity that cuts through the richness. I did this on a whim one Christmas, and now it’s my secret weapon.
Serving & Storage Suggestions
This gravy is best served hot, straight from the saucepan into a gravy boat. I love pouring it over mashed potatoes, stuffing, and of course, slices of roasted turkey. It’s also amazing on poutine or even over biscuits for a savory breakfast.
Serving Temperature: Serve it warm, not piping hot. If it’s too hot, it can break the butter. Aim for a gentle steam rising from the surface. I usually let it sit for 2 minutes after making it before serving.
Complementary Dishes: This gravy pairs beautifully with creamy mashed potatoes, roasted vegetables, and a fresh green salad. For a full holiday meal, serve it alongside my perfect roasted turkey and fluffy dinner rolls. The combination is pure comfort.
Storage: Store leftover gravy in an airtight container in the refrigerator for up to 4 days. The flavors will meld and deepen, making it even more delicious. I love having it on hand for leftover turkey sandwiches.
Reheating: Reheat the gravy gently on the stovetop over low heat, whisking occasionally. If it’s too thick, add a splash of broth or water. You can also microwave it in 30-second bursts, stirring in between. Be careful not to boil it, or the butter may separate. I find the stovetop method gives the best texture.
Freezing: This gravy freezes beautifully. Pour it into a freezer-safe container or a zip-top bag, and freeze for up to 3 months. Thaw it overnight in the refrigerator before reheating. The texture might be slightly different after freezing, but a good whisk will bring it back. I always make a double batch and freeze half for a rainy day.
Nutritional Information & Benefits
This gravy is a treat, but it’s made with real, whole ingredients. Here’s a rough estimate per 1/4 cup serving:
- Calories: 120
- Fat: 10g (mostly from butter, which is a source of healthy saturated fats)
- Carbohydrates: 6g (from the flour)
- Protein: 2g (from the broth)
- Sodium: 350mg (varies based on broth and drippings)
Health Benefits: The herbs in this gravy are packed with antioxidants. Rosemary and thyme are known for their anti-inflammatory properties. Sage is great for digestion. And butter, in moderation, provides fat-soluble vitamins like A, D, and E. It’s not health food, but it’s made with love and real ingredients.
Dietary Considerations: This recipe is naturally low-carb (about 6g per serving) and can be made gluten-free and dairy-free with simple substitutions. It’s not suitable for vegans unless you use vegan butter and vegetable broth. Always check your broth for hidden gluten if you’re cooking for someone with celiac disease.
Personal Wellness Perspective: I believe in enjoying food without guilt. This gravy is a special occasion treat, and it’s worth every calorie. Life is too short for bad gravy, honestly. Make it, enjoy it, and don’t stress about the numbers.
Conclusion
This homemade herb butter turkey gravy from scratch is more than just a recipe—it’s a little piece of culinary magic that brings people together. It’s the kind of dish that turns a simple meal into a celebration. Whether you’re making it for a holiday feast or a cozy Sunday dinner, it’s guaranteed to impress.
I encourage you to make it your own. Play with the herbs, adjust the seasoning, and don’t be afraid to make mistakes. That’s how you learn. And when you find your perfect version, share it with the people you love. That’s what cooking is all about.
I’d love to hear how it turns out for you! Drop a comment below and let me know if you tried any variations. Did you add wine? Did you go the mushroom route? Share your gravy stories with me. And if you loved this recipe, please share it with your friends and family. Let’s spread the love of good, homemade food.
Until next time, happy cooking! Remember, the best gravy is the one made with a little patience and a lot of butter.
Frequently Asked Questions
Can I make this gravy without pan drippings?
Yes, you can! If you don’t have pan drippings, use 1/4 cup of butter and 1 tablespoon of soy sauce or Worcestershire sauce for a similar savory depth. It won’t be exactly the same, but it’ll still be delicious. I’ve done this when I’ve roasted a chicken instead of a turkey.
How do I fix lumpy gravy?
Don’t panic! Pour the gravy through a fine-mesh strainer into a clean saucepan. Press on the lumps with a spatula to get as much liquid through as possible. Then whisk it smooth. I’ve saved many a lumpy gravy this way. Alternatively, you can use an immersion blender to blitz the lumps away.
Can I use dried herbs instead of fresh?
You can, but the flavor won’t be as vibrant. Use 1 teaspoon of dried herb blend (like poultry seasoning) instead of the fresh herbs. Add them to the butter and let it sit for 10 minutes to rehydrate. Fresh is always better, but dried works in a pinch.
How do I make the gravy thicker or thinner?
For thicker gravy, let it simmer an extra 2-3 minutes, or whisk in an additional tablespoon of flour mixed with a little cold water. For thinner gravy, add a splash of broth or water. Remember, it will thicken slightly as it cools, so aim for it to be a bit thinner than you want when it’s hot.
Can I make this gravy ahead of time?
Absolutely! Make the gravy up to 3 days in advance and store it in the refrigerator. Reheat gently on the stovetop, adding a splash of broth to thin it out. The flavor actually improves as the herbs meld together. I often make it the day before Thanksgiving to save time.
Pin This Recipe!

Homemade Herb Butter Turkey Gravy: Easy 15-Minute Recipe

This silky, herb-flecked gravy is made from scratch in just 15 minutes using a secret compound herb butter. It’s the perfect, foolproof gravy for Thanksgiving, Christmas, or any holiday meal.
- Prep Time: 5 minutes
- Cook Time: 10 minutes
- Total Time: 15 minutes
- Yield: 8 servings 1x
- Category: Sauce
- Cuisine: American
Ingredients
- 4 tablespoons (56 grams) unsalted butter, softened
- 1 tablespoon fresh rosemary, finely chopped
- 1 tablespoon fresh sage, finely chopped
- 1 teaspoon fresh thyme leaves
- 1 tablespoon fresh parsley, finely chopped
- 1/4 teaspoon garlic powder
- 1/4 teaspoon fine sea salt
- 1/4 teaspoon freshly ground black pepper
- 1/4 cup pan drippings from roasted turkey
- 1/4 cup (32 grams) all-purpose flour
- 2 cups (480 ml) low-sodium chicken or turkey broth
- Salt and pepper to taste
Instructions
- Make the herb butter: In a small bowl, combine softened butter, chopped rosemary, sage, thyme, parsley, garlic powder, salt, and pepper. Mash with a fork until herbs are evenly distributed. Set aside.
- Prepare the pan drippings: After roasting turkey, pour drippings into a fat separator or glass measuring cup. Let sit for a minute, then skim off most of the fat. Reserve 1/4 cup of the brown liquid.
- Make the roux: In a medium saucepan over medium heat, melt 2 tablespoons of the herb butter. Whisk in flour and cook, whisking constantly, for about 2 minutes until light golden and nutty.
- Add the drippings: Slowly pour in the reserved 1/4 cup pan drippings while whisking. Mixture will thicken into a paste; whisk until smooth and bubbly, about 30 seconds.
- Add the broth: Slowly pour in the 2 cups of broth while whisking constantly. Continue whisking until gravy thickens and coats the back of a spoon, about 3-4 minutes.
- Finish with remaining herb butter: Remove pan from heat. Whisk in the remaining 2 tablespoons of herb butter. Taste and adjust salt and pepper.
- Strain (optional): For perfectly smooth gravy, pour through a fine-mesh strainer into a gravy boat.
- Keep warm until serving: Cover gravy boat with foil or lid. If too thick, stir in a tablespoon of hot broth before serving.
Notes
Make the herb butter up to 3 days ahead and refrigerate. For a dairy-free version, use vegan butter. For gluten-free, substitute all-purpose flour with a gluten-free blend or cornstarch slurry. If gravy gets lumpy, strain through a fine-mesh strainer. Reheat gently on stovetop with a splash of broth.
Nutrition
- Serving Size: 1/4 cup
- Calories: 120
- Sodium: 350
- Fat: 10
- Saturated Fat: 6
- Carbohydrates: 6
- Protein: 2
Keywords: turkey gravy, herb butter gravy, homemade gravy, Thanksgiving gravy, easy gravy recipe, 15-minute gravy


