It was 10:47 PM on a random Tuesday in October, and I had a sudden, undeniable need to make something ridiculous and wonderful for Sunday’s game day gathering. I’m not supposed to play favorites with recipes, but when it comes to crowd-pleasing snacks, Rice Krispie treats are basically a cheat code. The problem was, I didn’t have any cute cookie cutters shaped like footballs, and honestly, I wasn’t about to drive to the store at that hour. But I had a bag of marshmallows, a box of cereal, and a wild idea that arrived out of nowhere—what if I just shaped them by hand? I mean, how hard could it be to make a football shape with your palms?
So there I was, standing in my kitchen at nearly midnight, buttering my fingers like a maniac and trying to form what looked like a tiny pigskin. Let me tell you, the first one was a disaster—lopsided, too sticky, and honestly looked more like a deflated balloon. But by the third try, I had something that actually resembled a football. By the time I went to bed, I had a whole platter of them cooling on the counter, and I felt like I’d just won the Super Bowl of late-night snacking. Maybe you’ve been there—that moment when a silly idea turns into something you can’t stop thinking about.
These easy football-shaped Rice Krispie treats for game day are now my go-to party trick. They’re simple enough to make with kids, impressive enough to get compliments, and they disappear faster than a quarterback scrambling out of the pocket. Honestly, they stayed with me because they proved that you don’t need fancy tools or a ton of time to make something that feels special. Just a little creativity and a willingness to get your hands a bit sticky.
Why You’ll Love This Recipe
I’ve tested this recipe about six times now—yes, six—because I wanted to make sure the texture was just right and the shaping technique actually worked for everyone. As someone who’s been developing recipes for over a decade, I can tell you that this one hits all the right notes. It’s not just another Rice Krispie treat recipe; it’s the version that makes you look like a game day hero without breaking a sweat.
- Quick & Easy: These come together in under 20 minutes, which means you can make them right before kickoff and still have time to set out the chips and dip.
- Simple Ingredients: You probably already have everything in your pantry. No fancy grocery trips needed—just marshmallows, butter, cereal, and a little food coloring if you want to get fancy.
- Perfect for Game Day: Whether it’s the Super Bowl, a college rivalry game, or just Sunday football, these little footballs are guaranteed to be a hit. They’re portable, non-messy, and everyone loves them.
- Crowd-Pleaser: I’ve brought these to potlucks, tailgates, and family gatherings, and they always get rave reviews. Kids and adults alike go crazy for them.
- Unbelievably Delicious: The classic Rice Krispie treat texture is already perfect, but shaping them into footballs makes them taste even better. I swear, food shaped like something fun just tastes better.
What makes this recipe different from the rest is the shaping technique. Most people try to use cookie cutters, which leads to crumbly edges and wasted cereal. My method—using lightly buttered hands and a gentle pressing motion—gives you smooth, perfect footballs every time. It’s a game changer, honestly. This isn’t just another version; it’s the best version I’ve ever tried.
There’s something about biting into a football-shaped treat that brings out the kid in everyone. It’s comfort food reimagined for a party—faster than baking, but with the same soul-soothing satisfaction. Perfect for impressing guests without stress, or turning a simple snack into something memorable.
What Ingredients You Will Need
This recipe uses simple, pantry-friendly ingredients to deliver that classic chewy, crispy texture without any fuss. Here’s what you’ll need to grab:
For the Treats
- 6 tablespoons unsalted butter (adds richness and helps prevent sticking)
- 1 package (10 oz) regular marshmallows (I recommend Jet-Puffed for best melt and texture)
- 6 cups Rice Krispies cereal (or any crispy rice cereal—store brands work fine too)
- 1/4 teaspoon vanilla extract (optional, but adds a lovely depth of flavor)
- Pinch of salt (balances the sweetness perfectly)
For Decoration
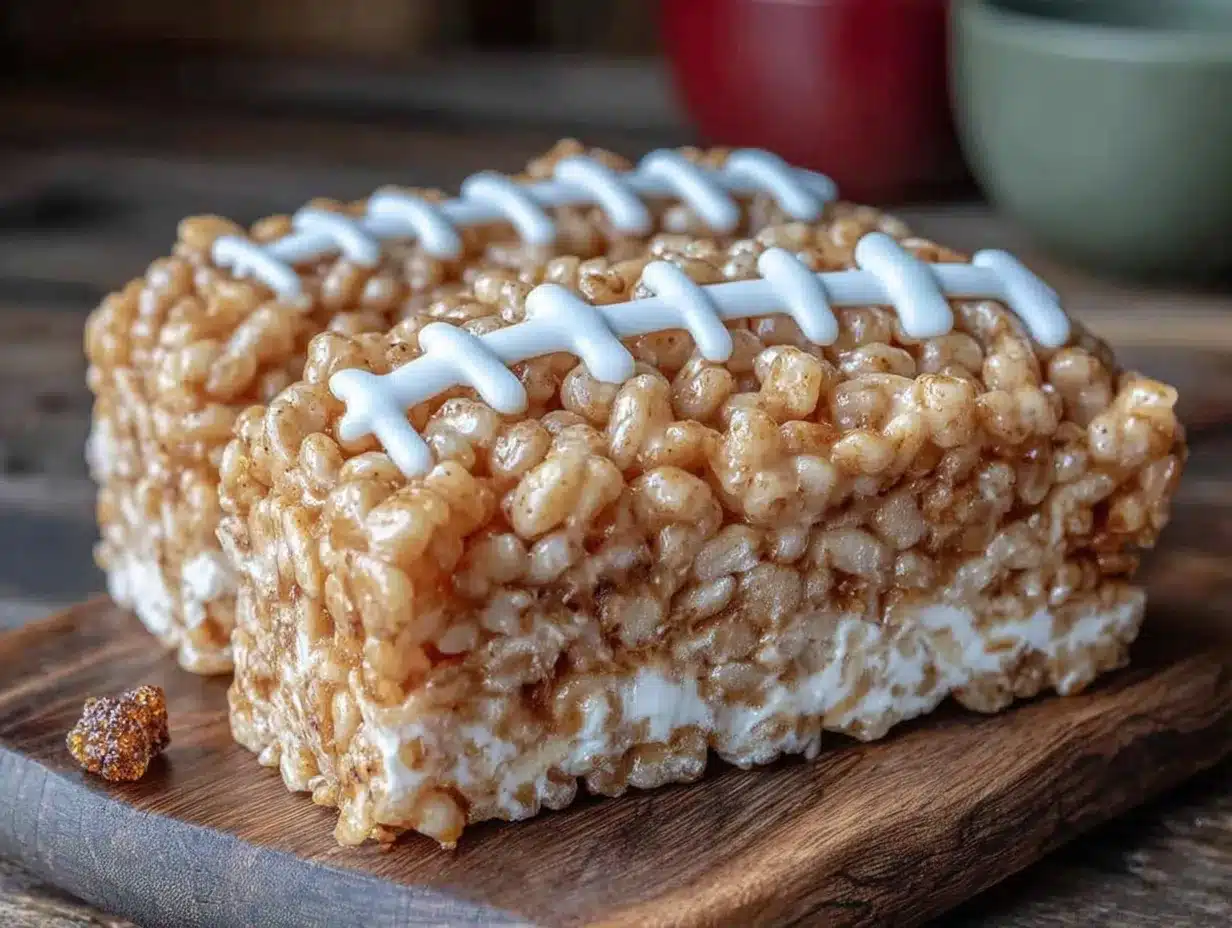
- 1/4 cup white candy melts or white chocolate chips (for the football laces)
- 1 teaspoon coconut oil or vegetable shortening (helps thin the chocolate for piping)
- Brown food coloring (optional, if you want a more realistic football color—I use Wilton brand)
Ingredient Tips: Look for fresh marshmallows—stale ones won’t melt as smoothly and can make your treats grainy. If you’re using a store-brand cereal, check the expiration date; fresh cereal gives a much better crunch. For the butter, I always use unsalted so I can control the salt level, but salted butter works if you reduce the added pinch of salt.
Substitution Guidance: Need a dairy-free version? Use vegan butter and dairy-free marshmallows (Dandies brand works great). For a gluten-free option, Rice Krispies are naturally gluten-free, but double-check the label if you’re serving someone with celiac disease—some store brands may vary. You can also swap the white chocolate for a simple icing made from powdered sugar and milk if you prefer.
Equipment Needed
You don’t need much for this recipe, which is part of its beauty. Here’s what you’ll want to have on hand:
- Large pot or Dutch oven (at least 4-quart capacity—gives you room to stir without making a mess)
- Wooden spoon or silicone spatula (silicone is my favorite because it doesn’t scratch the pot and is easy to clean)
- 9×13-inch baking pan (for setting the treats before shaping—I use a glass Pyrex dish)
- Parchment paper or wax paper (absolutely essential for preventing sticking)
- Small piping bag or zip-top bag (for the laces—I use a plastic sandwich bag with the corner snipped off)
- Sharp knife (for cutting the slab into pieces before shaping)
Honestly, I’ve made these with just a pot and my hands before. The parchment paper is the one thing I wouldn’t skip—it saves you from a sticky disaster. If you don’t have a piping bag, a toothpick works surprisingly well for drawing laces, though it takes a bit more patience.
Preparation Method
Let’s get to the fun part. Follow these steps carefully, and you’ll have perfect football-shaped treats that’ll be the star of your game day spread.
- Prepare your pan. Line a 9×13-inch baking pan with parchment paper, leaving some overhang on the sides. Lightly grease the parchment with butter or non-stick spray. This makes lifting the treats out later so much easier.
- Melt the butter. In a large pot over medium-low heat, melt the 6 tablespoons of butter. Stir occasionally so it doesn’t burn. You want it fully melted but not bubbling aggressively—about 2-3 minutes.
- Add the marshmallows. Pour in the entire bag of marshmallows and stir constantly with your wooden spoon or spatula. Keep the heat on medium-low. The marshmallows will start to puff up and melt—this takes about 4-5 minutes. Don’t walk away! Burnt marshmallows smell terrible and taste worse.
- Season the mixture. Once the marshmallows are mostly melted (a few small lumps are okay), remove the pot from the heat. Stir in the vanilla extract and pinch of salt. The mixture should be smooth, glossy, and pale yellow from the butter.
- Add the cereal. Pour in the 6 cups of Rice Krispies all at once. Fold gently until all the cereal is coated. Be careful not to crush the cereal—you want those crispy shapes intact for the best texture. This takes about 1-2 minutes of gentle folding.
- Add food coloring (optional). If you want a more realistic football color, add a few drops of brown food coloring now and fold until evenly distributed. I usually add about 6-8 drops for a nice tan color. Don’t overdo it—you want it to look like a football, not a chocolate bar.
- Press into the pan. Transfer the mixture to your prepared pan. Use a piece of parchment paper or wax paper to press it down evenly. Don’t use your bare hands—the mixture is hot and sticky! Press firmly to create an even layer, about 3/4-inch thick. Let it cool for 15-20 minutes at room temperature, or until firm enough to cut.
- Cut into pieces. Once cooled, use the parchment overhang to lift the slab out of the pan. Place it on a cutting board. Using a sharp knife, cut the slab into rectangles about 2 inches wide and 3 inches long. You should get about 12-16 pieces, depending on how big you cut them.
- Shape into footballs. Here’s the secret: lightly butter your hands or spray them with non-stick cooking spray. Take one rectangle and gently roll it between your palms, then taper the ends to form a football shape. Don’t squeeze too hard—you want it to hold together, not turn into a dense brick. Place each shaped football on a parchment-lined baking sheet. Repeat with all pieces.
- Melt the white chocolate. In a small microwave-safe bowl, combine the white candy melts or white chocolate chips with 1 teaspoon of coconut oil. Microwave in 20-second intervals, stirring between each, until smooth and fully melted. This usually takes about 60-90 seconds total.
- Pipe the laces. Transfer the melted white chocolate to a small piping bag or a zip-top bag with a tiny corner snipped off. On each football, pipe two parallel lines down the center, then 3-4 short crosswise lines to create the classic lace pattern. Don’t worry about perfection—football laces are a bit messy in real life too!
- Let them set. Allow the white chocolate to set completely, about 15-20 minutes at room temperature, or pop them in the fridge for 5 minutes if you’re in a hurry.
Sensory Cues: When you fold the cereal into the marshmallow mixture, you should hear a gentle crackling sound—that’s the cereal staying crispy. The mixture should look glossy and feel pliable but not sticky when you shape it. If it’s too sticky, let it cool another 5 minutes. If it’s too hard, you may have overcooked the marshmallows—next time, remove from heat sooner.
Cooking Tips & Techniques
I’ve made these treats more times than I can count, and I’ve learned a few things the hard way. Let me save you some trouble.
The biggest mistake people make is using high heat. I once cranked the burner to medium-high because I was in a hurry, and the marshmallows turned into a brown, burnt mess. Always use medium-low heat. Patience is your friend here.
Another common issue is pressing the mixture too hard into the pan. If you compact it too much, the treats become rock-hard and unpleasantly dense. Use gentle pressure—just enough to make an even layer. You want them to be sturdy enough to hold their shape but light and airy when you bite into them.
My personal failure that taught me the most: I once forgot to butter my hands before shaping, and I ended up with a sticky, tangled mess that took forever to clean. Now I keep a small bowl of softened butter next to my work station. Re-butter your hands after every 2-3 footballs for the best results.
Timing strategy: I usually make the treats the night before game day and shape them the next morning. The slab holds perfectly in the fridge overnight. Then I just cut, shape, and decorate on the day of the party. This breaks up the work and makes it feel less overwhelming.
For perfect laces every time, let the white chocolate cool slightly before piping—if it’s too hot, it will run and create a puddle instead of clean lines. You want it to be fluid but not watery, like the consistency of honey.
Variations & Adaptations
One of the best things about this recipe is how easy it is to customize. Here are some variations I’ve tried and loved:
Chocolate Lover’s Version
Melt 1/2 cup of chocolate chips with 1 tablespoon of butter and drizzle it over the finished footballs instead of white laces. Or, use chocolate Rice Krispies cereal for a darker, richer base. I made this for a friend’s birthday party, and it was gone in 10 minutes.
Peanut Butter Twist
Add 1/4 cup of creamy peanut butter to the marshmallow mixture right after removing it from the heat. Stir until fully incorporated before adding the cereal. This gives the treats a subtle nutty flavor that pairs beautifully with the white chocolate laces. Just make sure your peanut butter is well-stirred so it blends smoothly.
Gluten-Free Adaptation
This recipe is naturally gluten-free if you use certified gluten-free crispy rice cereal. Some store brands may contain malt flavoring, which has gluten, so check the label carefully. I’ve used Erewhon brand and it works perfectly.
Vegan Version
Use vegan butter (like Miyoko’s or Earth Balance) and vegan marshmallows (Dandies are my go-to). For the laces, use vegan white chocolate or make a simple glaze with powdered sugar and plant-based milk. The texture is slightly different—a bit softer—but still delicious.
Mini Footballs for Parties
Cut the slab into smaller rectangles (about 1×1.5 inches) and shape into mini footballs. These are perfect for snacking without committing to a full-sized treat. I brought a platter of these to a Super Bowl party last year, and people couldn’t stop grabbing them.
Serving & Storage Suggestions
These football-shaped Rice Krispie treats are best served at room temperature, which keeps them chewy and soft. Arrange them on a platter in a single layer, lace-side up, so everyone can see the cute details. For a game day spread, I like to place them next to a bowl of popcorn or pretzels for a sweet-and-salty combo.
Complementary dishes: These pair beautifully with classic game day fare like buffalo wings, nachos, or chili. For beverages, they go great with cold milk, hot coffee, or even a cold beer. Honestly, they’re versatile enough to fit any spread.
Storage instructions: Store the treats in an airtight container at room temperature for up to 5 days. Place a sheet of wax paper between layers to prevent sticking. Do not refrigerate them—the fridge makes them hard and less enjoyable. If you live in a humid climate, add a silica gel packet to the container to keep them from getting sticky.
Freezer instructions: These freeze beautifully! Place the shaped (undecorated) treats in a single layer on a baking sheet and freeze until solid, about 1 hour. Transfer to a freezer-safe bag or container, separating layers with parchment paper. They’ll keep for up to 3 months. When ready to serve, thaw at room temperature for about 30 minutes, then add the laces. I always keep a batch in the freezer for unexpected guests or last-minute cravings.
Reheating tip: If your treats have gone a bit stale, pop one in the microwave for 5-7 seconds. It’ll soften right up and taste almost fresh. Just don’t overdo it, or you’ll end up with a puddle of marshmallow goo.
Nutritional Information & Benefits
Let’s be real—these are a treat, not a health food. But here’s the estimated nutritional breakdown per serving (based on 16 servings):
- Calories: 185
- Total Fat: 7g
- Saturated Fat: 4g
- Carbohydrates: 30g
- Sugar: 16g
- Protein: 1.5g
- Sodium: 115mg
Health benefits of key ingredients: Rice Krispies cereal is fortified with iron and B vitamins, which support energy metabolism. Butter provides a small amount of vitamin A. And while marshmallows aren’t exactly a superfood, they do contain gelatin, which is a source of collagen—though in very small amounts. Honestly, these are about joy and celebration, not nutrition. And that’s okay!
Dietary considerations: This recipe contains dairy and gluten (check cereal labels). For dairy-free and gluten-free options, see the variations section above. These treats are nut-free as written, making them safe for school parties and events.
My personal wellness perspective: I believe in balance. These treats are perfect for special occasions and game days, but I don’t make them every week. Enjoy them fully when you have them, savor every bite, and don’t feel guilty. Food is meant to bring us together and make us happy.
Conclusion
These easy football-shaped Rice Krispie treats for game day are proof that you don’t need to be a professional baker to make something impressive. With just a few simple ingredients and a little bit of patience, you can create a snack that looks like you spent hours on it—even if it only took you 20 minutes. Honestly, that’s my favorite kind of recipe.
I love how customizable these are. You can make them chocolatey, peanut buttery, or keep them classic. You can make them big or small. You can even get the kids involved in shaping and decorating. It’s the kind of recipe that builds memories, not just snacks. And isn’t that what game day is really about?
I’d love to hear how yours turn out! Drop a comment below and let me know if you tried any fun variations, or tag me in your photos if you share them online. And if you’re looking for more game day inspiration, check out my crispy buffalo chicken dip or my loaded nacho skillet—they’re both crowd-pleasers too. Now go make some footballs and enjoy the big game!
Frequently Asked Questions
Can I use mini marshmallows instead of regular-sized ones?
Yes, absolutely! Use about 4 cups of mini marshmallows in place of the 10-ounce bag of regular marshmallows. Mini marshmallows actually melt faster and more evenly, which can save you a minute or two. Just keep an eye on them so they don’t burn.
Why are my Rice Krispie treats hard and crunchy instead of soft and chewy?
This usually happens when the marshmallow mixture is overcooked or when the treats are pressed too firmly into the pan. Cook the marshmallows just until melted—don’t let them bubble for too long. And use gentle pressure when pressing the mixture into the pan. You want them to hold together, not turn into bricks.
Can I make these ahead of time for a party?
Definitely! You can make the full batch (including decoration) up to 2 days in advance. Store them in an airtight container at room temperature. If you want to prep even further, make the slab up to a week ahead and freeze it, then cut, shape, and decorate the day of your party.
How do I keep the white chocolate laces from smudging?
Make sure the white chocolate is fully set before stacking or serving the treats. This usually takes about 20 minutes at room temperature. If you’re in a humid environment, pop them in the fridge for 5 minutes to speed up the setting process. Once set, the laces should be firm and won’t smudge easily.
Can I use a different cereal instead of Rice Krispies?
Sure! Cocoa Krispies, Fruity Pebbles, or even puffed rice cereal all work well. Just keep in mind that different cereals have different textures and sweetness levels. Cocoa Krispies will give you a chocolatey base, while Fruity Pebbles will make the treats more colorful and fruity. Adjust the marshmallow ratio if needed—some cereals are heavier and may require a bit more marshmallow mixture to hold together.
Pin This Recipe!
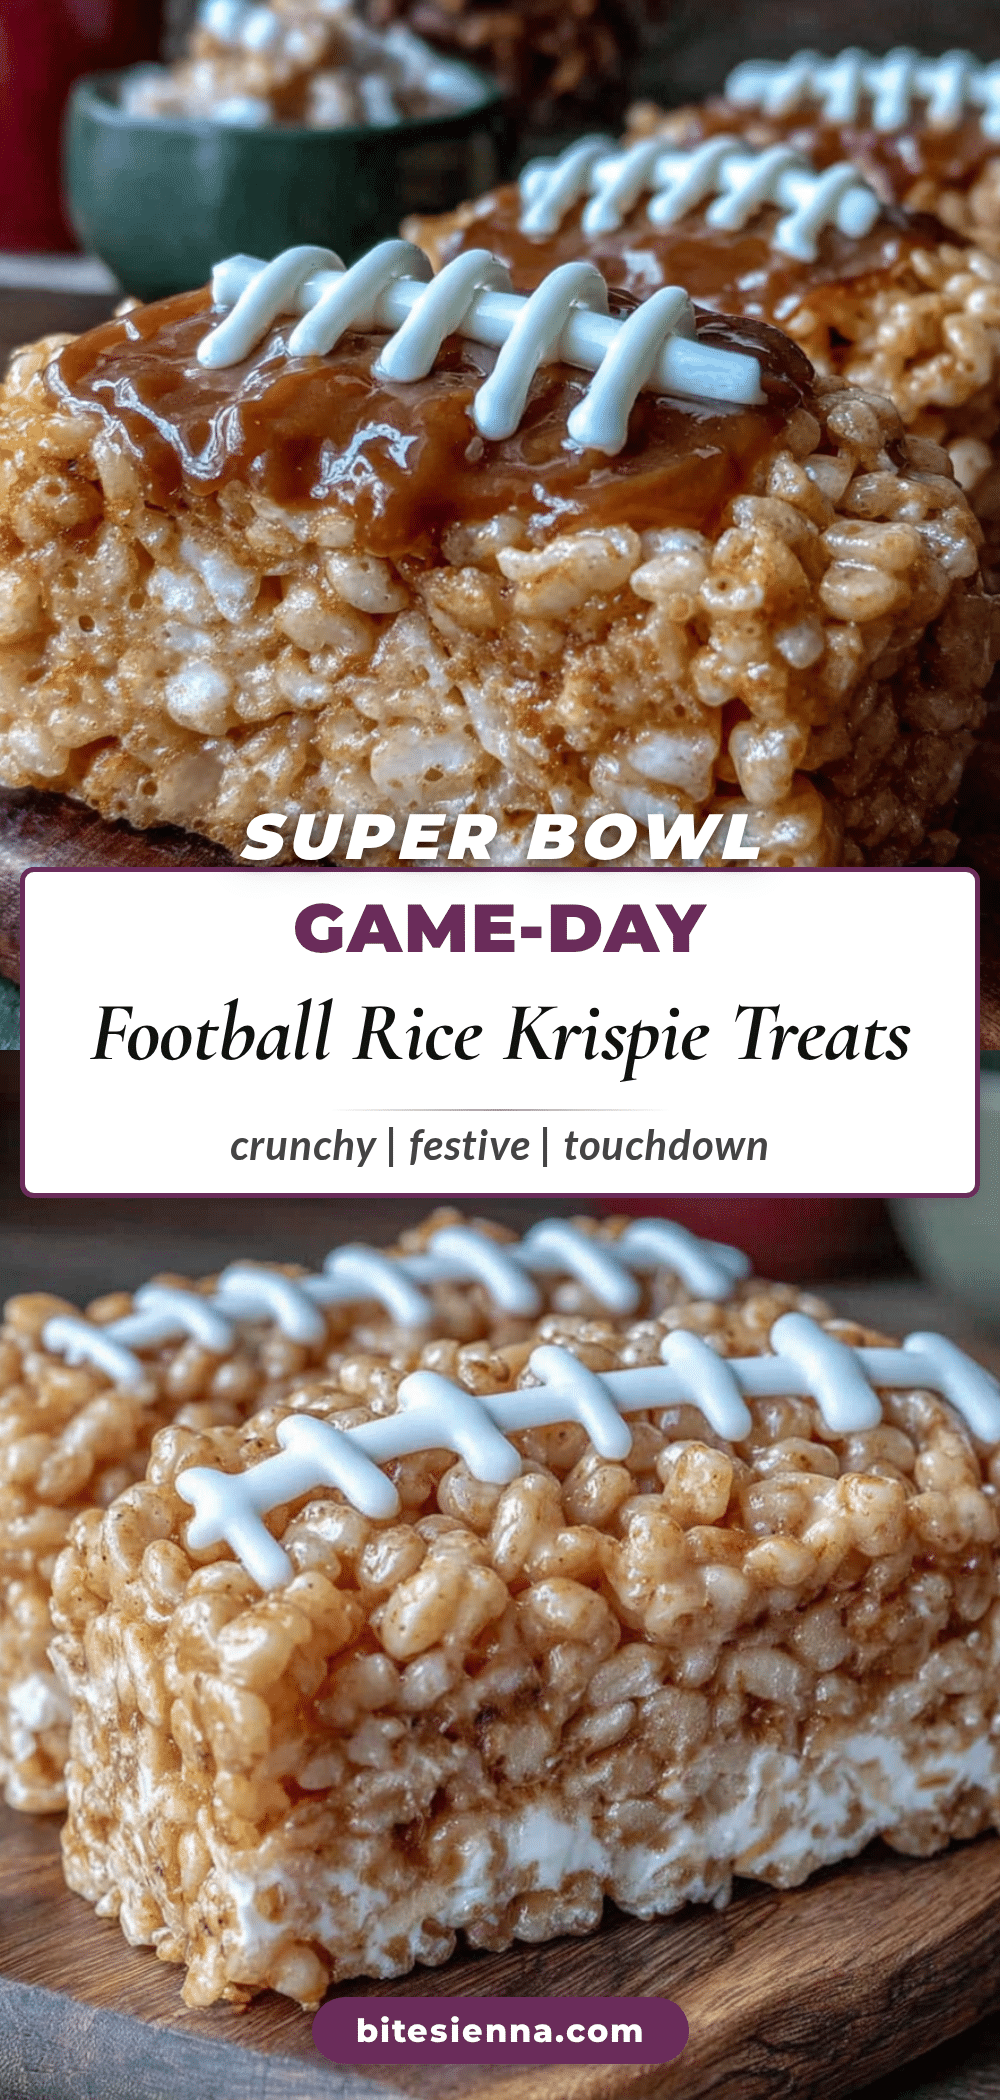
Easy Football-Shaped Rice Krispie Treats: Best Game Day Snack
These easy football-shaped Rice Krispie treats are the perfect game day snack. Made with simple pantry ingredients and a clever hand-shaping technique, they come together in under 20 minutes and are guaranteed to be a crowd-pleaser.
- Prep Time: 10 minutes
- Cook Time: 10 minutes
- Total Time: 20 minutes
- Yield: 16 servings 1x
- Category: Snack
- Cuisine: American
Ingredients
- 6 tablespoons unsalted butter
- 1 package (10 oz) regular marshmallows
- 6 cups Rice Krispies cereal
- 1/4 teaspoon vanilla extract (optional)
- Pinch of salt
- 1/4 cup white candy melts or white chocolate chips
- 1 teaspoon coconut oil or vegetable shortening
- Brown food coloring (optional)
Instructions
- Line a 9×13-inch baking pan with parchment paper, leaving some overhang. Lightly grease the parchment with butter or non-stick spray.
- In a large pot over medium-low heat, melt the 6 tablespoons of butter, stirring occasionally, about 2-3 minutes.
- Add the entire bag of marshmallows and stir constantly over medium-low heat until mostly melted, about 4-5 minutes.
- Remove the pot from the heat. Stir in the vanilla extract and pinch of salt until smooth and glossy.
- Pour in the 6 cups of Rice Krispies and fold gently until all cereal is coated, about 1-2 minutes. If using, add brown food coloring and fold until evenly distributed.
- Transfer the mixture to the prepared pan. Use a piece of parchment paper to press it down evenly to about 3/4-inch thick. Let cool for 15-20 minutes until firm.
- Use the parchment overhang to lift the slab out of the pan. Place on a cutting board and cut into rectangles about 2 inches wide and 3 inches long (12-16 pieces).
- Lightly butter your hands. Take one rectangle and gently roll it between your palms, tapering the ends to form a football shape. Place on a parchment-lined baking sheet. Repeat with all pieces.
- In a small microwave-safe bowl, combine white candy melts or white chocolate chips with 1 teaspoon coconut oil. Microwave in 20-second intervals, stirring between each, until smooth (about 60-90 seconds total).
- Transfer melted white chocolate to a small piping bag or zip-top bag with a tiny corner snipped off. On each football, pipe two parallel lines down the center, then 3-4 short crosswise lines to create the lace pattern.
- Let the white chocolate set completely, about 15-20 minutes at room temperature, or refrigerate for 5 minutes.
Notes
For best results, use fresh marshmallows and gentle pressure when shaping. If the mixture is too sticky, let it cool another 5 minutes. For dairy-free, use vegan butter and dairy-free marshmallows. For gluten-free, use certified gluten-free crispy rice cereal.
Nutrition
- Serving Size: 1 football-shaped tr
- Calories: 185
- Sugar: 16
- Sodium: 115
- Fat: 7
- Saturated Fat: 4
- Carbohydrates: 30
- Protein: 1.5
Keywords: football shaped rice krispie treats, game day snacks, easy rice krispie treats, football party food, super bowl snacks


