My neighbor, Mrs. Gable, wasn’t trying to impress anyone. I’d stopped by to return her pruning shears, and this warm, sweet, buttery smell hit me before I even got to her back porch. She was at her kitchen table, a flour-dusted apron tied over her sweater, calmly pressing a tiny cat face into a circle of sugar cookie dough. She looked up, grinned, and said, “Oh, these? Just something silly for the grandkids.” She didn’t make a big deal of it. But the way the cookies were perfectly golden, the way the black icing was glossy and smooth—it was the kind of quiet, unpretentious magic that makes the best recipes, you know? I stood there for a solid ten minutes, watching her work, completely forgetting why I’d come over in the first place. Honestly, I think I muttered something about needing to borrow sugar just so I could stay longer. That casual, unhurried afternoon is exactly where these Cozy Black Cat Spider Sugar Cookies were born—not in a stuffy test kitchen, but in a real kitchen with a slightly cracked mixing bowl and a woman who had been making the same batch of cookies for thirty years. I’ve tweaked the royal icing recipe a bit since then, but the heart of it—the soft, tender cookie, the simple joy of decorating—is all Mrs. Gable. Let me tell you, if you’ve ever wanted a Halloween cookie that feels more like a hug than a fright, this is it.
Why You’ll Love This Recipe
These aren’t just any Halloween cookies. They’re the kind that makes you slow down and smile. I’ve tested this recipe a dozen times to get that perfect balance—a soft, buttery cookie that holds its shape and a royal icing that dries shiny and hard, perfect for those cute little cat faces and spider webs.
- Simple Ingredients: You probably have everything in your pantry right now. No fancy extracts or hard-to-find flours.
- Perfect for Halloween: Whether it’s a classroom party, a cozy night in, or a spooky bake sale, these cookies fit right in.
- Kid-Friendly Fun: Let me tell you, getting the kids involved in piping the spider legs is half the fun. It’s a little messy, but that’s the point.
- Unbelievably Delicious: The cookie itself is soft, with a hint of vanilla, and the royal icing adds that satisfying snap. It’s comfort food in a spooky disguise.
- Stress-Free Decorating: I’ve streamlined the royal icing so it’s not fussy. You don’t need to be a pastry chef to make these look adorable.
What makes this recipe different from the rest? It’s the texture. I use a little cream of tartar in the cookie dough to keep them from spreading, so your black cats stay perfectly round and plump. And the royal icing? It’s my go-to recipe that dries in about two hours—no all-day waiting. This isn’t just another sugar cookie; it’s the one you’ll come back to year after year. It’s the kind that makes you close your eyes after the first bite and remember exactly why fall is the best season.
What Ingredients You Will Need
This recipe uses simple, wholesome ingredients to deliver a soft, flavorful cookie and a glossy, durable icing. Most of these are pantry staples, which makes this a great last-minute Halloween project.
For the Sugar Cookies
- All-purpose flour, 2 ¾ cups (345g) – Spoon and level for the best results. Too much flour makes a dense cookie.
- Unsalted butter, 1 cup (226g), softened – I always use unsalted so I can control the salt. Let it sit out for an hour.
- Granulated sugar, 1 cup (200g)
- Large egg, 1, room temperature – A cold egg can seize the butter mixture.
- Vanilla extract, 1 ½ teaspoons – Pure vanilla makes a difference, but imitation works in a pinch.
- Baking powder, ½ teaspoon
- Cream of tartar, ½ teaspoon – This is my secret weapon. It helps prevent spreading and gives a slight tang.
- Salt, ¼ teaspoon
For the Royal Icing
- Powdered sugar, 2 cups (240g), sifted – Sifting is key to avoiding lumps.
- Meringue powder, 2 tablespoons – This gives the icing that hard, shiny finish. You can find it in the baking aisle.
- Warm water, 3-4 tablespoons – Start with 3 and add more a teaspoon at a time.
- Black gel food coloring – Gel is much better than liquid; it won’t thin out your icing. I like the AmeriColor brand.
- Orange gel food coloring (optional) – For spider webs and little pumpkin accents.
For Decoration
- Black sanding sugar or sprinkles (optional) – For a little sparkle on the cat bodies.
- Candy eyes (optional) – The little white and black ones give the spiders a funny, friendly look.
- Piping bags or zip-top bags – Snip a tiny corner for fine lines.
Equipment Needed
- Stand mixer or hand mixer – A hand mixer works just fine, but you’ll need a little elbow grease for creaming the butter and sugar.
- Rolling pin – I prefer a French rolling pin (no handles), but any will do.
- Cat-shaped cookie cutter – A 2.5 to 3-inch size is perfect. You can also use a round cutter for spider bodies.
- Small round cookie cutter (for spider bodies) – About 1.5 inches wide.
- Baking sheets – Line them with parchment paper or a silicone baking mat.
- Cooling rack – Essential for letting the cookies cool completely before icing.
- Piping tips (small round, like Wilton #2 or #3) – For fine detail work on the faces and webs.
- Toothpicks – For popping air bubbles in the icing and for spreading it into tight corners.
Preparation Method
Making the Sugar Cookie Dough
- Cream the butter and sugar. In a large bowl, beat the softened butter and granulated sugar together on medium speed until light and fluffy, about 2-3 minutes. You want it to look pale and airy.
- Add the egg and vanilla. Beat in the egg and vanilla extract until just combined. Scrape down the sides of the bowl.
- Whisk dry ingredients. In a separate bowl, whisk together the flour, baking powder, cream of tartar, and salt.
- Combine. Gradually add the dry ingredients to the wet mixture, mixing on low speed until a soft dough forms. Don’t overmix, or the cookies will be tough. The dough should pull away from the sides of the bowl.
- Chill the dough. Divide the dough in half, flatten each into a disc, wrap tightly in plastic wrap, and refrigerate for at least 1 hour. This is non-negotiable—chilled dough spreads way less and is easier to roll.
Baking the Cookies
- Preheat oven to 350°F (175°C). Line your baking sheets with parchment paper.
- Roll out the dough. On a lightly floured surface, roll one disc of dough to about ¼-inch thickness. Keep turning the dough as you roll to prevent sticking.
- Cut out shapes. For the black cats, use your cat cutter. For the spiders, use the round cutter. Reroll the scraps once—after that, the dough gets tough.
- Bake. Place cookies about 1 inch apart on the prepared sheets. Bake for 8-10 minutes, or until the edges are just barely golden. The centers should look set but not brown.
- Cool. Let the cookies cool on the baking sheet for 5 minutes, then transfer to a wire rack to cool completely. Do not ice warm cookies, or the icing will melt and slide right off.
Making the Royal Icing
- Combine dry ingredients. In a medium bowl, whisk together the sifted powdered sugar and meringue powder.
- Add water. Add 3 tablespoons of warm water and beat on medium speed with a hand mixer for about 4 minutes. The icing should be thick and glossy, and it should hold a stiff peak. If it’s too thick, add the remaining tablespoon of water, a few drops at a time.
- Color the icing. Divide the icing into bowls. Color the majority black for the cat bodies and spider bodies. Leave a small portion white for the cat eyes and spider webs, and color another small portion orange if you want pumpkin accents.
- Check the consistency. For flooding (filling in the cookies), the icing should be a “10-second” consistency. Lift your spoon—the ribbon of icing should melt back into the bowl within 10 seconds. If it’s too thick, add tiny drops of water. If it’s too thin, add a pinch more powdered sugar.
Decorating the Black Cat Cookies
- Outline the cat. Using a piping bag fitted with a #2 tip, pipe a border around the edge of the cat cookie with the black icing.
- Flood the cat. Fill in the center with the same black icing, using a toothpick to spread it into the ears and tail. Pop any air bubbles with the toothpick.
- Add the face. While the black icing is still wet, pipe two small dots of white icing for the eyes. Let the cookies dry for about 10 minutes, then pipe tiny black dots in the center of the white eyes for the pupils. Pipe a little pink or white triangle for the nose.
Decorating the Spider Cookies
- Flood the body. Flood the round cookies with the black icing just like you did the cats.
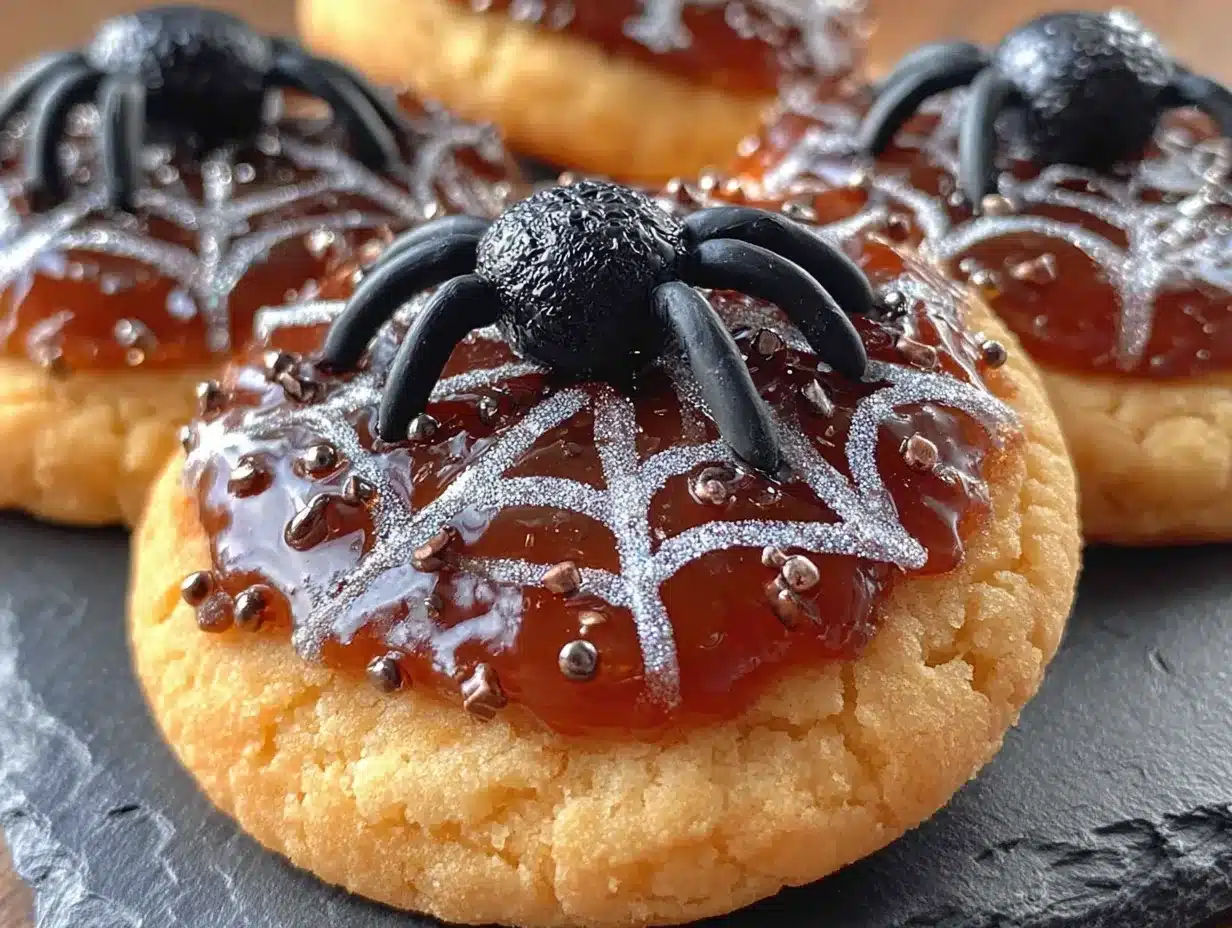
- Add the legs. Immediately after flooding, use the white icing to pipe eight legs coming out from the sides of the spider body. Start from the center and pull outward.
- Add eyes. Press two candy eyes into the wet icing, or pipe two white dots. Let dry completely.
Cooking Tips & Techniques
I’ve messed up this recipe more times than I care to admit. My first batch of royal icing was so thick it looked like paste. My second batch was so thin it ran right off the cookie and pooled on the counter. The key is that 10-second consistency. You want it to flow like thick honey.
Another mistake? Not chilling the dough. I was in a hurry once and skipped the hour in the fridge. The cats came out looking like blobs with ears. They tasted fine, but they were not cute. Patience is a virtue here.
For the royal icing, keep a damp paper towel over the bowl when you’re not using it. It dries out fast, and you’ll end up with crusty bits in your piping bag. Also, if your hands get warm while piping, the icing in the bag can get too thin. Just set it down for a minute.
When you’re piping the spider legs, don’t stress about making them perfect. Spiders are naturally a little messy. The more uneven the legs, the more character they have. Honestly, my favorite spider cookies are the ones where the legs look like they’re doing a little dance.
Variations & Adaptations
- Gluten-Free Version: Swap the all-purpose flour for a 1:1 gluten-free baking flour blend. I’ve used King Arthur’s Measure for Measure with great results. The texture will be a touch more tender, but still delicious.
- Vegan Adaptation: Use vegan butter (I like Earth Balance) and a flax egg (1 tablespoon ground flaxseed mixed with 3 tablespoons water). For the royal icing, use aquafaba (the liquid from a can of chickpeas) instead of meringue powder. It works surprisingly well.
- Spooky Flavor Twist: Add ½ teaspoon of ground cinnamon and ¼ teaspoon of cayenne pepper to the dry ingredients. It gives the cookies a warm, slightly spicy kick that’s perfect for fall.
- Different Shapes: Don’t have a cat cutter? Use a bat, ghost, or pumpkin cutter. The royal icing recipe works for any shape. I once made a batch of these as little ghosts for a Halloween party, and they were a hit.
- No Royal Icing: If you’re short on time, just dust the baked cookies with powdered sugar. It gives them a “snowy” look that’s surprisingly elegant. Or, dip the tops in melted dark chocolate and add sprinkles.
Serving & Storage Suggestions
These cookies are best served at room temperature. I like to arrange them on a platter with some fake spider webs and little plastic spiders for a fun, spooky centerpiece. They’re perfect with a cup of hot apple cider or a warm mug of chai tea.
For storage, place the decorated cookies in a single layer in an airtight container. Separate layers with parchment paper. They will stay fresh for up to 5 days at room temperature. Do not refrigerate them—the humidity can make the icing sticky and soft.
You can freeze the undecorated baked cookies for up to 3 months. Just wrap them tightly in plastic wrap and then foil. When you’re ready to decorate, thaw them at room temperature, then ice as directed. The royal icing itself does not freeze well, so always make that fresh.
The flavors actually get a little better after a day or two. The cookie softens slightly, and the royal icing hardens to that perfect snap. So making these a day ahead of your party is a great idea.
Nutritional Information & Benefits
Let’s be real: these are a treat, not a health food. But knowing what’s in them helps. Per cookie (based on a 2.5-inch cat cutter, with icing), here’s the estimated breakdown:
- Calories: 180-200
- Fat: 8g
- Carbohydrates: 28g
- Sugar: 18g
- Protein: 2g
The butter provides a small amount of Vitamin A, and the egg adds a bit of protein. The cream of tartar is a natural byproduct of winemaking, so there’s that fun fact. If you use gel food coloring, you’re avoiding the artificial dyes found in some liquid colors. The best nutritional benefit, honestly, is the joy they bring. Baking with kids? That’s a memory that lasts longer than any calorie count.
Conclusion
These Cozy Black Cat Spider Sugar Cookies are more than just a Halloween project. They’re a little pause in a busy season. A chance to get flour on your counter and icing on your fingers and laugh at a spider cookie with crooked legs. I make them every year, and every year, Mrs. Gable’s casual, unassuming magic finds its way back into my kitchen. I hope they find a place in yours, too.
Don’t stress about making them perfect. The best ones are the ones that look like they were made with love, not a ruler. If you make a batch, I’d love to see them. Drop a comment below and tell me how your spiders turned out—did they have eight legs or ten? Did the cats look more like grumpy owls? Share your photos and stories. Let’s make this a little tradition.
Frequently Asked Questions
Can I use store-bought royal icing mix?
Yes, you absolutely can. It won’t be quite as shiny or firm as homemade, but it’s a good shortcut. Just follow the package directions and add the black gel coloring.
Why did my cookies spread so much?
This usually happens for two reasons: the dough wasn’t chilled long enough, or your butter was too soft. Make sure your butter is at room temperature (not melted) and chill the dough for a full hour.
How do I get the black icing to be really black?
Black gel food coloring can be tricky. Add it a little at a time, mixing well. Sometimes it takes more than you think. Let the icing sit for 10 minutes—the color will deepen as it sits.
Can I freeze the decorated cookies?
I don’t recommend it. The royal icing can become tacky and lose its shine when thawed. It’s better to freeze the plain cookies and decorate them later.
My royal icing is too runny. Can I fix it?
Yes! Just add a little more sifted powdered sugar, a tablespoon at a time, and beat it in. It’s easier to fix thin icing than thick icing, so go slow.
Pin This Recipe!
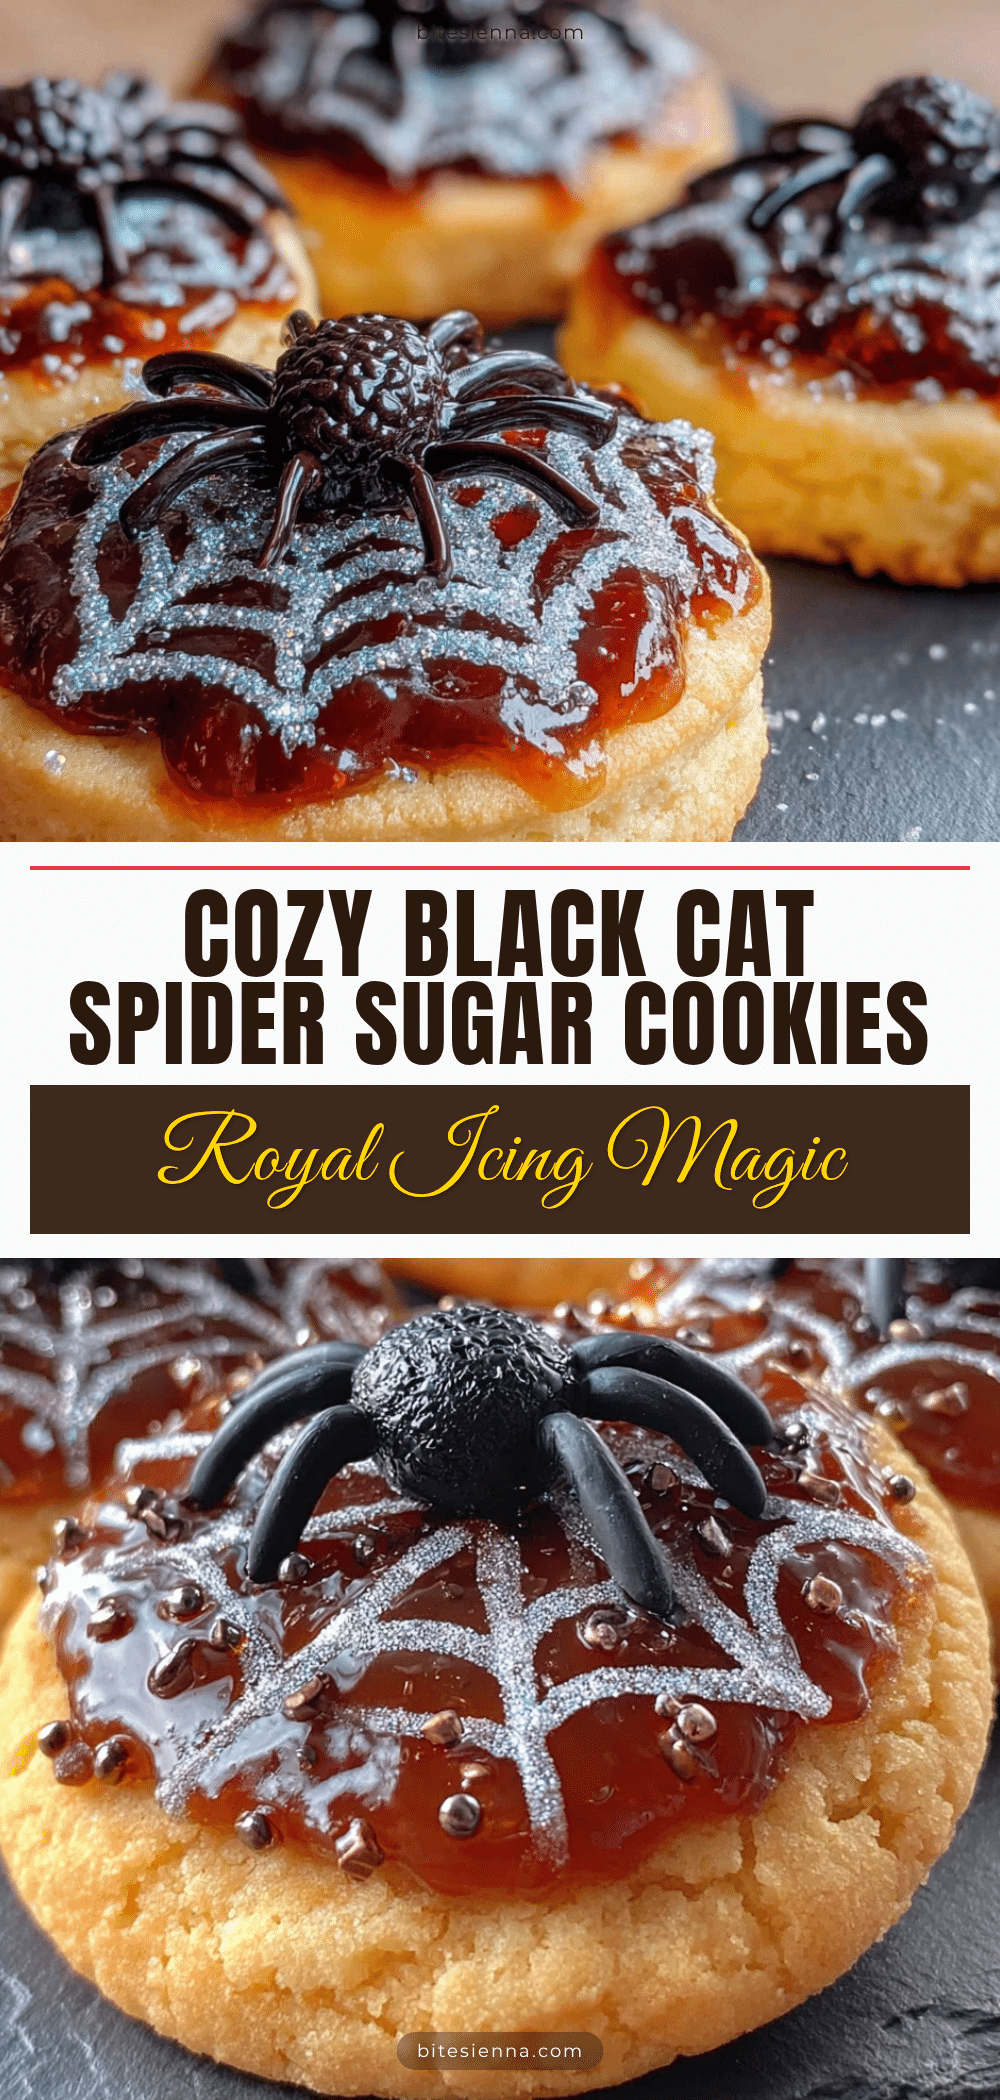
Cozy Black Cat Spider Sugar Cookies with Easy Royal Icing
These soft, buttery sugar cookies are shaped like black cats and spiders, then decorated with a glossy royal icing. They’re the perfect Halloween treat that feels more like a hug than a fright.
- Prep Time: 1 hour 30 minutes
- Cook Time: 10 minutes
- Total Time: 2 hours 40 minutes
- Yield: 24 servings 1x
- Category: Dessert
- Cuisine: American
Ingredients
- 2 ¾ cups (345g) all-purpose flour
- 1 cup (226g) unsalted butter, softened
- 1 cup (200g) granulated sugar
- 1 large egg, room temperature
- 1 ½ teaspoons vanilla extract
- ½ teaspoon baking powder
- ½ teaspoon cream of tartar
- ¼ teaspoon salt
- 2 cups (240g) powdered sugar, sifted
- 2 tablespoons meringue powder
- 3–4 tablespoons warm water
- Black gel food coloring
- Orange gel food coloring (optional)
- Black sanding sugar or sprinkles (optional)
- Candy eyes (optional)
- Piping bags or zip-top bags
Instructions
- Cream the butter and sugar: In a large bowl, beat the softened butter and granulated sugar together on medium speed until light and fluffy, about 2-3 minutes.
- Add the egg and vanilla: Beat in the egg and vanilla extract until just combined. Scrape down the sides of the bowl.
- Whisk dry ingredients: In a separate bowl, whisk together the flour, baking powder, cream of tartar, and salt.
- Combine: Gradually add the dry ingredients to the wet mixture, mixing on low speed until a soft dough forms. Don’t overmix.
- Chill the dough: Divide the dough in half, flatten each into a disc, wrap tightly in plastic wrap, and refrigerate for at least 1 hour.
- Preheat oven to 350°F (175°C). Line baking sheets with parchment paper.
- Roll out the dough: On a lightly floured surface, roll one disc of dough to about ¼-inch thickness.
- Cut out shapes: Use a cat-shaped cookie cutter for cats and a round cutter for spiders. Reroll scraps once.
- Bake: Place cookies about 1 inch apart on prepared sheets. Bake for 8-10 minutes, until edges are just barely golden.
- Cool: Let cookies cool on baking sheet for 5 minutes, then transfer to a wire rack to cool completely.
- Make royal icing: Whisk together sifted powdered sugar and meringue powder. Add 3 tablespoons warm water and beat for 4 minutes until thick and glossy. Adjust consistency with additional water if needed.
- Color the icing: Divide icing into bowls. Color most black, leave some white, and optionally color some orange.
- Check consistency: For flooding, icing should be ’10-second’ consistency—ribbon melts back into bowl within 10 seconds.
- Decorate cat cookies: Outline cat with black icing using #2 tip, flood center, add white eyes while wet, then add pupils and nose after 10 minutes.
- Decorate spider cookies: Flood round cookies with black icing, immediately pipe eight white legs, add candy eyes or white dots. Let dry completely.
Notes
Chill dough for at least 1 hour to prevent spreading. For royal icing, keep a damp paper towel over the bowl to prevent drying. The 10-second consistency is key—thick like honey. Don’t ice warm cookies. Store in airtight container at room temperature for up to 5 days. Freeze undecorated cookies for up to 3 months.
Nutrition
- Serving Size: 1 cookie
- Calories: 190
- Sugar: 18
- Sodium: 60
- Fat: 8
- Saturated Fat: 5
- Carbohydrates: 28
- Protein: 2
Keywords: Halloween cookies, sugar cookies, black cat cookies, spider cookies, royal icing, fall baking, spooky treats