Tuesday night, 5:47 PM. I was staring into the fridge like it held the secrets to the universe, but all it had was a pack of chicken thighs, a slightly sad head of broccoli, and the dregs of a soy sauce bottle. My kids were circling like hungry sharks, asking what was for dinner every thirty seconds. I had exactly zero energy for a complicated recipe. You know that feeling, right? The one where you just want something that tastes like you tried, but without actually trying that hard.
I grabbed the honey, some garlic that was starting to sprout (don’t judge), and decided to wing it. Honestly, I was just hoping for edible. I threw everything in one pan, crossed my fingers, and prayed the kids wouldn’t ask for cereal instead. The whole house started smelling incredible, like a cozy takeout joint but better. My youngest wandered into the kitchen and asked, “Is that candy chicken?” I almost laughed.
When I put the pan on the table, I braced myself for complaints. Instead, there was silence. The kind of silence that only happens when everyone is actually eating. My oldest, who usually picks at her food, asked for seconds. My son licked his plate—I’m not proud of it, but I’m also not mad about it. That was the night this honey garlic chicken thighs recipe was born, and honestly, it saved my sanity more than once since then. It’s the kind of dinner that makes you feel like a hero, even when you’re running on fumes.
Why You’ll Love This Recipe
Let me tell you why this one-pan honey garlic chicken thighs recipe is a total game-changer for busy families. I’ve tested it about a dozen times now, tweaking the sauce ratio and the cooking time until it was just right. It’s not just another chicken recipe—it’s the one I turn to when I need a guaranteed win.
- Quick & Easy: From fridge to table in about 35 minutes. Seriously. No marinating, no complicated steps. Just a quick sear and a bake.
- Simple Ingredients: You probably have everything in your pantry right now. Soy sauce, honey, garlic, chicken thighs—that’s the core of it. No fancy grocery trips required.
- Perfect for Busy Weeknights: This is the definition of a weeknight hero. It’s fast enough for a Tuesday but fancy enough that you could serve it to guests without embarrassment.
- Crowd-Pleaser: My kids call it “candy chicken” and my husband asks for it every other week. It’s sweet, savory, and just plain delicious. Picky eaters don’t stand a chance.
- Unbelievably Delicious: The sauce caramelizes around the chicken thighs, creating this sticky, glossy coating that’s pure comfort food. The garlic gets mellow and sweet, not sharp at all.
What makes this version different from all the other honey garlic chicken recipes out there? It’s the balance. I spent time getting the honey-to-soy-sauce ratio perfect so it’s not cloyingly sweet or too salty. And the one-pan method means the chicken stays juicy while the sauce reduces into a glaze. No dry chicken here, I promise.
This recipe is the kind that makes you close your eyes after the first bite. It’s comfort food reimagined—faster, easier, but with the same soul-soothing satisfaction. Perfect for impressing your family without stressing yourself out.
What Ingredients You Will Need
This honey garlic chicken thighs recipe uses simple, everyday ingredients to create something truly special. Most of these are pantry staples, which is exactly what you need on a busy night.
- Chicken Thighs: 6 bone-in, skin-on chicken thighs (about 2 pounds or 900g). The skin gets crispy in the pan, and the bone keeps the meat incredibly juicy. You can use boneless thighs too, but reduce the cooking time by about 10 minutes.
- Honey: 1/3 cup (110g) of good quality honey. I prefer a mild wildflower honey, but any liquid honey works. If your honey is crystallized, warm it up slightly so it mixes easily.
- Soy Sauce: 1/4 cup (60ml) of low-sodium soy sauce. This adds the savory umami that balances the sweetness. Tamari or coconut aminos work great for a gluten-free option.
- Garlic: 5-6 cloves of fresh garlic, minced. Don’t use the jarred stuff here—fresh garlic makes a huge difference in flavor. I love how it mellows and sweetens as it cooks.
- Olive Oil: 2 tablespoons (30ml) for searing the chicken. Avocado oil works too if you prefer a higher smoke point.
- Rice Vinegar: 1 tablespoon (15ml). This brightens the sauce and cuts through the richness. Apple cider vinegar is a good substitute.
- Sesame Oil: 1 teaspoon (5ml), optional but recommended. It adds a lovely nutty aroma that makes the dish feel more authentic.
- Red Pepper Flakes: 1/4 teaspoon (or to taste). This is optional, but a tiny pinch gives a nice warmth without making it spicy for the kids.
- Green Onions: 2-3, sliced, for garnish. They add a fresh pop of color and a mild onion flavor.
- Sesame Seeds: 1 tablespoon, for garnish. Toasted if you have them, but raw works fine.
For the sauce, I recommend using a brand like Kikkoman for soy sauce or Bragg’s for liquid aminos. When it comes to honey, local honey is always lovely if you can find it. The garlic should be firm and not sprouting—though I’ve used sprouting garlic in a pinch and it was still fine!
You can easily swap the chicken thighs for drumsticks or even chicken breasts. Just adjust the cooking time. For a low-carb version, substitute the honey with a sugar-free honey alternative or a bit of brown sugar substitute. The texture will change slightly, but the flavor will still be delicious.
Equipment Needed
One of the best things about this recipe is how little equipment you need. Here’s what you’ll need to get started:
- Large Oven-Safe Skillet: A 12-inch cast iron skillet is my go-to. It heats evenly and goes from stovetop to oven without fuss. A stainless steel or oven-safe nonstick pan works too. Just make sure the handle is oven-safe up to 400°F.
- Tongs: For flipping the chicken without piercing the skin. I like the ones with silicone tips so they don’t scratch my pans.
- Small Bowl: For whisking together the sauce ingredients. Any small mixing bowl will do.
- Whisk or Fork: To combine the sauce until smooth.
- Measuring Cups and Spoons: For accurate measurements. I cannot stress this enough—eyeballing the honey and soy sauce can throw off the balance.
- Meat Thermometer: Optional but highly recommended. Chicken thighs are done at 165°F (74°C) in the thickest part. It takes the guesswork out of cooking.
If you don’t have an oven-safe skillet, you can sear the chicken in a regular pan and then transfer everything to a baking dish. It’s one extra dish to wash, but it still works perfectly. I’ve done it many times when my cast iron was busy with something else.
For budget-friendly options, check your local thrift store for cast iron skillets. They last forever and are usually cheap. My favorite skillet cost me eight dollars and it’s been with me for years.
Preparation Method
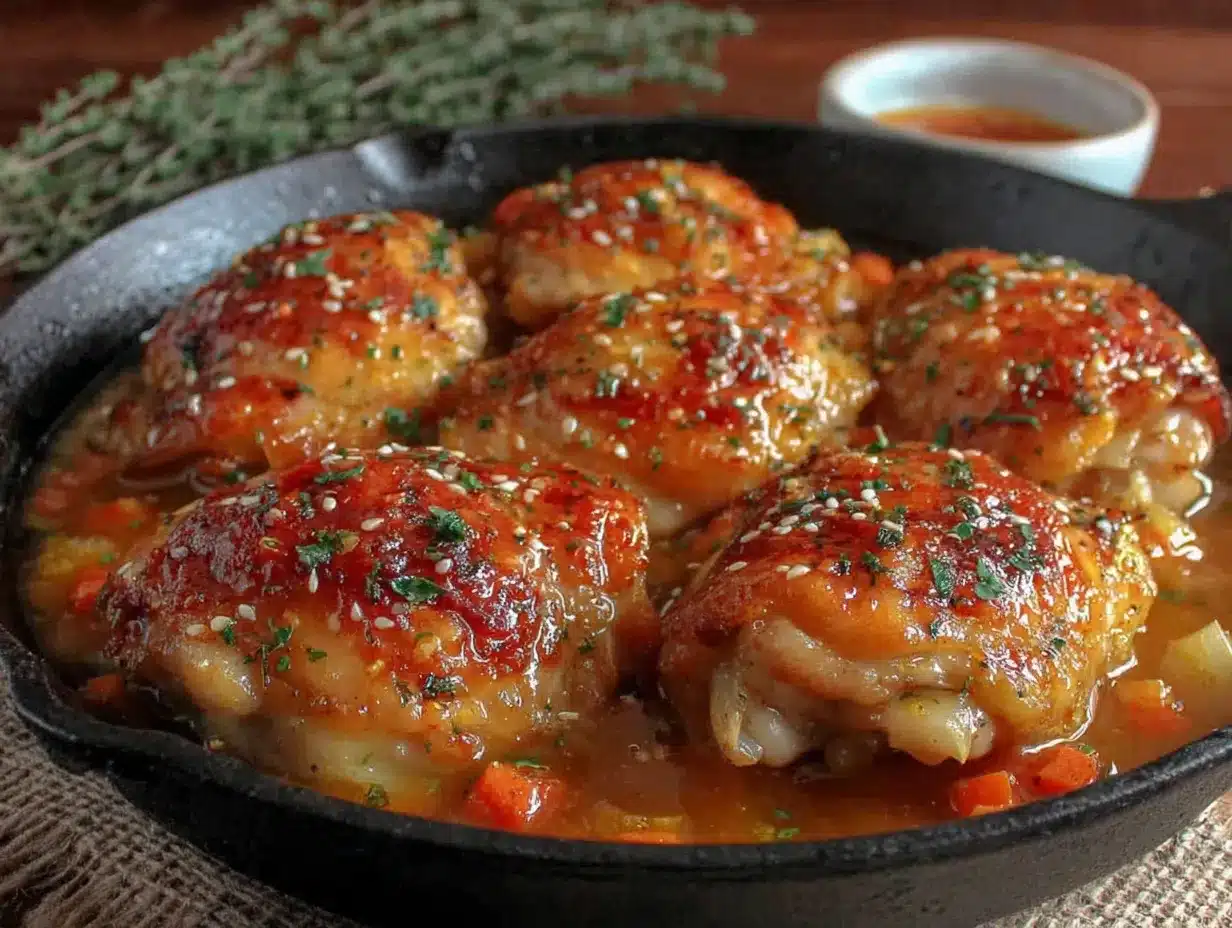
Let’s get cooking! This honey garlic chicken thighs recipe comes together in about 35 minutes, and most of that is hands-off oven time. Here’s how to do it:
- Preheat your oven to 400°F (200°C). Position the rack in the middle of the oven. While it’s heating, pat the chicken thighs dry with paper towels. This is crucial for getting crispy skin. Season them generously on both sides with salt and pepper.
- Make the sauce. In a small bowl, whisk together the honey, soy sauce, minced garlic, rice vinegar, sesame oil, and red pepper flakes if using. Set it aside. The garlic will infuse the sauce as it sits.
- Sear the chicken. Heat the olive oil in your oven-safe skillet over medium-high heat. When the oil is shimmering (not smoking), carefully place the chicken thighs skin-side down. Don’t crowd the pan—work in batches if needed. Let them cook undisturbed for 4-5 minutes until the skin is golden brown and crispy. Flip them with tongs and cook for another 2 minutes on the other side. The chicken won’t be cooked through yet, and that’s okay.
- Pour the sauce over the chicken. Carefully pour the honey garlic sauce over the chicken thighs, making sure to coat each piece. Tilt the pan to spread the sauce evenly. It will sizzle and bubble up—that’s the good stuff happening.
- Bake. Transfer the skillet to the preheated oven. Bake for 20-25 minutes, or until the chicken reaches an internal temperature of 165°F (74°C) and the sauce is bubbling and slightly thickened. Halfway through, you can spoon some of the pan sauce over the chicken for extra glaze.
- Rest and garnish. Remove the skillet from the oven (careful, the handle is hot!). Let the chicken rest for 5 minutes. This allows the juices to redistribute. Sprinkle with sliced green onions and sesame seeds. The sauce will continue to thicken as it cools.
- Serve. Spoon the extra pan sauce over the chicken and serve immediately. I like to serve it over steamed rice or with roasted vegetables to soak up all that delicious sauce.
A few things to watch for: If the sauce starts to look too dark or is burning around the edges of the pan, your oven might run hot. Just reduce the temperature to 375°F next time. The sauce should be a deep amber color, not black. Also, don’t skip the resting step—I once got too eager and cut into the chicken right away, and all the juices ran out onto the plate. Patience pays off!
The smell when this is baking is absolutely incredible. Your whole kitchen will smell like a cozy restaurant. The garlic gets sweet and mellow, and the honey caramelizes into this sticky, glossy perfection. It’s the kind of aroma that brings everyone running to the table.
Cooking Tips & Techniques
After making this honey garlic chicken thighs recipe more times than I can count, I’ve picked up a few tricks that make a real difference. Let me share them so you can skip the learning curve.
Pat the chicken really dry. I cannot emphasize this enough. Moisture is the enemy of crispy skin. Use paper towels and press firmly. If you have time, let the seasoned chicken sit uncovered in the fridge for 30 minutes—this dries out the skin even more and gives you that crackling crispiness.
Don’t move the chicken too early. When you place the thighs skin-side down in the hot oil, leave them alone for a full 4-5 minutes. I know it’s tempting to peek, but the skin needs that undisturbed contact to brown properly. If you try to flip it and it sticks, it’s not ready yet. Give it another minute and try again.
Watch the sauce consistency. The sauce will look thin when you pour it in the pan, but it thickens beautifully as it bakes. If you want it even thicker, you can remove the chicken after baking and simmer the sauce on the stovetop for 2-3 minutes. Just be careful not to burn it—honey burns fast.
One mistake I made early on: I used too much honey because I thought more would be better. The result was a sauce that was way too sweet and actually burned on the edges of the pan. Stick to the measurements in this recipe. The balance is perfect as written.
Timing is everything. Start your rice or vegetables before you put the chicken in the oven. That way, everything finishes at the same time. I usually start the rice, then sear the chicken, and by the time the chicken goes in the oven, the rice is almost done. It makes for a much smoother dinner routine.
For juicier chicken: Use bone-in, skin-on thighs. They have more fat and connective tissue, which keeps the meat moist during cooking. Boneless thighs are quicker but can dry out if you’re not careful. If you use boneless, check for doneness at 15 minutes instead of 20.
Variations & Adaptations
This honey garlic chicken thighs recipe is wonderfully adaptable. Here are a few ways I’ve changed it up depending on what I have on hand or who I’m feeding.
Spicy Honey Garlic Chicken: Add 1-2 teaspoons of sriracha or gochujang to the sauce. It adds heat without overwhelming the sweetness. My husband loves this version, and it’s great for adults-only dinners. Just keep the kids’ portions separate if they’re sensitive to spice.
Gluten-Free Version: Swap the soy sauce for tamari or coconut aminos. Both are gluten-free and taste almost identical. I’ve used coconut aminos many times, and the flavor is slightly milder but still delicious. Make sure your rice vinegar is also gluten-free—most brands are, but check the label.
Vegetable Add-In: Add broccoli florets, green beans, or snap peas to the pan during the last 10 minutes of baking. They’ll roast in the sauce and absorb all that honey garlic goodness. It turns the dish into a complete one-pan meal with minimal extra effort. I do this all the time when I want to sneak in extra veggies.
Air Fryer Adaptation: If you don’t want to use the oven, you can finish the chicken in an air fryer. Sear the chicken as directed, then transfer to the air fryer basket. Pour the sauce over the top and cook at 375°F for 12-15 minutes, flipping halfway through. The skin gets extra crispy this way.
Dairy-Free Note: This recipe is naturally dairy-free, which is great. Just double-check your chicken thighs aren’t injected with any butter solution—some brands do that. Look for air-chilled chicken if you can find it.
I once tried a version with lime juice instead of rice vinegar. It was good, but definitely different—more citrusy and bright. My kids preferred the original, but I enjoyed it as a change of pace. Feel free to experiment based on what you have in your fridge.
Serving & Storage Suggestions
This honey garlic chicken thighs recipe is best served hot, straight from the pan. The sauce is at its glossiest and most flavorful right after resting. Here’s how I like to serve it:
I spoon the chicken over a bed of steamed jasmine rice or fluffy white rice. The rice soaks up all that extra honey garlic sauce, and honestly, that’s my favorite part. You could also serve it with mashed potatoes, quinoa, or even cauliflower rice for a lower-carb option. For vegetables, roasted broccoli, green beans, or a simple cucumber salad are perfect companions. The sweetness of the chicken pairs beautifully with something fresh and crunchy.
For presentation, I arrange the chicken thighs on a platter, drizzle the pan sauce over the top, and sprinkle with green onions and sesame seeds. A few extra sesame seeds on the rice makes it look restaurant-worthy. If you’re serving guests, a sprinkle of red pepper flakes adds a pop of color.
Storage: Leftovers keep well in an airtight container in the refrigerator for up to 4 days. The flavors actually meld together overnight, making it even more delicious the next day. I’ve been known to make extra just for lunch the next day.
Reheating: The best way to reheat is in a skillet over medium-low heat with a splash of water or chicken broth. Cover the pan and let it steam for 5-7 minutes until warmed through. This keeps the chicken moist. You can also reheat in the microwave, but the skin won’t be crispy. For crispy skin again, reheat in a 350°F oven for 10 minutes.
Freezing: This recipe freezes beautifully. Let the chicken cool completely, then transfer to a freezer-safe container. It will keep for up to 3 months. Thaw overnight in the refrigerator and reheat as directed. The sauce might be a bit thinner after freezing, but the flavor is still spot-on.
One thing I’ve noticed: the sauce thickens as it sits in the fridge. When you reheat it, it might seem a little thick, but that’s normal. Just add a splash of water or broth to loosen it up.
Nutritional Information & Benefits
Here’s a rough estimate for one serving of honey garlic chicken thighs (one thigh with sauce, without rice or vegetables):
- Calories: 380-420
- Protein: 28g
- Fat: 22g
- Carbohydrates: 18g
- Fiber: 0g
- Sugar: 16g
- Sodium: 680mg
Please note these are estimates and can vary based on the exact ingredients and brands you use. If you’re tracking macros, I recommend calculating with your specific ingredients.
From a health perspective, chicken thighs are a great source of protein, iron, and B vitamins. They have more fat than chicken breasts, but that fat is what keeps them juicy and flavorful. The garlic in this recipe is known for its immune-boosting properties, and honey provides antioxidants. It’s not a “health food,” but it’s a balanced meal that fits well into a sensible diet.
This recipe is naturally dairy-free and can be made gluten-free with simple swaps. It’s also nut-free, which is great for school lunches or if you have allergies in the house. If you’re watching your sugar intake, you can reduce the honey to 1/4 cup, but the sauce will be less sticky and sweet.
I personally love that this recipe uses real, whole ingredients. No weird preservatives or processed sauces. It’s comfort food you can feel good about feeding your family.
Conclusion
This honey garlic chicken thighs recipe has become a staple in my kitchen, and I think it deserves a spot in yours too. It’s the kind of dinner that solves the “what’s for dinner?” problem without any drama. Quick, affordable, and loved by everyone from picky toddlers to hungry teenagers to tired parents.
What I love most about this recipe is how forgiving it is. You don’t need to be a professional chef to nail it. The first time I made it, I was just throwing things together, and it still turned out amazing. That’s the beauty of simple, well-balanced flavors. It’s hard to mess up.
I encourage you to make this your own. Add more garlic if you’re a garlic lover. Throw in some veggies. Swap the chicken for drumsticks. The base recipe is solid, but it’s also a canvas for your own creativity. And when you make it, I’d love to hear how it went. Leave a comment below and tell me how your family liked it. Did your kids ask for seconds? Did your husband lick his plate? I want to know!
Thanks for stopping by, and happy cooking. You’ve got this—one pan, a little honey, and a whole lot of love. That’s all you need for a dinner that feels like a hug.
Frequently Asked Questions
Can I use chicken breasts instead of thighs?
Yes, you can! Boneless, skinless chicken breasts will work, but they cook faster and can dry out more easily. Reduce the baking time to 15-18 minutes and check for doneness at 165°F. I recommend pounding the breasts to an even thickness for consistent cooking.
How do I prevent the sauce from burning?
Make sure your oven isn’t too hot and keep an eye on the sauce during the last 5 minutes of baking. If it looks like it’s getting too dark, you can tent the pan with foil. Also, don’t use too much honey—the recipe measurements are designed to caramelize without burning.
Can I make this recipe in a slow cooker?
You can, but the skin won’t get crispy. Sear the chicken first, then transfer to a slow cooker with the sauce. Cook on low for 4-5 hours or high for 2-3 hours. For crispy skin, finish under the broiler for 2-3 minutes after cooking.
What should I serve with honey garlic chicken?
Steamed rice is the classic choice because it soaks up the sauce. Mashed potatoes, roasted vegetables, or a simple green salad also work wonderfully. For a low-carb option, serve with cauliflower rice or zucchini noodles.
How do I make the sauce thicker?
If you want a thicker glaze, remove the chicken from the pan after baking and simmer the sauce on the stovetop over medium heat for 2-3 minutes, stirring constantly. You can also mix 1 teaspoon of cornstarch with 2 teaspoons of cold water and stir it into the sauce before simmering.
Pin This Recipe!

Kid-Approved Honey Garlic Chicken Thighs: Easy One-Pan Dinner

This one-pan honey garlic chicken thighs recipe is a quick and easy weeknight dinner that the whole family will love. With a perfect balance of sweet and savory, it’s ready in about 35 minutes and uses simple pantry ingredients.
- Prep Time: 10 minutes
- Cook Time: 25 minutes
- Total Time: 35 minutes
- Yield: 6 servings 1x
- Category: Main Course
- Cuisine: Asian
Ingredients
- 6 bone-in, skin-on chicken thighs (about 2 pounds or 900g)
- 1/3 cup (110g) honey
- 1/4 cup (60ml) low-sodium soy sauce
- 5–6 cloves fresh garlic, minced
- 2 tablespoons (30ml) olive oil
- 1 tablespoon (15ml) rice vinegar
- 1 teaspoon (5ml) sesame oil (optional)
- 1/4 teaspoon red pepper flakes (optional)
- 2–3 green onions, sliced (for garnish)
- 1 tablespoon sesame seeds (for garnish)
- Salt and pepper to taste
Instructions
- Preheat your oven to 400°F (200°C). Pat the chicken thighs dry with paper towels and season generously with salt and pepper on both sides.
- In a small bowl, whisk together the honey, soy sauce, minced garlic, rice vinegar, sesame oil, and red pepper flakes (if using). Set aside.
- Heat the olive oil in a large oven-safe skillet over medium-high heat. When the oil is shimmering, carefully place the chicken thighs skin-side down. Cook undisturbed for 4-5 minutes until the skin is golden brown and crispy. Flip and cook for another 2 minutes.
- Pour the honey garlic sauce over the chicken, making sure to coat each piece. Tilt the pan to spread the sauce evenly.
- Transfer the skillet to the preheated oven. Bake for 20-25 minutes, or until the chicken reaches an internal temperature of 165°F (74°C) and the sauce is bubbling and slightly thickened. Halfway through, spoon some pan sauce over the chicken for extra glaze.
- Remove the skillet from the oven and let the chicken rest for 5 minutes. Sprinkle with sliced green onions and sesame seeds.
- Serve immediately with steamed rice or roasted vegetables, spooning extra pan sauce over the chicken.
Notes
Pat the chicken really dry for crispy skin. Don’t move the chicken too early when searing. Watch the sauce consistency—if it gets too dark, reduce oven temperature to 375°F next time. Let the chicken rest before cutting to keep it juicy.
Nutrition
- Serving Size: 1 chicken thigh with
- Calories: 400
- Sugar: 16
- Sodium: 680
- Fat: 22
- Saturated Fat: 6
- Carbohydrates: 18
- Protein: 28
Keywords: honey garlic chicken, one-pan chicken, easy chicken dinner, kid-friendly chicken, weeknight dinner, chicken thighs


