I wasn’t expecting to find baking wisdom from our apartment building’s maintenance guy, but there I was, locked out of my kitchen on a Tuesday afternoon, sitting on the stoop while he replaced a broken lock. Frank was maybe sixty-five, quiet, always wore a faded baseball cap. We’d exchanged nods for two years, nothing more. But that afternoon, as he worked, he started talking about his wife’s Halloween baking. “She made these brownies every year,” he said, not looking up from the lock. “Peanut butter swirl on top, looked like spiderwebs. Kids went crazy for them.” He described the technique so precisely — the toothpick drag, the timing of the swirl — that I scribbled it on a takeout napkin. I thanked him, got back inside, and honestly, I forgot about the napkin for months.
Then October rolled around last year, and I was digging through a junk drawer for a pen when I found that napkin, stained and crumpled. I stared at Frank’s words: “Drizzle peanut butter, drag toothpick from center out. Don’t over-swirl.” That was it. No measurements, no real instructions. Just the soul of a recipe. I spent three weekends testing, failing, laughing at my own lopsided webs, and finally — finally — landing on something that made me want to knock on Frank’s door and show him. I didn’t, because that would be weird. But I made these brownies for every Halloween party last year, and they stole the show every single time. Maybe you’ve been there — a recipe that finds you when you least expect it, from a person you never expected to teach you anything about a kitchen.
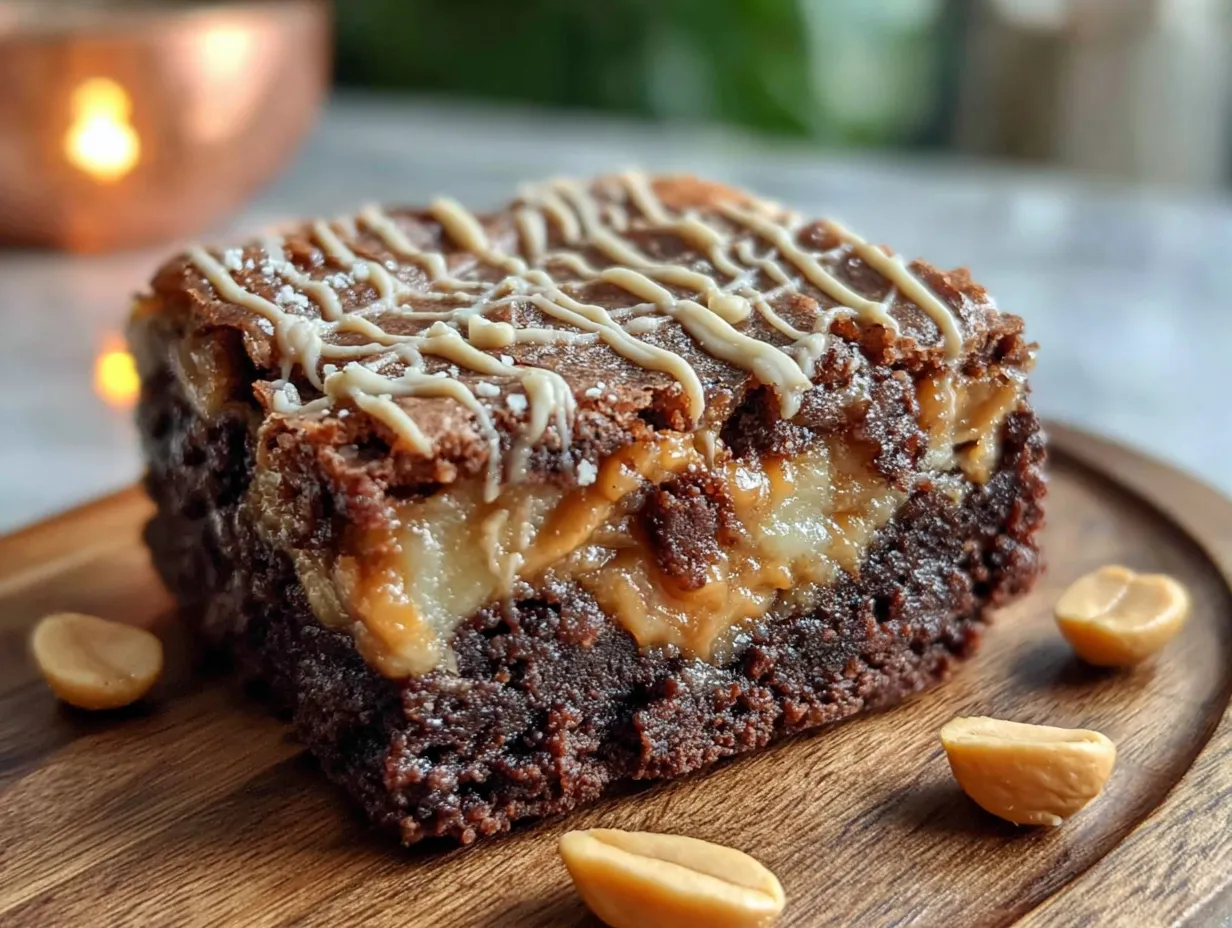
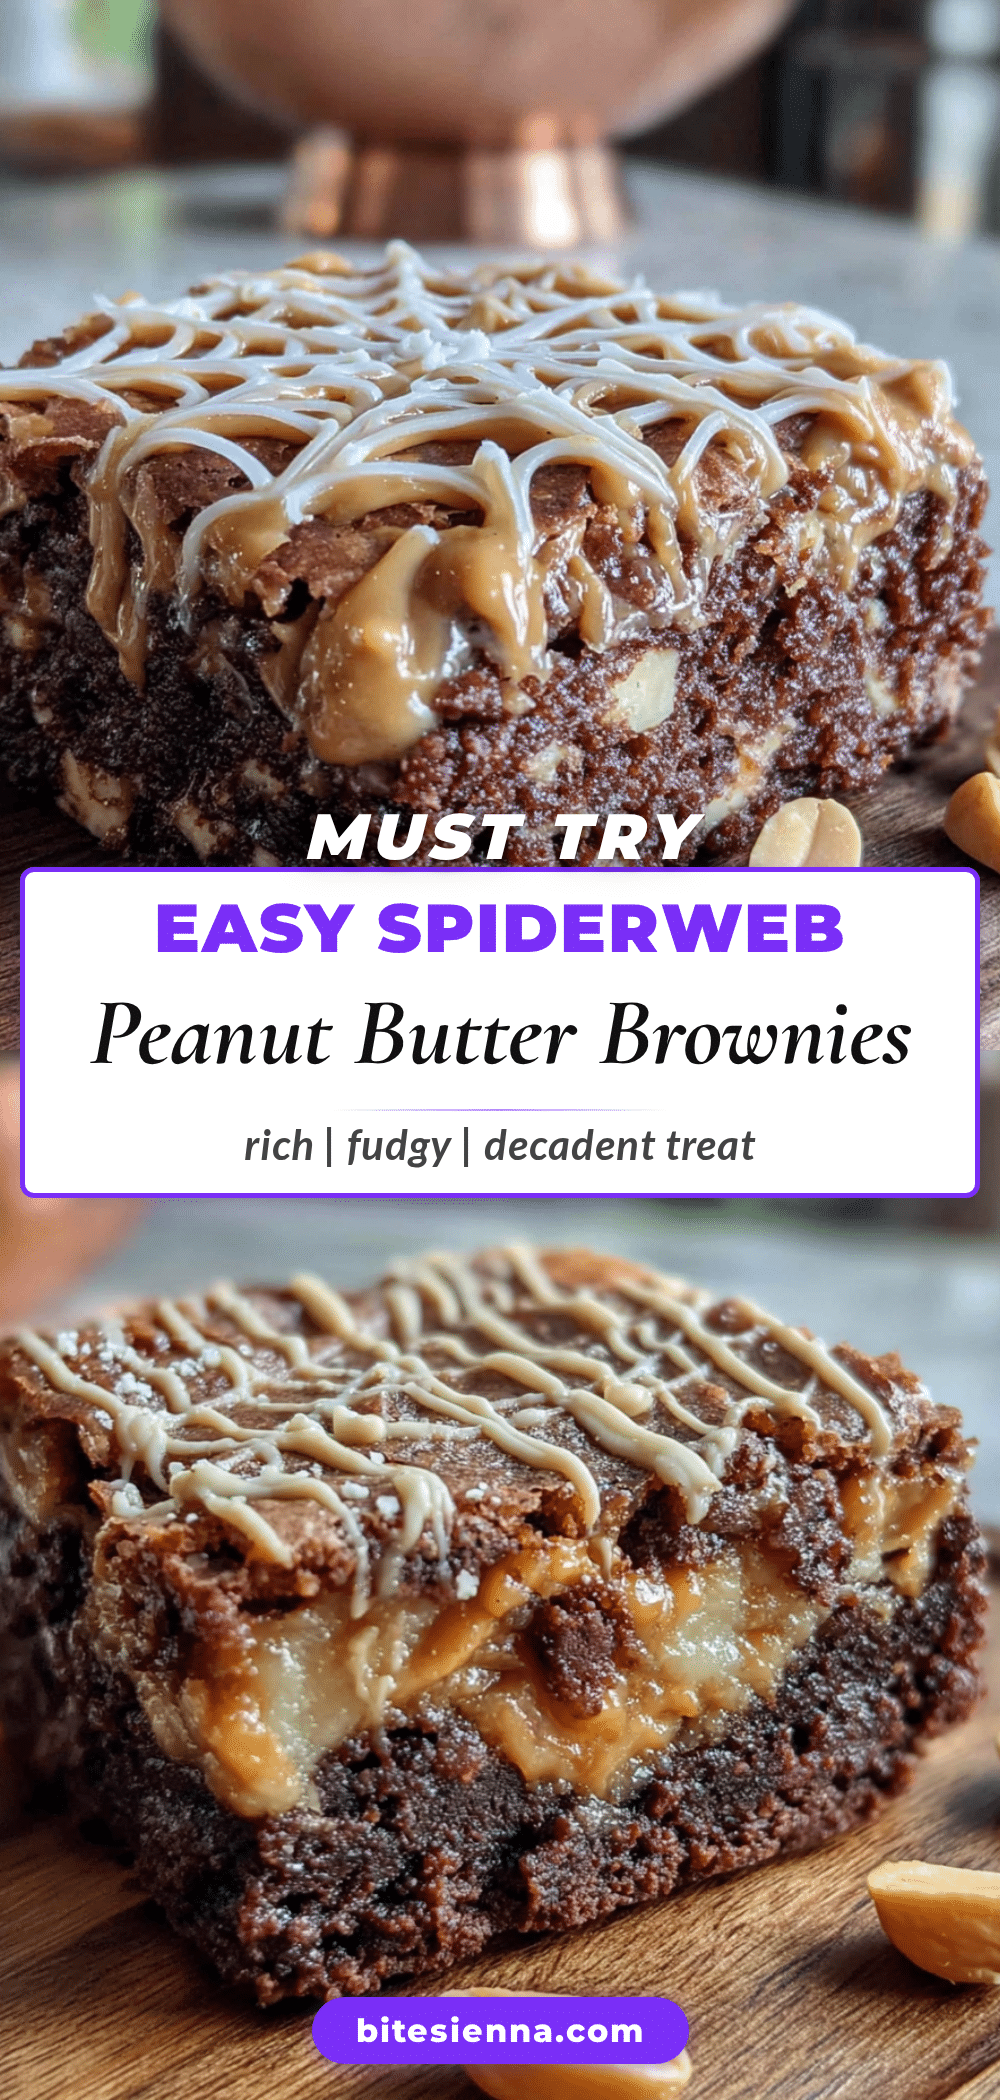
These Easy Spiderweb Peanut Butter Brownies are exactly that. They’re the kind of treat that looks impossibly impressive — like you spent hours piping and detailing — but actually comes together with a boxed mix, a spoonful of peanut butter, and one simple trick. No fancy equipment, no pastry bags, no stress. Just fudgy, rich chocolate brownies topped with a creamy peanut butter swirl that mimics a spiderweb in the most satisfying way. And the best part? They taste even better than they look. The saltiness of the peanut butter cuts through the sweet chocolate, creating that perfect balance that keeps you reaching for “just one more.” I keep making them because they remind me that good recipes don’t always come from cookbooks or celebrity chefs. Sometimes they come from a quiet man with a screwdriver and a story about his wife.
Why You’ll Love This Recipe
Let me tell you why these brownies have become my go-to Halloween contribution. First off, they’re ridiculously easy. I’m talking one bowl, a boxed brownie mix, and maybe ten minutes of active work. The rest is just oven time and letting them cool. For a busy weeknight when you’re scrambling to bring something to a school party or a work potluck, that’s everything.
- Quick & Easy: From start to finish, these are on your counter in under 45 minutes. The actual hands-on time is maybe 10 minutes. You can make the brownie batter, pour it in the pan, and have the spiderweb swirled in before your oven even finishes preheating.
- Simple Ingredients: You probably have most of this already. A box of brownie mix, eggs, oil, water, peanut butter, and powdered sugar. That’s it. No trip to a specialty baking store, no hunting for weird extracts or decorations.
- Perfect for Halloween: Let’s be real — Halloween treats are judged on two things: how cute they look and how fast they disappear. These win on both counts. The spiderweb design is instantly recognizable and genuinely impressive, but they’re just brownies underneath. Everyone loves brownies.
- Crowd-Pleaser: I’ve brought these to parties with kids, adults, even a few self-proclaimed “not dessert people.” They vanish. The peanut butter swirl adds a salty, creamy element that makes these feel more sophisticated than a plain brownie, but they’re still familiar enough that even picky eaters go for them.
- Unbelievably Delicious: Look, I’ve made brownies from scratch. I’ve used expensive chocolate and fancy cocoa powder. And honestly? These boxed-mix brownies, with that peanut butter swirl, are just as good. The texture is fudgy, the top cracks just right, and the peanut butter adds this gorgeous ribbon of flavor in every bite.
What makes this recipe different from every other spiderweb brownie out there is the technique I learned from Frank’s napkin. Most recipes tell you to use a knife to swirl. That creates thick, muddy lines that don’t look like webs at all. Using a toothpick — and dragging it in a specific pattern — creates those delicate, thread-like lines that actually resemble a real spiderweb. It’s a tiny detail, but it makes all the difference between “oh, that’s cute” and “wait, how did you do that?”
This recipe isn’t just good — it’s the kind that makes you close your eyes after the first bite. It’s comfort food dressed up in a Halloween costume, but it delivers the same soul-soothing satisfaction as a regular brownie. Perfect for impressing guests without stress, or turning a simple weeknight into something a little more festive.
What Ingredients You Will Need
This recipe uses simple, everyday ingredients to deliver big flavor and that gorgeous spiderweb effect. Most of these are pantry staples, which is exactly what you want when you’re short on time and energy.
- 1 box (18.4 oz) brownie mix — I recommend Ghirardelli or Duncan Hines for the fudgiest texture. Avoid mixes that say “chewy” or “cake-like” — you want the fudge variety for that dense, rich base that contrasts perfectly with the peanut butter swirl.
- 2 large eggs — Room temperature is ideal, but if you’re in a rush (and let’s face it, when aren’t you?), just run them under warm water for 30 seconds. It makes them blend more smoothly into the batter.
- 1/2 cup vegetable oil — You can use melted butter instead if you want a richer flavor. I’ve done both, and honestly, butter makes the brownies slightly more tender, but oil keeps them fudgy longer. Your call.
- 1/4 cup water — Some mixes call for different amounts, so check your box. If you want even fudgier brownies, substitute the water with strong brewed coffee. You won’t taste the coffee, but it deepens the chocolate flavor like crazy.
- 1/2 cup creamy peanut butter — Do not use natural peanut butter here. The kind that separates and needs stirring will make your swirl greasy and weird. Use Jif, Skippy, or any standard creamy peanut butter. It has stabilizers that help it hold its shape when you swirl it.
- 1/4 cup powdered sugar — This is what makes the peanut butter drizzle thick enough to hold those spiderweb lines. If you skip it, the peanut butter will be too runny and will just sink into the brownie batter instead of sitting on top.
- 1/2 teaspoon vanilla extract — Optional, but I like adding it to the peanut butter mixture. It rounds out the flavor and makes the whole thing taste more “baked” rather than just peanut butter dumped on top.
- Optional: 1/4 cup chocolate chips or chopped peanuts for garnish — I sometimes sprinkle a few on top before baking for extra texture. Totally optional, but fun.
When you’re picking your peanut butter, look for one that’s thick and spreadable. I’ve made the mistake of using a thinner, natural brand, and the swirl just disappeared into the brownie batter. It tasted fine, but the spiderweb effect was completely gone. Stick with the classic stuff for this one.
For the brownie mix, I’ve tested this with three different brands. Ghirardelli gives the richest, most fudgy result. Duncan Hines is a close second and is usually cheaper. Betty Crocker works fine but tends to be a little more cake-like, so reduce the water by a tablespoon if you use that brand. Just a heads up.
Equipment Needed
You don’t need much for this recipe, which is exactly how I like it on a busy weeknight. Here’s what you’ll need:
- 8×8 inch baking pan — This is the perfect size for a standard box of brownie mix. If you use a 9×9, your brownies will be thinner and might bake faster, so check them a few minutes early. A 9×13 will give you very thin brownies — not ideal for this recipe.
- Mixing bowl — Any medium bowl works. I use a glass one because I can see when the batter is fully mixed, but metal or ceramic is fine too.
- Whisk or spatula — A whisk works best for getting the eggs fully incorporated, but a sturdy spatula does the job too. I’ve used a fork in a pinch. No judgment.
- Toothpicks — This is the secret weapon. You need at least 3-4 toothpicks because they can get coated in batter and become less effective after a few drags. I keep a whole pile ready.
- Small microwave-safe bowl — For warming the peanut butter mixture. You could also do this on the stovetop in a small saucepan, but the microwave is faster and means fewer dishes.
- Parchment paper or non-stick spray — I strongly recommend parchment paper with overhang on two sides. It makes lifting the entire block of brownies out of the pan so much easier. Plus, clean-up is basically zero.
- Cooling rack — Not strictly necessary, but it helps the brownies cool evenly so the top sets properly. If you don’t have one, just let them cool in the pan on the counter.
If you don’t have an 8×8 pan, you can use a 9×9, just reduce the baking time by 3-5 minutes. I learned that the hard way when I made these for a party and ended up with slightly overdone edges. Still delicious, but not as fudgy as I wanted.
Preparation Method
Alright, let’s get into the actual making of these beauties. I’ve broken this down step by step so even if you’ve never made a spiderweb design before, you’ll nail it.
- Preheat your oven to 350°F (175°C). Line your 8×8 baking pan with parchment paper, leaving about 2 inches of overhang on two opposite sides. This is your “handle” for lifting the brownies out later. If you don’t have parchment, spray the pan generously with non-stick spray. I prefer parchment because it’s foolproof.
- Make the brownie batter. In your mixing bowl, combine the brownie mix, eggs, oil, and water. Stir until just combined — about 30-40 strokes. Don’t overmix! Overmixing develops the gluten and makes your brownies tough instead of fudgy. A few small lumps are totally fine. The batter should be thick and glossy.
- Pour the batter into the prepared pan. Use your spatula to spread it evenly into all corners. Give the pan a gentle tap on the counter to release any air bubbles. Set it aside while you make the peanut butter swirl.
- Make the peanut butter mixture. In a small microwave-safe bowl, combine the peanut butter, powdered sugar, and vanilla extract. Microwave for 20-30 seconds, then stir. It should be smooth, thick, and slightly runny — like a thick sauce. If it’s too thick to drizzle, microwave for another 10 seconds. If it’s too thin (which shouldn’t happen with creamy peanut butter), add another tablespoon of powdered sugar.
- Create the spiderweb base. Using a spoon, drizzle the peanut butter mixture over the brownie batter in a spiral pattern. Start from the center and work your way out in a rough circle. Don’t worry about making it perfect — the spiral is just the foundation for the web. You want about 4-5 concentric circles.
- Now for the magic — the spiderweb drag. Take a toothpick and starting from the center of the spiral, drag it outward toward the edge of the pan. This pulls the peanut butter into thin lines. Then, move about an inch around the circle and drag another line from center to edge. Continue all the way around, creating 8-12 lines radiating from the center. Here’s the trick: after you complete the first set of outward drags, immediately drag from the edge back toward the center in between each of those lines. This creates the classic web pattern. You’ll see the peanut butter form those delicate, webbed lines. Work quickly — you want to do this while the peanut butter is still warm and the brownie batter hasn’t started setting.
- Bake. Place the pan in the preheated oven and bake for 28-32 minutes. Start checking at 28 minutes. The brownies are done when a toothpick inserted into the center comes out with a few moist crumbs — not wet batter, not clean. The edges will look set and the top will be slightly cracked. If you see wet batter, give it another 2 minutes and check again.
- Cool completely. This is the hardest part, I know. Let the brownies cool in the pan on a wire rack for at least 30 minutes. Then, using the parchment overhang, lift the entire block out and transfer to a cutting board. Let them cool completely before cutting — about another 30 minutes. I know you want to dig in, but cutting warm brownies is a mess. The peanut butter swirl will smear, the edges will crumble, and you’ll be sad. Trust me on this.
- Cut and serve. Use a sharp knife to cut into squares. Wipe the knife clean between cuts for the cleanest edges. I like to cut 16 small squares — perfect for a party. If you want bigger brownies, cut 9 larger squares.
One thing I learned the hard way: if your peanut butter mixture is too hot when you drizzle it, it will sink into the brownie batter instead of sitting on top. Let it cool for about a minute after microwaving before you start drizzling. You want it warm enough to be pourable, but not so hot that it melts through.
Cooking Tips & Techniques
I’ve made these brownies probably a dozen times now, and I’ve collected a few hard-won tips that make the process smoother and the results more consistent.
Don’t over-swirl. This was Frank’s original advice, and it’s the most important tip. When you drag your toothpick, do it once. Don’t go back and re-drag the same lines. If you do, the peanut butter will blend into the brownie batter and you’ll lose the web effect entirely. You want distinct lines, not a muddy swirl. I made this mistake my first time and ended up with brownies that looked like a peanut butter Jackson Pollock painting. Tasted fine, but not exactly spiderweb-y.
Work quickly once you start the swirl. The brownie batter starts setting as soon as it hits the warm pan, and the peanut butter mixture cools and thickens fast. Have everything ready before you start drizzling. I lay out my toothpicks in a row, have the peanut butter mixture warm and stirred, and know exactly which direction I’m going to drag. It takes maybe 60 seconds from start to finish once you begin.
Use a toothpick, not a knife. A knife creates thick, blunt lines that look more like smears than web threads. A toothpick creates those delicate, hair-thin lines that make the design look intricate and intentional. Plus, toothpicks are disposable, so you don’t have to clean peanut butter out of a knife crevice. Win-win.
Check your brownies at the earliest suggested time. Every oven runs differently. My old apartment oven would bake these in exactly 28 minutes. My current oven takes 31. The first time I used this oven, I left them in for 30 minutes and they were slightly overdone. Now I start checking at 26 minutes. A toothpick test is your best friend here.
Let them cool completely before cutting. I cannot stress this enough. I’ve ruined three batches by getting impatient. The brownies need time to set up, and the peanut butter swirl needs to firm up. If you cut too early, the swirl smears across the top and you lose that beautiful web. Plus, the brownies themselves will be crumbly and fall apart. I’ve learned to make these the night before I need them, let them cool completely, and then cut them in the morning. They actually taste better the next day anyway.
Variations & Adaptations
One of the best things about this recipe is how easily it adapts. Here are a few variations I’ve tried and loved.
Dark Chocolate Spiderweb Brownies. Use a dark chocolate brownie mix instead of milk chocolate. The bitterness of the dark chocolate pairs beautifully with the sweet, creamy peanut butter. It’s a more grown-up version that’s still kid-friendly. I made these for a Halloween party with mostly adults, and they were the first thing to disappear.
White Chocolate Peanut Butter Swirl. Swap the creamy peanut butter for white chocolate peanut butter (yes, it exists, and it’s amazing). Or, make a white chocolate drizzle instead: melt 1/2 cup white chocolate chips with 1 tablespoon coconut oil, and use that for the web. It creates a striking contrast against dark brownies and looks incredibly elegant.
Gluten-Free Version. Use a gluten-free brownie mix. Most of them work perfectly with this recipe — just follow the box instructions for the base. The peanut butter swirl is naturally gluten-free, so no changes needed there. I’ve tested this with King Arthur’s gluten-free mix and it was fantastic. No one could tell the difference.
Spiderweb Cream Cheese Brownies. This is my personal favorite variation. Instead of peanut butter, make a cream cheese swirl: 4 oz softened cream cheese, 1/4 cup sugar, 1 egg yolk, and 1/2 teaspoon vanilla. Mix until smooth, then drizzle and swirl the same way. The tanginess of the cream cheese cuts through the chocolate in a completely different way. It’s less sweet, more sophisticated, and the spiderweb effect is even more pronounced because the cream cheese is white.
Add a Crunch. Before baking, sprinkle a handful of chopped peanuts or chocolate chips over the top. The peanuts add a salty crunch that plays off the soft, fudgy brownie. I did this for a Halloween movie night and everyone kept asking what the “secret ingredient” was. It’s that simple.
Serving & Storage Suggestions
These brownies are best served at room temperature or slightly warm. If you’re serving them at a party, I like to arrange them on a black or orange platter to lean into the Halloween theme. A dusting of powdered sugar on top (right before serving) makes them look even more festive — it looks like a light frost settled on the spiderwebs.
For a full dessert spread, pair these with vanilla ice cream or a tall glass of cold milk. The creaminess of the ice cream or milk balances the rich, fudgy brownie perfectly. I’ve also served them alongside a warm caramel sauce for dipping, and that was a huge hit. If you’re feeling extra, drizzle some caramel over the top and add a sprinkle of flaky sea salt. Trust me.
Storage: Store leftover brownies in an airtight container at room temperature for up to 4 days. I layer them with parchment paper between each layer so the peanut butter swirls don’t stick together. Do not refrigerate them — the fridge dries out brownies and makes them crumbly. If you need to keep them longer, freeze them.
Freezing: These freeze beautifully. Once the brownies are completely cool, wrap the entire block (or individual squares) tightly in plastic wrap, then in aluminum foil. Freeze for up to 3 months. To thaw, let them sit at room temperature for about 30 minutes. The peanut butter swirl will look just as good as the day you made them. I often make a double batch in October and freeze one batch for Thanksgiving or Christmas parties. They’re always a hit.
Reheating: If you want that just-baked warmth, pop an individual brownie in the microwave for 10-15 seconds. It softens the chocolate and makes the peanut butter slightly gooey again. Don’t overdo it, or the brownie will become tough.
The flavors actually develop and deepen after a day. The peanut butter melds with the chocolate, and the texture becomes even more fudgy. So if you can stand to wait, these are even better on day two.
Nutritional Information & Benefits
Let’s be real — these are brownies. They’re a treat, not a health food. But that doesn’t mean they can’t have some redeeming qualities. Here’s a rough estimate per brownie (based on 16 servings):
- Calories: Approximately 220-250 per brownie
- Fat: 12-14g
- Carbohydrates: 28-32g
- Protein: 4-5g
- Sugar: 18-22g
The peanut butter adds a small amount of protein and healthy fats, which helps balance the sugar rush a little. Peanut butter also contains vitamin E, magnesium, and potassium. The chocolate (especially if you use dark chocolate mix) provides antioxidants. So while I wouldn’t call these “healthy,” they’re not completely empty calories either.
For dietary considerations: these are not gluten-free unless you use a gluten-free mix. They contain dairy (in the brownie mix and potentially in the peanut butter, depending on the brand). They obviously contain peanuts. If you have allergies, the cream cheese variation I mentioned earlier is a great peanut-free alternative.
My approach to treats like this is simple: enjoy them in moderation, savor every bite, and don’t stress about the numbers. Halloween comes once a year. Life is too short to skip brownies.
Conclusion
These Easy Spiderweb Peanut Butter Brownies have become my signature Halloween contribution, and I honestly don’t see that changing anytime soon. They’re the perfect combination of impressive and effortless — the kind of recipe that makes people think you spent hours in the kitchen when you really just stirred a box mix and dragged a toothpick through some peanut butter. That’s my favorite kind of recipe.
I love that this recipe came from a random conversation with a neighbor who probably never expected me to remember his advice. It reminds me that good ideas can come from anywhere — a crumpled napkin, a quiet afternoon, a person you’ve passed a hundred times without really seeing. So if you make these, I hope they bring you a little of that same unexpected joy. And if you figure out a new variation or a better technique, I’d love to hear about it. Leave a comment below and tell me how yours turned out. Did you try the cream cheese version? Did your kids freak out over the spiderweb design? Did you burn the first batch like I did? (No judgment, honestly. It happens.)
Go make some brownies. Halloween is waiting.
Frequently Asked Questions
Can I use homemade brownie batter instead of a box mix?
Absolutely! If you have a favorite from-scratch brownie recipe, use it. Just make sure the batter is thick enough to support the peanut butter swirl — thin batters will cause the peanut butter to sink. I’ve used my go-to fudgy brownie recipe with great results. Just adjust the baking time as needed.
Why did my spiderweb design disappear after baking?
This usually happens for one of two reasons: your peanut butter mixture was too thin (add more powdered sugar next time) or you over-swirled with the toothpick. Remember, one outward drag and one inward drag per line is enough. Going over the same lines multiple times blends the peanut butter into the batter.
Can I make these ahead of time for a party?
Yes, and I actually recommend it. These brownies taste even better the next day. Make them the night before, let them cool completely, and store them in an airtight container at room temperature. Cut them just before serving for the cleanest edges.
Can I use crunchy peanut butter instead of creamy?
You can, but the texture will be different. The peanut pieces can make the swirl look bumpy and less defined. If you only have crunchy, try blending it in a food processor for a few seconds to break down the pieces, or just embrace the rustic look. It’ll still taste great.
How do I get clean cuts without smearing the spiderweb?
Use a sharp, thin-bladed knife and wipe it clean with a damp paper towel between each cut. Let the brownies cool completely before cutting — this is non-negotiable. For the absolute cleanest cuts, chill the brownies in the refrigerator for 15 minutes before slicing. Just let them come back to room temperature before serving.
Pin This Recipe!
Easy Spiderweb Peanut Butter Brownies: Best Halloween Treat
Fudgy chocolate brownies topped with a creamy peanut butter swirl that mimics a spiderweb. This easy Halloween treat uses a boxed mix and a simple toothpick technique for an impressive look with minimal effort.
- Prep Time: 10 minutes
- Cook Time: 30 minutes
- Total Time: 40 minutes
- Yield: 16 servings 1x
- Category: Dessert
- Cuisine: American
Ingredients
- 1 box (18.4 oz) brownie mix (Ghirardelli or Duncan Hines recommended)
- 2 large eggs, room temperature
- 1/2 cup vegetable oil
- 1/4 cup water
- 1/2 cup creamy peanut butter (Jif or Skippy recommended)
- 1/4 cup powdered sugar
- 1/2 teaspoon vanilla extract (optional)
- Optional: 1/4 cup chocolate chips or chopped peanuts for garnish
Instructions
- Preheat your oven to 350°F (175°C). Line an 8×8 inch baking pan with parchment paper, leaving about 2 inches of overhang on two opposite sides.
- In a mixing bowl, combine the brownie mix, eggs, oil, and water. Stir until just combined (about 30-40 strokes). Do not overmix.
- Pour the batter into the prepared pan and spread evenly. Tap the pan gently on the counter to release air bubbles.
- In a small microwave-safe bowl, combine the peanut butter, powdered sugar, and vanilla extract. Microwave for 20-30 seconds, then stir until smooth and slightly runny.
- Using a spoon, drizzle the peanut butter mixture over the brownie batter in a spiral pattern, starting from the center and working outward in 4-5 concentric circles.
- Take a toothpick and starting from the center of the spiral, drag it outward toward the edge of the pan. Repeat every inch around the circle to create 8-12 radiating lines. Then, drag from the edge back toward the center between each line to create the web pattern. Work quickly.
- Bake for 28-32 minutes, until a toothpick inserted into the center comes out with a few moist crumbs (not wet batter).
- Cool in the pan on a wire rack for at least 30 minutes. Then lift the entire block out using the parchment overhang and transfer to a cutting board. Cool completely before cutting (about another 30 minutes).
- Use a sharp knife to cut into squares. Wipe the knife clean between cuts for clean edges. Cut into 16 small squares or 9 larger squares.
Notes
Do not over-swirl the peanut butter—one outward drag and one inward drag per line is enough. Use a toothpick, not a knife, for delicate web lines. Let the peanut butter mixture cool for about a minute after microwaving before drizzling so it doesn’t sink into the batter. Check brownies at the earliest suggested baking time as ovens vary. Cool completely before cutting to avoid smearing the web. These taste even better the next day.
Nutrition
- Serving Size: 1 brownie (based on
- Calories: 235
- Sugar: 20
- Sodium: 180
- Fat: 13
- Saturated Fat: 3
- Carbohydrates: 30
- Fiber: 1
- Protein: 4.5
Keywords: Halloween brownies, spiderweb brownies, peanut butter brownies, easy Halloween dessert, fudgy brownies, box mix brownies, spiderweb design, Halloween treat