I watched my neighbor across the hall, an older woman named Rosa, carefully pressing almond slices into pretzel dough one October afternoon. She didn’t say anything at first. Then she looked up and smiled, her flour-dusted hands moving with a rhythm that came from decades of holiday baking. “For my grandchildren,” she said simply, pointing to the witchy little fingers taking shape on her baking sheet. I had been struggling with what to make for a Halloween gathering—something that felt festive but also genuinely good to eat, not just another bag of store-bought candy. Rosa handed me a piece of dough without asking and showed me how to shape the knuckles. Honestly, I was intimidated at first. My first few attempts looked more like sad little worms than witch fingers. But Rosa just laughed and said, “That’s the thing about Halloween—imperfect is part of the charm.” I mean, she wasn’t wrong. The whole experience felt less like a formal recipe transfer and more like an invitation into someone’s cozy kitchen ritual. And that’s exactly what these Cozy Witch’s Finger Pretzel Rods with Almond Nails have become for me. They’re not scary—they’re silly, warm, and somehow comforting in that slightly macabre Halloween way. Maybe you’ve been there, standing in the kitchen wondering if you can make something that feels both festive and homemade without spending hours on something complicated. These pretzel rods are the answer. They taste like soft, buttery pretzels with a hint of salt, and that almond “nail” at the tip adds the perfect crunch. Every time I make them now, I think of Rosa’s flour-dusted hands and the way she treated a stranger like an old friend.
Why You’ll Love This Recipe
Let me tell you why these witchy pretzel rods have become my go-to Halloween treat. I’ve tested this recipe about four times now—yes, I ate a lot of pretzels that week—and each batch got better. Here’s what makes them special:
- Quick & Easy: Comes together in under 45 minutes, including baking time. Perfect for last-minute Halloween parties or a fun afternoon project with kids.
- Simple Ingredients: You likely have everything in your pantry right now. No weird specialty items or expensive decorations needed.
- Perfect for Halloween: Great for classroom treats, office parties, or a cozy night in watching spooky movies. They’re festive without being overwhelmingly sweet.
- Crowd-Pleaser: Kids love the creepy finger shape, and adults appreciate that they’re not loaded with sugar. I’ve seen grown-ups sneak three at a party.
- Unbelievably Delicious: The combination of soft, salty pretzel with that crunchy almond tip is honestly addictive. The texture contrast is next-level comfort food.
What makes this recipe different from other Halloween treats? It’s the technique. Instead of using pre-made breadsticks or cookie dough, we’re making a proper pretzel dough that bakes up soft and chewy. The baking soda bath gives them that authentic pretzel flavor and deep golden color. Plus, the almond “nails” aren’t just for show—they toast slightly during baking and add this wonderful nutty crunch that balances the salt. This isn’t just another version of a spooky snack. It’s the kind of treat that makes people smile. It’s comfort food reimagined for Halloween—cozy, a little creepy, and completely satisfying. Perfect for impressing guests without stress, or turning a simple October evening into something memorable.
What Ingredients You Will Need
This recipe uses simple, wholesome ingredients to create that signature pretzel flavor and satisfying texture. Most of these are pantry staples, which is exactly what you want when Halloween sneaks up on you.
- All-purpose flour (3 cups / 360g) – The backbone of our dough. I’ve tested this with bread flour too, and it works, but all-purpose gives the softest, most tender crumb for these witchy fingers.
- Active dry yeast (1 packet / 2 ¼ teaspoons) – Gives the pretzels that airy, chewy texture. Make sure your yeast is fresh—check the expiration date before you start.
- Warm water (1 cup / 240ml, about 110°F) – Not too hot, not too cold. If it feels warm on your wrist like baby bottle temperature, you’re good.
- Granulated sugar (1 tablespoon) – Feeds the yeast and adds a tiny hint of sweetness to balance the salt.
- Unsalted butter (2 tablespoons, melted) – Adds richness and tenderness to the dough. I use Kerrygold for its flavor, but any unsalted butter works.
- Salt (1 teaspoon) – For the dough itself. Don’t skip this—pretzels need salt to taste right.
- Baking soda (⅓ cup for the bath) – This is what gives pretzels their distinctive dark, shiny crust. Do not skip this step.
- Water for bath (8 cups / 2 liters) – You’ll boil the shaped pretzels briefly before baking. This sets the crust.
- Egg wash (1 egg beaten with 1 tablespoon water) – Gives them that beautiful glossy finish. You could use milk instead, but egg wash gives the best shine.
- Coarse sea salt (for sprinkling) – The big, flaky kind is best. I use Maldon sea salt flakes for their texture and clean taste.
- Whole almonds (24-30, one for each pretzel rod) – These become the “fingernails.” Look for raw almonds, not roasted, so they toast evenly in the oven.
- Optional: Red food coloring or paprika (for tinting the “nail bed”) – Adds extra creepiness. I’ve used both and prefer a tiny drop of red gel coloring mixed with a bit of water.
For the almond nails, I recommend Blue Diamond whole almonds for their consistent size. You want almonds that are roughly the same shape—oval and slightly pointed on one end. If your almonds are too round, they won’t look as much like fingernails. Also, look for almonds that aren’t split or broken, because they need to stay intact during baking.
Equipment Needed
You don’t need fancy equipment for these witchy pretzel rods, which is part of why I love this recipe. Here’s what you’ll need:
- Large mixing bowl – For mixing and kneading the dough. A glass or ceramic bowl works best because it holds warmth.
- Wooden spoon or dough whisk – For mixing the initial dough. I prefer a wooden spoon because it feels more rustic.
- Clean kitchen surface – For kneading. A lightly floured countertop is perfect.
- Large pot (at least 4 quarts) – For the baking soda bath. Don’t use aluminum—it can react with the baking soda and give the pretzels a metallic taste.
- Slotted spoon or spider strainer – For lifting the pretzels out of the boiling water bath. A spider strainer is my favorite because it drains well.
- Baking sheets (2 large) – Line them with parchment paper or silicone baking mats. Silicone mats are non-stick and reusable.
- Pastry brush – For applying egg wash. A silicone brush is easiest to clean.
- Sharp knife or bench scraper – For cutting the dough into portions. A bench scraper is also great for cleaning your work surface.
- Kitchen timer – Crucial for the boiling step. Two minutes per batch, no more.
If you don’t have a spider strainer, a regular slotted spoon works fine. I’ve also used tongs in a pinch, though they can sometimes squeeze the pretzels. And if you don’t have parchment paper, you can grease the baking sheets lightly with butter or oil. Silicone baking mats are worth the investment if you bake often—they make cleanup so much easier.
Preparation Method
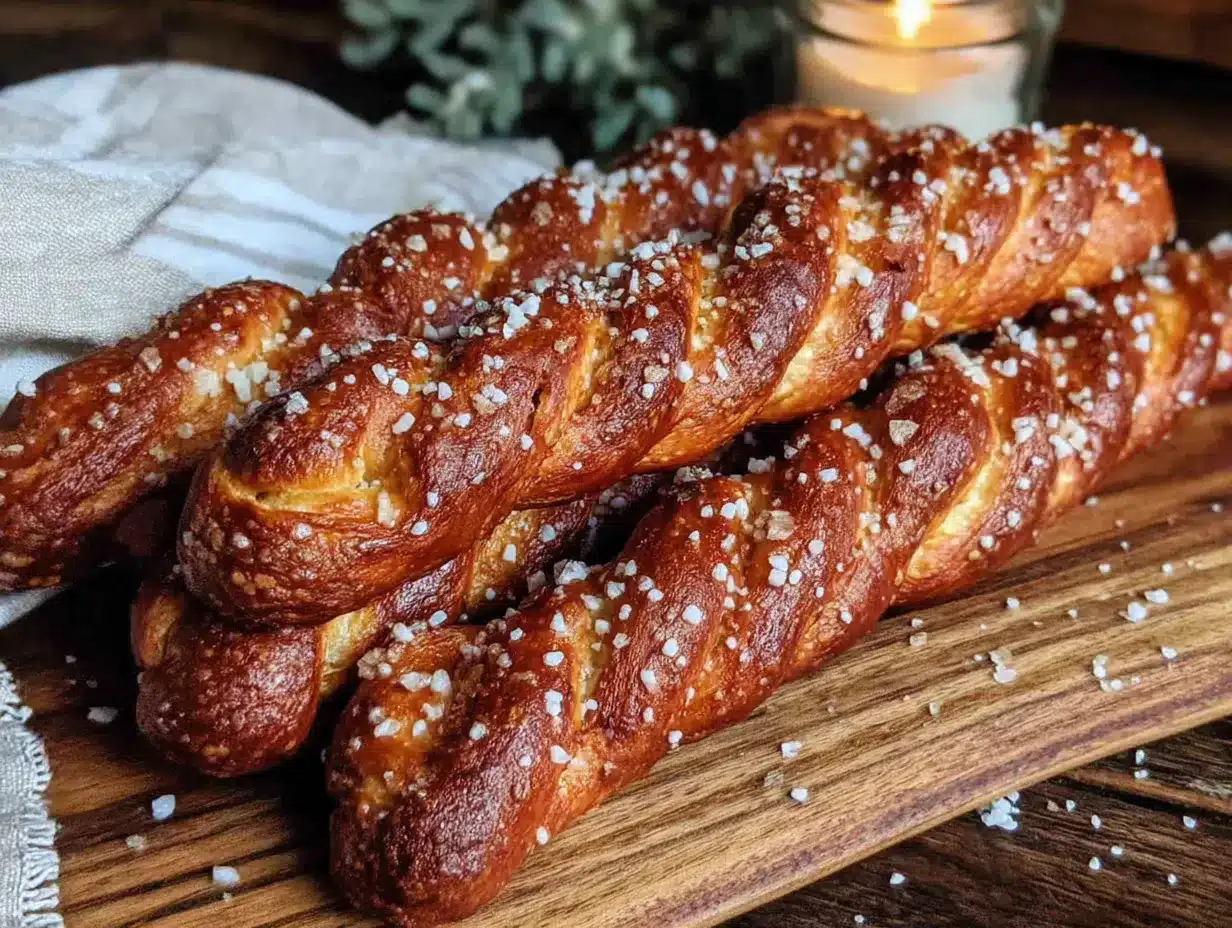
Let me walk you through this step by step. I’ve made these about eight times now, so I’ve learned a few tricks along the way.
- Activate the yeast: In your large mixing bowl, combine the warm water (about 110°F) and sugar. Sprinkle the yeast on top and let it sit for 5-7 minutes until it gets foamy. If it doesn’t foam, your yeast might be dead—start over with fresh yeast. I learned this the hard way on my second attempt.
- Make the dough: Add the melted butter, salt, and 2 cups of flour to the yeast mixture. Stir with your wooden spoon until combined. Gradually add the remaining flour, ½ cup at a time, until the dough pulls away from the sides of the bowl. It should be slightly sticky but manageable.
- Knead the dough: Turn the dough onto a lightly floured surface. Knead for 6-8 minutes, pushing the dough away from you with the heel of your hand, then folding it back toward you. The dough should become smooth and elastic. If it’s too sticky, add a little more flour—but not too much, or the pretzels will be dense.
- First rise: Place the dough in a lightly oiled bowl, cover with a clean kitchen towel, and let it rise in a warm spot for about 45 minutes, or until doubled in size. I usually put mine in the microwave (not turned on) with a cup of hot water next to it. The steam and warmth help the dough rise beautifully.
- Shape the fingers: Punch down the risen dough and turn it onto a clean surface. Divide the dough into 24-30 equal pieces—I use a bench scraper and aim for pieces about the size of a walnut. Roll each piece into a rope about 4-5 inches long. Make one end slightly thicker (the base of the finger) and taper the other end (the fingertip). Using a sharp knife, make 2-3 shallow cuts across the “knuckle” area of each finger. This is where the creepy factor comes in. Don’t cut too deep—just enough to create the illusion of knuckles.
- Add the almond nails: Press one whole almond firmly into the tapered end of each finger. The pointed end of the almond should face outward, like a fingernail. Push it in about ¼ inch so it stays put during boiling and baking. If you’re using red food coloring, dip the tip of each almond in a tiny bit of diluted red coloring before pressing it in—this creates a creepy “nail bed” effect.
- Prepare the baking soda bath: Bring 8 cups of water to a boil in your large pot. Carefully add the ⅓ cup of baking soda—it will bubble up dramatically, so be ready. Reduce the heat to a gentle simmer. This bath is what gives pretzels their signature crust and dark color.
- Boil the pretzels: Working in batches of 4-5 fingers at a time, gently lower the shaped pretzels into the simmering water bath. Let them boil for 30 seconds on each side (60 seconds total). Use your slotted spoon to flip them carefully. The longer they boil, the chewier and darker they’ll be. I prefer 30 seconds per side for a softer pretzel texture. Remove with the slotted spoon and place on your parchment-lined baking sheets, spacing them about 2 inches apart.
- Apply egg wash and salt: In a small bowl, beat the egg with 1 tablespoon of water. Brush each boiled pretzel finger with the egg wash—this gives them that gorgeous golden shine. Sprinkle generously with coarse sea salt. Don’t be shy with the salt; it’s what makes pretzels taste like pretzels.
- Bake: Preheat your oven to 400°F (200°C). Bake the pretzel fingers for 12-15 minutes, or until they’re deep golden brown. The almonds should be lightly toasted and fragrant. Keep an eye on them during the last few minutes—oven temperatures vary, and you don’t want burnt almonds.
- Cool and serve: Let the pretzel fingers cool on the baking sheets for 5 minutes, then transfer to a wire rack. They’re best served warm, but they’re still delicious at room temperature. The texture will be soft and chewy on the inside with a slightly crisp exterior.
Cooking Tips & Techniques
After making these several times, I’ve collected some tips that will save you from my early mistakes. Trust me, I’ve made them all.
Don’t skip the baking soda bath. I tried skipping it once because I was in a hurry, and the result was pale, sad breadsticks that tasted nothing like pretzels. The bath is non-negotiable. It chemically alters the surface of the dough, creating that dark, shiny crust and distinctive flavor. You can substitute baking soda with food-grade lye for an even more authentic pretzel crust, but baking soda is safer and easier for home bakers.
Watch your water temperature. If the water is too hot (above 120°F), it will kill the yeast. Too cold, and the yeast won’t activate. I use an instant-read thermometer, but if you don’t have one, the water should feel warm but not hot on your wrist—like a comfortable bath. I once used water that was too hot and ended up with dense, flat pretzels. Lesson learned.
Keep the dough covered. While you’re shaping individual fingers, cover the remaining dough with a damp towel or plastic wrap. Pretzel dough dries out quickly, and dry dough is harder to shape and cracks during boiling. I learned this when my fourth batch of fingers all split open in the water bath.
Don’t overcrowd the boiling water. Boiling too many fingers at once lowers the water temperature and can cause them to stick together. Four to five at a time is perfect. Give them space to float and move around.
Timing is everything. Boil for exactly 30 seconds per side. Any longer, and the pretzels become tough and overly salty. Any shorter, and they won’t develop that proper pretzel crust. Set a timer—I promise you’ll forget otherwise.
Multitask wisely. While the dough is rising, prepare your baking sheets, measure your salt, and set up your boiling station. This makes the final steps much smoother. I like to line my baking sheets while the dough rises so I’m not scrambling later.
Variations & Adaptations
One of the best things about this recipe is how adaptable it is. Here are some variations I’ve tried and loved.
Gluten-Free Version: Substitute the all-purpose flour with a 1:1 gluten-free baking flour blend that contains xanthan gum. The dough will be stickier and harder to shape, so keep your hands lightly oiled. The texture won’t be exactly the same—a bit more delicate—but they’re still delicious. I recommend King Arthur’s Measure for Measure blend for best results.
Savory Herb Fingers: Add 1 teaspoon of garlic powder and 1 teaspoon of dried rosemary to the flour mixture. Before baking, sprinkle the pretzels with everything bagel seasoning instead of coarse salt. These are amazing with beer cheese dip. I made these for a Halloween party and they disappeared before the sweet treats.
Sweet Cinnamon Sugar Version: Skip the salt on top and brush the baked pretzels with melted butter, then roll them in a mixture of cinnamon and sugar. The almond nails still work here—the combination of sweet cinnamon and nutty almond is surprisingly good. These are more dessert than snack, perfect for a Halloween movie night.
Cheesy Witch Fingers: Add ½ cup of finely grated Parmesan cheese to the flour mixture. The cheese adds a savory depth that pairs beautifully with the salt. You could also sprinkle a little extra cheese on top before baking. These are dangerously addictive.
Spicy Kick: Add ½ teaspoon of cayenne pepper and 1 teaspoon of smoked paprika to the dough. The heat builds slowly and complements the salt and almond perfectly. I tried this on a whim and now it’s my husband’s favorite version.
For any variation, the basic technique stays the same—the boiling bath and baking time remain unchanged. Just adjust the flavor additions and toppings as desired.
Serving & Storage Suggestions
These pretzel fingers are best served warm, straight from the oven. The contrast between the soft, chewy interior and the crunchy almond nail is at its peak when they’re fresh. Arrange them on a platter with the “fingers” pointing in different directions for maximum creepiness. I like to serve them with a small bowl of spicy mustard or cheese dip in the center—the red or orange color adds to the Halloween vibe.
For a full Halloween spread, pair them with a warm bowl of pumpkin soup or a pot of chili. They also go wonderfully with a crisp apple cider or a dark beer for the adults. If you’re hosting a party, make a double batch—trust me, one batch disappears fast.
Storage: Store leftover pretzel fingers in an airtight container at room temperature for up to 2 days. Do not refrigerate them—the fridge dries out the pretzels and makes them tough. I learned this when I tried to save some for the next day and ended up with sad, hard breadsticks.
Reheating: To revive day-old pretzels, wrap them in a damp paper towel and microwave for 15-20 seconds. This steams them back to softness. Alternatively, reheat them in a 300°F oven for 5-7 minutes. Avoid the microwave without the damp towel—it makes them rubbery.
Freezing: You can freeze the unbaked, shaped pretzel fingers before the boiling step. Place them on a baking sheet in the freezer until solid, then transfer to a freezer bag. When ready to bake, boil them directly from frozen (add 10 seconds per side) and bake as directed. I’ve done this successfully for last-minute Halloween gatherings.
One note: the almond nails can soften slightly after a day of storage. If you’re making these ahead for a party, I recommend baking them the morning of the event for the best texture.
Nutritional Information & Benefits
Here’s the approximate nutritional breakdown for one pretzel finger (based on 24 servings):
| Nutrient | Amount per serving |
|---|---|
| Calories | 95 |
| Total Fat | 3g |
| Saturated Fat | 1g |
| Cholesterol | 10mg |
| Sodium | 380mg |
| Total Carbohydrates | 14g |
| Dietary Fiber | 1g |
| Sugars | 1g |
| Protein | 3g |
These pretzel fingers offer a few surprising health benefits. Almonds are rich in vitamin E, magnesium, and healthy monounsaturated fats that support heart health. The whole wheat flour alternative (if you choose to substitute half the all-purpose flour) adds fiber and B vitamins. Plus, because they’re baked (not fried), they’re lower in fat than many Halloween treats.
Dietary considerations: This recipe contains gluten, dairy (butter), eggs, and tree nuts (almonds). For a dairy-free version, substitute the butter with coconut oil or vegan butter. For an egg-free version, brush the pretzels with milk or melted butter instead of egg wash—the shine won’t be as pronounced, but they’ll still taste great.
From a wellness perspective, I love that these are a savory alternative to the sugar overload typical of Halloween. They satisfy that craving for something indulgent without sending you into a sugar crash. Plus, making them with kids is a wonderful way to spend a cozy October afternoon—the process is as rewarding as the eating.
Conclusion
These Cozy Witch’s Finger Pretzel Rods with Almond Nails have become my signature Halloween treat, and I think they deserve a spot in your fall baking rotation too. They’re fun without being fussy, creepy without being gross, and genuinely delicious in a way that most Halloween treats aren’t. Whether you’re making them for a party, a classroom, or just a cozy night in with a spooky movie, they deliver every time.
I love that this recipe came from a simple conversation with a neighbor—proof that the best recipes often come from unexpected places. Rosa probably has no idea that her casual lesson turned into something I make every October, but I think about her every time I press an almond into the dough. That’s the magic of cooking, isn’t it? A small moment of connection becomes a tradition.
Now I want to hear from you. Did your witch fingers turn out delightfully creepy? Did you try any fun variations? Drop a comment below and share your photos—I love seeing how different bakers interpret the same recipe. And if you enjoyed this post, share it with a friend who needs a little Halloween magic in their kitchen. Happy baking, and remember: the more imperfect your fingers look, the more authentic they are!
Frequently Asked Questions
Can I make these without yeast?
Yes, but the texture will be different. You can substitute the yeast and warm water with 1½ cups of self-rising flour and ¾ cup of buttermilk. The pretzels will be denser and more like biscuits, but they’ll still taste good. The baking soda bath is still necessary for the pretzel flavor.
Why did my pretzels turn out pale?
This usually happens for one of two reasons: you didn’t boil them long enough, or your baking soda bath wasn’t alkaline enough. Make sure you’re using fresh baking soda (check the expiration date) and boil for at least 30 seconds per side. If they’re still pale, try adding 1 tablespoon of brown sugar to the dough—it helps with browning.
Can I use sliced almonds instead of whole almonds?
You can, but they won’t look as much like fingernails. Sliced almonds are thinner and tend to break or curl during baking. If you only have sliced almonds, press two or three slices together to create a larger “nail” shape. They won’t be as stable, but they’ll still look creepy.
How do I keep the almond nails from falling off?
Press the almond firmly into the dough—about ¼ inch deep—before boiling. The boiling process helps seal the almond in place. If you’re still having trouble, brush a tiny bit of egg wash under the almond before pressing it in. This acts like glue during baking.
Can I make these ahead of time?
Absolutely. You can prepare the dough and shape the fingers up to the boiling step, then refrigerate them covered for up to 24 hours. Boil and bake them just before serving. Alternatively, freeze the unbaked, shaped fingers as described in the storage section. I often make a double batch and freeze half for later.
Pin This Recipe!

Cozy Witch’s Finger Pretzel Rods – Easy Halloween Treat

These Cozy Witch’s Finger Pretzel Rods with Almond Nails are a fun, festive, and delicious Halloween treat. They taste like soft, buttery pretzels with a hint of salt and a crunchy almond ‘nail’ at the tip, perfect for parties or a cozy night in.
- Prep Time: 20 minutes
- Cook Time: 15 minutes
- Total Time: 1 hour 20 minutes (including rising time)
- Yield: 24-30 servings 1x
- Category: Appetizer / Snack
- Cuisine: American
Ingredients
- 3 cups all-purpose flour (360g)
- 1 packet active dry yeast (2 ¼ teaspoons)
- 1 cup warm water (240ml, about 110°F)
- 1 tablespoon granulated sugar
- 2 tablespoons unsalted butter, melted
- 1 teaspoon salt
- ⅓ cup baking soda (for the bath)
- 8 cups water (2 liters, for the bath)
- 1 egg (for egg wash, beaten with 1 tablespoon water)
- Coarse sea salt (for sprinkling)
- 24–30 whole almonds (raw, one for each pretzel rod)
- Optional: Red food coloring or paprika (for tinting the ‘nail bed’)
Instructions
- Activate the yeast: In a large mixing bowl, combine warm water (about 110°F) and sugar. Sprinkle yeast on top and let sit for 5-7 minutes until foamy.
- Make the dough: Add melted butter, salt, and 2 cups of flour to the yeast mixture. Stir until combined. Gradually add remaining flour, ½ cup at a time, until dough pulls away from the sides of the bowl. It should be slightly sticky but manageable.
- Knead the dough: Turn dough onto a lightly floured surface. Knead for 6-8 minutes until smooth and elastic. Add more flour if too sticky, but not too much.
- First rise: Place dough in a lightly oiled bowl, cover with a clean kitchen towel, and let rise in a warm spot for about 45 minutes, or until doubled in size.
- Shape the fingers: Punch down risen dough and turn onto a clean surface. Divide into 24-30 equal pieces (walnut-sized). Roll each piece into a rope about 4-5 inches long, making one end slightly thicker (base) and tapering the other (fingertip). Use a sharp knife to make 2-3 shallow cuts across the ‘knuckle’ area of each finger.
- Add the almond nails: Press one whole almond firmly into the tapered end of each finger, pointed end outward, about ¼ inch deep. Optionally, dip almond tip in diluted red food coloring before pressing.
- Prepare the baking soda bath: Bring 8 cups of water to a boil in a large pot. Carefully add ⅓ cup baking soda (it will bubble up). Reduce heat to a gentle simmer.
- Boil the pretzels: Working in batches of 4-5 fingers, gently lower shaped pretzels into simmering water. Boil for 30 seconds per side (60 seconds total). Remove with slotted spoon and place on parchment-lined baking sheets, spacing 2 inches apart.
- Apply egg wash and salt: Beat egg with 1 tablespoon water. Brush each boiled pretzel finger with egg wash. Sprinkle generously with coarse sea salt.
- Bake: Preheat oven to 400°F (200°C). Bake for 12-15 minutes until deep golden brown and almonds are lightly toasted.
- Cool and serve: Let cool on baking sheets for 5 minutes, then transfer to a wire rack. Serve warm or at room temperature.
Notes
Don’t skip the baking soda bath—it gives pretzels their signature crust and flavor. Keep dough covered while shaping to prevent drying. Boil exactly 30 seconds per side for best texture. For variations, see blog content (gluten-free, savory herb, sweet cinnamon sugar, cheesy, spicy). Store at room temperature for up to 2 days; reheat with a damp paper towel in microwave for 15-20 seconds.
Nutrition
- Serving Size: 1 pretzel finger
- Calories: 95
- Sugar: 1
- Sodium: 380
- Fat: 3
- Saturated Fat: 1
- Carbohydrates: 14
- Fiber: 1
- Protein: 3
Keywords: Halloween, pretzel rods, witch fingers, almond nails, easy treat, festive, savory snack


