There used to be a tiny, red-checkered-tablecloth diner called Mabel’s on Route 9 that made a green bean casserole that ruined me for all others. When Mabel retired and the diner became a parking lot for a chain pharmacy, I honestly felt a little pang of grief. I mean, it sounds dramatic to mourn a casserole, but you know that feeling when a perfect dish just disappears from the world? After twelve tries — some were watery, one was a salt bomb, and let’s not talk about the mushroom paste incident — I finally got it. This is the one. The creamy, from-scratch version that tastes like Mabel never left. It’s the dish I now bring to every Thanksgiving and potluck, and honestly, it gets more attention than the turkey. I had to share it with you because no one should have to rely on a can of soup to get that deep, savory, creamy flavor. This is the real deal, and it’s worth every minute you spend in the kitchen.
Why You’ll Love This Recipe
Let’s be honest, the classic green bean casserole is a potluck staple, but it often falls flat. This version is different. It’s the one that makes people ask for the recipe before they’ve even finished their first helping. I’ve tested this for years, tweaking the cream sauce and the crispy topping until it was absolutely perfect for a crowd.
- Made Completely from Scratch: No canned soups or processed onion rings here. You control the ingredients, which means you control the incredible flavor. It tastes cleaner, fresher, and so much more satisfying.
- Unbelievably Creamy, Not Gluey: The secret is a velvety homemade béchamel sauce with fresh mushrooms and a touch of cream. It coats every bean perfectly without being heavy or pasty. It’s comfort food at its finest.
- The Ultimate Crowd-Pleaser for Hosting: This dish is a showstopper at any gathering. It’s the first thing to disappear from the buffet table, and it pairs beautifully with a honey glazed ham or a classic roast turkey. It’s the side dish that steals the show.
- Can Be Prepped Ahead for Stress-Free Hosting: You can assemble this casserole a day before your guests arrive. Just pop it in the oven when you’re ready. This is a lifesaver when you’re trying to get a whole meal on the table without losing your mind.
- Perfectly Balanced Texture: You get that satisfying crunch from the homemade shallot topping, the tender-crisp bite of fresh green beans, and the luscious, creamy sauce in every single forkful.
This isn’t just a side dish. It’s the kind of recipe that makes you close your eyes after the first bite. It’s nostalgic, but better. It’s the dish you’ll be proud to set on your holiday table or bring to a friend’s house, knowing you’ve made something truly special.
What Ingredients You Will Need
This recipe uses simple, wholesome ingredients to build layers of deep, savory flavor. You likely have most of these in your pantry, which makes it even better for last-minute hosting emergencies.
For the Creamy Mushroom Sauce
- 2 tablespoons unsalted butter: This is the base of our roux and adds a rich, nutty flavor. I prefer using European-style butter like Kerrygold for its higher fat content, which makes the sauce silkier.
- 8 ounces cremini mushrooms, sliced: These have a deeper, earthier flavor than white button mushrooms. Don’t skip them! They are the heart of the sauce. (You can use white mushrooms if that’s what you have.)
- 1 small yellow onion, finely chopped: About 1 cup. It adds a savory sweetness that builds the foundation of the sauce.
- 3 cloves garlic, minced: Fresh garlic is non-negotiable here. It adds a pungent, aromatic kick that powder just can’t match.
- 3 tablespoons all-purpose flour: This thickens the sauce. Use a gluten-free all-purpose blend if you need to make this gluten-free.
- 1 ½ cups low-sodium chicken or vegetable broth: Low-sodium is key so you can control the salt level. The broth adds a savory depth that water or milk alone can’t provide.
- 1 cup heavy cream: This is what makes it truly creamy and luxurious. For a lighter version, you can use half-and-half, but the sauce won’t be quite as rich.
- ½ cup sour cream: This adds a subtle tang and extra creaminess that balances the richness of the heavy cream. It’s my secret ingredient.
- 1 teaspoon dried thyme: Thyme and mushrooms are a classic pairing. It adds an earthy, slightly floral note.
- ½ teaspoon smoked paprika: This adds a subtle smokiness and a beautiful warm color to the sauce.
- Salt and freshly ground black pepper to taste: Don’t be shy with the pepper. It really wakes up the flavors.
For the Green Beans & Casserole Assembly
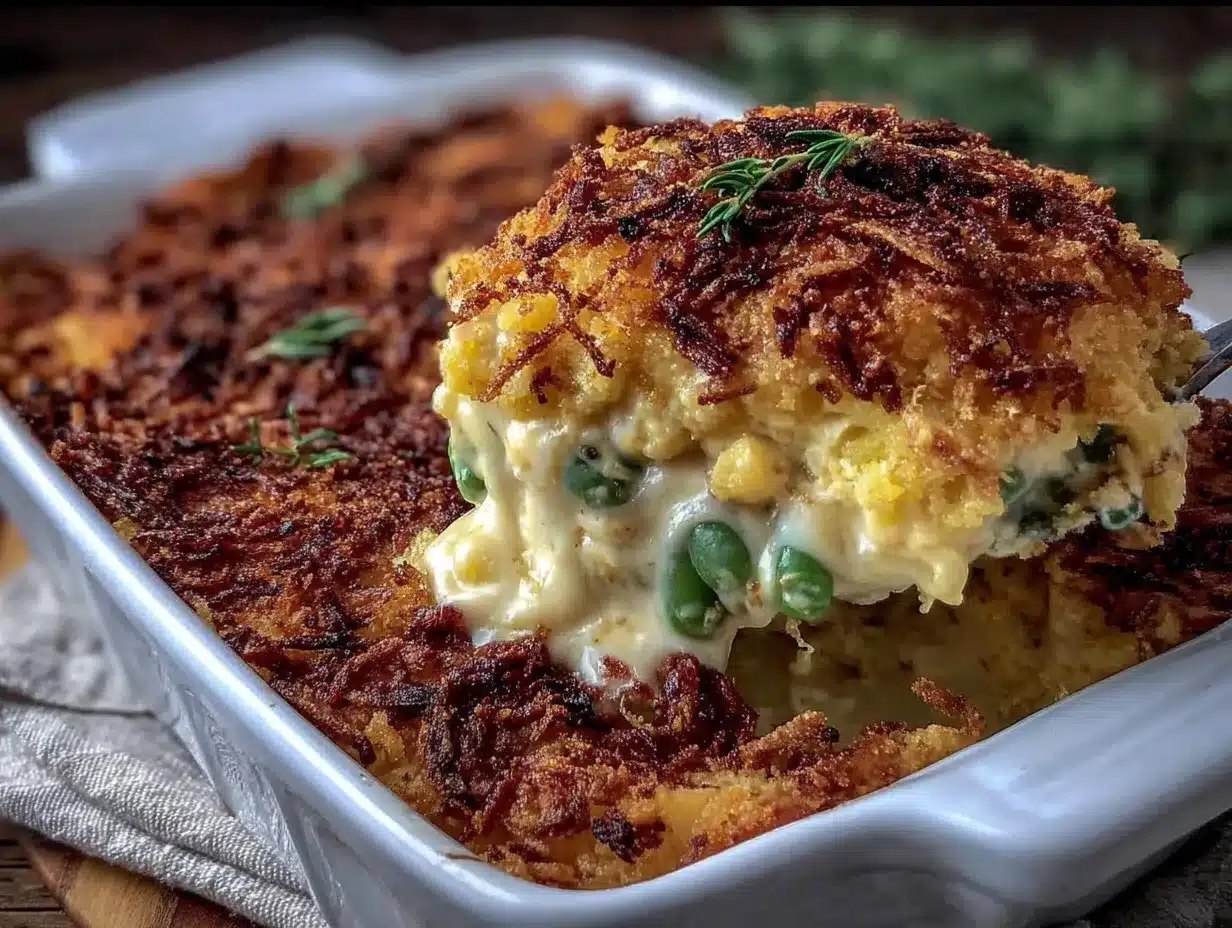
- 2 pounds fresh green beans, trimmed and cut into 2-inch pieces: Fresh is non-negotiable for the best texture. Canned or frozen will become mushy. Look for bright, crisp beans with no blemishes.
- ½ cup grated Parmesan cheese: This is optional, but I love how it adds a salty, nutty umami to the casserole. Add it to the sauce just before mixing in the beans.
For the Homemade Crispy Shallot Topping
- 3 large shallots, thinly sliced into rings: Shallots are sweeter and more delicate than onions, making them perfect for this job. They crisp up beautifully.
- ½ cup all-purpose flour: For dredging the shallots. You can use a gluten-free blend here too.
- ½ teaspoon salt: For seasoning the flour.
- ¼ teaspoon cayenne pepper (optional): A tiny pinch adds a wonderful warmth that doesn’t make the dish spicy, just more complex.
- Vegetable or canola oil for frying: You need about 1 inch of oil in your pan. Use a neutral oil with a high smoke point.
Equipment Needed
You don’t need a professional kitchen to pull this off, but having the right tools makes the process so much smoother. Here’s what you’ll need:
- Large Pot: For blanching the green beans. A 6-quart pot works perfectly.
- Large Skillet or Sauté Pan: A 12-inch skillet with high sides is ideal for making the mushroom sauce.
- 9×13-inch Baking Dish: This is the standard size for serving a crowd. You can also use a 3-quart casserole dish.
- Medium Bowl: For tossing the shallots with the flour mixture.
- Small Skillet or Saucepan: For frying the shallots. A 2-quart saucepan works well.
- Slotted Spoon or Spider Strainer: Essential for removing the crispy shallots from the hot oil.
- Paper Towels: For draining the fried shallots.
- Chef’s Knife and Cutting Board: For prepping all your vegetables.
If you don’t have a deep-fry thermometer, don’t worry. Just drop a small piece of shallot into the oil; if it sizzles immediately, the oil is ready. I’ve used the same cast-iron skillet for years for this job, and it works like a charm.
Preparation Method
Alright, let’s get cooking. This recipe has a few steps, but I promise they are all worth it. The key is to work efficiently and taste as you go.
- Blanch the Green Beans: Bring a large pot of generously salted water to a rolling boil. Add the trimmed green beans and cook for exactly 3-4 minutes. You want them to be bright green and tender-crisp, not soft. Immediately drain them and plunge them into a large bowl of ice water to stop the cooking process. This is called “shocking” them. Once they are cool, drain them well and pat them dry with a clean kitchen towel. Set them aside.
- Make the Crispy Shallot Topping: While the beans are cooling, start the topping. In a medium bowl, whisk together the flour, salt, and cayenne pepper. Toss the thinly sliced shallots in the flour mixture until they are completely separated and coated. Shake off any excess flour. In a small saucepan, heat about 1 inch of vegetable oil to 350°F (175°C). Working in batches to avoid crowding the pan, fry the shallots for 2-3 minutes, stirring occasionally, until they are a deep golden brown. They will darken slightly after you remove them from the oil. Use a slotted spoon to transfer them to a plate lined with paper towels to drain. Season immediately with a pinch of salt. Let them cool completely; they will get crunchier as they cool.
- Sauté the Aromatics: In your large skillet, melt the 2 tablespoons of butter over medium-high heat. Once it’s foaming, add the sliced cremini mushrooms. Cook, without stirring too much, for 5-7 minutes until they release their moisture and start to brown. You want a nice golden sear on them for maximum flavor. Add the chopped onion and cook for another 3-4 minutes until softened and translucent. Stir in the minced garlic and cook for just 30 seconds until fragrant.
- Build the Creamy Sauce: Sprinkle the 3 tablespoons of flour over the mushroom mixture. Stir constantly for 1-2 minutes to cook out the raw flour taste. This is your roux. Slowly pour in the chicken broth while whisking continuously to prevent lumps. Bring the mixture to a simmer, and it will start to thicken. Whisk in the heavy cream and sour cream until the sauce is smooth and velvety. Reduce the heat to low.
- Season the Sauce: Stir in the dried thyme, smoked paprika, and a generous amount of salt and black pepper. Taste it! This is your chance to adjust the seasoning. If you are using the Parmesan cheese, stir it in now until melted. The sauce should be rich, savory, and incredibly creamy. If it seems too thick, you can add a splash more broth or milk.
- Combine and Assemble: Preheat your oven to 350°F (175°C). Add the blanched and dried green beans to the skillet with the mushroom sauce. Gently fold everything together until the beans are fully coated. Pour the mixture into your greased 9×13-inch baking dish and spread it into an even layer.
- Bake and Top: Bake the casserole, uncovered, for 20-25 minutes until it is hot and bubbly around the edges. The sauce will be thick and luscious. Remove it from the oven and immediately sprinkle the homemade crispy shallots all over the top. Serve hot.
Cooking Tips & Techniques
I’ve made this casserole more times than I can count, and I’ve learned a few things the hard way. Here are my best tips to make sure yours is perfect every single time.
- Don’t Overcook the Green Beans: The blanching step is crucial. If you cook them too long, they will become mushy in the oven. You want them to still have a bit of a snap. The 3-4 minute blanch is perfect. Shocking them in ice water stops the cooking immediately.
- Get a Good Sear on the Mushrooms: This is where a ton of flavor comes from. Don’t crowd the pan, and don’t stir them constantly. Let them sit and develop a nice, brown crust. If you stir too much, they will steam and release water instead of browning.
- Low and Slow for the Crispy Shallots: Frying shallots at too high a heat will burn them before they get crispy. Keep the oil at a steady 350°F. And don’t skip the step of salting them right after they come out of the oil – it makes a huge difference.
- Make-Ahead Magic: This is a game-changer for hosting. You can prepare the casserole completely (steps 1-6) up to 24 hours in advance. Just cover it and store it in the refrigerator. When you’re ready to bake, you might need to add 10-15 minutes to the baking time since it will be cold from the fridge. Make the crispy shallots fresh on the day you serve them, or they will lose their crunch.
- Taste and Adjust: The amount of salt and pepper you need will depend on your broth and your personal preference. Always taste the sauce before you add the beans. It should be well-seasoned because the beans will soak up some of that flavor.
Variations & Adaptations
One of the best things about this recipe is how easily it adapts. Here are a few ways I’ve tweaked it over the years to suit different crowds and diets.
- Add Some Protein: For a main dish casserole, I’ve added about 2 cups of shredded rotisserie chicken or cooked, crumbled bacon to the mix. It makes it a hearty, one-dish meal that’s perfect for a cozy weeknight dinner.
- Make it Gluten-Free: It’s incredibly easy. Just swap the all-purpose flour in the sauce for a 1:1 gluten-free flour blend (like Bob’s Red Mill), and use a gluten-free all-purpose blend for the crispy shallots. The texture and flavor are virtually identical.
- Vegan Version: I’ve made this for vegan friends with great success. Use a high-quality vegan butter, replace the heavy cream with full-fat coconut cream (the kind in a can), and use a vegan sour cream. The coconut flavor is very subtle and actually pairs beautifully with the mushrooms.
- Add a Crunchy Nut Topping: For extra texture and a nutty flavor, I sometimes mix ½ cup of chopped pecans or sliced almonds into the crispy shallot topping before sprinkling it on the casserole. Toast the nuts in a dry pan first for the best flavor.
- Spice It Up: If you like a little heat, add a finely chopped jalapeño to the mushroom mixture when you sauté the onions, or add a pinch of red pepper flakes to the cream sauce. It gives the dish a wonderful warmth.
Serving & Storage Suggestions
This casserole is built for a crowd, and it’s even better when you have a plan for leftovers. Here’s how to serve and store it like a pro.
Serving: Serve this casserole hot, straight from the oven. The contrast between the hot, creamy sauce and the cold, crunchy topping is what makes it so special. It’s the perfect side dish for your classic roast turkey at Thanksgiving, but it also shines alongside a crispy garlic chicken or a juicy steak. I like to set it out in a nice baking dish and let people help themselves. For presentation, I sometimes garnish the top with a few fresh thyme sprigs or a sprinkle of fresh parsley right before serving.
Storage: Leftovers can be stored in an airtight container in the refrigerator for up to 4 days. The casserole will thicken as it sits, which is totally normal. The biggest challenge is that the crispy shallots will lose their crunch. I recommend storing them separately from the casserole if you have leftovers. Simply reheat the casserole and add fresh crispy shallots right before serving.
Reheating: The best way to reheat this is in the oven. Place the casserole in a 350°F oven for 15-20 minutes, or until it is heated through. You can also microwave individual portions, but the texture of the sauce will be a little less creamy. If the sauce seems too thick when reheating, just stir in a splash of milk or broth before warming it up.
Freezing: You can freeze the assembled (but unbaked) casserole for up to 3 months. Wrap the dish tightly in plastic wrap and then a layer of aluminum foil. Thaw it in the refrigerator overnight before baking. Do not add the crispy shallot topping until after it’s been baked, or they will become soggy.
Nutritional Information & Benefits
While this is definitely a comfort food dish, it’s made with real, whole ingredients that offer some nutritional benefits. Here’s a quick look at what you’re getting in a serving.
| Nutrient | Amount per Serving |
|---|---|
| Calories | 290 |
| Total Fat | 19g |
| Saturated Fat | 11g |
| Cholesterol | 55mg |
| Sodium | 480mg |
| Total Carbohydrates | 22g |
| Dietary Fiber | 4g |
| Sugars | 6g |
| Protein | 8g |
Note: These values are estimates and can vary based on specific ingredients used.
The star ingredient here is, of course, the green beans. They are an excellent source of vitamins A, C, and K, as well as fiber. The mushrooms provide B vitamins and are a great source of antioxidants. Using from-scratch ingredients allows you to control the sodium and avoid the preservatives found in canned soups. It’s a dish you can feel good about serving to your family, even on a holiday.
Conclusion
I hope you give this recipe a try. It’s more than just a side dish; it’s a little piece of culinary history, recreated in your own kitchen. The first time I made this for a holiday dinner, my brother-in-law, who swore he hated green bean casserole, asked for seconds. That’s the power of cooking from scratch. It transforms something ordinary into something unforgettable. Don’t be afraid to make it your own. Add a little extra garlic, swap the thyme for rosemary, or pile on the crispy shallots. The best recipes are the ones you adapt to your own taste. I can’t wait to hear how it turns out for you. Leave a comment below and let me know if this became the new star of your holiday table! Happy cooking!
Frequently Asked Questions
Can I use frozen green beans instead of fresh?
You can, but I really don’t recommend it for this recipe. Fresh green beans have a much better texture. Frozen beans tend to release a lot of water as they cook, which can make your casserole watery and the beans mushy. If you are in a pinch, thaw them completely and pat them very dry before using.
How do I make the crispy shallots stay crunchy?
The key is to fry them until they are a deep golden brown and then let them cool completely on a paper towel-lined plate. They will continue to crisp up as they cool. Also, make sure you don’t add them to the casserole until right before you serve it. If you add them too early, they will absorb moisture from the sauce and become soft.
Can I make this casserole dairy-free?
Yes, absolutely. Use a good quality vegan butter, replace the heavy cream with full-fat canned coconut milk or a barista-style oat milk (which is creamier), and use a dairy-free sour cream. The flavor will be slightly different, but it will still be incredibly creamy and delicious.
Why did my sauce turn out lumpy?
Lumpy sauce usually happens when the flour isn’t cooked into the butter properly, or when you add the liquid too quickly. Make sure you whisk the flour into the butter and cook it for a full minute before adding any liquid. Then, pour the broth in slowly while whisking constantly. If you still get lumps, you can use an immersion blender to smooth it out right in the pot.
Can I double this recipe for a larger crowd?
Absolutely! This recipe doubles beautifully. Just use a larger baking dish (like a 12×17-inch roasting pan) and increase the baking time by about 10-15 minutes. You will also need to fry the shallots in batches to ensure they get evenly crispy. It’s the perfect recipe for a big holiday gathering.
Pin This Recipe!

Best Creamy Green Bean Casserole Recipe from Scratch

This from-scratch green bean casserole features a velvety homemade mushroom sauce, fresh green beans, and a crispy shallot topping. It’s the ultimate crowd-pleaser for holidays and potlucks, with a rich, savory flavor that beats any canned version.
- Prep Time: 30 minutes
- Cook Time: 25 minutes
- Total Time: 55 minutes
- Yield: 8 servings 1x
- Category: Side Dish
- Cuisine: American
Ingredients
- 2 tablespoons unsalted butter
- 8 ounces cremini mushrooms, sliced
- 1 small yellow onion, finely chopped (about 1 cup)
- 3 cloves garlic, minced
- 3 tablespoons all-purpose flour
- 1 ½ cups low-sodium chicken or vegetable broth
- 1 cup heavy cream
- ½ cup sour cream
- 1 teaspoon dried thyme
- ½ teaspoon smoked paprika
- Salt and freshly ground black pepper to taste
- 2 pounds fresh green beans, trimmed and cut into 2-inch pieces
- ½ cup grated Parmesan cheese (optional)
- 3 large shallots, thinly sliced into rings
- ½ cup all-purpose flour (for dredging)
- ½ teaspoon salt (for dredging)
- ¼ teaspoon cayenne pepper (optional)
- Vegetable or canola oil for frying
Instructions
- Blanch the Green Beans: Bring a large pot of generously salted water to a rolling boil. Add the trimmed green beans and cook for exactly 3-4 minutes until bright green and tender-crisp. Immediately drain and plunge into a large bowl of ice water to stop the cooking. Once cool, drain well and pat dry with a clean kitchen towel. Set aside.
- Make the Crispy Shallot Topping: In a medium bowl, whisk together ½ cup flour, ½ teaspoon salt, and ¼ teaspoon cayenne pepper. Toss the thinly sliced shallots in the flour mixture until completely separated and coated. Shake off excess flour. In a small saucepan, heat about 1 inch of vegetable oil to 350°F (175°C). Working in batches, fry the shallots for 2-3 minutes, stirring occasionally, until deep golden brown. Use a slotted spoon to transfer to a plate lined with paper towels to drain. Seas…
- Sauté the Aromatics: In a large skillet, melt 2 tablespoons butter over medium-high heat. Add the sliced cremini mushrooms and cook, without stirring too much, for 5-7 minutes until they release moisture and start to brown. Add the chopped onion and cook for 3-4 minutes until softened. Stir in the minced garlic and cook for 30 seconds until fragrant.
- Build the Creamy Sauce: Sprinkle 3 tablespoons flour over the mushroom mixture. Stir constantly for 1-2 minutes to cook out the raw flour taste. Slowly pour in the chicken broth while whisking continuously to prevent lumps. Bring to a simmer and let thicken. Whisk in the heavy cream and sour cream until smooth and velvety. Reduce heat to low.
- Season the Sauce: Stir in the dried thyme, smoked paprika, and a generous amount of salt and black pepper. Taste and adjust seasoning. If using Parmesan cheese, stir it in now until melted. If the sauce seems too thick, add a splash more broth or milk.
- Combine and Assemble: Preheat oven to 350°F (175°C). Add the blanched and dried green beans to the skillet with the mushroom sauce. Gently fold until the beans are fully coated. Pour the mixture into a greased 9×13-inch baking dish and spread into an even layer.
- Bake and Top: Bake the casserole, uncovered, for 20-25 minutes until hot and bubbly around the edges. Remove from the oven and immediately sprinkle the homemade crispy shallots all over the top. Serve hot.
Notes
For make-ahead: Assemble the casserole (steps 1-6) up to 24 hours in advance, cover, and refrigerate. Add 10-15 minutes to baking time if baking from cold. Make the crispy shallots fresh on the day of serving to maintain crunch. For gluten-free: use a 1:1 gluten-free flour blend in the sauce and for the shallots. For vegan: use vegan butter, full-fat coconut cream, and vegan sour cream.
Nutrition
- Serving Size: 1 serving (about 1 c
- Calories: 290
- Sugar: 6
- Sodium: 480
- Fat: 19
- Saturated Fat: 11
- Carbohydrates: 22
- Fiber: 4
- Protein: 8
Keywords: green bean casserole, from scratch, creamy, holiday side dish, Thanksgiving, potluck, crispy shallots, homemade


