I swore I didn’t need another Halloween dessert. Three autumns ago, standing in my tiny kitchen with a cracked mixing bowl and a bag of candy corn I’d bought on impulse, I had this stubborn idea that sugar cookies were just for December and that holiday baking should stay in its lane. Then my friend Margot texted me a photo of these bars she’d made for her son’s class party, and I found myself at her door an hour later with a Tupperware container and zero shame.
Let me tell you, I was ready to be unimpressed. Halloween treats tend to be all show and no substance, you know? Lots of frosting, creepy decorations, but the cookie itself is usually dry or bland. But these bars? The first bite had this unexpected softness, like the perfect intersection between a sugar cookie and a birthday cake. The orange buttercream hit me with that bright, citrusy zing that somehow made total sense for October.
I stood there in her doorway, eating a second bar before I’d even said hello properly. She just laughed. “Told you.”
Maybe you’ve been there, rolling your eyes at yet another holiday recipe that promises the world but delivers a crumbly mess. Honestly, I get it. But these bars are different. They’re the kind of recipe that makes you close your eyes after the first bite and forget you’re standing in someone’s doorway with frosting on your chin. I’ve made them every October since, and they’ve never let me down.
Why You’ll Love This Recipe
Let’s be real for a second. Halloween baking can feel like a lot of work for something the kids will inhale in thirty seconds flat. Between carving pumpkins, sorting costumes, and answering the doorbell every five minutes, who has time for complicated cookie decorating?
- Quick & Easy: These bars come together in under an hour, including cooling time. No rolling, no cutting, no individual cookie shaping. Just press the dough into a pan and bake.
- Simple Ingredients: You probably have everything in your pantry right now. Butter, sugar, flour, eggs, vanilla, and a few drops of orange extract. No weird specialty items.
- Perfect for Halloween Parties: Whether it’s a classroom celebration, a trunk-or-treat event, or a spooky movie night, these bars travel well and feed a crowd.
- Crowd-Pleaser: Kids love the fun colors and sprinkles. Adults love that it actually tastes like a real dessert, not just a sugar bomb.
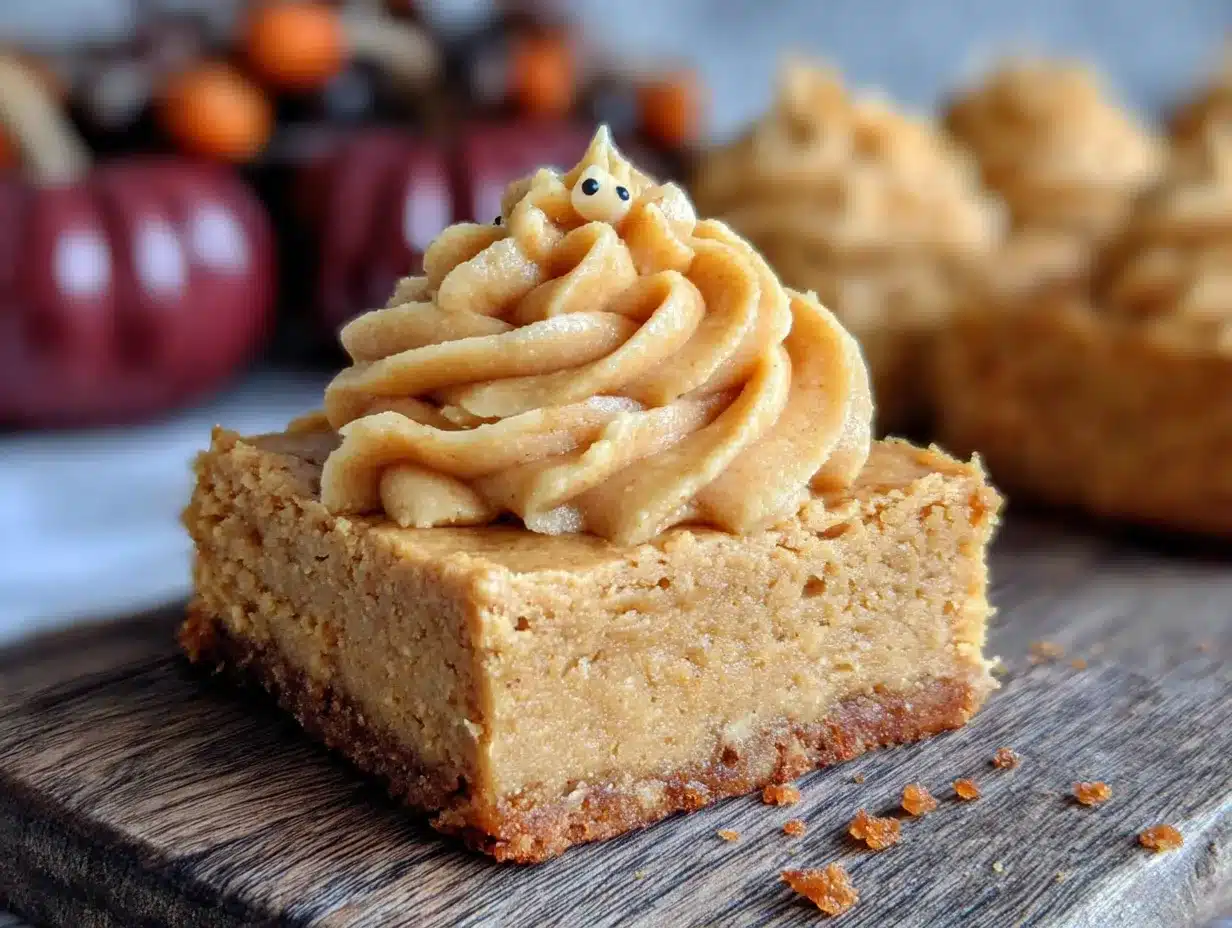
- Unbelievably Delicious: The texture is the real star here. Soft, tender, almost cake-like, with that creamy orange buttercream on top. It’s comfort food with a Halloween twist.
What makes these different from every other Halloween cookie recipe out there? It’s the orange buttercream, honestly. Most holiday frostings are just butter and powdered sugar with food coloring slapped on. This one has real orange flavor that cuts through the sweetness and makes everything taste fresh and bright. I tested this recipe four times before I got the orange-to-sweet ratio perfect, and let me tell you, it was worth every sticky batch.
This isn’t just another Halloween dessert. It’s the one that makes people ask for the recipe before they’ve even swallowed their first bite. It’s the kind of bar you’ll find yourself making in November too, just because you have leftover sprinkles and a hankering for something cheerful.
What Ingredients You Will Need
This recipe uses simple, everyday ingredients to create something that tastes way more impressive than it should. Here’s what you’ll need to gather before you start:
For the Sugar Cookie Bars
- 1 cup (2 sticks) unsalted butter, softened to room temperature (I use Land O’Lakes for consistent results)
- 1 ½ cups granulated sugar
- 2 large eggs, room temperature
- 2 teaspoons vanilla extract
- 3 cups all-purpose flour, spooned and leveled (don’t scoop directly from the bag or you’ll end up with dry bars)
- 1 teaspoon baking powder
- ½ teaspoon baking soda
- ½ teaspoon salt
- ¼ cup sour cream, room temperature (this is the secret to the soft texture)
For the Orange Buttercream
- 1 cup (2 sticks) unsalted butter, softened
- 4 cups powdered sugar, sifted if you have the patience
- 2 tablespoons heavy cream (or whole milk in a pinch)
- 1 teaspoon orange extract (I prefer McCormick or LorAnn for the strongest flavor)
- 1 tablespoon fresh orange zest (from about one medium orange)
- 1-2 drops orange food coloring (optional, but it makes it look so festive)
- Pinch of salt
For Decoration
- Halloween sprinkles (I use the Wilton fall mix with pumpkins, ghosts, and orange jimmies)
- Orange sanding sugar (optional, for extra sparkle)
A quick note on the sour cream: don’t skip it. I know it seems random in a sugar cookie, but it adds moisture and a slight tang that balances the sweetness. If you’re dairy-free, you can use plain dairy-free yogurt instead, but the texture will be slightly less tender.
For the orange extract, make sure you’re using extract and not orange juice. Juice will make the frosting too thin and won’t give you that concentrated citrus punch. Trust me, I learned this the hard way when I tried to be clever and ended up with soupy frosting that wouldn’t hold its shape.
Equipment Needed
You don’t need fancy tools for this recipe, which is honestly my favorite thing about it. Here’s what you’ll want to have on hand:
- 9×13-inch baking pan (metal works best for even browning; glass will work but may need an extra 2-3 minutes)
- Parchment paper (for easy lifting and minimal cleanup)
- Electric hand mixer or stand mixer (you can do this by hand, but your arm will hate you by the end)
- Large mixing bowls (at least two)
- Rubber spatula (for scraping down the sides and spreading the dough)
- Measuring cups and spoons
- Cooling rack (or just use the stovetop grates in a pinch)
- Offset spatula (for spreading the frosting evenly, though a butter knife works fine)
- Microplane or zester (for the orange zest)
I’ve made these bars in a borrowed kitchen with a wooden spoon and a warped baking pan, and they still turned out great. Don’t let equipment hold you back. If you don’t have a 9×13 pan, you can use two 8×8 pans and adjust the baking time by about 5 minutes.
Preparation Method
Alright, let’s get to the good part. Here’s how to make these bars step by step, with all the little details I’ve learned from making them way too many times.
- Preheat your oven to 375°F (190°C). Line your 9×13-inch baking pan with parchment paper, leaving a little overhang on the long sides. This makes lifting the bars out so much easier later. Lightly grease the parchment with cooking spray or a swipe of butter.
- Cream the butter and sugar together. In a large mixing bowl, beat the softened butter and granulated sugar together on medium speed for about 3-4 minutes. You want it light, fluffy, and noticeably paler in color. Scrape down the sides of the bowl halfway through. Don’t rush this step, it’s where the texture starts to build.
- Add the eggs and vanilla. Crack in the eggs one at a time, beating well after each addition. Pour in the vanilla extract and beat until everything is smooth and combined. The mixture might look slightly curdled at this point, and that’s totally normal.
- Mix the dry ingredients separately. In a medium bowl, whisk together the flour, baking powder, baking soda, and salt. This ensures the leavening agents are evenly distributed so you don’t get weird puffy spots in your bars.
- Combine wet and dry ingredients. With the mixer on low speed, gradually add the flour mixture to the butter mixture. Mix until just combined. You’ll see a few streaks of flour remaining, and that’s perfect. Overmixing at this stage will make the bars tough.
- Fold in the sour cream. Add the sour cream and fold it in with a rubber spatula until the dough is smooth and uniform. The dough will be thick and slightly sticky, kind of like a soft playdough. That’s exactly what you want.
- Press the dough into the pan. Transfer the dough to your prepared baking pan. Use your hands or the spatula to press it into an even layer. I find that lightly wetting my fingers helps prevent sticking. Try to get the corners and edges as even as possible for uniform baking.
- Bake for 18-22 minutes. Place the pan in the preheated oven and bake until the edges are lightly golden and the center looks set. A toothpick inserted in the center should come out clean or with just a few moist crumbs. The top should be pale golden, not brown. If you overbake, the bars will be dry, so start checking at 18 minutes.
- Cool completely. Let the bars cool in the pan on a wire rack for about 10 minutes, then use the parchment overhang to lift them out onto the rack. Cool completely before frosting. This takes about 45 minutes to an hour. I know it’s tempting to frost while they’re warm, but the buttercream will just melt into a puddle and slide right off.
- Make the orange buttercream. While the bars are cooling, beat the softened butter in a clean bowl on medium speed for about 2 minutes until it’s smooth and creamy. Gradually add the powdered sugar, about 1 cup at a time, beating on low speed to avoid a powdered sugar cloud. Add the heavy cream, orange extract, orange zest, and a pinch of salt. Beat on medium-high for 2-3 minutes until light, fluffy, and spreadable. If it’s too thick, add another tablespoon of cream. Too thin, add a bit more powdered sugar.
- Frost and decorate. Once the bars are completely cool, spread the orange buttercream evenly over the top using your offset spatula. Add a few drops of orange food coloring if you want that vibrant Halloween orange. Sprinkle generously with Halloween sprinkles and sanding sugar while the frosting is still soft so they stick.
- Slice and serve. Let the frosted bars set for about 15 minutes before slicing. Cut into squares or rectangles. I get 24 bars from a 9×13 pan, but you can make them bigger or smaller depending on your crowd.
Cooking Tips & Techniques
I’ve made this recipe at least a dozen times, and I’ve definitely learned a few things the hard way. Here are the tips that will save you from my mistakes:
Room temperature ingredients matter. I know, everyone says this and it sounds like a fussy rule. But cold butter won’t cream properly, and cold eggs will make your batter seize up. Take everything out of the fridge 30 minutes before you start. If you forgot, microwave the butter for 10 seconds at a time until it’s soft but not melted, and place the eggs in a bowl of warm water for 5 minutes.
Don’t overbake. This is the most common mistake with cookie bars. They look underdone in the center when you pull them out, but they continue to cook from the residual heat in the pan. If the edges are golden and the center looks slightly soft, you’re done. Overbaked bars turn into sugar cookies that crumble when you try to cut them.
Let the bars cool completely. I cannot stress this enough. I once frosted warm bars because I was in a hurry for a party, and the buttercream slid right off in a sad orange puddle. If you’re short on time, you can speed up cooling by placing the pan in the refrigerator for 20 minutes.
Use a sharp knife for clean slices. A dull knife will drag through the frosting and make a mess. Run your knife under hot water, wipe it dry, then slice. Wipe the blade clean between cuts for picture-perfect bars.
Toast the orange zest. For a deeper, more aromatic orange flavor, try toasting the zest in a dry pan over low heat for about 30 seconds before adding it to the frosting. It sounds extra, but it brings out the oils and makes the citrus taste more complex.
Prep ahead. You can make the cookie base a day in advance and store it in the fridge, tightly covered. Let it come to room temperature before pressing into the pan and baking. The frosting can also be made ahead and stored in the fridge for up to 3 days. Just bring it to room temperature and re-whip before using.
Variations & Adaptations
One of the best things about this recipe is how easy it is to tweak. Here are some variations I’ve tried and loved:
Chocolate Sugar Cookie Bars. Replace ½ cup of the all-purpose flour with ½ cup of unsweetened cocoa powder. The chocolate base pairs beautifully with the orange buttercream. I made this version for a Halloween party last year, and it was gone in ten minutes.
Spiced Pumpkin Version. Swap the sour cream for ¼ cup of pumpkin puree and add 1 teaspoon of pumpkin pie spice to the dry ingredients. Use cream cheese frosting instead of orange buttercream for a fall-themed treat that works for Thanksgiving too.
Gluten-Free Adaptation. Use a 1:1 gluten-free baking flour blend. I’ve tested this with Bob’s Red Mill and King Arthur brands, and both worked well. Add an extra tablespoon of sour cream to compensate for the drier texture of gluten-free flours.
Lemon Buttercream Twist. Replace the orange extract and zest with lemon extract and lemon zest. The bright, tart flavor is perfect for spring or summer, but honestly, I make it year-round because it’s just that good.
Funfetti Style. Fold ½ cup of rainbow sprinkles into the cookie dough before pressing it into the pan. The sprinkles bleed a little during baking, creating a pretty confetti effect. Kids go absolutely wild for this version.
Mini Bars for Parties. Use two 8×8 pans and cut the bars into bite-sized squares. They’re perfect for potlucks or classroom treats where you want everyone to grab one without commitment.
Serving & Storage Suggestions
These bars are best served at room temperature, which lets the buttercream soften to that perfect creamy consistency. If you’ve refrigerated them, let them sit on the counter for about 20 minutes before serving.
For presentation, I like to arrange the bars on a white platter or a Halloween-themed cake stand. The orange frosting pops beautifully against a neutral background. Add a few candy corn pieces around the edges for extra visual interest.
These bars pair wonderfully with a cold glass of milk, a warm cup of apple cider, or even a pumpkin spice latte. For an adult gathering, they’re fantastic with a dark stout or a creamy chai tea.
Storage Instructions:
- Room temperature: Store in an airtight container for up to 3 days. Layer parchment paper between stacked bars to prevent the frosting from sticking.
- Refrigerator: These bars keep well in the fridge for up to a week. The texture stays soft, and the flavors actually meld together nicely overnight.
- Freezer: You can freeze unfrosted bars for up to 3 months. Wrap tightly in plastic wrap, then foil. Thaw overnight in the fridge, then frost before serving. Frosted bars can also be frozen, but the sprinkles may lose their crunch.
The flavors actually develop and deepen after a day in the fridge. I sometimes make these a day ahead on purpose because the orange buttercream gets even more aromatic and the cookie base becomes almost fudgy in texture. Just don’t tell anyone they’re day-old, they’ll never know.
Nutritional Information & Benefits
Let’s be honest, these are a treat, not a health food. But here’s the estimated breakdown per bar (based on 24 servings):
- Calories: 285
- Total Fat: 15g
- Saturated Fat: 9g
- Carbohydrates: 36g
- Sugar: 24g
- Protein: 3g
- Sodium: 120mg
On the bright side, the sour cream adds a small amount of calcium and probiotics, and the orange zest provides a tiny dose of vitamin C. The butter contains vitamin A, which is good for eye health. I mean, it’s a stretch, but we’re celebrating Halloween, not competing in a nutrition contest.
If you’re watching your sugar intake, you can reduce the sugar in the cookie base to 1 cup without affecting the texture too much. The frosting is harder to adjust, but you can use a sugar-free powdered sugar substitute if needed.
These bars contain dairy, eggs, and gluten. For a dairy-free version, use vegan butter and a dairy-free yogurt alternative. For egg-free, try a flax egg (1 tablespoon ground flaxseed mixed with 3 tablespoons water per egg).
Conclusion
These Halloween sugar cookie bars have become my go-to for every October gathering, and I don’t see that changing anytime soon. They’re simple enough for a Tuesday night baking session with the kids, but impressive enough to bring to the fanciest Halloween party. The orange buttercream is the unexpected star that keeps people coming back for seconds, and the soft, tender cookie base is exactly what you want in a bar dessert.
I love that this recipe doesn’t require any special cookie cutters, royal icing piping skills, or hours of decorating. It’s just good, honest baking that happens to look festive and taste incredible. The first time I made these, I ate three before I even put the sprinkles on. No regrets.
I’d love to hear how yours turn out! Did you try a variation? Did your kids help with the sprinkles? Drop a comment below and let me know. And if you’re looking for another easy treat, you might enjoy my pumpkin bread with cream cheese swirl or these no-bake chocolate peanut butter bars for when you don’t even want to turn on the oven.
Happy Halloween, and happy baking! May your buttercream be fluffy and your sprinkles be plentiful.
Frequently Asked Questions
Can I use store-bought frosting instead of making the orange buttercream?
You absolutely can, but I’d recommend adding a teaspoon of orange extract and some fresh zest to the store-bought frosting to give it that bright citrus flavor. Plain vanilla frosting works in a pinch, but the orange really makes these bars special.
Why did my cookie bars turn out dry?
The most common reason is overbaking. Start checking at 18 minutes, and remember that the bars continue to cook in the hot pan after you pull them out. Another culprit is overmeasuring the flour. Make sure you’re spooning the flour into your measuring cup and leveling it off, not scooping directly from the bag.
Can I make these bars ahead of time for a party?
Yes! You can bake the cookie base up to 2 days ahead and store it tightly wrapped at room temperature. Frost and decorate the day you plan to serve them for the freshest look and taste. The frosting can also be made 3 days ahead and stored in the fridge.
How do I get clean, neat slices?
Use a sharp chef’s knife and run it under hot water before each cut. Wipe the blade clean with a paper towel between slices. For the neatest results, chill the frosted bars in the refrigerator for 30 minutes before cutting. This firms up the frosting and prevents dragging.
Can I freeze these cookie bars?
Yes, but I recommend freezing them unfrosted. Wrap the cooled cookie base tightly in plastic wrap and then foil. It will keep for up to 3 months. Thaw overnight in the refrigerator, then bring to room temperature before frosting and decorating. If you freeze them already frosted, the sprinkles may lose their crunch and the frosting can develop ice crystals.
Pin This Recipe!
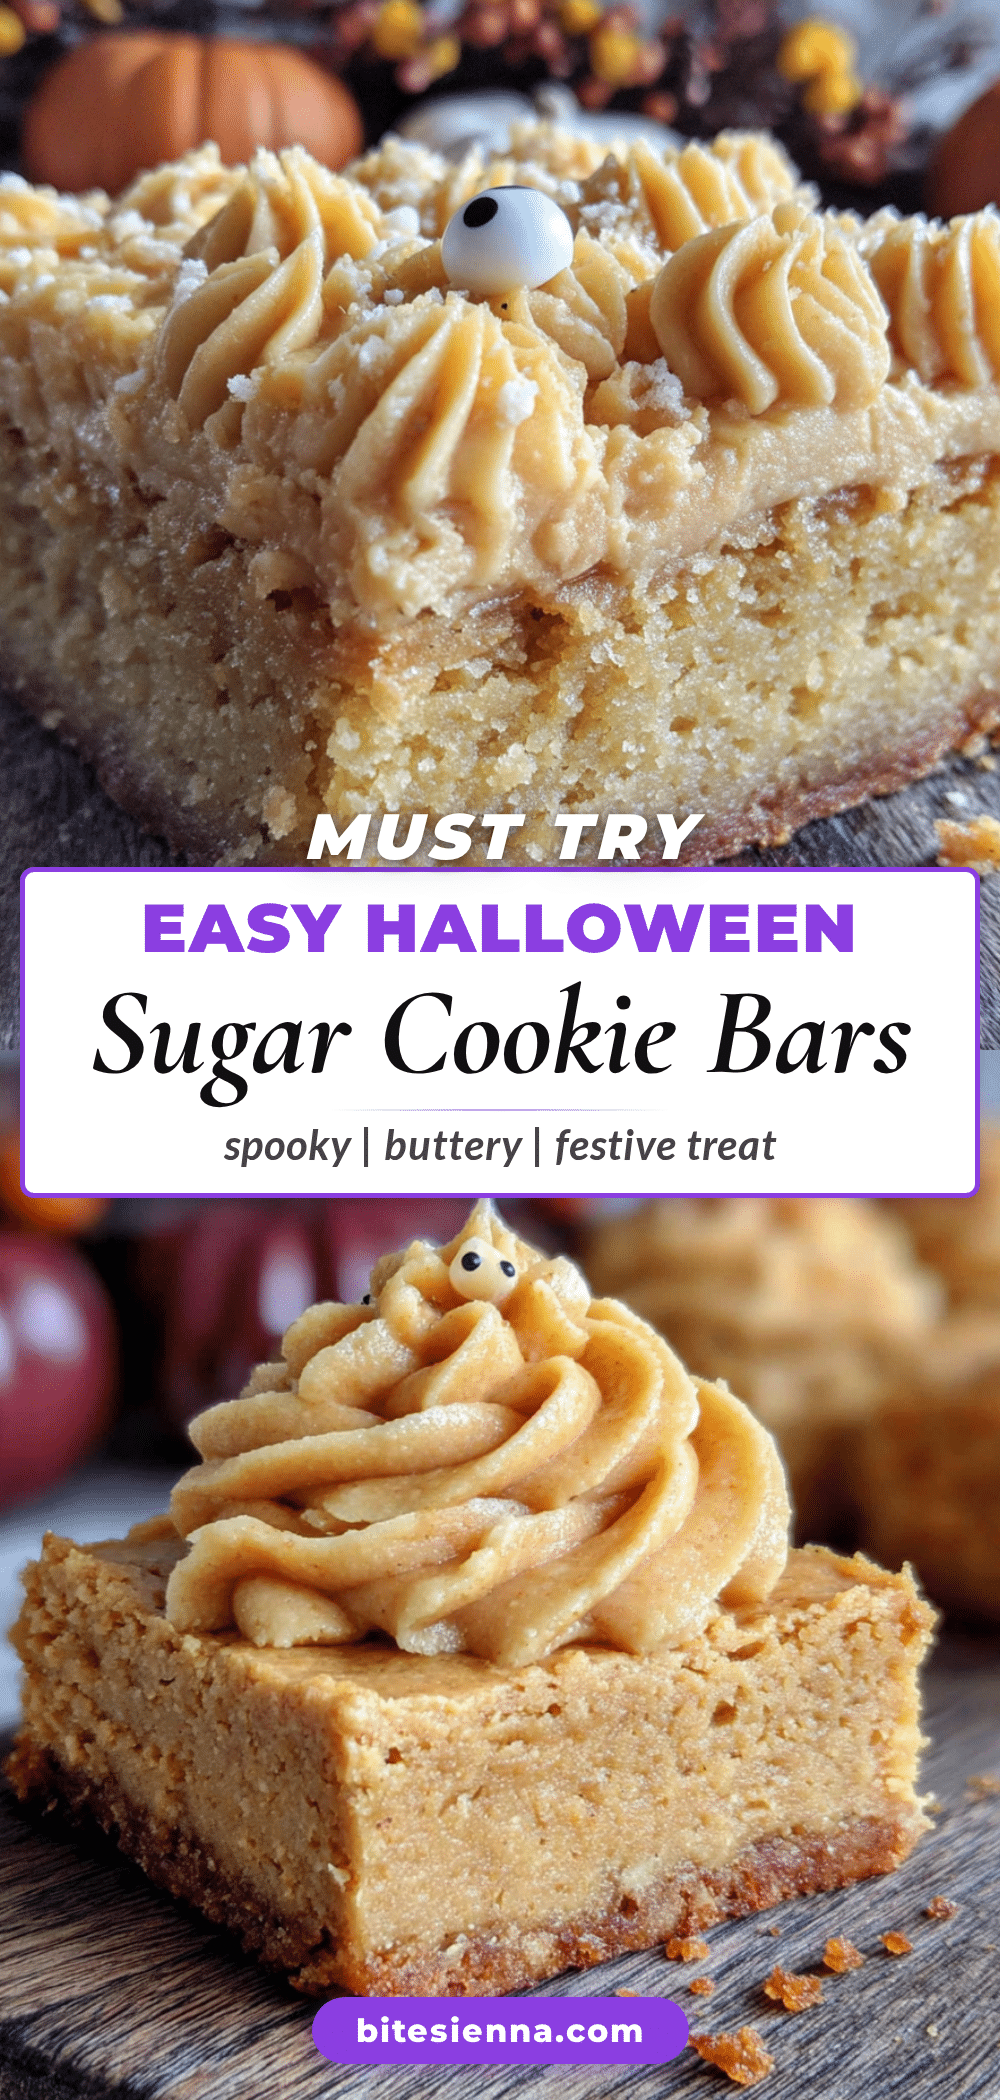
Best Easy Halloween Sugar Cookie Bars with Orange Buttercream
Soft, tender sugar cookie bars topped with a bright and creamy orange buttercream, perfect for Halloween parties and gatherings. Easy to make with simple ingredients and no rolling or cutting required.
- Prep Time: 20 minutes
- Cook Time: 20 minutes
- Total Time: 1 hour 25 minutes (including cooling)
- Yield: 24 servings 1x
- Category: Dessert
- Cuisine: American
Ingredients
- 1 cup (2 sticks) unsalted butter, softened
- 1 ½ cups granulated sugar
- 2 large eggs, room temperature
- 2 teaspoons vanilla extract
- 3 cups all-purpose flour, spooned and leveled
- 1 teaspoon baking powder
- ½ teaspoon baking soda
- ½ teaspoon salt
- ¼ cup sour cream, room temperature
- 1 cup (2 sticks) unsalted butter, softened (for frosting)
- 4 cups powdered sugar, sifted
- 2 tablespoons heavy cream
- 1 teaspoon orange extract
- 1 tablespoon fresh orange zest
- 1–2 drops orange food coloring (optional)
- Pinch of salt
- Halloween sprinkles (for decoration)
- Orange sanding sugar (optional, for decoration)
Instructions
- Preheat oven to 375°F (190°C). Line a 9×13-inch baking pan with parchment paper, leaving overhang on the long sides. Lightly grease the parchment.
- In a large bowl, beat softened butter and granulated sugar together on medium speed for 3-4 minutes until light, fluffy, and pale. Scrape down the sides.
- Add eggs one at a time, beating well after each. Add vanilla extract and beat until smooth.
- In a medium bowl, whisk together flour, baking powder, baking soda, and salt.
- With mixer on low, gradually add flour mixture to butter mixture. Mix until just combined (a few streaks of flour remain).
- Fold in sour cream with a rubber spatula until dough is smooth and thick (like soft playdough).
- Press dough evenly into prepared pan using lightly wet fingers or spatula.
- Bake for 18-22 minutes until edges are lightly golden and center is set. A toothpick inserted in center should come out clean or with a few moist crumbs.
- Cool in pan on wire rack for 10 minutes, then lift out using parchment and cool completely (about 45 minutes to 1 hour).
- For frosting: Beat softened butter on medium speed for 2 minutes until creamy. Gradually add powdered sugar, 1 cup at a time, on low speed. Add heavy cream, orange extract, orange zest, and salt. Beat on medium-high for 2-3 minutes until light and fluffy. Add food coloring if desired.
- Once bars are completely cool, spread frosting evenly over top. Sprinkle with Halloween sprinkles and sanding sugar while frosting is soft.
- Let frosted bars set for 15 minutes before slicing into squares (24 bars).
Notes
Room temperature ingredients are crucial for proper creaming. Don’t overbake; bars continue to cook from residual heat. Cool completely before frosting to prevent melting. For clean slices, use a sharp knife run under hot water and wiped clean between cuts. Bars can be stored at room temperature for up to 3 days, refrigerated for up to a week, or frozen unfrosted for up to 3 months.
Nutrition
- Serving Size: 1 bar
- Calories: 285
- Sugar: 24
- Sodium: 120
- Fat: 15
- Saturated Fat: 9
- Carbohydrates: 36
- Protein: 3
Keywords: Halloween sugar cookie bars, orange buttercream, easy Halloween dessert, cookie bars, fall baking, party dessert


