The woman at the next stall watched me fumbling with a wobbly pie tin, the crimped edges of my crust collapsing as I tried to transfer it to my carrier bag. She didn’t say anything at first. Then she reached under her table and pulled out a foil pan, perfectly square, and pressed a piece of paper into my hand. “Try it this way,” she said. “No wrestling with rolling pins. No cracked crusts.”
That was three autumns ago at the farmers’ market, and honestly, I’d been so focused on making the perfect traditional pumpkin pie that I’d completely missed the point. The woman—her name was Gloria, I learned later—had been making these pumpkin pie bars for her church bake sales for thirty years. She told me the graham cracker crust was her grandmother’s idea, a shortcut that turned into a signature. “Sometimes the best recipes come from letting go of the fuss,” she said, wiping her hands on her apron.
I’ll admit, I was skeptical at first. A bar? For Thanksgiving? But then I made them that weekend, and let me tell you—the first bite had me questioning everything I thought I knew about pumpkin desserts. The crust was buttery and sandy, nothing like the soggy bottom of a traditional pie. The filling was just as creamy, just as spiced, but somehow more substantial. More satisfying. And the edges? Those caramelized, slightly chewy edges became my new favorite part.
Maybe you’ve been there—standing in the kitchen, flour on your counter, wondering if the extra effort is really worth it for a dessert that’ll be gone in ten minutes. These pumpkin pie bars are the answer to that question. They’re the recipe that makes you wonder why you ever did it the hard way. And every time I make them, I think of Gloria, and how she handed me a better way to bake without making me feel silly for not knowing it.
Why You’ll Love This Recipe
Let me tell you why these pumpkin pie bars have become my go-to fall dessert, and why they might just become yours too. After testing this recipe at least a dozen times across three different ovens (my old one ran hot, my current one runs cold—baking is fun like that), I can confidently say this version is foolproof.
- Quick & Easy: You’re looking at about 15 minutes of active prep time. No rolling dough, no blind baking, no wrestling with a pie crust that cracks at the edges. The graham cracker crust comes together with just a bowl and your hands.
- Simple Ingredients: Everything on the list is something you probably already have in your pantry, especially if you’ve been stocking up for fall baking. Canned pumpkin, eggs, sugar, spices—the usual suspects.
- Perfect for Fall Gatherings: Whether it’s Friendsgiving, a potluck, or just a cozy Sunday afternoon, these bars travel well, slice cleanly, and disappear fast. I’ve brought them to three different gatherings this season alone.
- Crowd-Pleaser: Kids love the bar format (no weird pie texture issues), adults love the familiar pumpkin spice flavor, and everyone loves that you can pick them up and eat them with your hands. No plates needed.
- Unbelievably Delicious: The texture is where these bars really shine. That buttery graham cracker crust, the silky pumpkin filling, and the way the edges get just a little bit firmer and almost caramelized—it’s comfort food in its purest form.
What makes this recipe different from all the other pumpkin bars out there? It’s the ratio. I spent a lot of time getting the filling just right—not too eggy, not too dense, with exactly the right amount of spice to complement the sweet, salty crust. And speaking of that crust, pressing it into the pan rather than rolling it means you get a perfect, even layer every single time. No thin spots, no thick edges, just consistent buttery goodness.
This is the kind of dessert that makes you close your eyes after the first bite. It’s familiar enough to feel like home, but special enough to feel like an occasion. And honestly? It’s the recipe I turn to when I want to impress people without stress. Because let’s face it—we could all use a little less fuss and a lot more pumpkin in our lives.
What Ingredients You Will Need
This recipe uses simple, wholesome ingredients to deliver that classic pumpkin pie flavor with a buttery graham cracker twist. Most of these are pantry staples, especially if you keep a well-stocked baking cupboard. Here’s what you’ll need:
For the Graham Cracker Crust
- Graham cracker crumbs, 2 cups (about 16 full sheets): You can buy pre-crushed crumbs, but I find grinding whole graham crackers in a food processor gives you a fresher, more consistent texture. If you’re in a pinch, a zip-top bag and a rolling pin work just fine too.
- Granulated sugar, 1/4 cup (50g): Just enough to sweeten the crust without making it candy-like. The filling is sweet enough on its own.
- Unsalted butter, 1/2 cup (1 stick, 113g), melted: I use unsalted so I can control the salt level. If you only have salted butter, just skip the pinch of salt I mention below.
- Pinch of salt: This balances the sweetness and makes the crust taste more buttery. Trust me on this one.
For the Pumpkin Filling
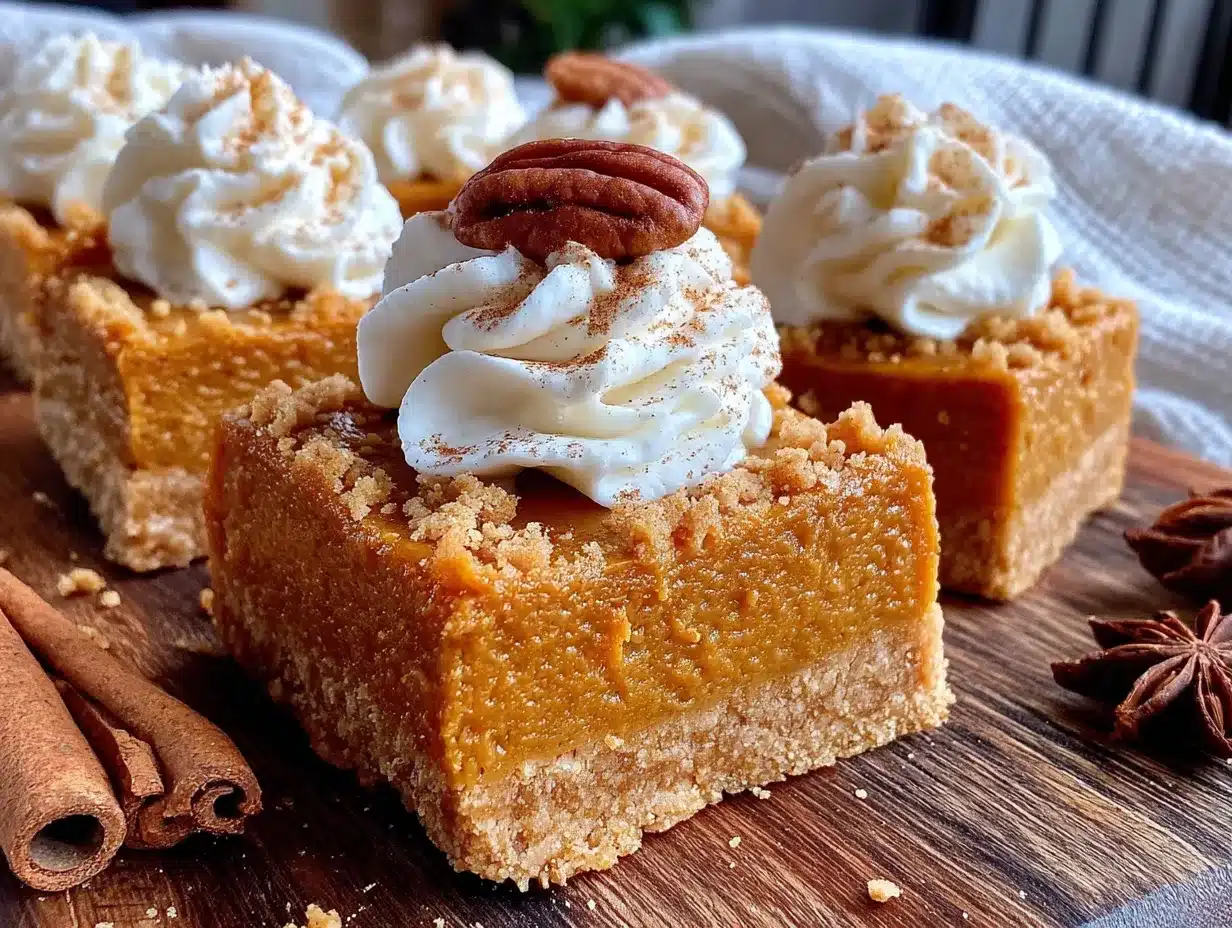
- Canned pumpkin puree, 1 can (15 ounces or 425g): Make sure you’re getting pure pumpkin, not pumpkin pie filling. They’re different, and the pre-sweetened filling will throw off the whole recipe. I prefer Libby’s for consistent results, but store brands work fine too.
- Sweetened condensed milk, 1 can (14 ounces or 396g): This is the secret to that silky, creamy texture without having to fuss with cream and sugar separately. It also adds a lovely richness that pairs perfectly with the spices.
- Large eggs, 2: Room temperature is best—they incorporate more smoothly into the filling. If you forget to take them out ahead of time, place them in a bowl of warm water for 5 minutes.
- Vanilla extract, 1 teaspoon: Pure vanilla, not imitation, if you can swing it. It adds a warmth that rounds out the pumpkin spice.
- Pumpkin pie spice, 1 1/2 teaspoons: You can use store-bought or make your own with 3/4 teaspoon cinnamon, 1/2 teaspoon ginger, 1/4 teaspoon nutmeg, and a pinch of cloves. I usually make my own because I like a little extra cinnamon.
- Cinnamon, 1/2 teaspoon: Because you can never have too much cinnamon in a pumpkin dessert. I add this even if my pumpkin pie spice already has it.
- Salt, 1/4 teaspoon: Don’t skip this. Salt makes the sweetness more pronounced and the spices more aromatic.
For Topping (Optional but Recommended)
- Whipped cream or Cool Whip: For serving. I like to make fresh whipped cream with a little cinnamon and maple syrup stirred in, but store-bought works perfectly too.
- Ground cinnamon or nutmeg: For dusting on top before serving. It makes the bars look as good as they taste.
Ingredient Note: If you’re dairy-free, you can substitute the butter in the crust with a vegan butter stick (I like Miyoko’s for baking) and use a dairy-free sweetened condensed milk like Nature’s Charm. The texture will be slightly different but still delicious.
Equipment Needed
You don’t need a fancy kitchen to make these pumpkin pie bars, which is part of why I love this recipe so much. Here’s what you’ll need:
- 9×13-inch baking pan: This is the sweet spot for these bars. A metal pan will give you slightly crispier edges, while glass or ceramic will work just fine. I use a metal pan because I like those caramelized corners.
- Food processor or zip-top bag and rolling pin: For crushing the graham crackers. I’ve done it both ways, and honestly, the bag-and-rolling-pin method is oddly satisfying when you need to work out some frustration.
- Mixing bowls (medium and large): One for the crust, one for the filling. Nothing fancy needed.
- Whisk: For combining the filling ingredients. A fork works in a pinch, but a whisk gives you a smoother result with fewer lumps.
- Measuring cups and spoons: For accuracy. Baking is a science, after all.
- Rubber spatula: For scraping every last bit of filling into the pan. Waste not, want not.
- Parchment paper: This is optional but highly recommended. Lining the pan with parchment makes lifting the bars out a breeze and makes cleanup almost too easy.
If you don’t have a 9×13 pan, you can use two 8×8 square pans instead—just reduce the baking time by about 5-7 minutes and check for doneness earlier. And if you’re really in a bind, a 9-inch round cake pan works too, though you’ll get thicker bars that need a few extra minutes in the oven.
Preparation Method
Alright, let’s get baking! I’ve broken this down into clear steps with all the little details I’ve learned from making these bars more times than I can count.
Step 1: Preheat and Prep
Preheat your oven to 350°F (175°C). While it’s heating up, line your 9×13-inch baking pan with parchment paper, leaving a little overhang on two opposite sides. This will be your “handle” for lifting the bars out later. If you don’t have parchment, just grease the pan well with butter or non-stick spray.
Step 2: Make the Graham Cracker Crust
In a food processor, pulse the graham crackers until they become fine crumbs. You should have about 2 cups. If you’re going the old-school route, put the crackers in a zip-top bag, seal it, and go to town with a rolling pin. It’s a great way to release some pent-up energy.
Transfer the crumbs to a medium bowl. Add the 1/4 cup of granulated sugar and a pinch of salt, and stir to combine. Pour in the melted butter and mix with a fork until all the crumbs are evenly moistened. The mixture should look like wet sand and clump together when you squeeze it.
Press the mixture firmly and evenly into the bottom of your prepared pan. I use the bottom of a measuring cup to really pack it down—this prevents the crust from being crumbly later. Bake the crust for 10 minutes, then remove it from the oven and set it aside to cool slightly while you make the filling.
Step 3: Make the Pumpkin Filling
In a large bowl, whisk together the canned pumpkin puree and the sweetened condensed milk until smooth. There shouldn’t be any streaks of white left. Add the eggs one at a time, whisking well after each addition. Then add the vanilla extract, pumpkin pie spice, cinnamon, and salt. Whisk until everything is beautifully combined and the mixture is a uniform, creamy orange color.
Here’s a little trick I learned the hard way: scrape down the sides and bottom of the bowl with a rubber spatula before your final whisk. Sometimes butter or egg hides there, and you don’t want a streak of unincorporated egg in your finished bars.
Step 4: Assemble and Bake
Pour the pumpkin filling over the pre-baked crust. Use your spatula to spread it evenly, making sure it reaches all the corners. Give the pan a gentle tap on the counter to release any air bubbles.
Bake at 350°F (175°C) for 35-40 minutes. The bars are done when the edges are set and the center is just slightly jiggly—like a firm Jell-O, not liquid. A knife inserted about an inch from the center should come out clean. If the center still looks wet and wobbly, give it another 5 minutes.
Let the bars cool completely in the pan on a wire rack. This is important! If you try to cut them while they’re warm, they’ll fall apart. I know it’s tempting, but patience is a virtue here. After they’ve cooled to room temperature, refrigerate them for at least 2 hours (or overnight) before slicing. This makes them firm enough to cut into clean, beautiful squares.
Step 5: Slice and Serve
Once chilled, use the parchment overhang to lift the entire block of bars out of the pan. Place it on a cutting board and use a sharp knife to slice into squares. I usually go for 12 bars (3 rows by 4 rows), but you can make them smaller or larger depending on your crowd. Wipe the knife clean between cuts for the neatest edges.
Serve cold or at room temperature, topped with a dollop of whipped cream and a dusting of cinnamon. Store any leftovers in the refrigerator.
Cooking Tips & Techniques
Over the years, I’ve made every mistake you can imagine with pumpkin desserts. Here’s what I’ve learned so you don’t have to repeat my errors.
Don’t overmix the filling. I know it’s tempting to whisk vigorously until the mixture is perfectly smooth, but overmixing incorporates too much air, which can cause the filling to puff up and then crack as it cools. Just mix until everything is combined—a few small lumps are fine and will smooth out during baking.
Use room temperature ingredients. Cold eggs can seize up the filling and make it lumpy. If you forgot to take them out of the fridge, place them in a bowl of warm (not hot) water for 5 minutes. Same goes for the pumpkin puree—let it sit on the counter for 15 minutes before you start.
Watch the edges of the crust. Because the crust bakes twice (once alone, once with the filling), the edges can get a little dark if you’re not careful. If you notice the edges browning too quickly during the second bake, tent the pan loosely with aluminum foil for the last 10 minutes.
The jiggle test is your friend. The center of the bars should still have a slight wobble when you pull them out of the oven. They’ll continue to set as they cool. Overbaking will give you a dry, cracked filling, so err on the side of underdone. I speak from experience—I once overbaked a batch by 10 minutes and ended up with pumpkin-flavored hockey pucks.
Chill before slicing. I cannot stress this enough. Warm pumpkin filling is soft and unstable. After a proper chill in the fridge, it firms up beautifully and slices like a dream. If you’re in a hurry, you can pop the pan in the freezer for 30 minutes, but don’t forget about them!
Variations & Adaptations
One of the best things about this recipe is how adaptable it is. Here are some ways to make it your own:
Gluten-Free Option: Use gluten-free graham crackers or gluten-free digestive biscuits for the crust. The rest of the ingredients are naturally gluten-free, so this is an easy swap. I’ve tested this with Schär brand graham-style crackers and it worked beautifully.
Dairy-Free Version: Substitute the butter with a plant-based butter stick (not margarine, which has too much water). Use dairy-free sweetened condensed milk—Nature’s Charm makes a great coconut-based version that adds a subtle tropical note that actually complements the pumpkin nicely.
Spice It Up: If you like a little heat, add 1/4 teaspoon of cayenne pepper or a pinch of black pepper to the filling. It sounds weird, I know, but the warmth of the pepper makes the pumpkin flavor pop in a way that’s genuinely surprising. I tried this on a whim last year and now I can’t go back.
Nutty Crust: Add 1/2 cup of finely chopped pecans or walnuts to the graham cracker crust mixture. Toast them first for extra flavor. It adds a lovely crunch and makes the bars feel even more special.
Chocolate Twist: Drizzle melted dark chocolate over the cooled bars before slicing. The bitterness of the chocolate is a perfect counterpoint to the sweet, spiced pumpkin. I did this for a Halloween party and people lost their minds.
Pumpkin Cheesecake Bars: For an extra-indulgent version, spread an 8-ounce block of softened cream cheese (mixed with 1/4 cup sugar and 1 egg) over the crust before adding the pumpkin filling. Swirl them together with a knife for a marbled effect. This is my go-to for Thanksgiving when I want to show off a little.
Serving & Storage Suggestions
These pumpkin pie bars are versatile enough for any fall occasion. Here’s how to serve and store them for the best experience.
Serving: I like to serve these bars chilled, straight from the fridge, with a generous dollop of whipped cream. The contrast between the cold, creamy filling and the fluffy topping is pure magic. If you prefer room temperature, let them sit out for about 15 minutes before serving—the flavors become a bit more pronounced.
For a pretty presentation, cut the bars into uniform squares and arrange them on a platter. Dust with cinnamon or nutmeg, and add a few fresh cranberries or a small cinnamon stick for a festive touch. These bars are perfect for Thanksgiving dessert tables, Friendsgiving gatherings, or even just a cozy afternoon treat with a cup of coffee.
Complementary Pairings: A hot cup of spiced chai, a pumpkin spice latte, or even a simple black coffee all pair beautifully with these bars. For a boozy option, a glass of bourbon or a dark rum cocktail complements the warm spices nicely.
Storage: Store leftover bars in an airtight container in the refrigerator for up to 5 days. The flavor actually improves after a day or two as the spices meld together. I’ve been known to sneak one for breakfast—don’t judge me.
Freezing: These bars freeze beautifully! Wrap individual slices tightly in plastic wrap, then place them in a freezer-safe bag or container. They’ll keep for up to 3 months. To thaw, just transfer a slice to the fridge overnight or let it sit at room temperature for about 30 minutes. The texture remains remarkably close to fresh.
Reheating: I don’t recommend reheating these bars—they’re meant to be served cold or at room temperature. If you prefer a warm dessert, microwave a single slice for about 10-15 seconds, but be careful not to overdo it or the filling can get runny.
Nutritional Information & Benefits
Let’s talk about what’s actually in these bars, because I know we all like to pretend calories don’t count during the holidays. But knowledge is power, right?
Estimated per serving (based on 12 bars):
- Calories: 285
- Total Fat: 12g
- Saturated Fat: 7g
- Cholesterol: 65mg
- Sodium: 220mg
- Total Carbohydrates: 40g
- Dietary Fiber: 2g
- Sugars: 28g
- Protein: 5g
Health Highlights: Pumpkin is packed with vitamin A (in the form of beta-carotene), which is great for eye health and immune function. It’s also a good source of fiber, which helps with digestion—especially welcome after a heavy Thanksgiving meal. The eggs provide high-quality protein, and the graham cracker crust offers a small amount of whole grains if you use whole wheat graham crackers.
Dietary Considerations: This recipe can be made gluten-free (as noted above) and dairy-free (also noted above). It’s not suitable for vegan diets due to the eggs and sweetened condensed milk, but I’ve seen successful vegan versions using silken tofu and coconut cream. The bars are naturally nut-free unless you add the pecan variation.
Look, I’m not going to tell you these are health food. They’re a dessert, and they’re meant to be enjoyed. But compared to a traditional slice of pumpkin pie with a butter crust, these bars are actually a little lighter—less fat, fewer calories, and that satisfying bar format makes portion control a bit easier. Or at least that’s what I tell myself when I go back for a second one.
Conclusion
These cozy pumpkin pie bars with graham cracker crust have become my signature fall dessert, and for good reason. They capture everything I love about autumn baking—the warm spices, the creamy pumpkin, the buttery crust—without the stress and fuss of traditional pie-making. They’re forgiving, they’re portable, and they disappear faster than anything else on the dessert table.
What I love most about this recipe is how it honors the spirit of pumpkin pie while making it accessible for real life. You don’t need a pastry blender or a rolling pin or a pie shield. You just need a pan, some crackers, and a can of pumpkin. And when you pull those golden bars out of the oven and the whole kitchen smells like cinnamon and cloves, you’ll understand why this recipe has earned a permanent spot in my fall rotation.
I’d love to hear how these turn out for you! Did you try one of the variations? Did you come up with your own twist? Leave a comment below and let me know—I read every single one, and your feedback helps me create better recipes for all of us. And if you share a photo on Pinterest or Instagram, tag me so I can see your beautiful creations. Happy baking, friends!
Frequently Asked Questions
Can I use fresh pumpkin instead of canned?
Yes, you can! Roast a small sugar pumpkin until tender, then puree the flesh in a food processor. You’ll need about 1 3/4 cups of puree for this recipe. Just be aware that fresh pumpkin puree has more water content than canned, so you might need to drain it in a cheesecloth-lined sieve for an hour or so to remove excess moisture. Otherwise, your bars could turn out a bit soggy.
Why did my pumpkin pie bars crack on top?
Cracking usually happens for one of two reasons: overbaking or overmixing. If the bars are baked too long, the filling dries out and cracks as it cools. If the filling is overmixed, too much air gets incorporated, causing the bars to puff up and then collapse. To avoid both issues, bake just until the edges are set and the center is slightly jiggly, and mix the filling only until combined.
Can I make these bars ahead of time?
Absolutely! In fact, I recommend it. These bars taste even better the next day after the flavors have had time to meld. You can make them up to 2 days in advance and keep them covered in the refrigerator. They also freeze beautifully for up to 3 months—just wrap individual slices tightly in plastic wrap and store in a freezer bag.
How do I get clean, neat slices?
The key is patience. Make sure the bars are thoroughly chilled—at least 2 hours in the fridge, or even better, overnight. Use a sharp knife and wipe it clean with a damp paper towel between each cut. For the absolute cleanest slices, you can run the knife under hot water and dry it off before cutting. The warmth helps the blade glide through the filling without dragging.
Can I use a different crust?
Of course! While I love the graham cracker crust, you can easily swap it out. A shortbread crust made with crushed shortbread cookies and butter is delicious and adds a buttery richness. A gingersnap crust adds a lovely spicy kick that pairs beautifully with the pumpkin. Or for a nutty twist, try a crust made with crushed pecans, a little flour, and butter. Just keep the ratios similar—about 2 cups of crumbs to 1/2 cup of melted butter—and pre-bake for 10 minutes before adding the filling.
Pin This Recipe!
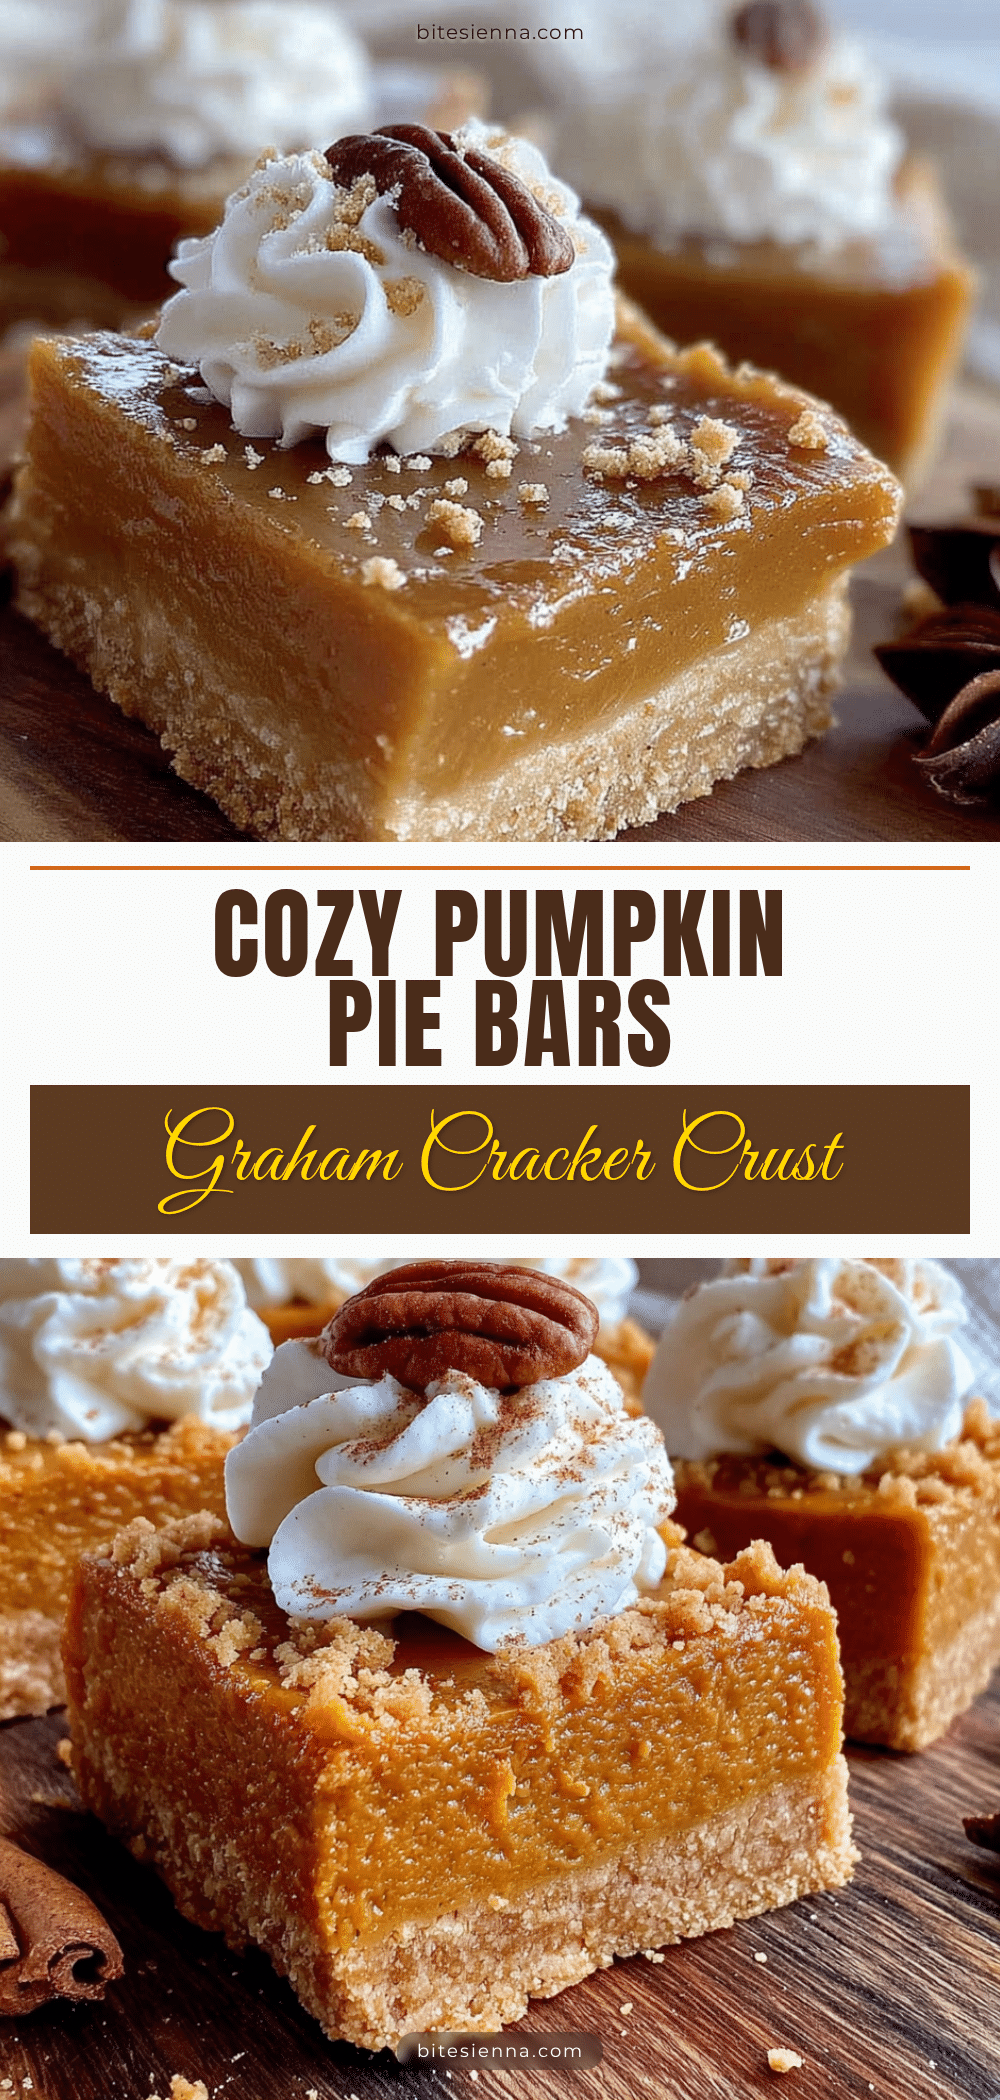
Best Easy Pumpkin Pie Bars with Graham Cracker Crust
These pumpkin pie bars feature a buttery graham cracker crust and a creamy, spiced pumpkin filling. They are quick and easy to make, perfect for fall gatherings, and slice cleanly without the fuss of a traditional pie.
- Prep Time: 15 minutes
- Cook Time: 35-40 minutes
- Total Time: 50-55 minutes (plus cooling and chilling time)
- Yield: 12 servings 1x
- Category: Dessert
- Cuisine: American
Ingredients
- 2 cups graham cracker crumbs (about 16 full sheets)
- 1/4 cup (50g) granulated sugar
- 1/2 cup (1 stick, 113g) unsalted butter, melted
- Pinch of salt
- 1 can (15 ounces or 425g) canned pumpkin puree
- 1 can (14 ounces or 396g) sweetened condensed milk
- 2 large eggs, room temperature
- 1 teaspoon vanilla extract
- 1 1/2 teaspoons pumpkin pie spice
- 1/2 teaspoon cinnamon
- 1/4 teaspoon salt
- Whipped cream or Cool Whip (for serving, optional)
- Ground cinnamon or nutmeg (for dusting, optional)
Instructions
- Preheat oven to 350°F (175°C). Line a 9×13-inch baking pan with parchment paper, leaving overhang on two opposite sides. Alternatively, grease the pan well.
- Make the crust: In a food processor, pulse graham crackers into fine crumbs (or crush in a zip-top bag with a rolling pin). Transfer to a medium bowl. Add 1/4 cup sugar and a pinch of salt; stir. Pour in melted butter and mix with a fork until all crumbs are evenly moistened (like wet sand). Press firmly and evenly into the bottom of the prepared pan. Bake for 10 minutes. Remove and set aside to cool slightly.
- Make the filling: In a large bowl, whisk together pumpkin puree and sweetened condensed milk until smooth. Add eggs one at a time, whisking well after each. Add vanilla, pumpkin pie spice, cinnamon, and salt; whisk until combined. Scrape down sides and bottom of bowl with a rubber spatula.
- Pour filling over pre-baked crust. Spread evenly with a spatula. Tap pan gently on counter to release air bubbles.
- Bake at 350°F (175°C) for 35-40 minutes, until edges are set and center is slightly jiggly (like firm Jell-O). A knife inserted about an inch from center should come out clean. If center is still wet, bake 5 more minutes.
- Cool completely in pan on a wire rack. Then refrigerate for at least 2 hours (or overnight) before slicing.
- Once chilled, use parchment overhang to lift bars out of pan. Place on cutting board and slice into squares (e.g., 3 rows by 4 rows for 12 bars). Wipe knife clean between cuts.
- Serve cold or at room temperature, topped with whipped cream and a dusting of cinnamon or nutmeg if desired. Store leftovers in refrigerator.
Notes
For clean slices, chill bars thoroughly. Do not overmix filling to avoid cracking. Use room temperature ingredients for best results. If crust edges brown too quickly, tent with foil during last 10 minutes of baking.
Nutrition
- Serving Size: 1 bar (based on 12 s
- Calories: 285
- Sugar: 28
- Sodium: 220
- Fat: 12
- Saturated Fat: 7
- Carbohydrates: 40
- Fiber: 2
- Protein: 5
Keywords: pumpkin pie bars, graham cracker crust, easy pumpkin dessert, fall dessert, Thanksgiving bars


